I work with a lot of customers to design and deploy secure, zero-trust environments utilising VMware NSX-T Data Center and, specifically, by using its Distributed Firewall (DFW). I’ve also spoken at several VMUGs where I’ve discussed the realities of micro-segmentation using both NSX for vSphere (NSX-v) and NSX-T and the tools that can be utilised to aid in the identification of application dependencies, traffic flows, services, etc.
I also understand that not all customers are able to utilise some of the more advanced VMware toolings such as NSX Intelligence and vRealize Network Insight, however, there is another tool that we can use to identify our application dependencies and, best of all, if you’re a licensed NSX-T customer, you’re also licensed for…vRealize Log Insight (vRLI).
In this article, we explore how we can utilise vRLI to identify and visualise application traffic flows so that we can more effectively secure our applications.
Like most of us in the virtualisation ecosystem, I run a lab. Actually, I run multiple labs, however, unlike some, my labs are nested environments running on a single ESXi host, specifically, the awesome SuperMicro SuperServer E300-9D-8CN8TP. My labs are just that – testing environments for personal development, study, validation of customer designs, etc. They don’t run any production/home applications, so they’re spun up and down fairly often.
As some of these labs can be resource hungry (multi-site VMware NSX-T Federation environments or VMware Cloud Foundation to name two examples), the workload VMs I deploy for testing within these environments must be small.
There may be some scenarios where you will need to patch a vSphere Host manually. Maybe the host is air-gapped for security purposes, or maybe the host is simply a standalone ESXi Server and isn’t connected to a vCenter Server.
Patching the host is a simple enough exercise, and in this article, I detail both the implementation and validation steps.
Welcome to the second article in the series detailing a migration of VMware NSX Data Center for vSphere (NSX-V) to NSX-T Data Center. In this article I focus on the preliminary checks to ensure the NSX-V environment is fit for migration.
In part 1 (VMware NSX-T Data Center Migration – Part 1 – Deploy Manager Appliance) I covered the process of deploying the NSX -T Data Center Manager Appliance, as well as a number of prerequisite tasks required to prepare the new NSX-T environment for the eventual migration (coming in part 3).
In this article I detail a number of preliminary checks within the NSX-V environment (including ESXi hosts, vSphere Distributed Switches, VXLAN configuration, VTEP, NSX Controllers, Edge Services Gateways, etc.) to ensure all is well prior to the migration process itself. Where any issues are identified, these must be resolved prior to the migration process.
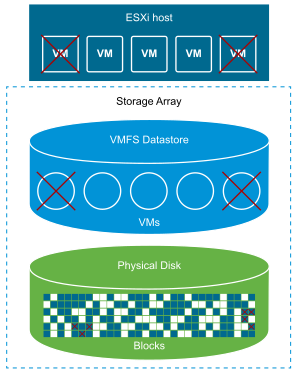
Since the release of vSphere 5.5 back in September 2013 we have been able to utilise ESXCLI to manually reclaim deleted blocks from VMFS datastores. Essentially, by using the VAAI UNMAP primitive, we can reclaim previously used blocks by releasing them back to the storage array, allowing them to be re-utilised by other devices/virtual machines. It wasn’t until the release of vSphere 6.5 in November 2016 that the much sought-after automation of disk space reclamation was announced with the availability of VMFS 6. More on VMFS 6 and automated reclamation in a future post.
In this article we will cover the manual process of reclaiming deleted blocks from a VMFS 5 (or earlier) file system via a esxcli UNMAP call.
Procedure
We have two options when making an UNMAP call on a VMFS volume:
Option 1 – Reference the Volume Label
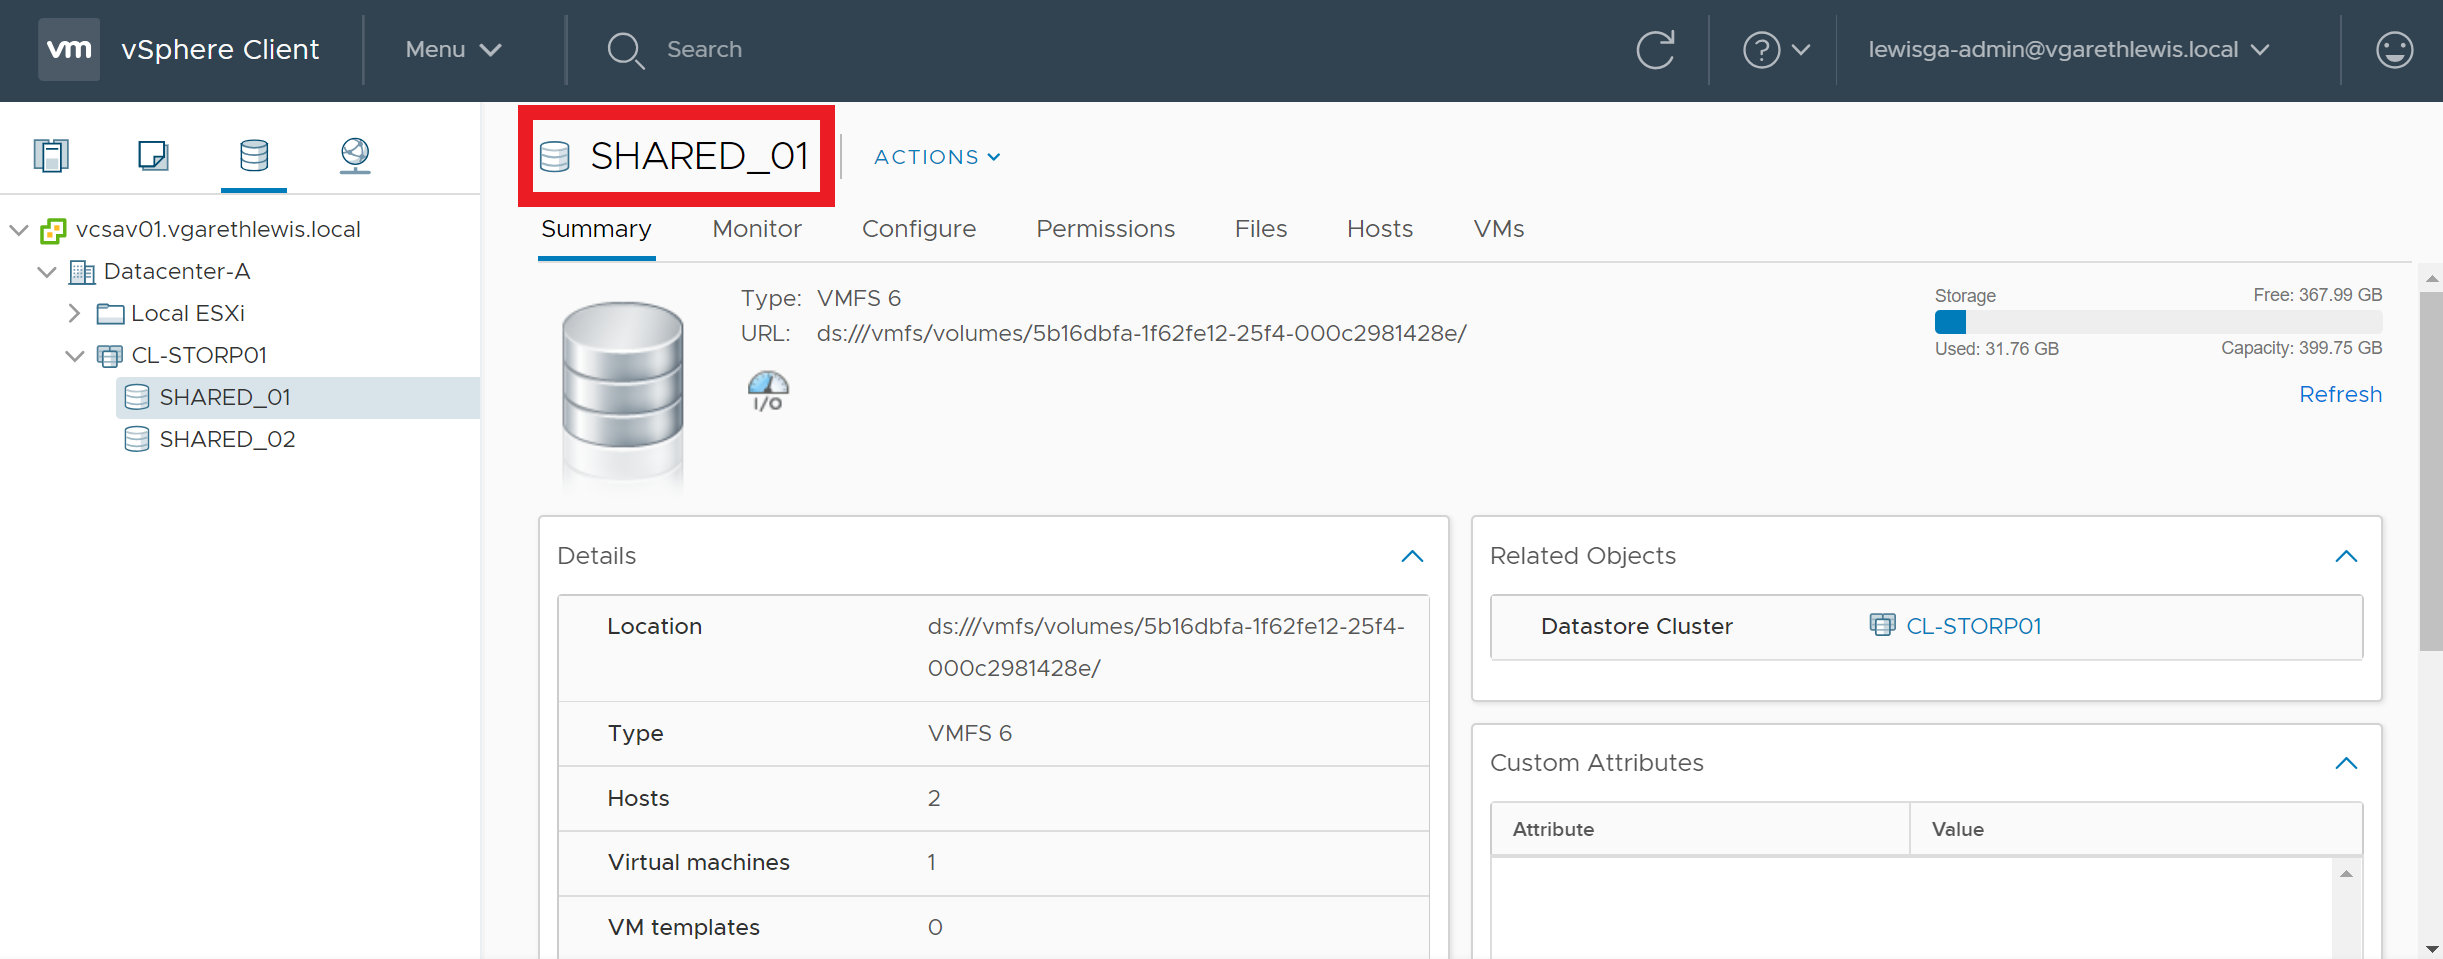
1. Identify the volume/datastore label.
2. Via SSH, connect to an ESXi host which has access to the datastore in question.
3. Run the below command to perform an UNMAP call utilising the volume label.
esxcli storage vmfs unmap -l DatastoreName
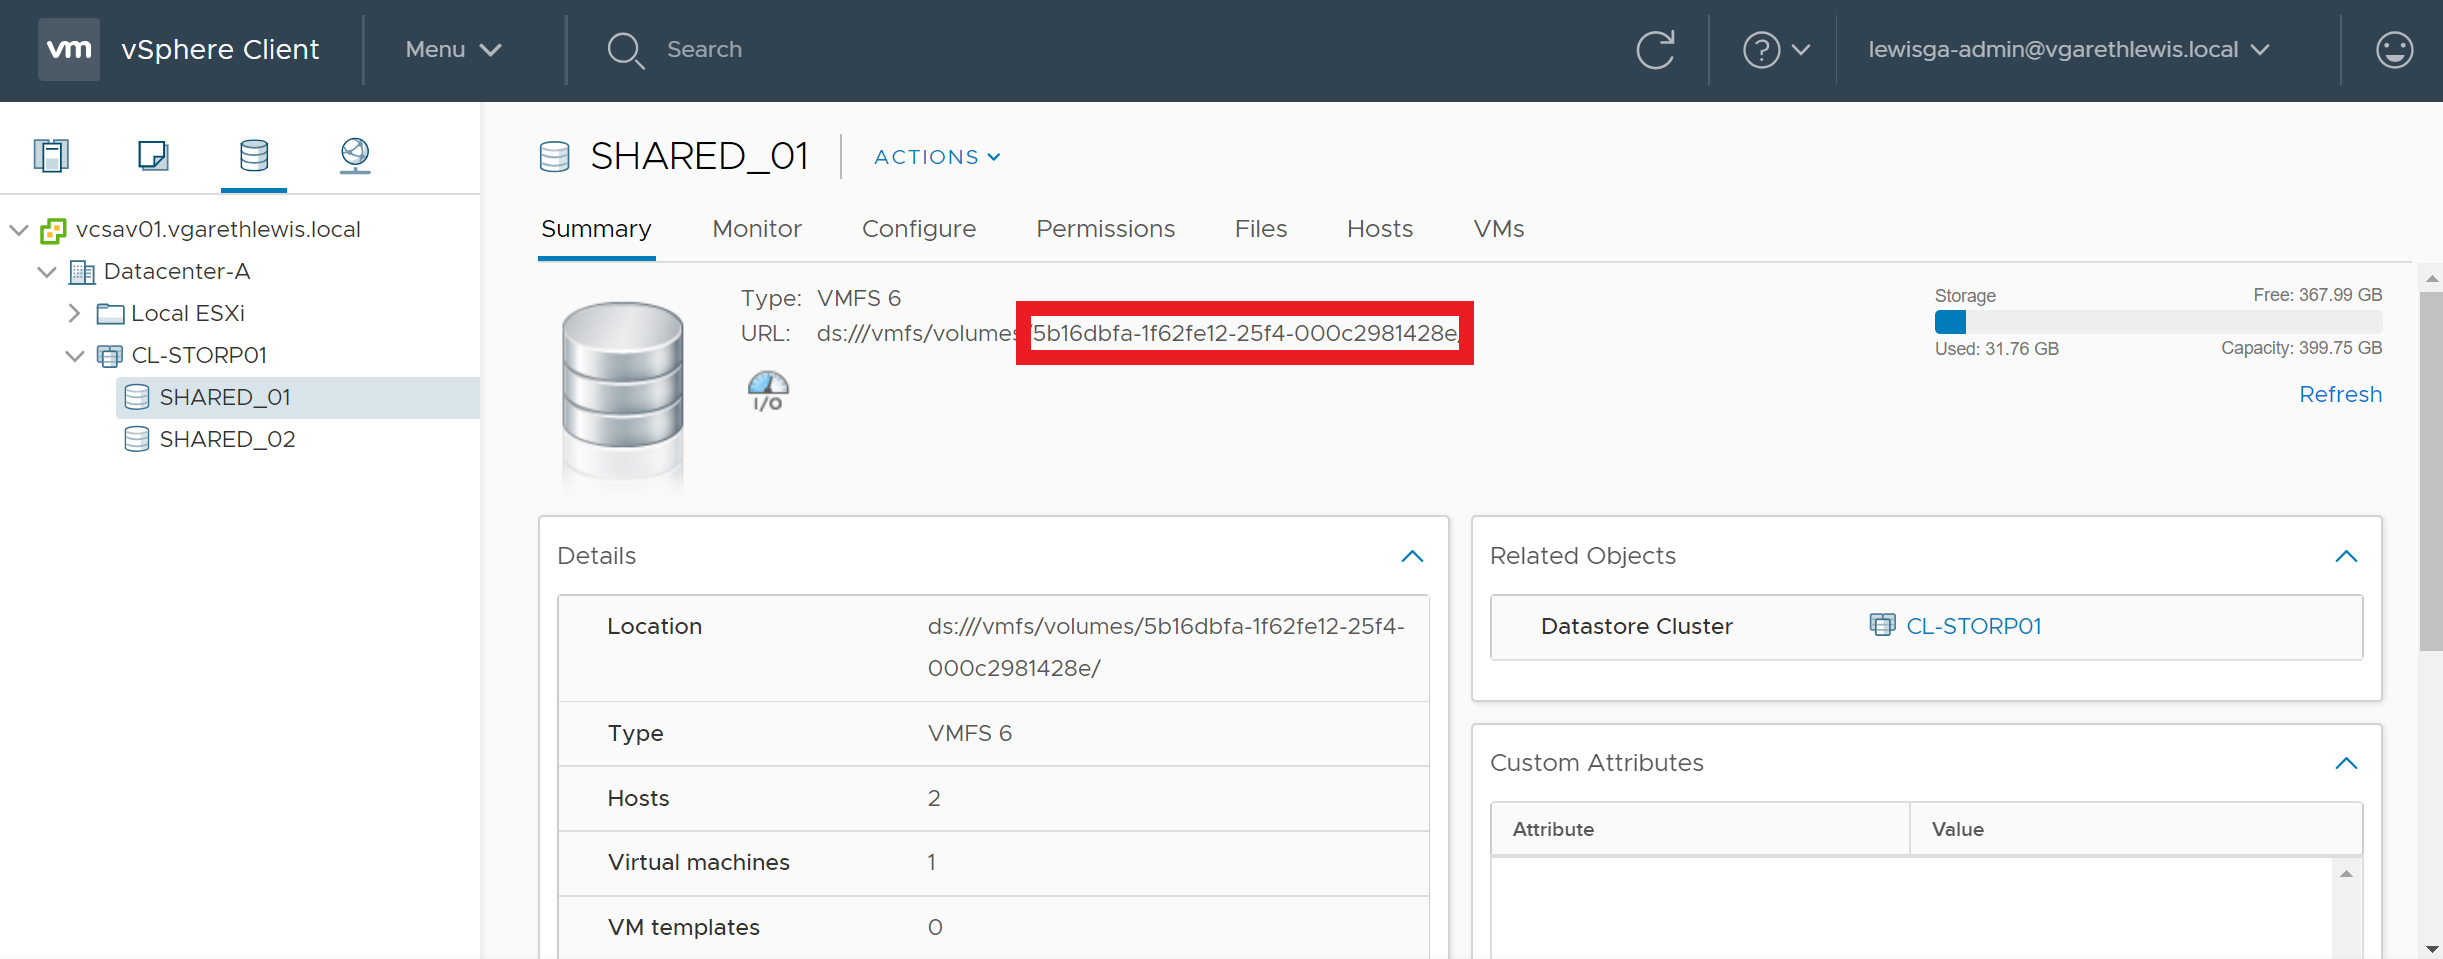
Option 2 – Reference the Volume UUID
1. Identify the UUID of the datastore/volume in question.
2. Via SSH, connect to an ESXi host which has access to the datastore in question.
3. Run the below command to perform an UNMAP call utilising the volume UUID.
As an example, the below screenshots detail a storage volume before and after an UNMAP call. Over time, the storage volume has experienced a high number of VM deletions and storage vMotions. Following either of the above UNMAP commands, the volume has reclaimed over 2 TB of deleted blocks.
Reclaim VMFS Deleted Blocks via UNMAP – BEFORE
Reclaim VMFS Deleted Blocks via UNMAP – AFTER
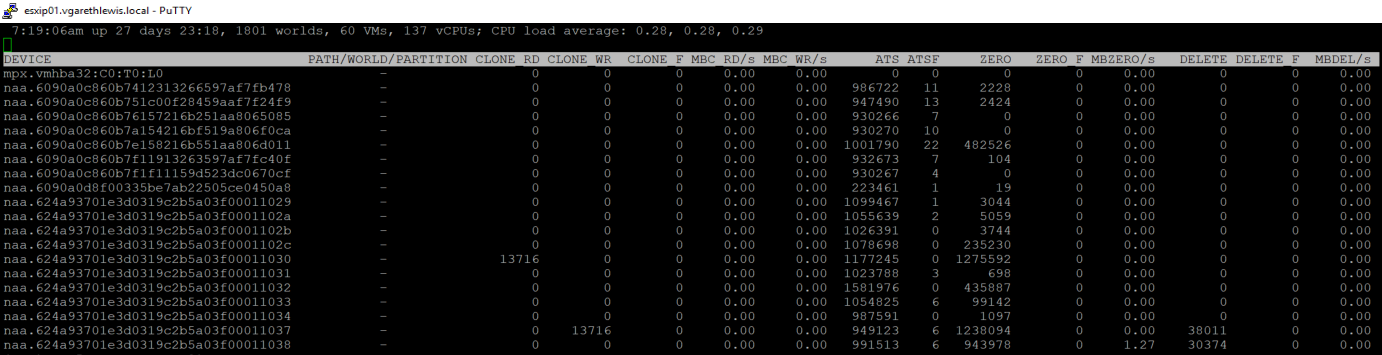
Monitoring UNMAPs via ESXTOP
Finally, it’s nice to be able to monitor such actions and, via ESXTOP, we can. Connect to one of your hosts via SSH and launch ESXTOP. There is going to be a lot of information displayed at this point, so we’ll likely need to toggle-off some of the superfluous information. Press ‘U’ to view disks/devices, and press ‘F’ to launch the currently displayed field order. In the below screenshot I have toggled-off all columns except A, B, and O.
From the below screenshot you can see that, following a little housekeeping on two volumes in my environment, the DELETE counters display the UNMAP I/O count issued to those devices. Note, ESXTOP counters are reset with each host restart.
With VMFS 6 now available, you’ll probably want to leverage it’s automated reclamation capabilities, however, the only upgrade path is to create new datastores, migrate your workloads, and blow away the old VMFS 5 datastores. More on VMFS 6 in a future post.
A reoccurring issue this one, and usually due to a failed backup. In my case, this was due to a failure of a Veeam Backup & Replication disk backup job which had, effectively, failed to remove it’s delta disks following a backup run. As a result, a number of virtual machines reported disk consolidation alerts and, due to the locked vmdks, I was unable to consolidate the snapshots or Storage vMotion the VM to a different datastore. A larger and slightly more pressing concern that arose (due to the size and amount of delta disks being held) meant the underlying datastore had blown it’s capacity, taking a number of VMs offline.
So, how do we identify a) the locked file, b) the source of the lock, and c) resolve the locked vmdks and consolidate the disks?
Disk consolidation required.
Manual attempts at consolidating snapshots fail with either DISKLOCKED errors…
…and/or ‘msg.fileio.lock’ errors.
Storage vMotion attempts fail, identifying the locked file.
Identify the Locked File
As a first step, we’ll need to check the hostd.log to try and identify what is happening during the above tasks. To do this, SSH to the ESXi host hosting the VM in question, and launch the hostd.log.
tail -f /var/log/hostd.log
While the log is being displayed, jump back to either the vSphere Client for Windows (C#) or vSphere Web Client and re-run a snapshot consolidation (Virtual Machine > Snapshot > Consolidate). Keep an eye on the hostd.log output while the snapshot consolidation task attempts to run, as any/all file lock errors will be displayed. In my instance, the file-lock error detailed in the Storage vMotion screenshot above is confirmed via the hostd.log output (below), and clearly shows the locked disk in question.
File lock errors, detailed via the hostd.log, should be fairly easy to identify, and will enable you to identify the locked vmdk.
Identify the Source of the Locked File
Next, we need to identify which ESXi host is holding the lock on the vmdk by using vmkfstools.
We are specifically interested in the ‘RO Owner’, which (in the below example) shows both the lock itself and the MAC address of the offending ESXi host (in this example, ending ‘f1:64:09’).
The MAC address shown in the above output can be used to identify the ESXi host via vSphere.
Resolve the Locked VMDKs and Consolidate the Disks
Now the host has been identified, place in Maintenance Mode and restart the Management Agent/host daemon service (hostd) via the below command.
/etc/init.d/hostd restart
Following a successful restart of the hostd service, re-run the snapshot consolidation. This should now complete without any further errors and, once complete, any underlying datastore capacity issues (such as in my case) should be cleared.
For more information, an official VMware KB is available by clicking here.
Following the general release of VMware vSphere 6.5 last month (see my What’s New in VMware vSphere 6.5 post), I’ll be covering a number of technical run-throughs already in discussion throughout the virtual infrastructure community.
We’ll be starting with a fresh installation of the new and highly improved vCenter Server Appliance (VCSA), followed by a migration from the Windows-based vCenter Server 6.0; the latter task made all the easier thanks to the vSphere Migration Assistant. More on this to come. Lastly, I’ll be looking at a fresh installation of the Windows-based product, however, the experience throughout all of these installation/migration scenarios has been vastly improved.
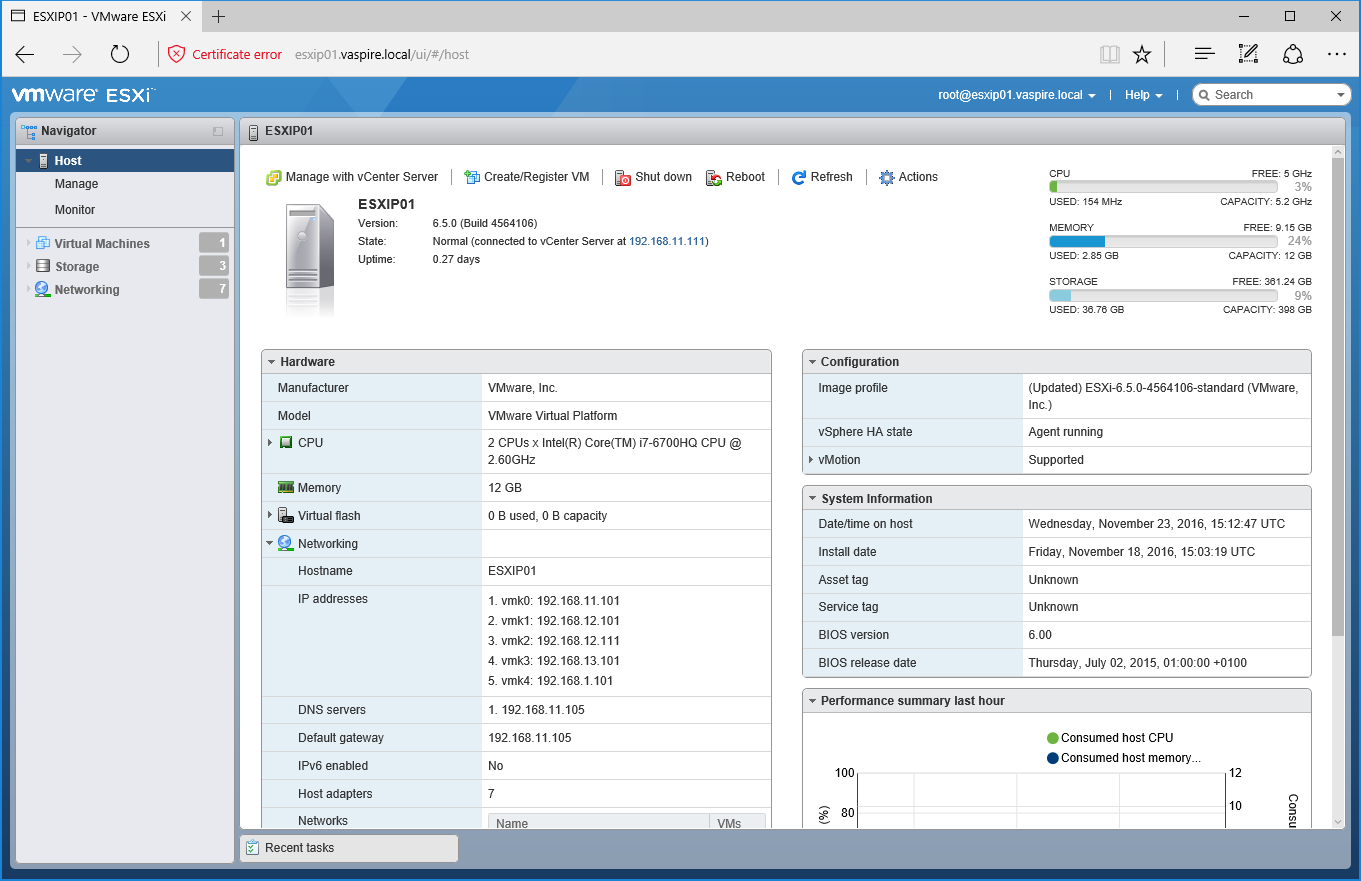
With the release of vSphere 6.5 back in October, VMware have finally been able to offer a true HTML 5-based experience via their new vSphere Client (something that has been on the cards for quite a number of years), and I must say, I’m rather (very) pleased. Add to this the fact that the older C# Client has been pushed even closer to the Decommission Bin due to the release of the new ESXi Embedded Host Client (more on this in a future post), things are looking very good indeed.
The brand new ESXi Embedded Host Client offers a much welcomed move away from the legacy C# Client thanks to the new HTML5 and JavaScript UI.
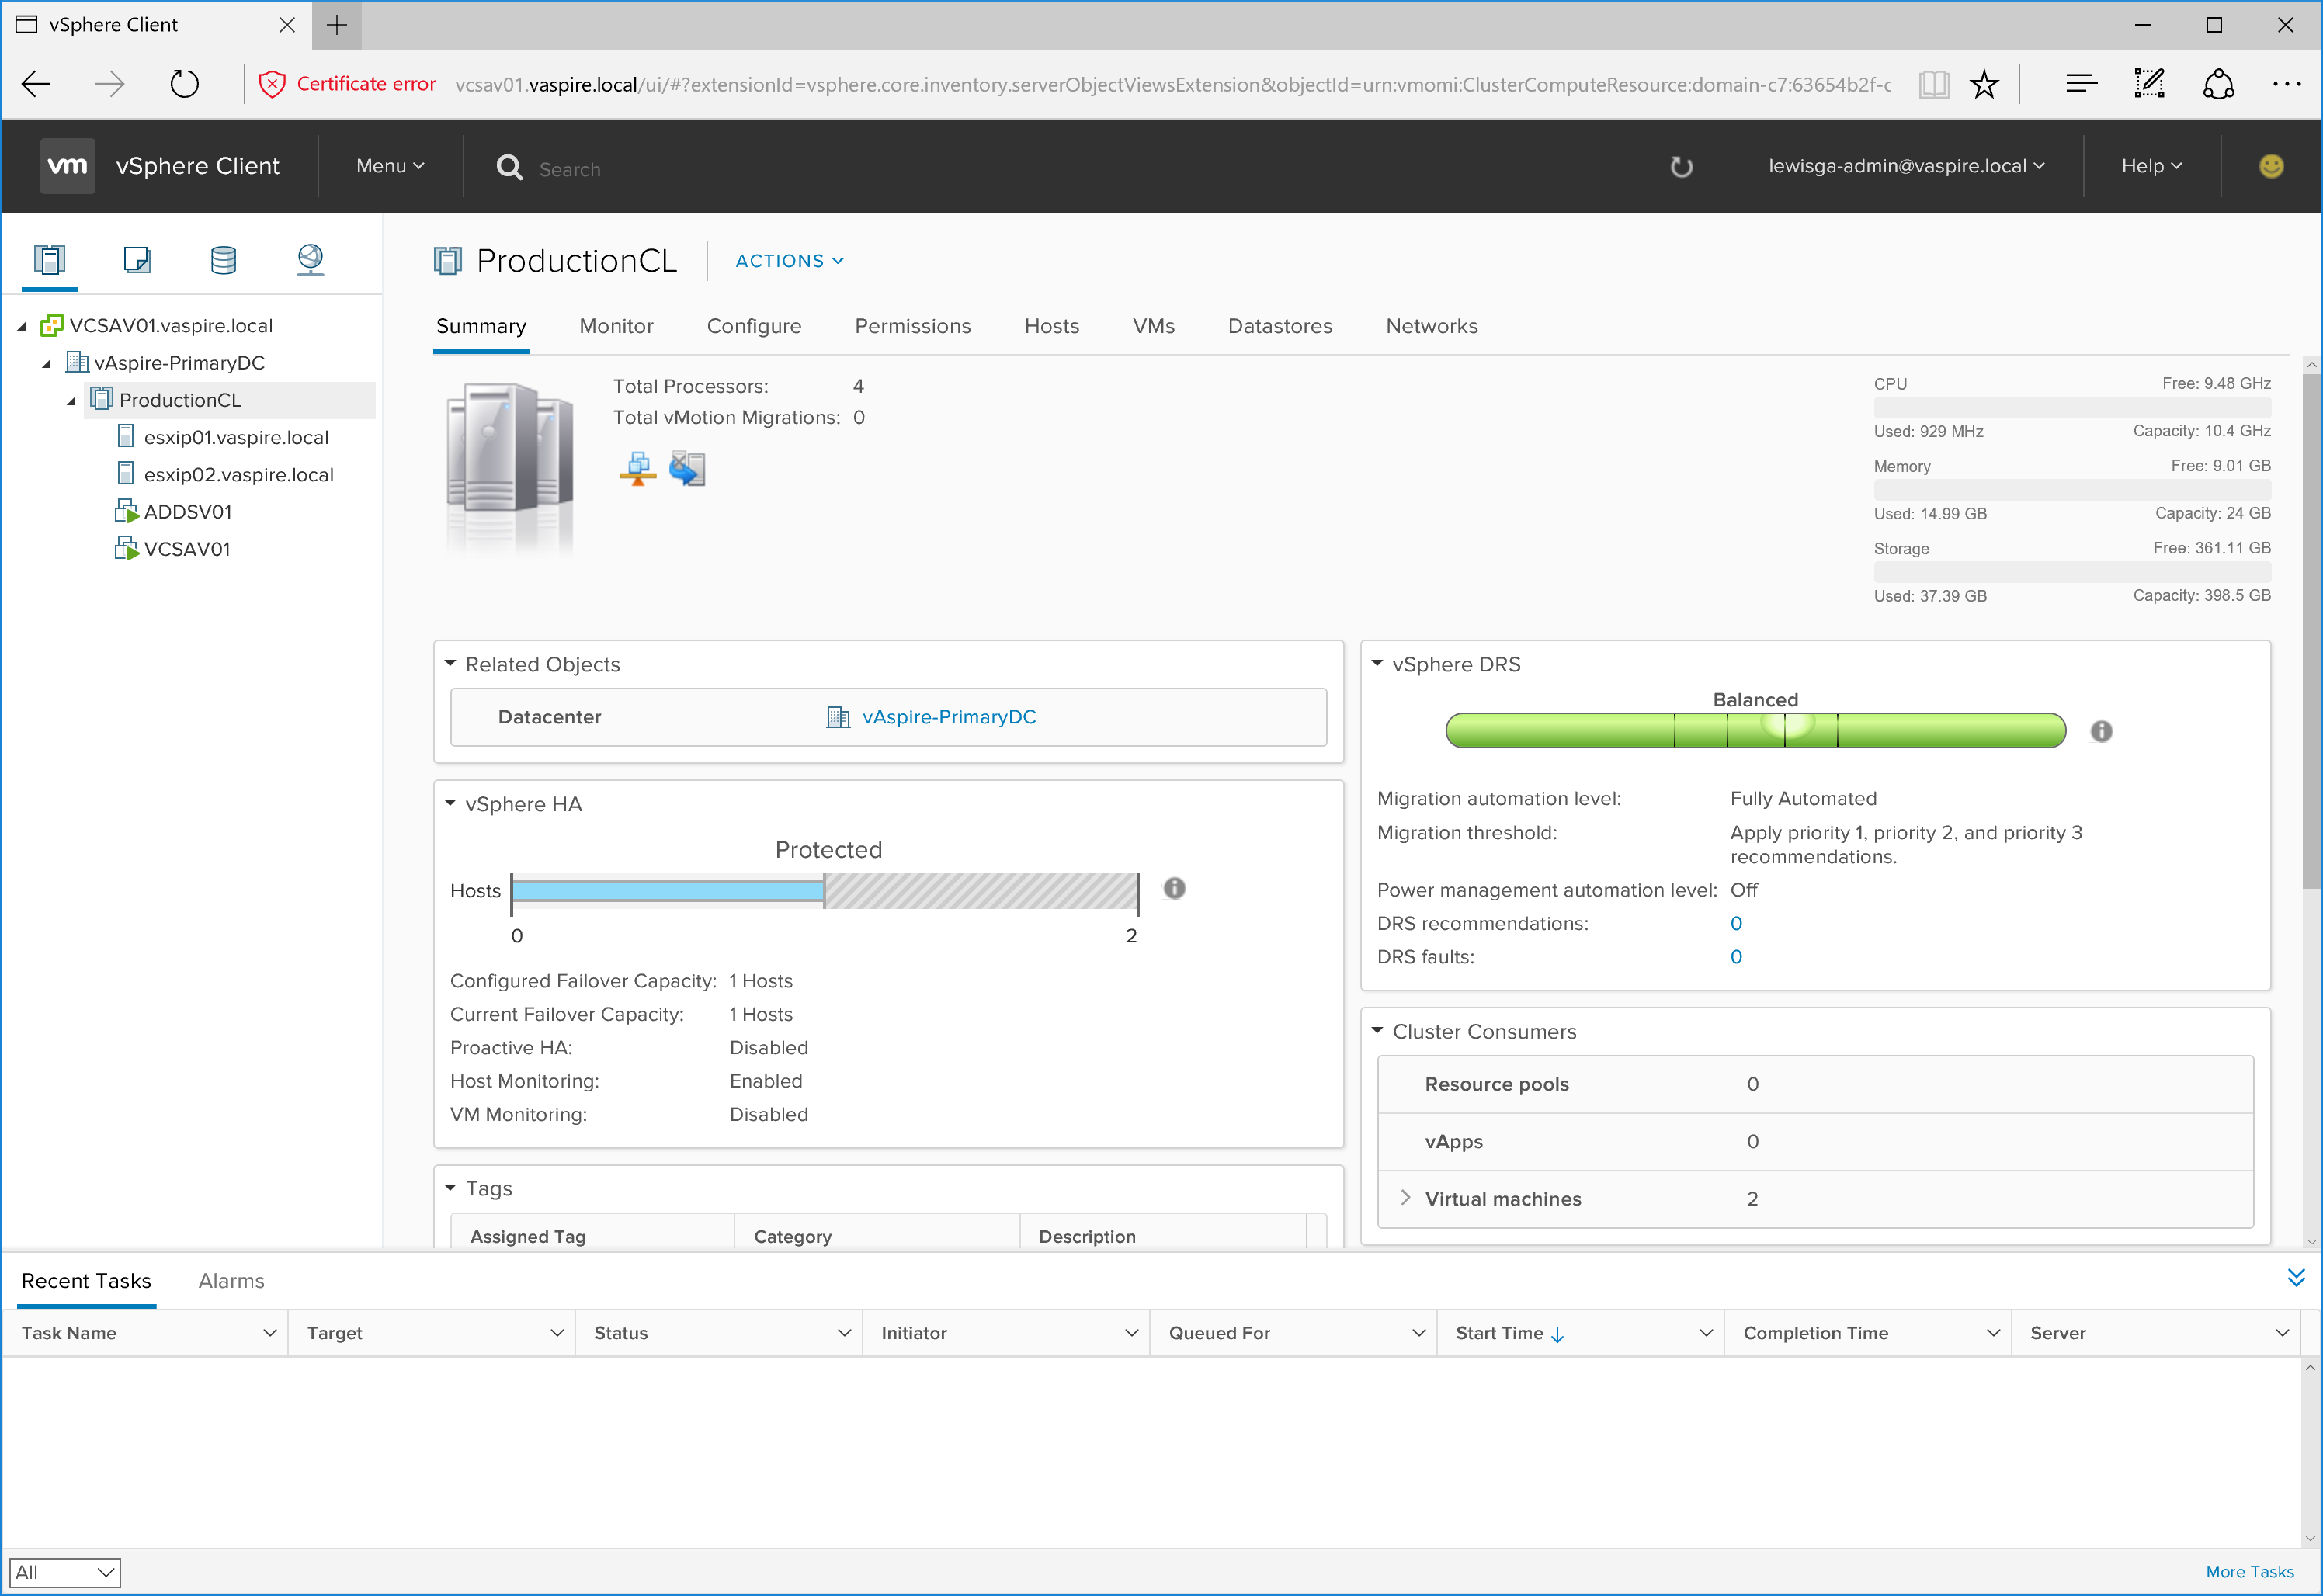
The new vSphere Client will run alongside the older vSphere Web Client and is an inbuilt feature of both Windows and Appliance versions of vCenter Server 6.5. Don’t jump out of your seats just yet, however, as the reason for running the two interfaces in parallel is due to the new vSphere Client not offering full functionality. VMware state that their teams are looking to flesh-out the new Client with priority, so we hopefully won’t have to wait long. For all full-functional requirements, you’ll still be able to access the vSphere Web Client via standard means (http://<vcenter_fqdn>/vsphere-client), with the new vSphere Client accessible via http://<vcenter_fqdn>/ui.
Like the new ESXi Embedded Host Client, the new vSphere Client offers a fantastic HTML 5/JavaScript experience, but is lacking in some functionality at time of writing.
Other features of vSphere 6.5 and the vCenter Server Applicance include a fully integrated vSphere Update Manager, file-based backup and recovery, native VCSA high availability, and performance improvements of up to 3x; HTML5-based web clients outlined above; security enhancements including VM disk-level encryption, vMotion encryption, as well as the addition of a secure boot model (enabling VMware to now offer ‘Secure Data, Secure Infrastructure, and Secure Access’).
Configuring VLANs within vSphere is a simple enough task, however, testing outgoing ICMP traffic between hosts is a must when you find yourself unable to communicate with another VMkernel port on another host. Using the vmkping CLI command, we are able to test outgoing traffic via specific VMkernel ports, perfect for those attempting to troubleshoot connectivity issues on different subnets and/or vSwitches.
Testing Basic Network Connectivity
Connect to an ESXi host via SSH.
Via command shell, run the below command (where x.x.x.x is the hostname or IP address of the server that you wish to ping):
# vmkping x.x.x.x
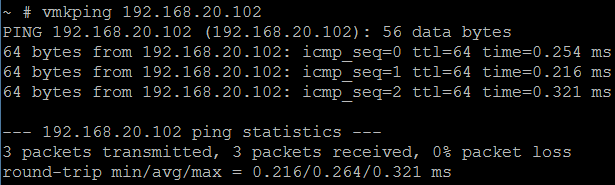
In my example below, I test connectivity between the Management Networks on two ESXi hosts in my lab. Specifically, I connect to Host A (192.168.20.101) via SSH, and ping Host B (192.168.20.102):
Testing Network Connectivity via a Specific VMkernel Port
ESXi 5.1 and up allows us to test outgoing ICMP traffic on specific vmkernel ports by adding the -I switch, followed by vmkX (where X is the VMkernal number):
# vmkping -I vmkX x.x.x.x
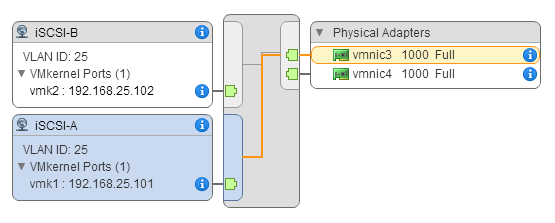
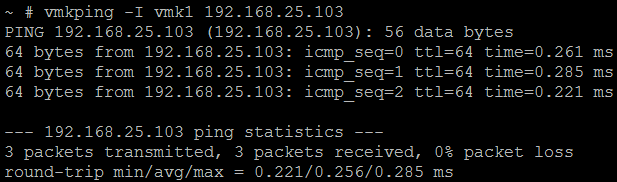
In my example below, I test ICMP traffic between two VMkernel ports which have been configured for iSCSI traffic (vmk1 on both hosts). Specifically, I SSH on to Host A and test ICMP traffic between the specific VMkernel ports (Host A = 192.168.25.101, Host B = 192.168.25.103):
We use cookies to ensure that we give you the best experience on our website. If you continue to use this site we will assume that you are happy with it.