Following the general release of VMware vSphere 6.5 last month (see my What’s New in VMware vSphere 6.5 post), I’ll be covering a number of technical run-throughs already in discussion throughout the virtual infrastructure community.
We’ll be starting with a fresh installation of the new and highly improved vCenter Server Appliance (VCSA), followed by a migration from the Windows-based vCenter Server 6.0; the latter task made all the easier thanks to the vSphere Migration Assistant. More on this to come. Lastly, I’ll be looking at a fresh installation of the Windows-based product, however, the experience throughout all of these installation/migration scenarios has been vastly improved.
So, first up then, let’s take a quick look at a fresh installation of the new vCenter Server Appliance, the installation and configuration of which can take just 20 minutes.
1. Log on to a domain-joined server, mount the VCSA installation media, and click Install (more on the Upgrade, Migrate, and Restore options in future posts).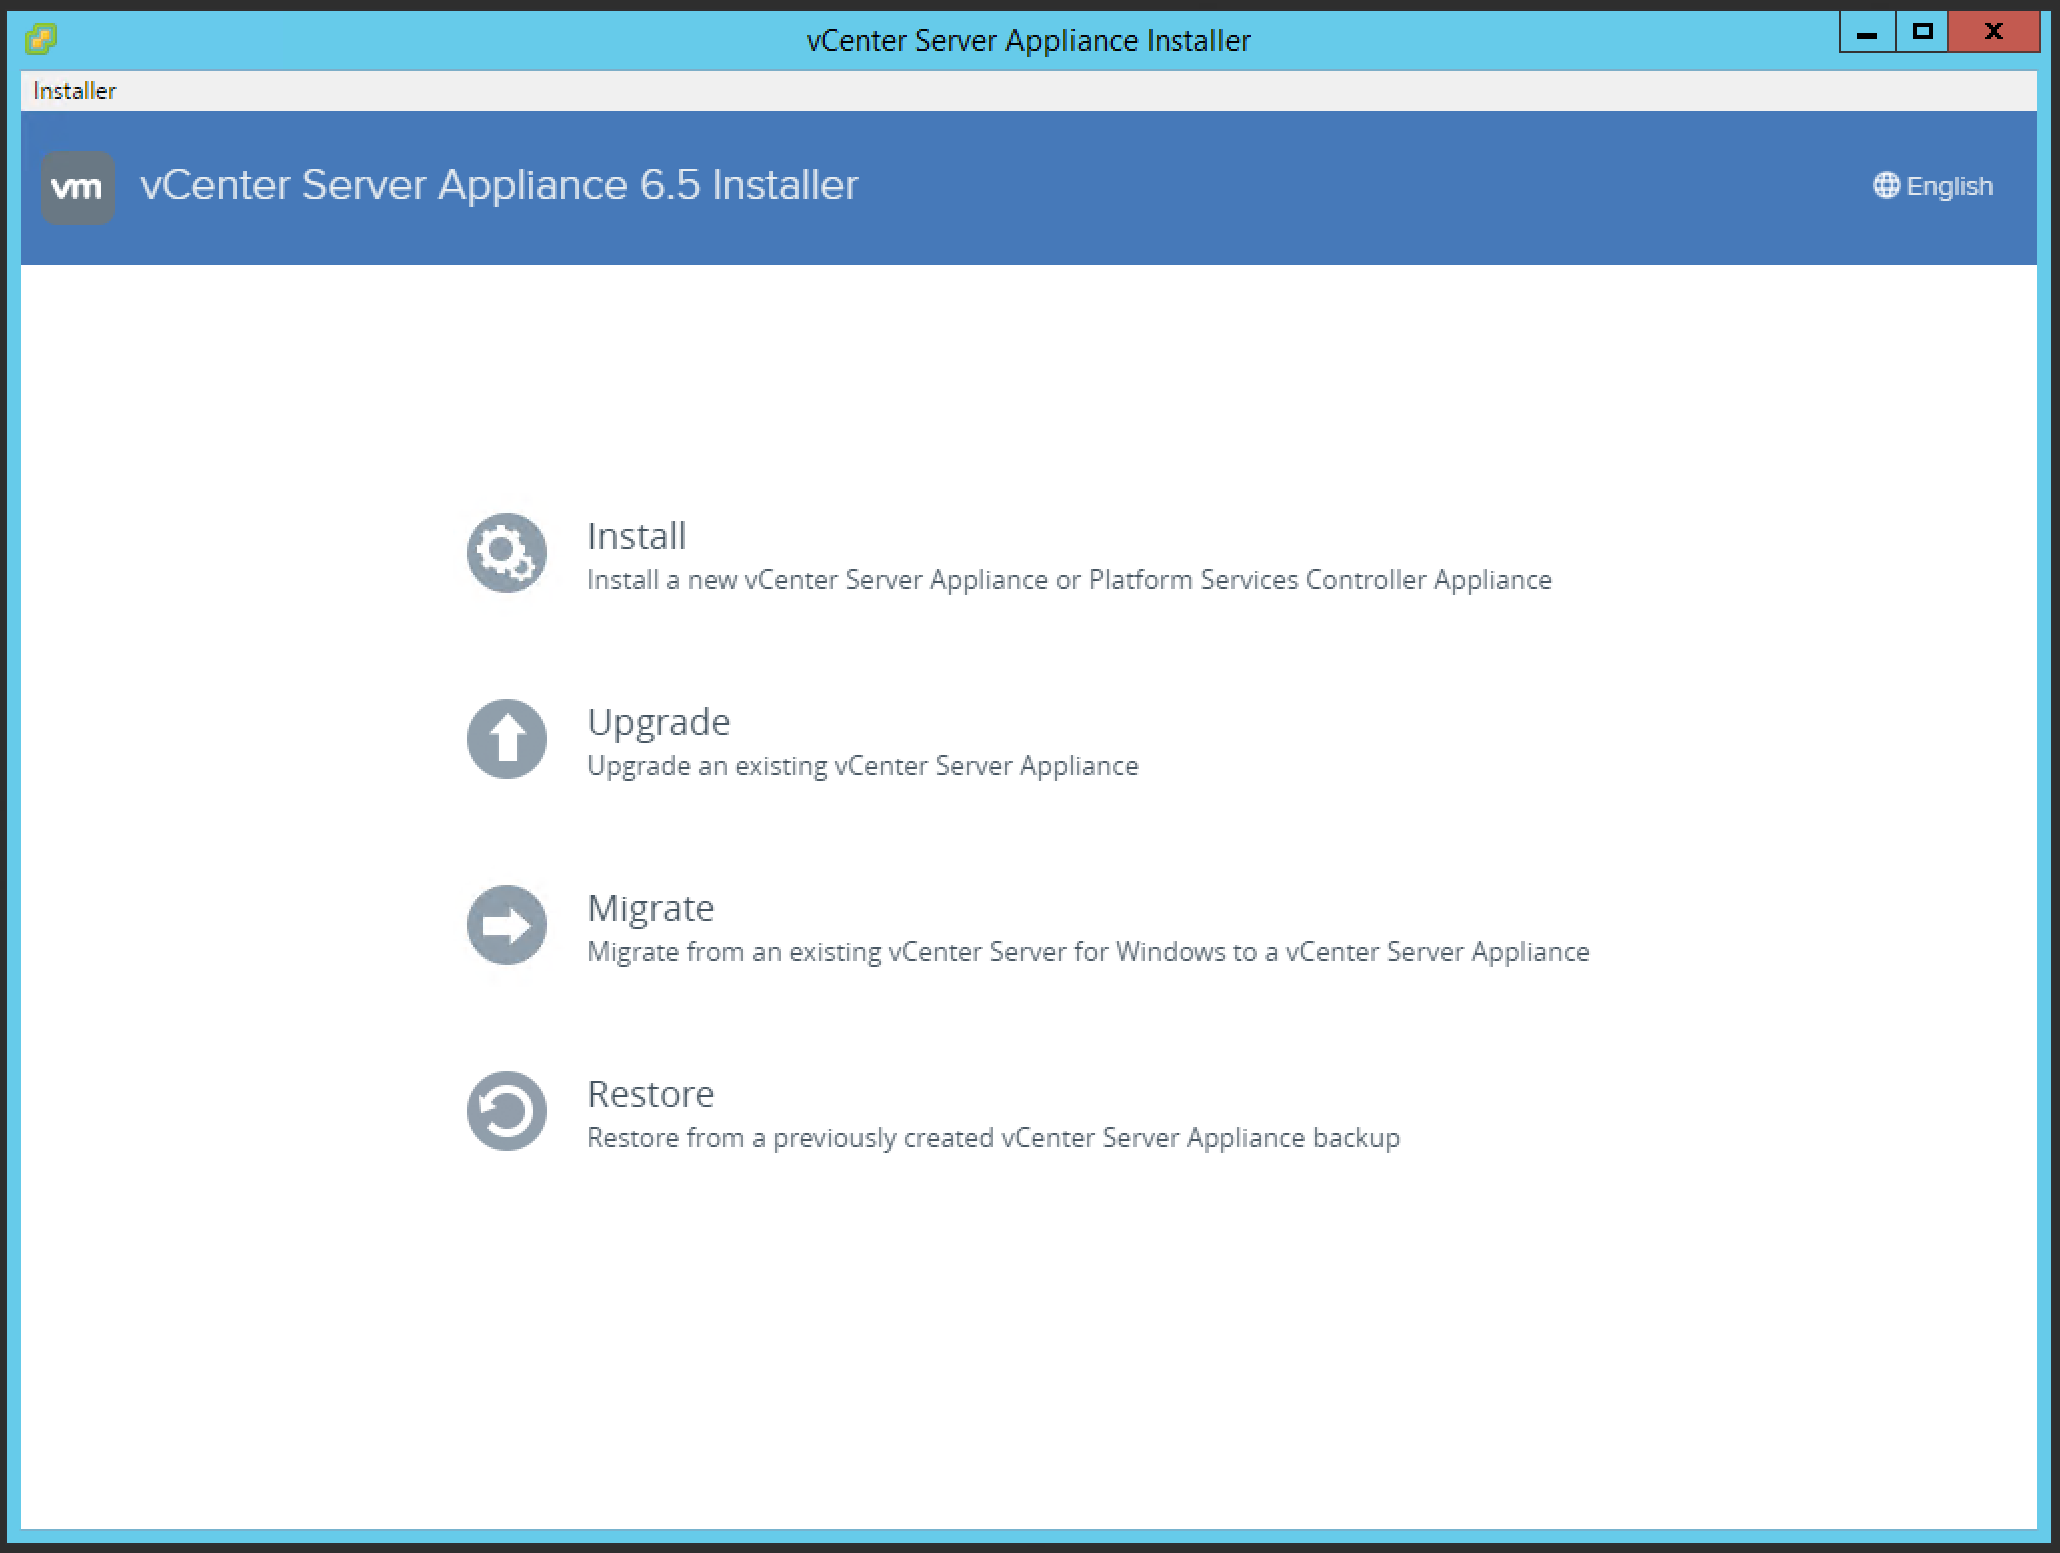
2. Click Next at the Introduction screen.
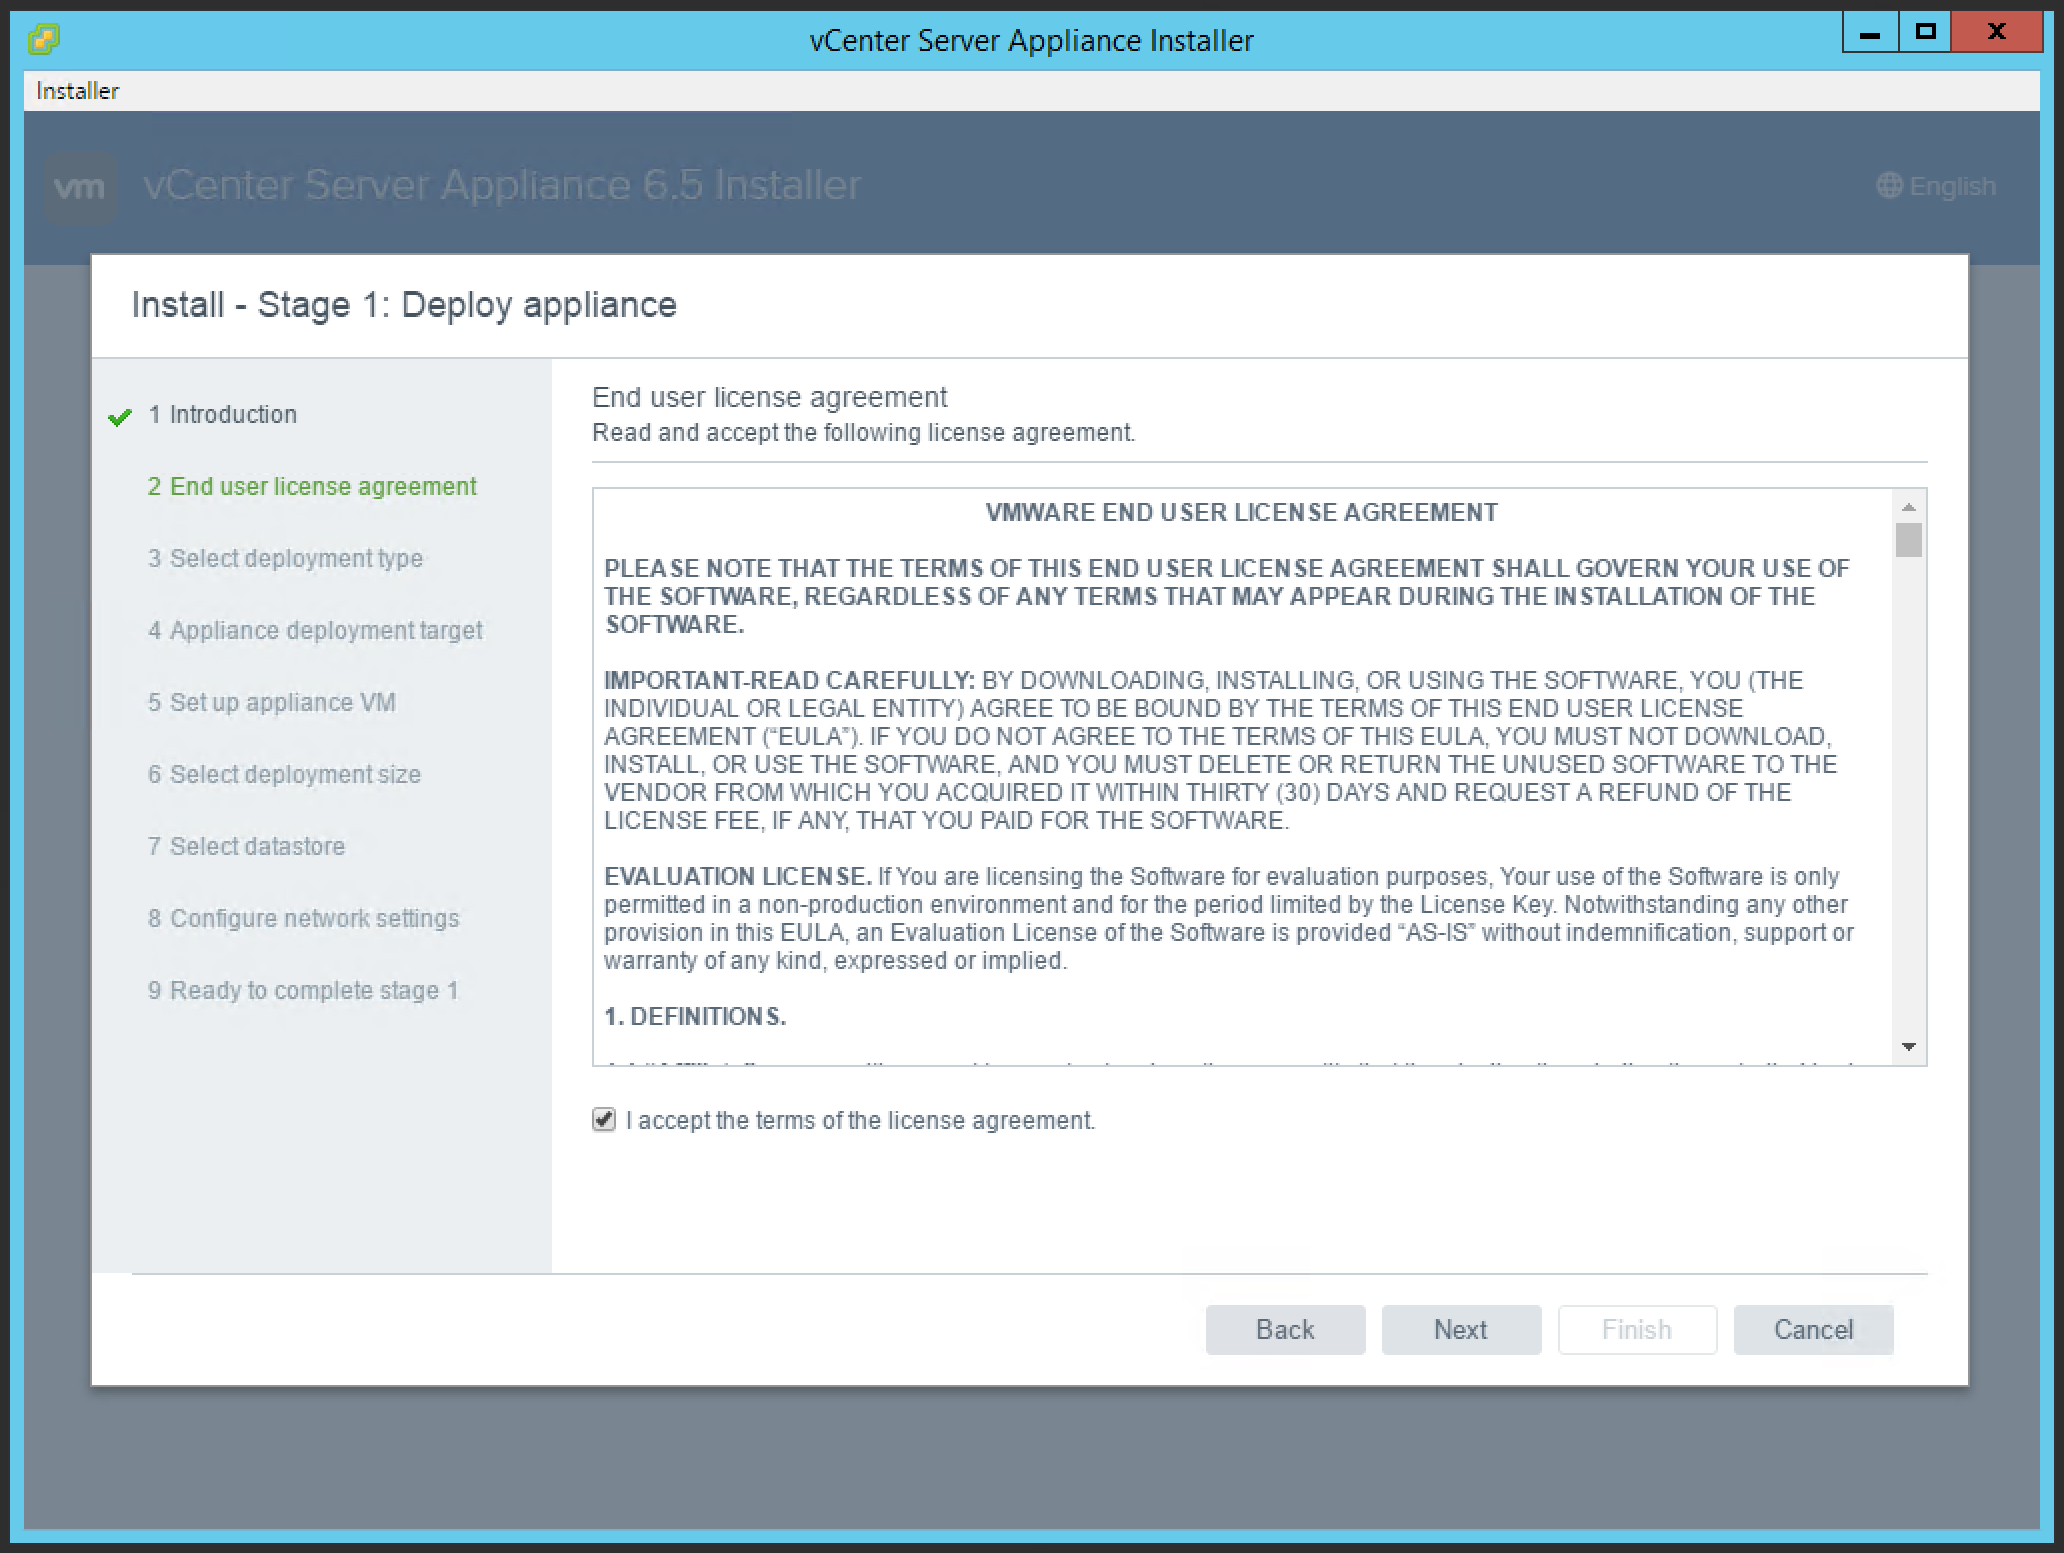
3. Accept the EULA and click Next.
4. For this installation, we will be deploying the vCenter Server with an Embedded Platform Services Controller. Once done, click Next.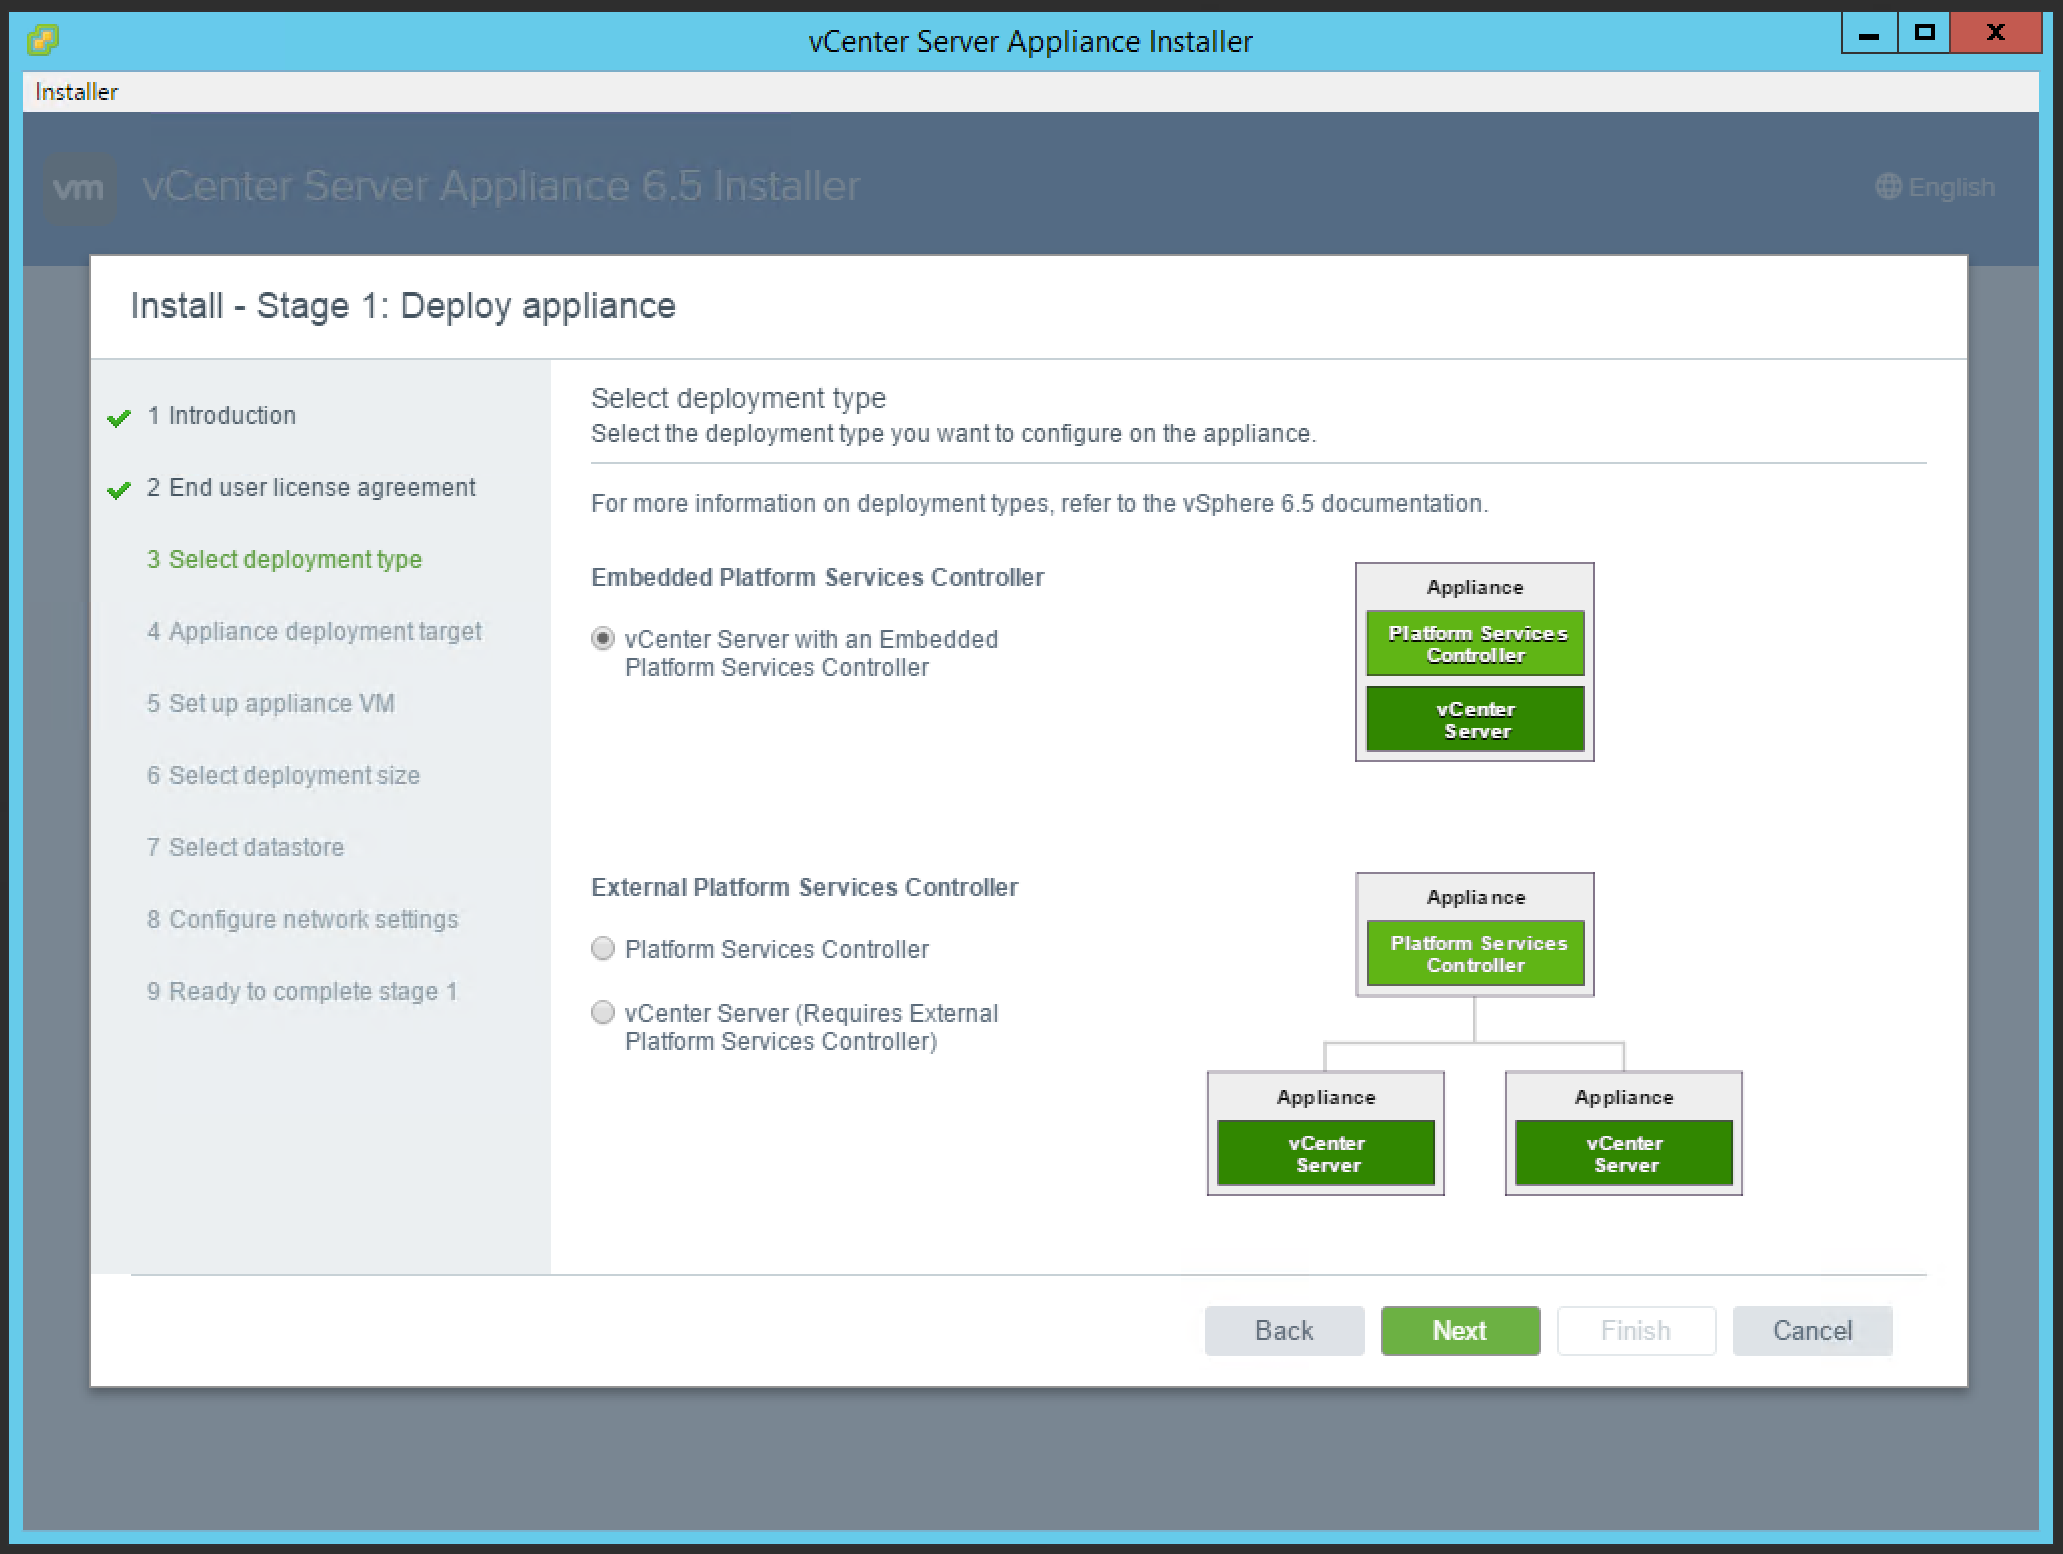
5. Configure the Appliance Deployment Target by entering the target ESXi host, HTTPS port, and user credentials, and click Next.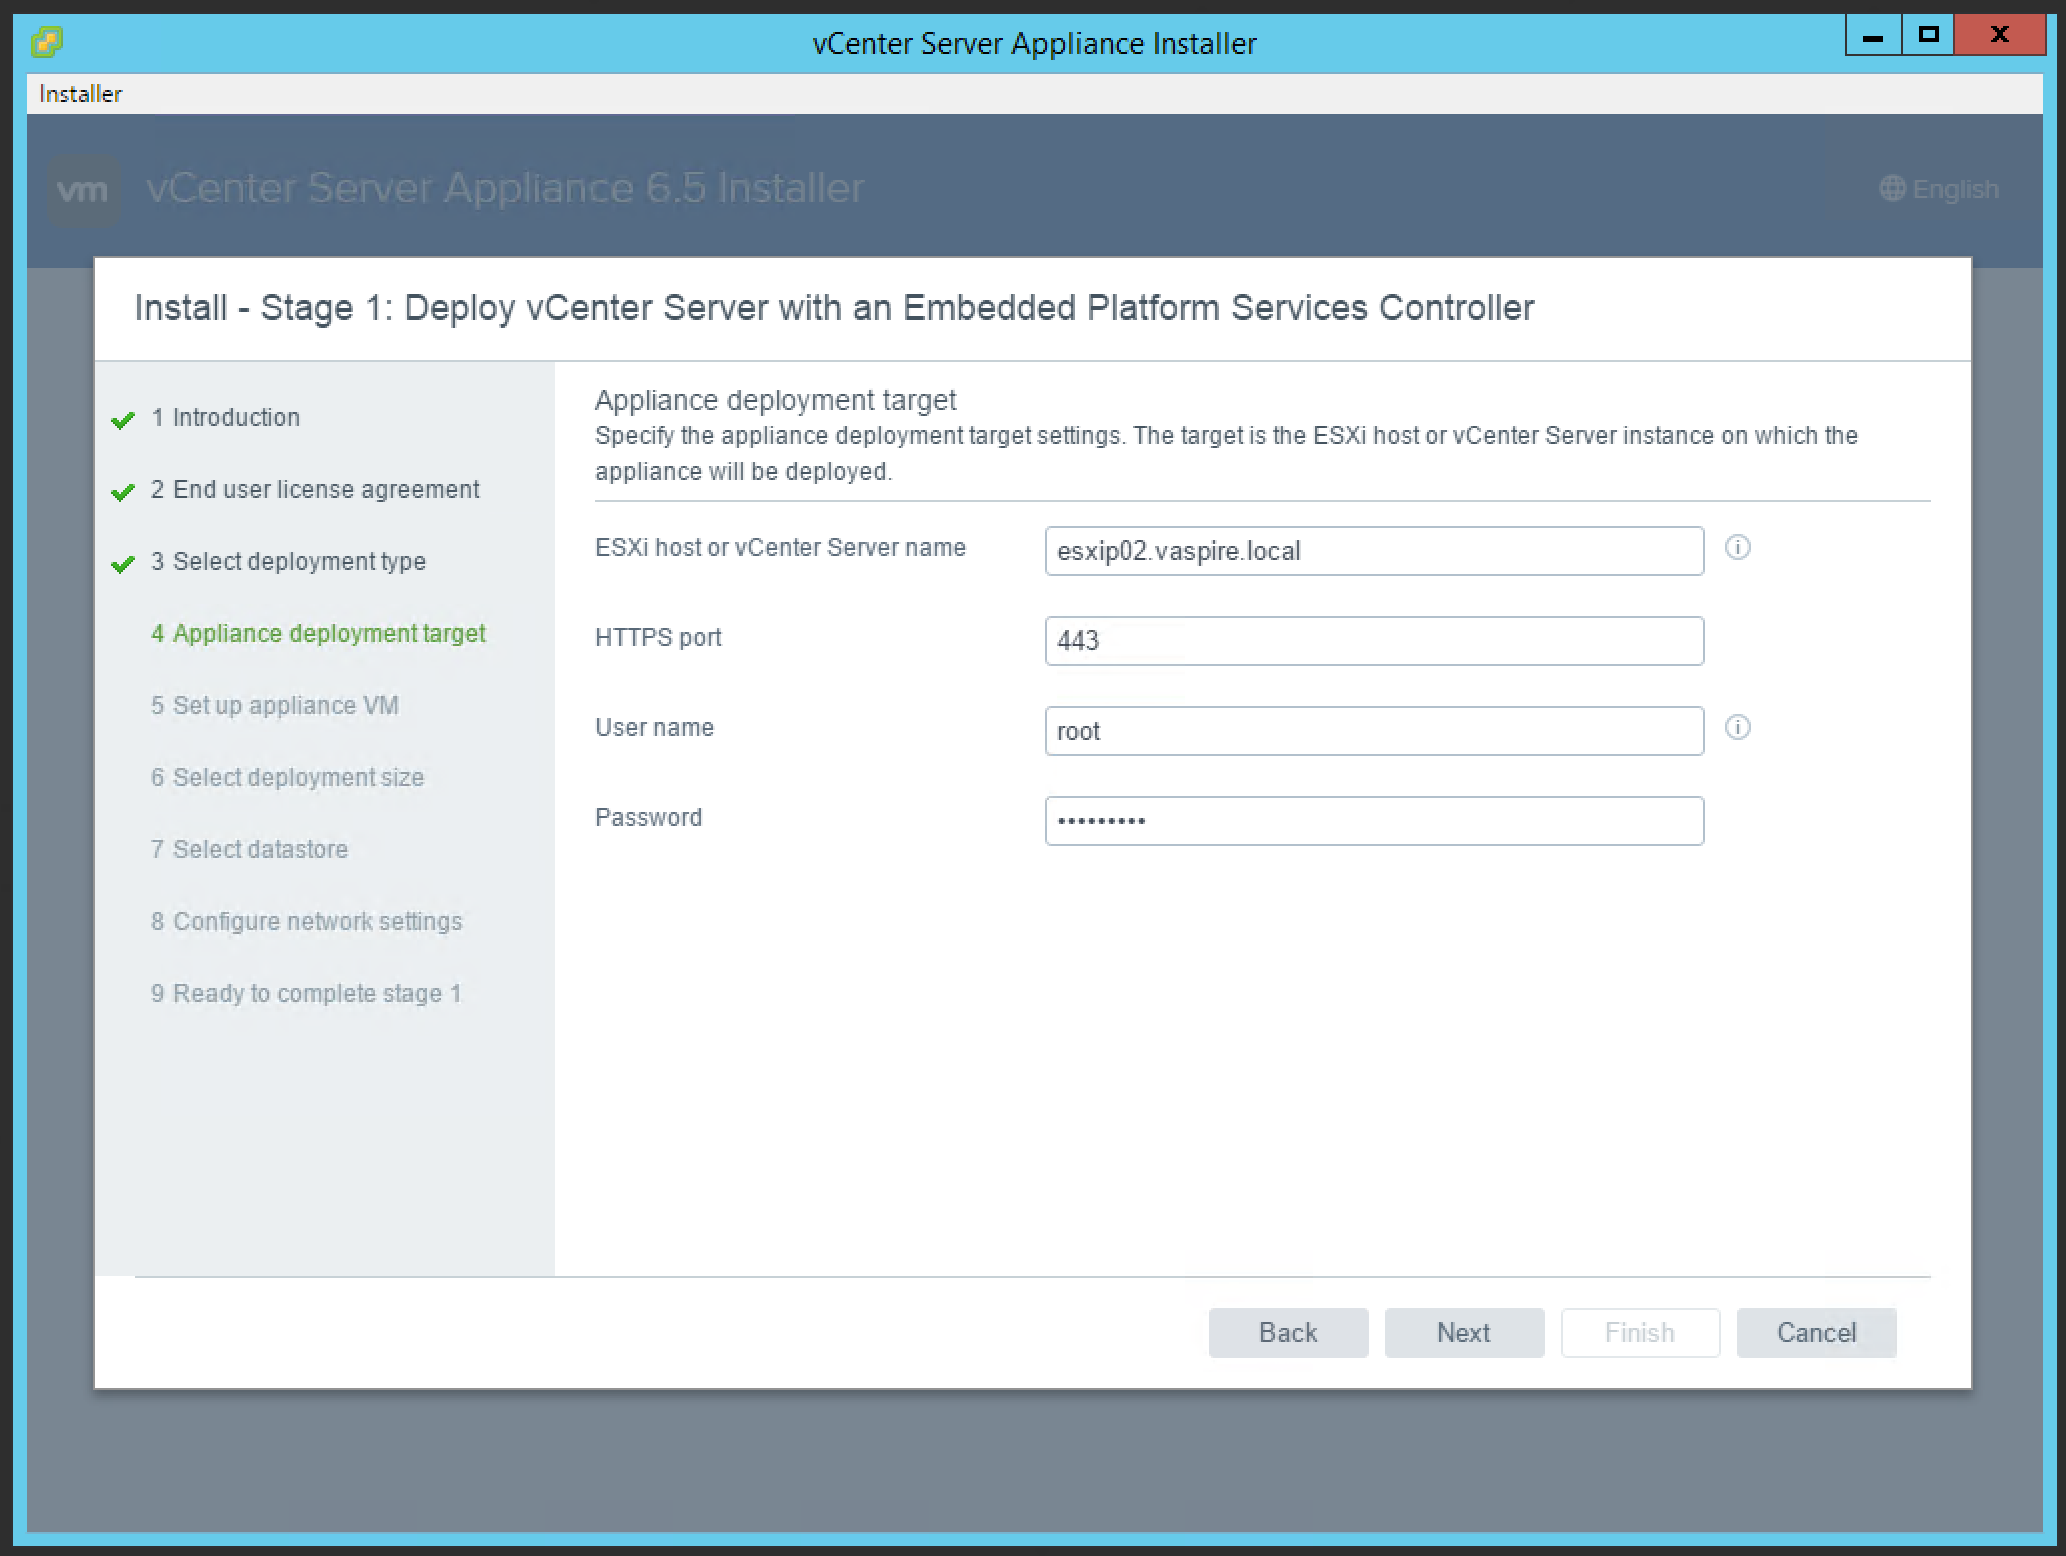
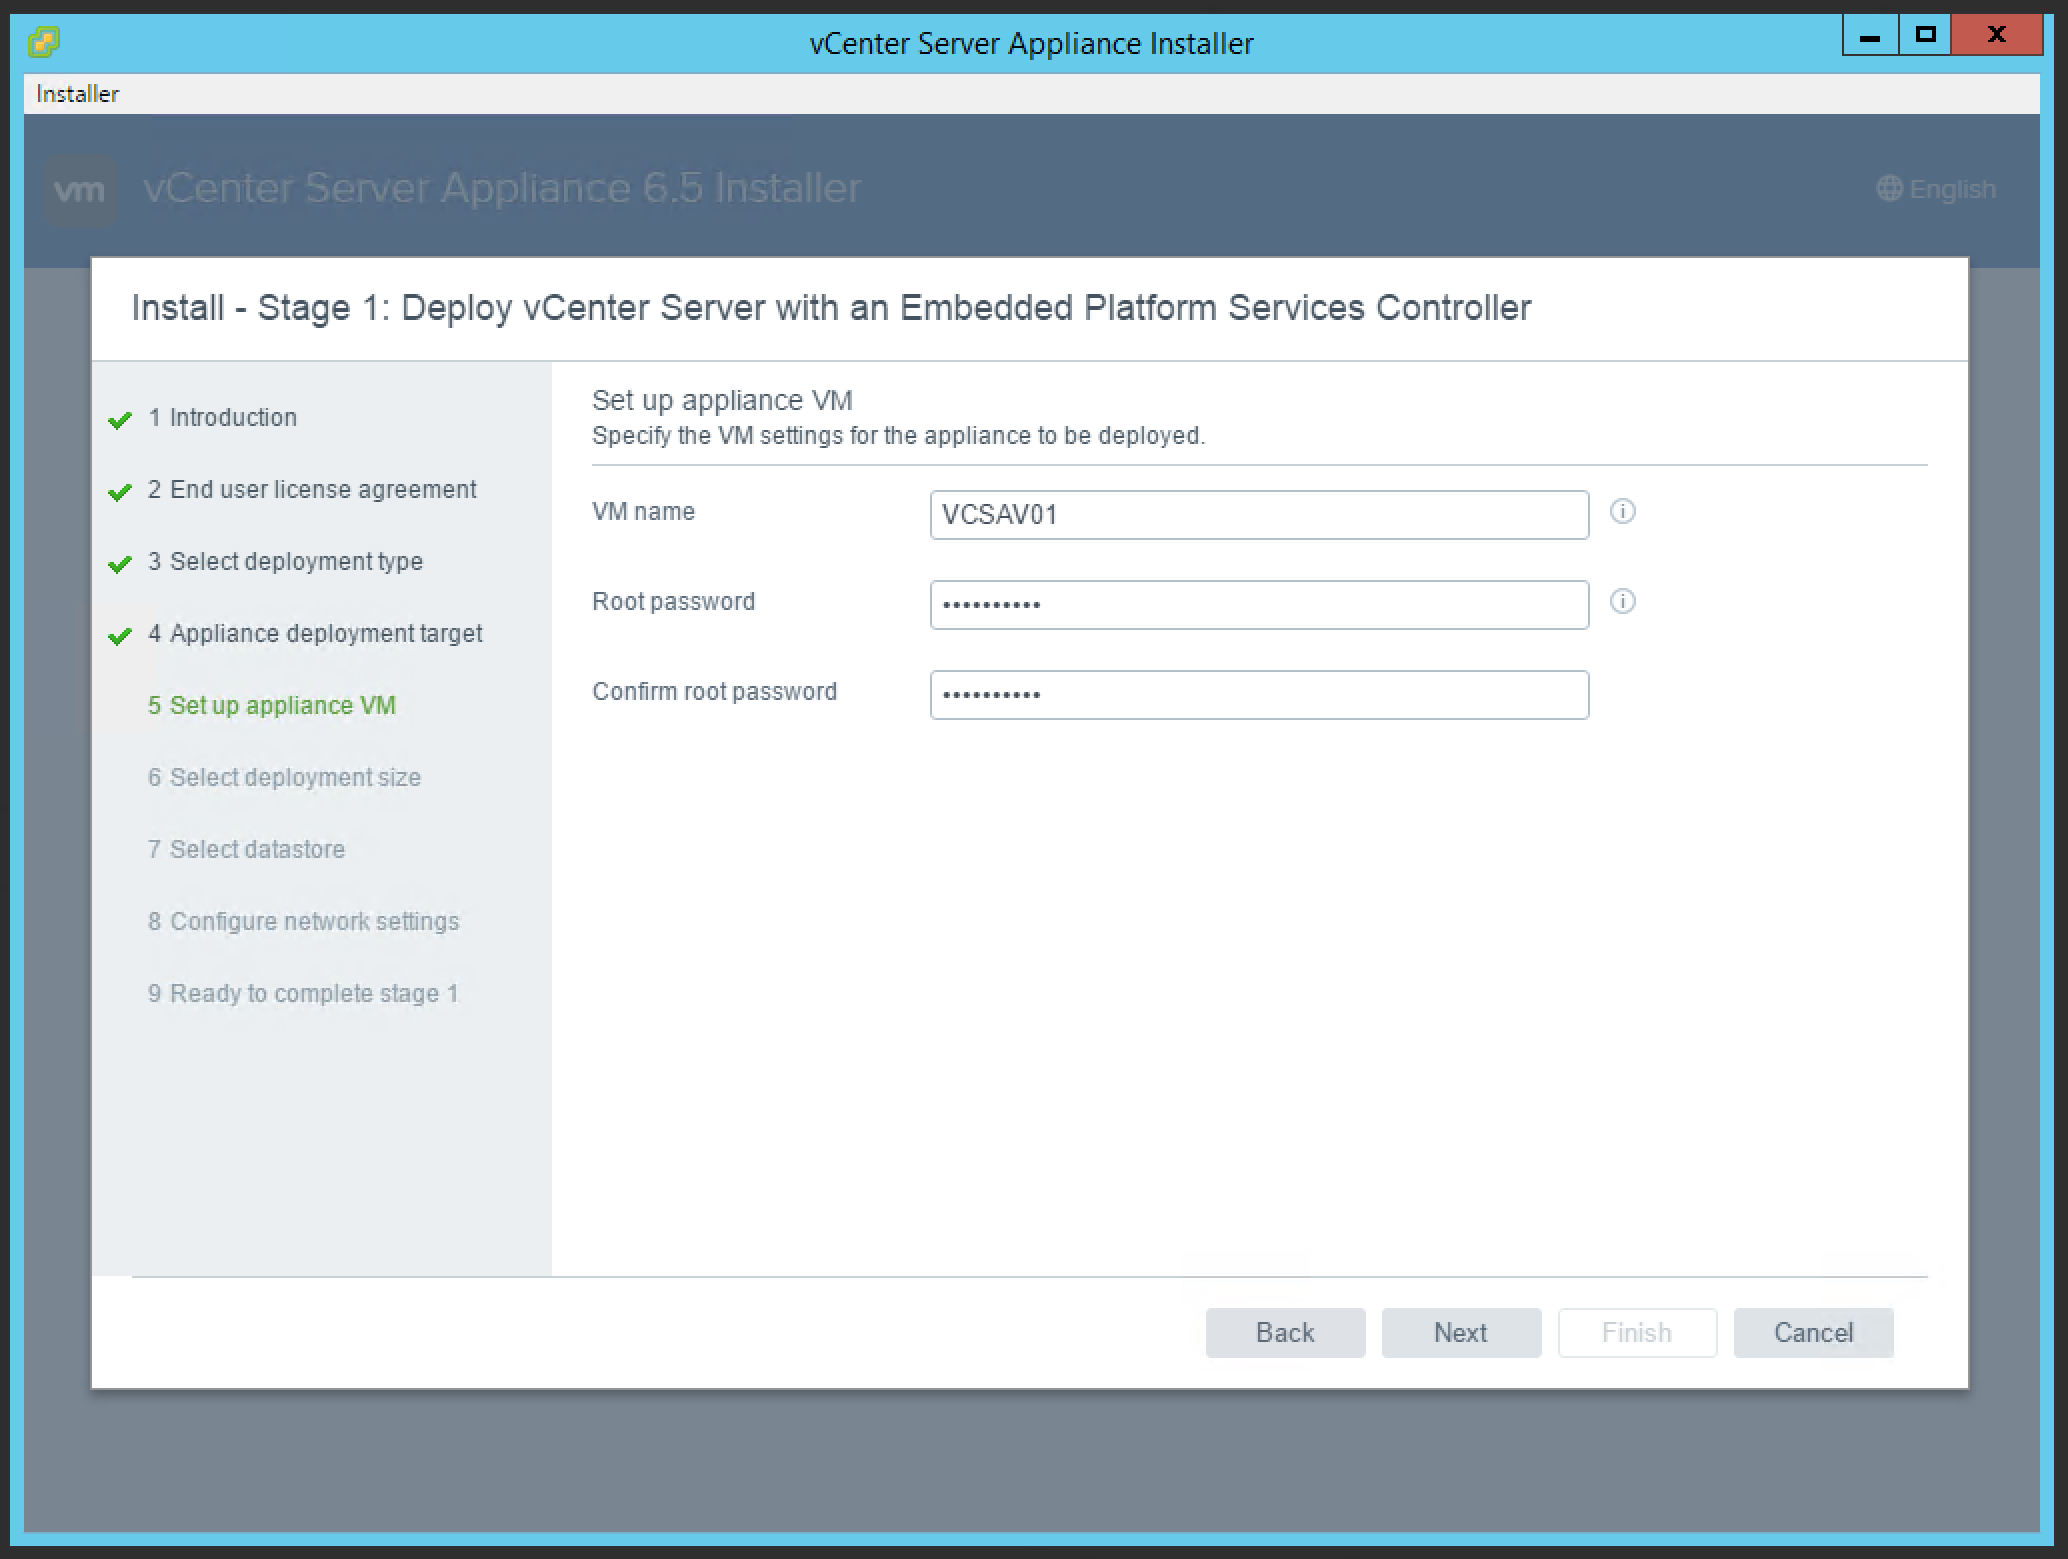
6. Configure up the appliance virtual machine by specifying a VM name, and Root credentials.
7. Select your deployment size; for this example, Tiny will suffice. Once done, click Next.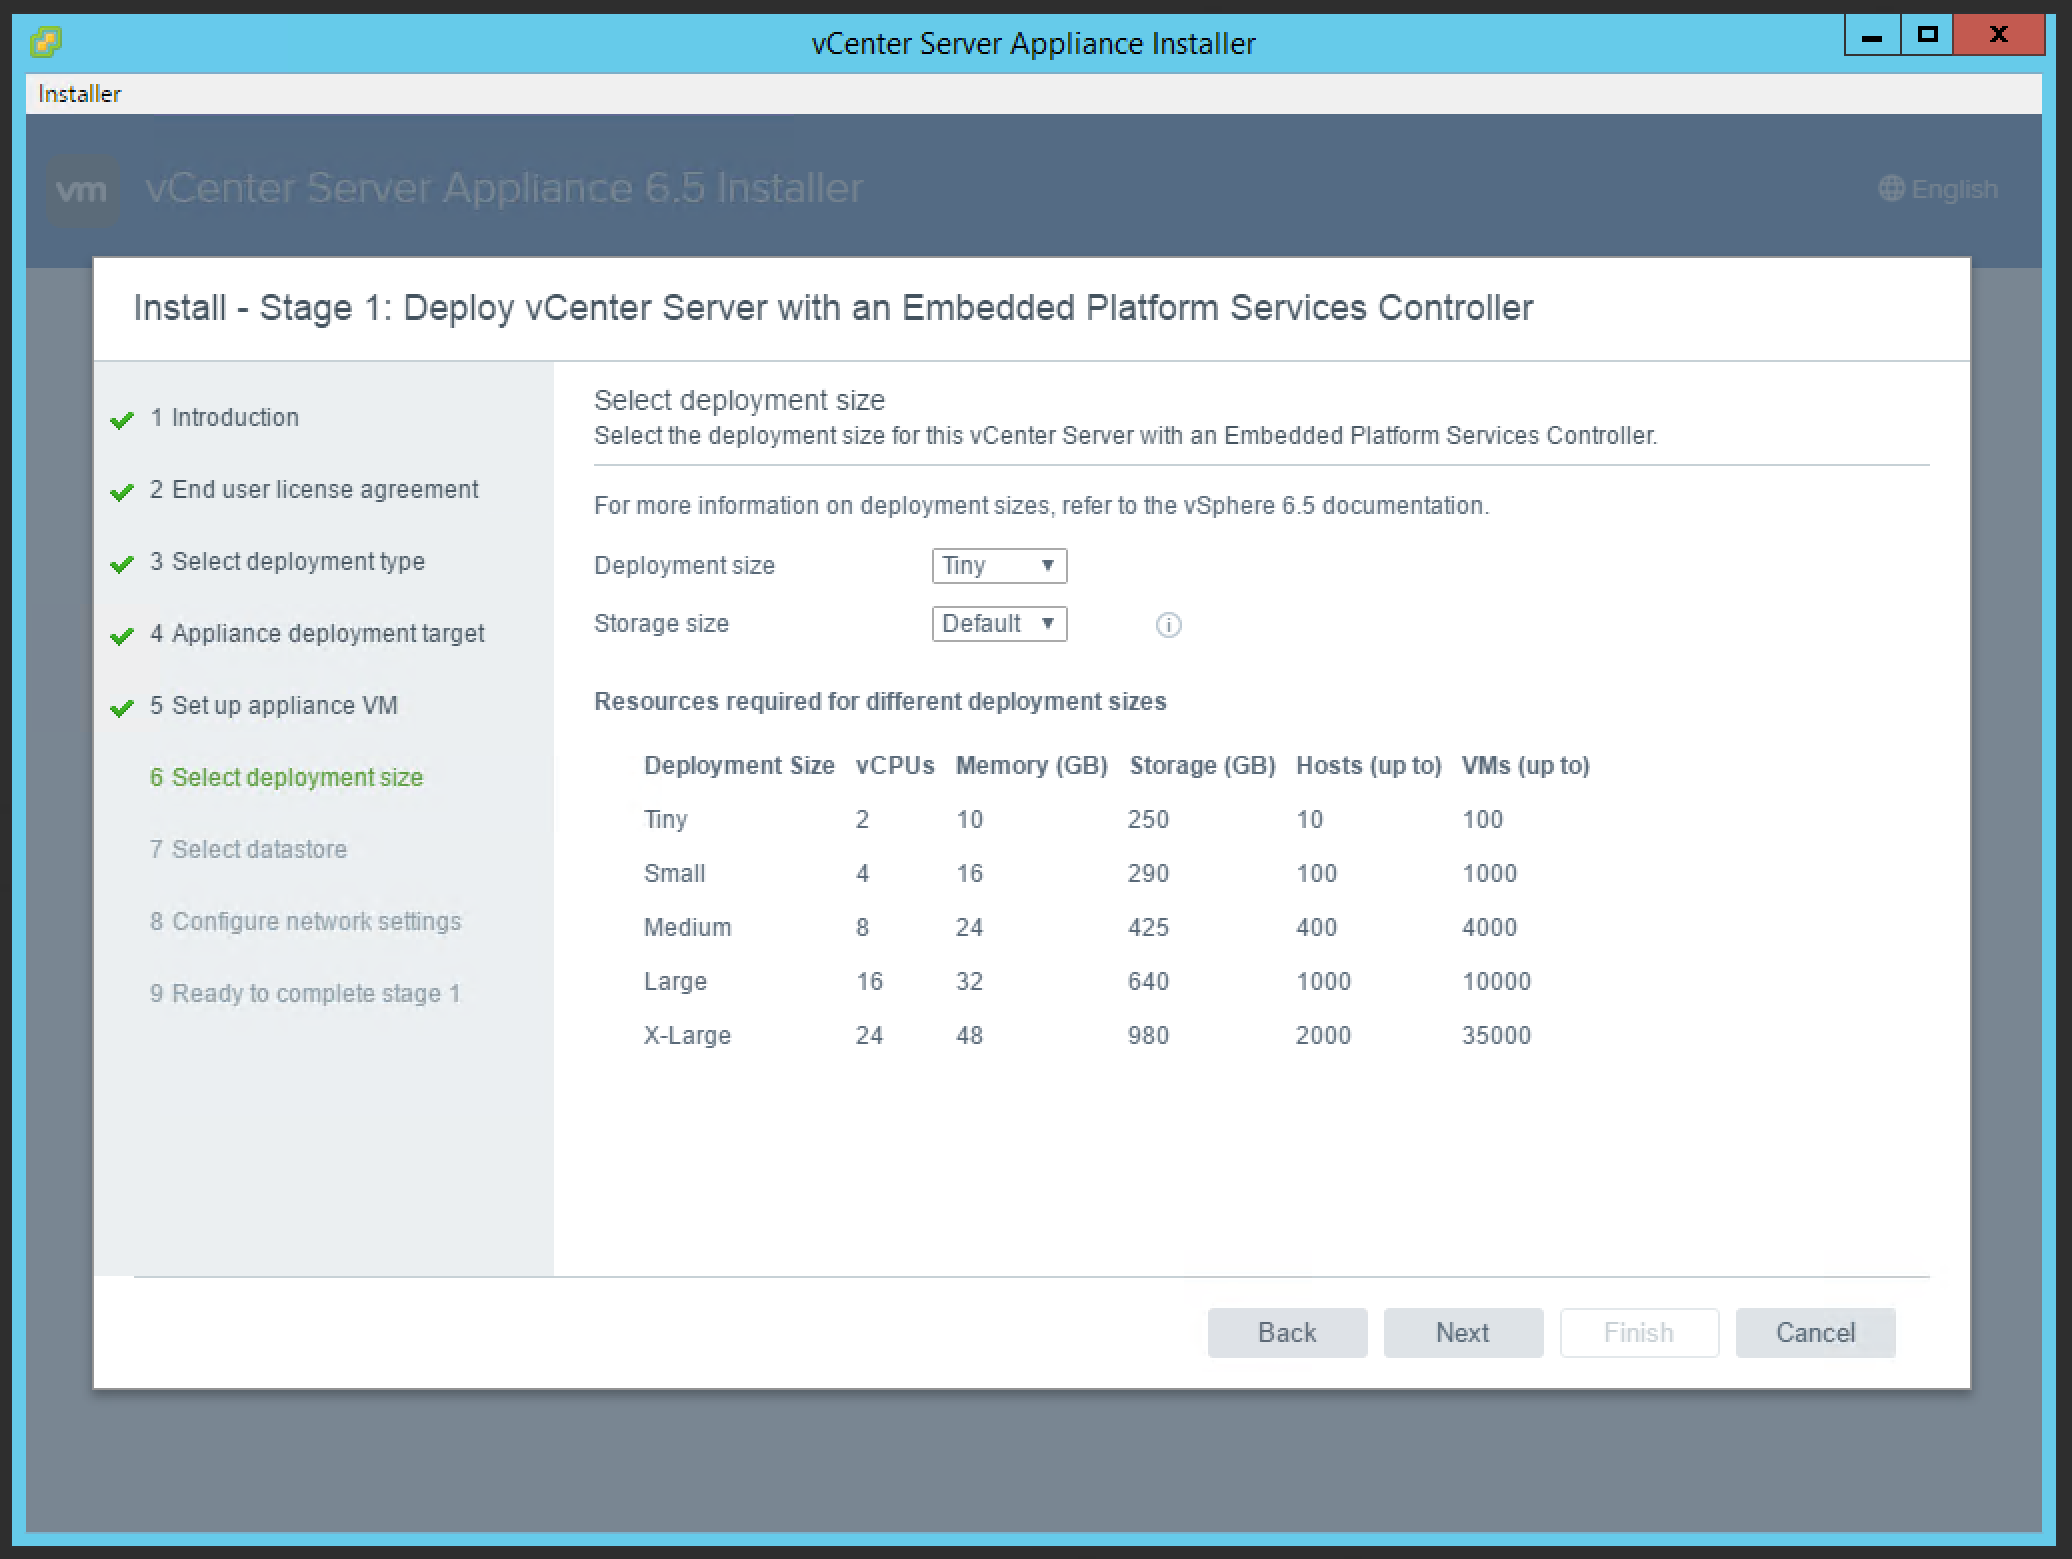
8. Select a suitable datastore for the new VM, and click Next.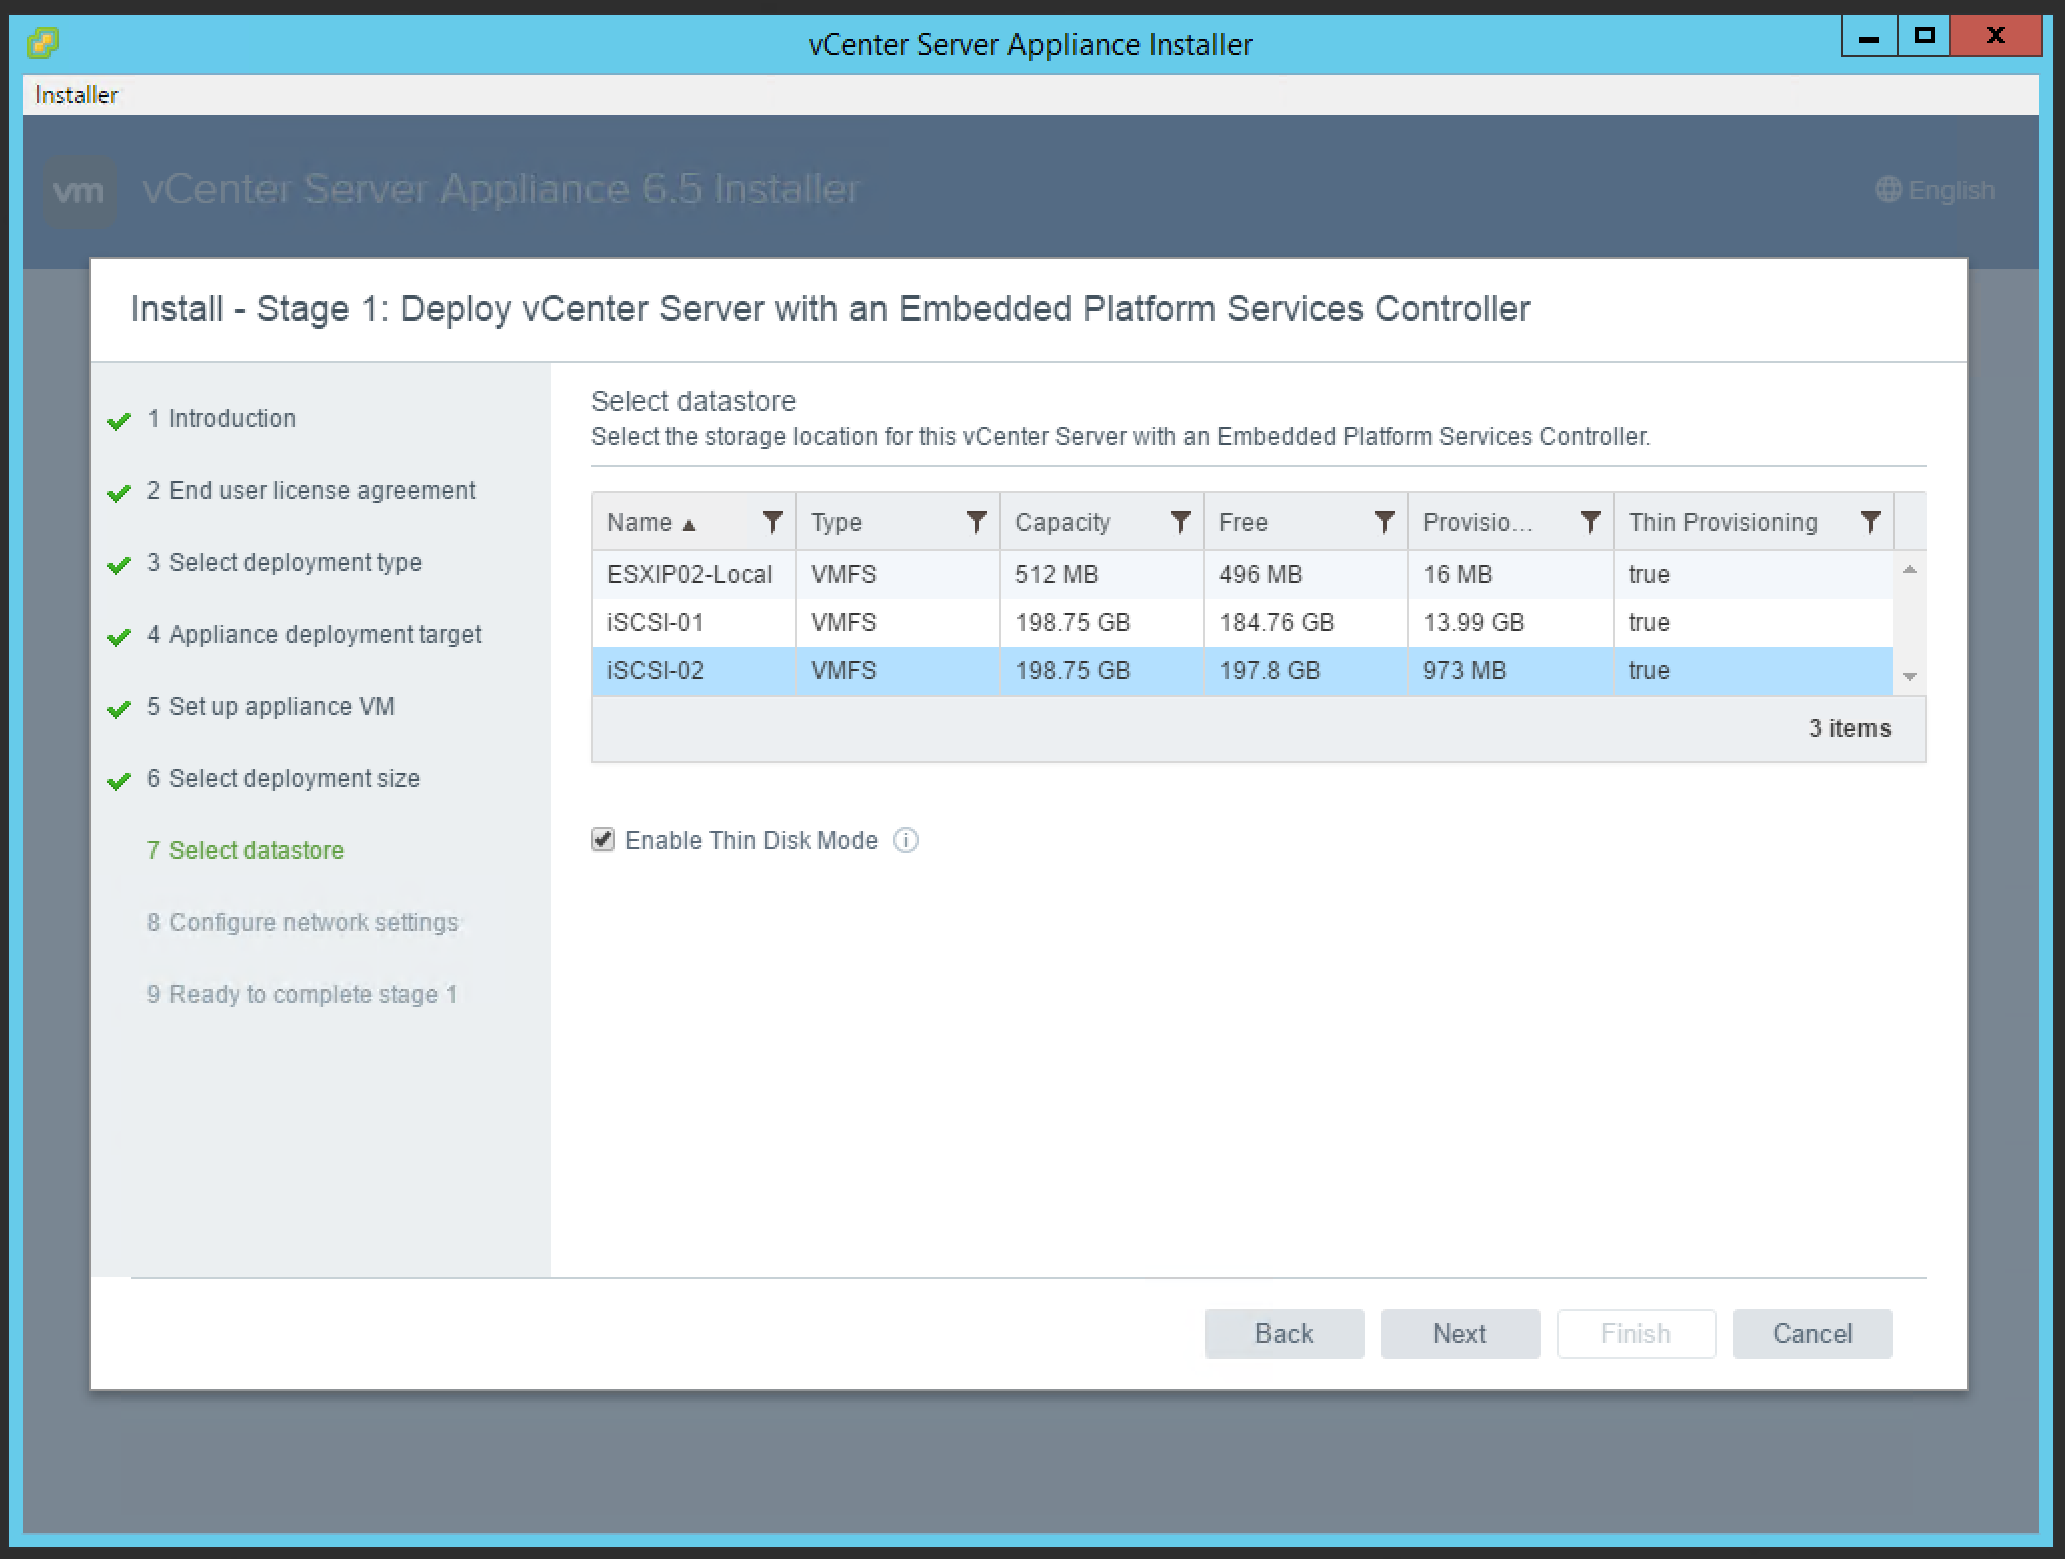
9. Configure the network settings accordingly, and click Next.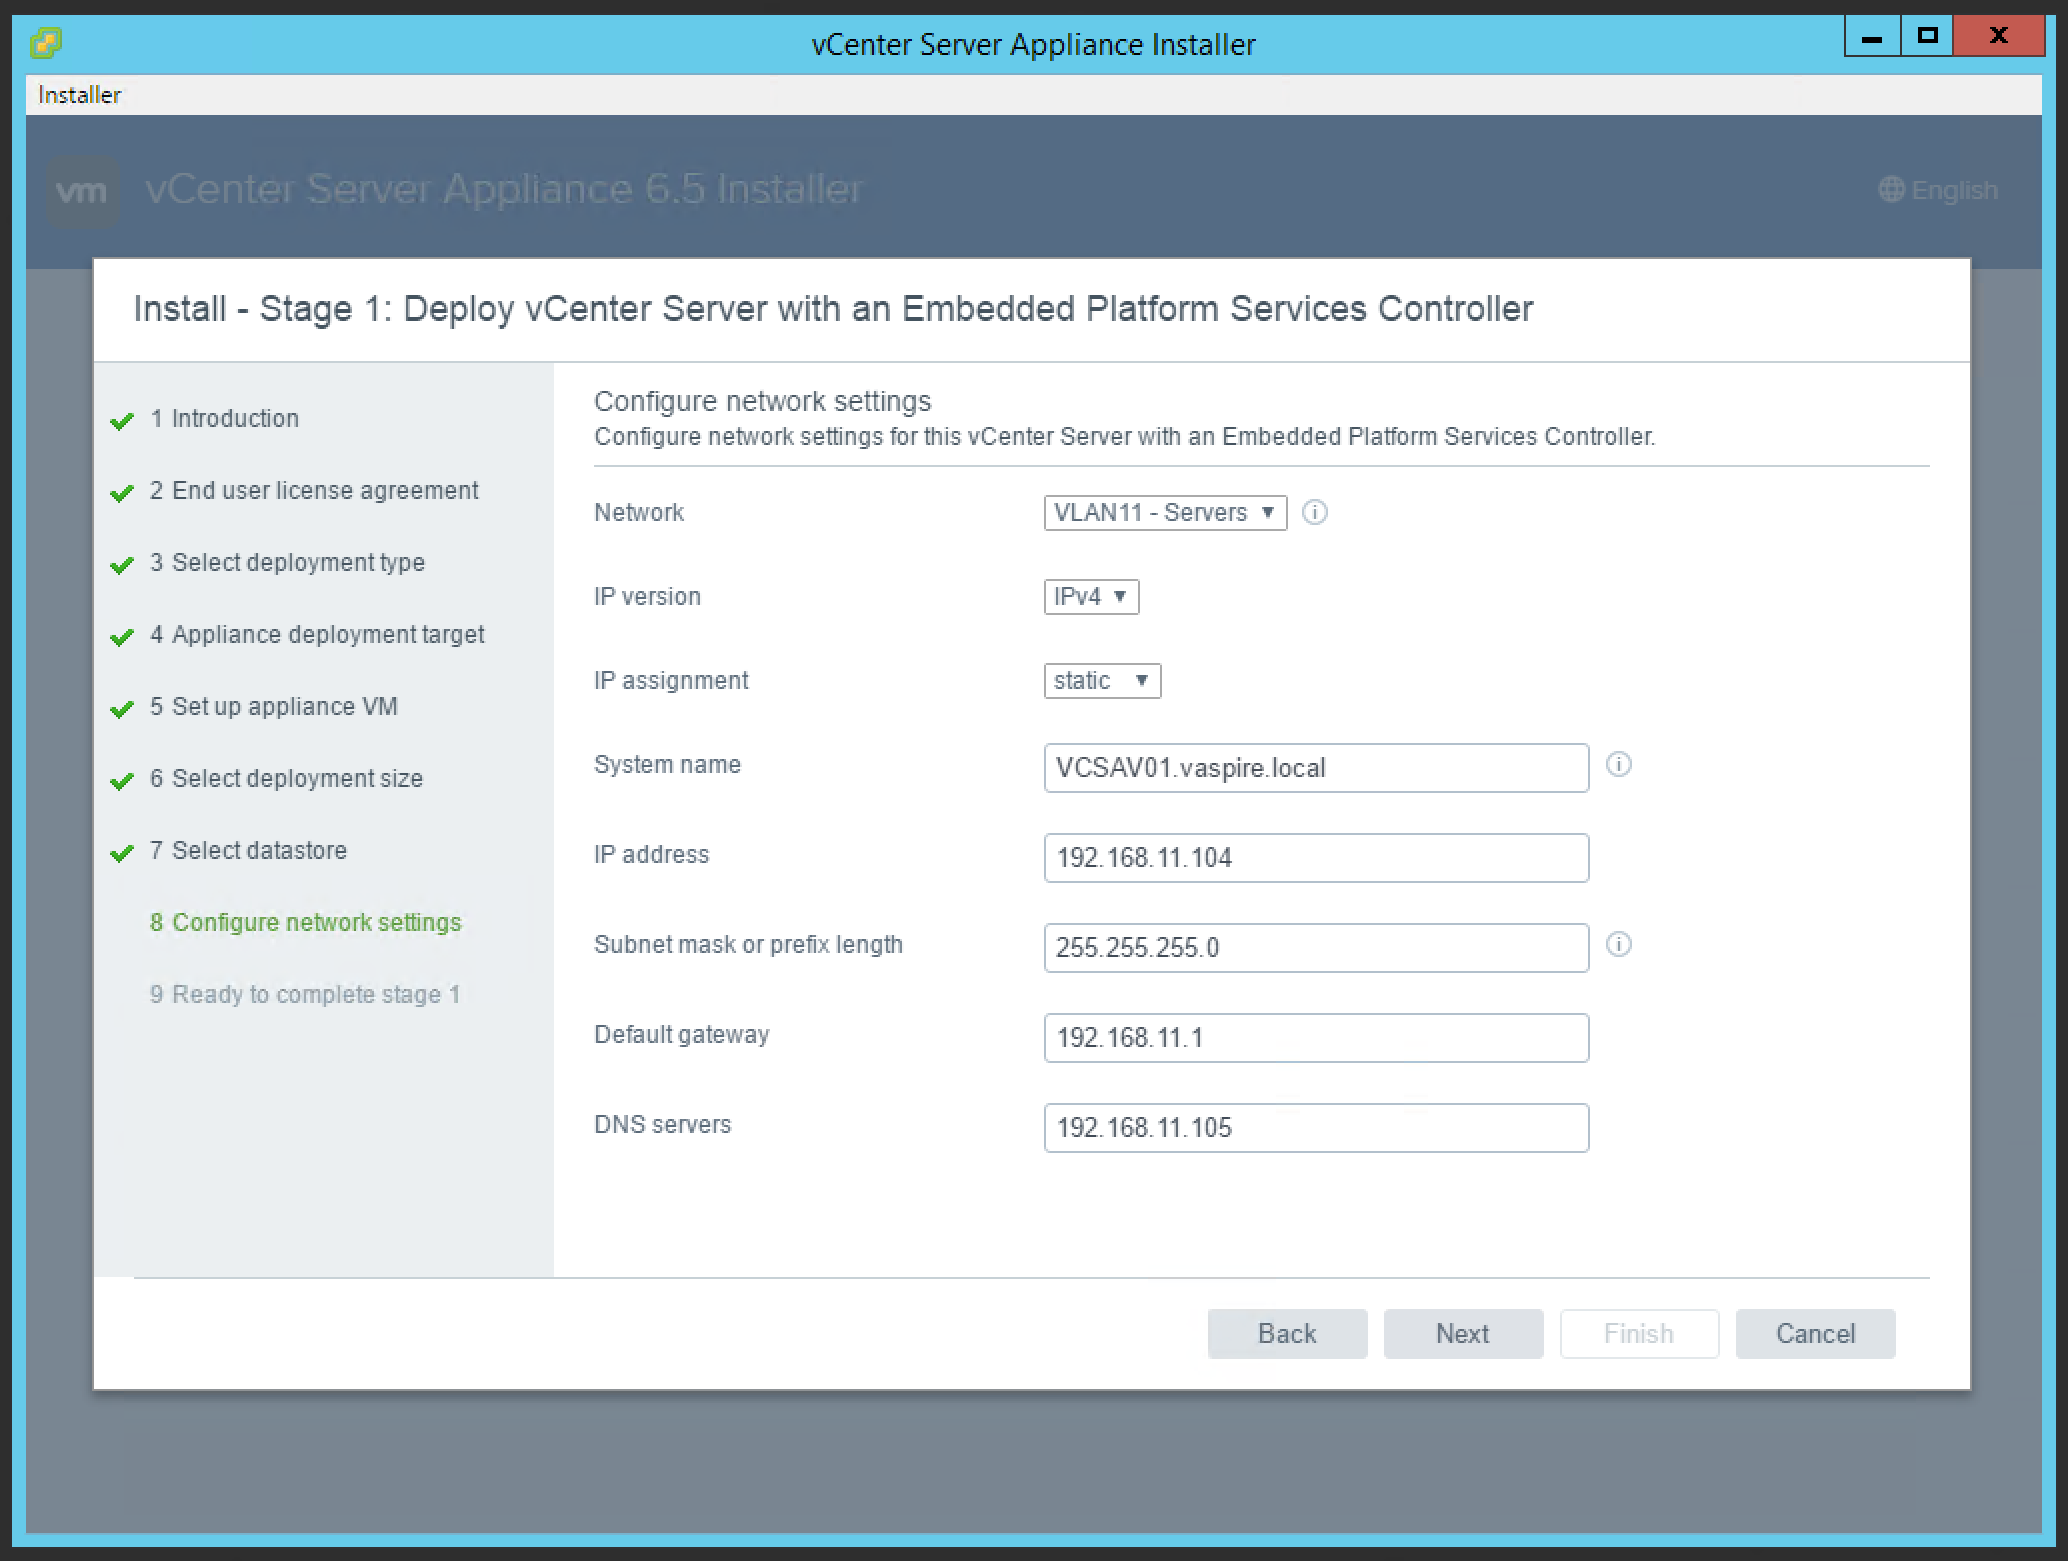
10. Confirm the configuration and click Finish once happy.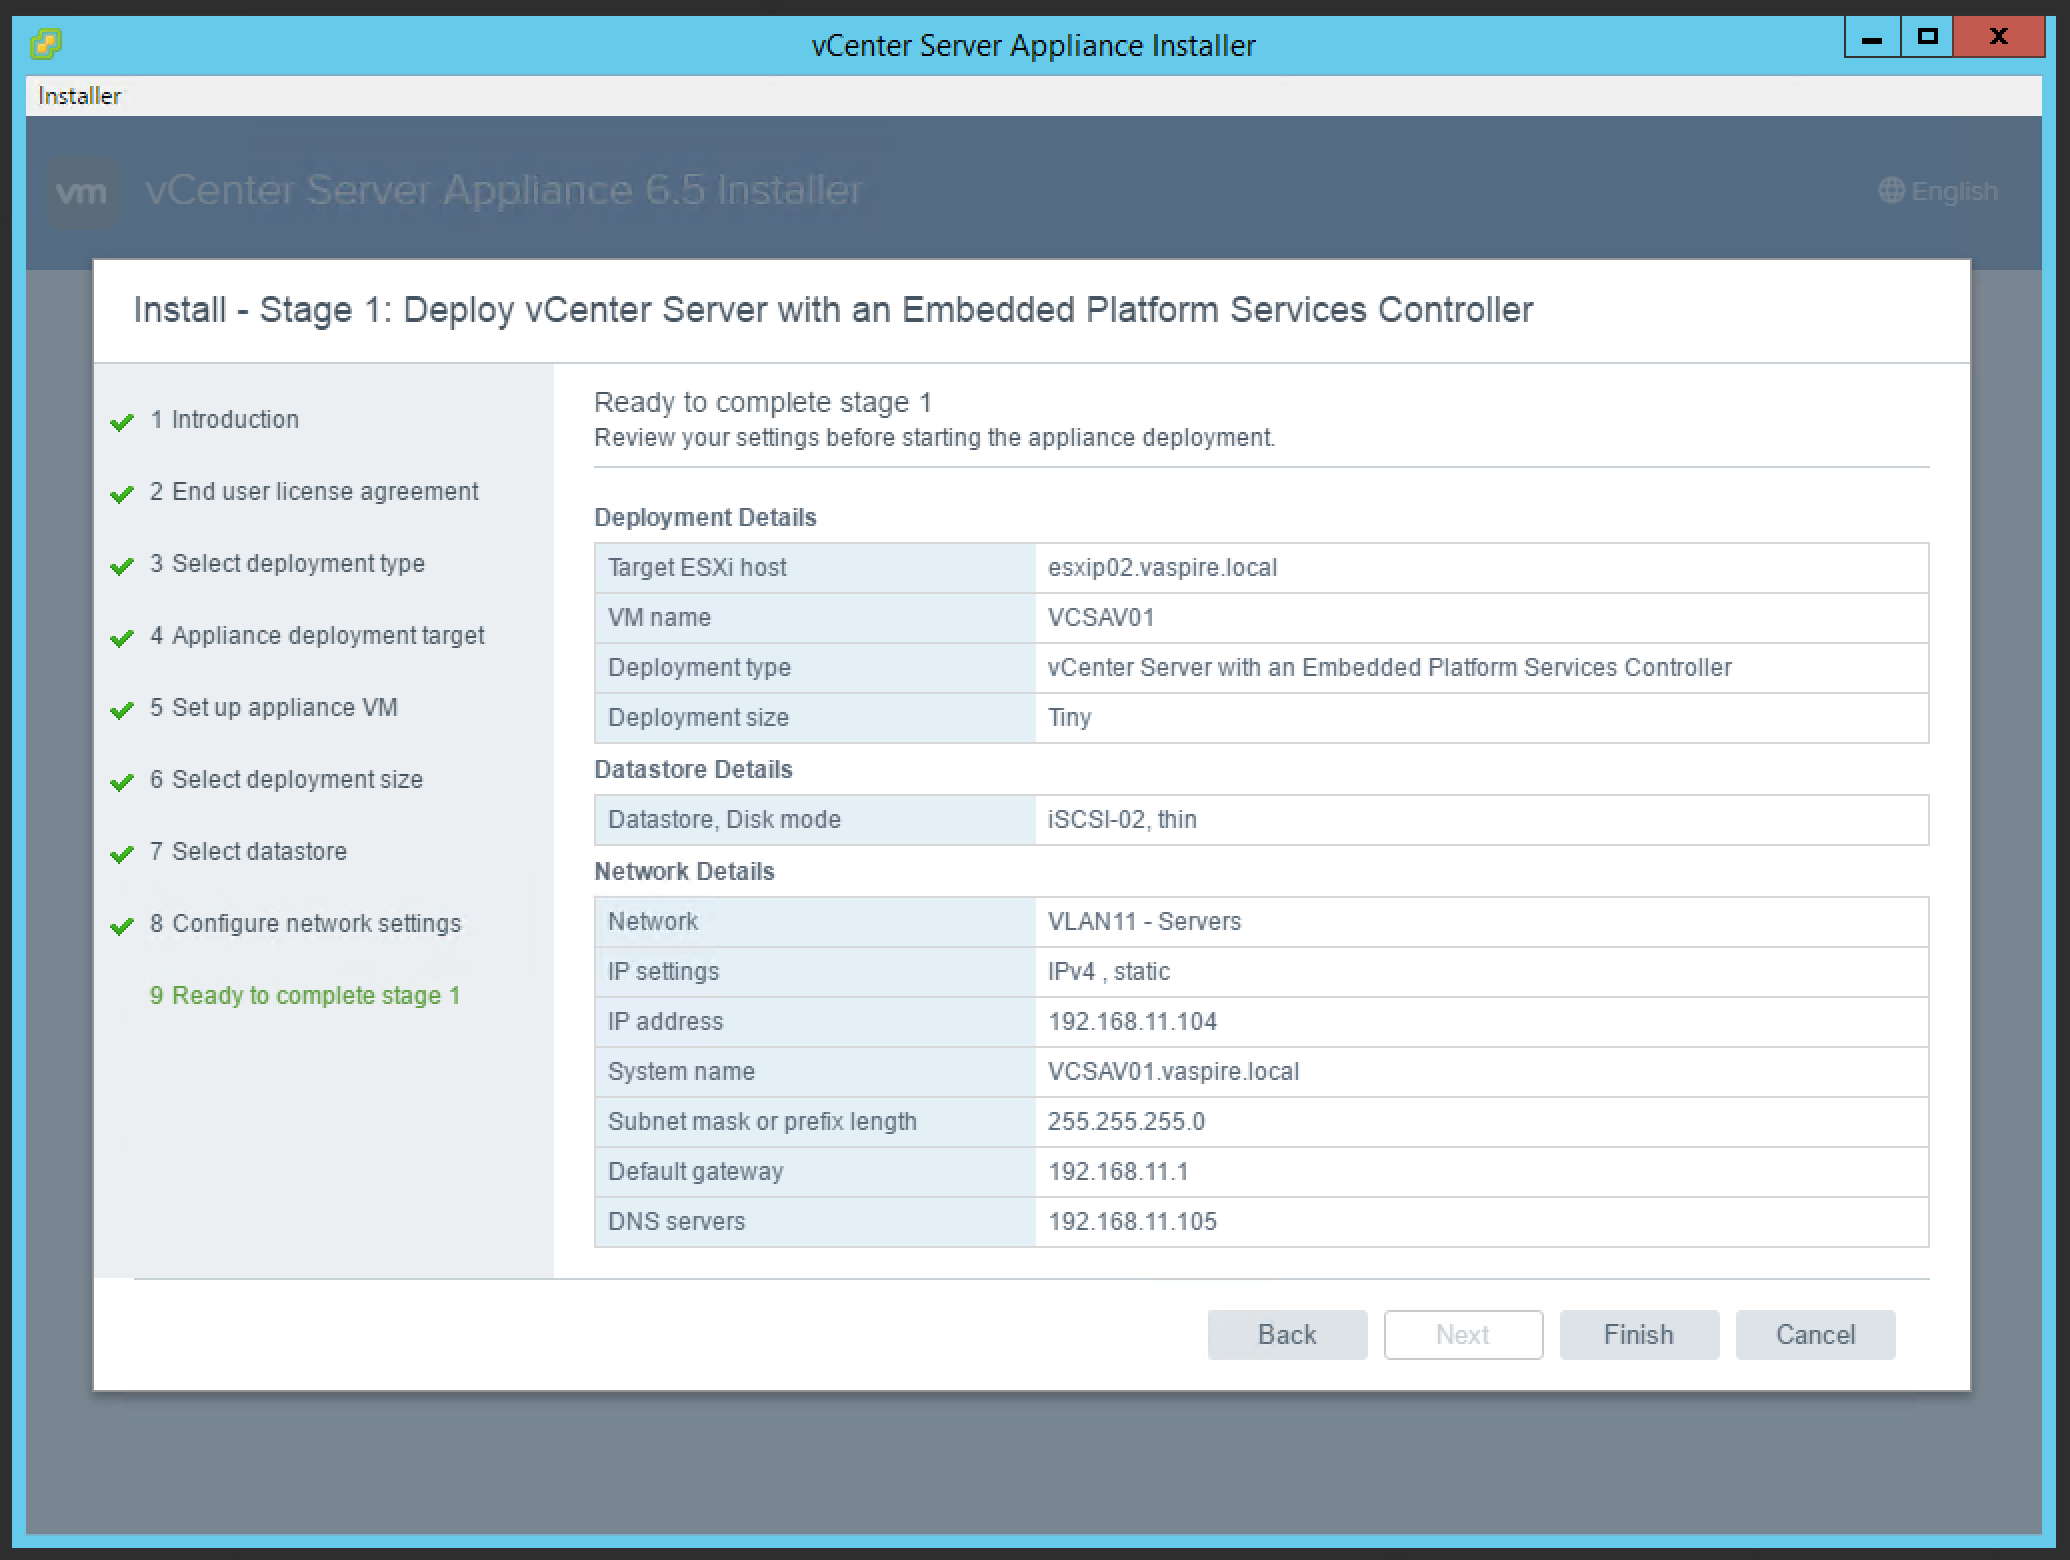
11. Stage 1 of the installation (appliance deployment) will now begin.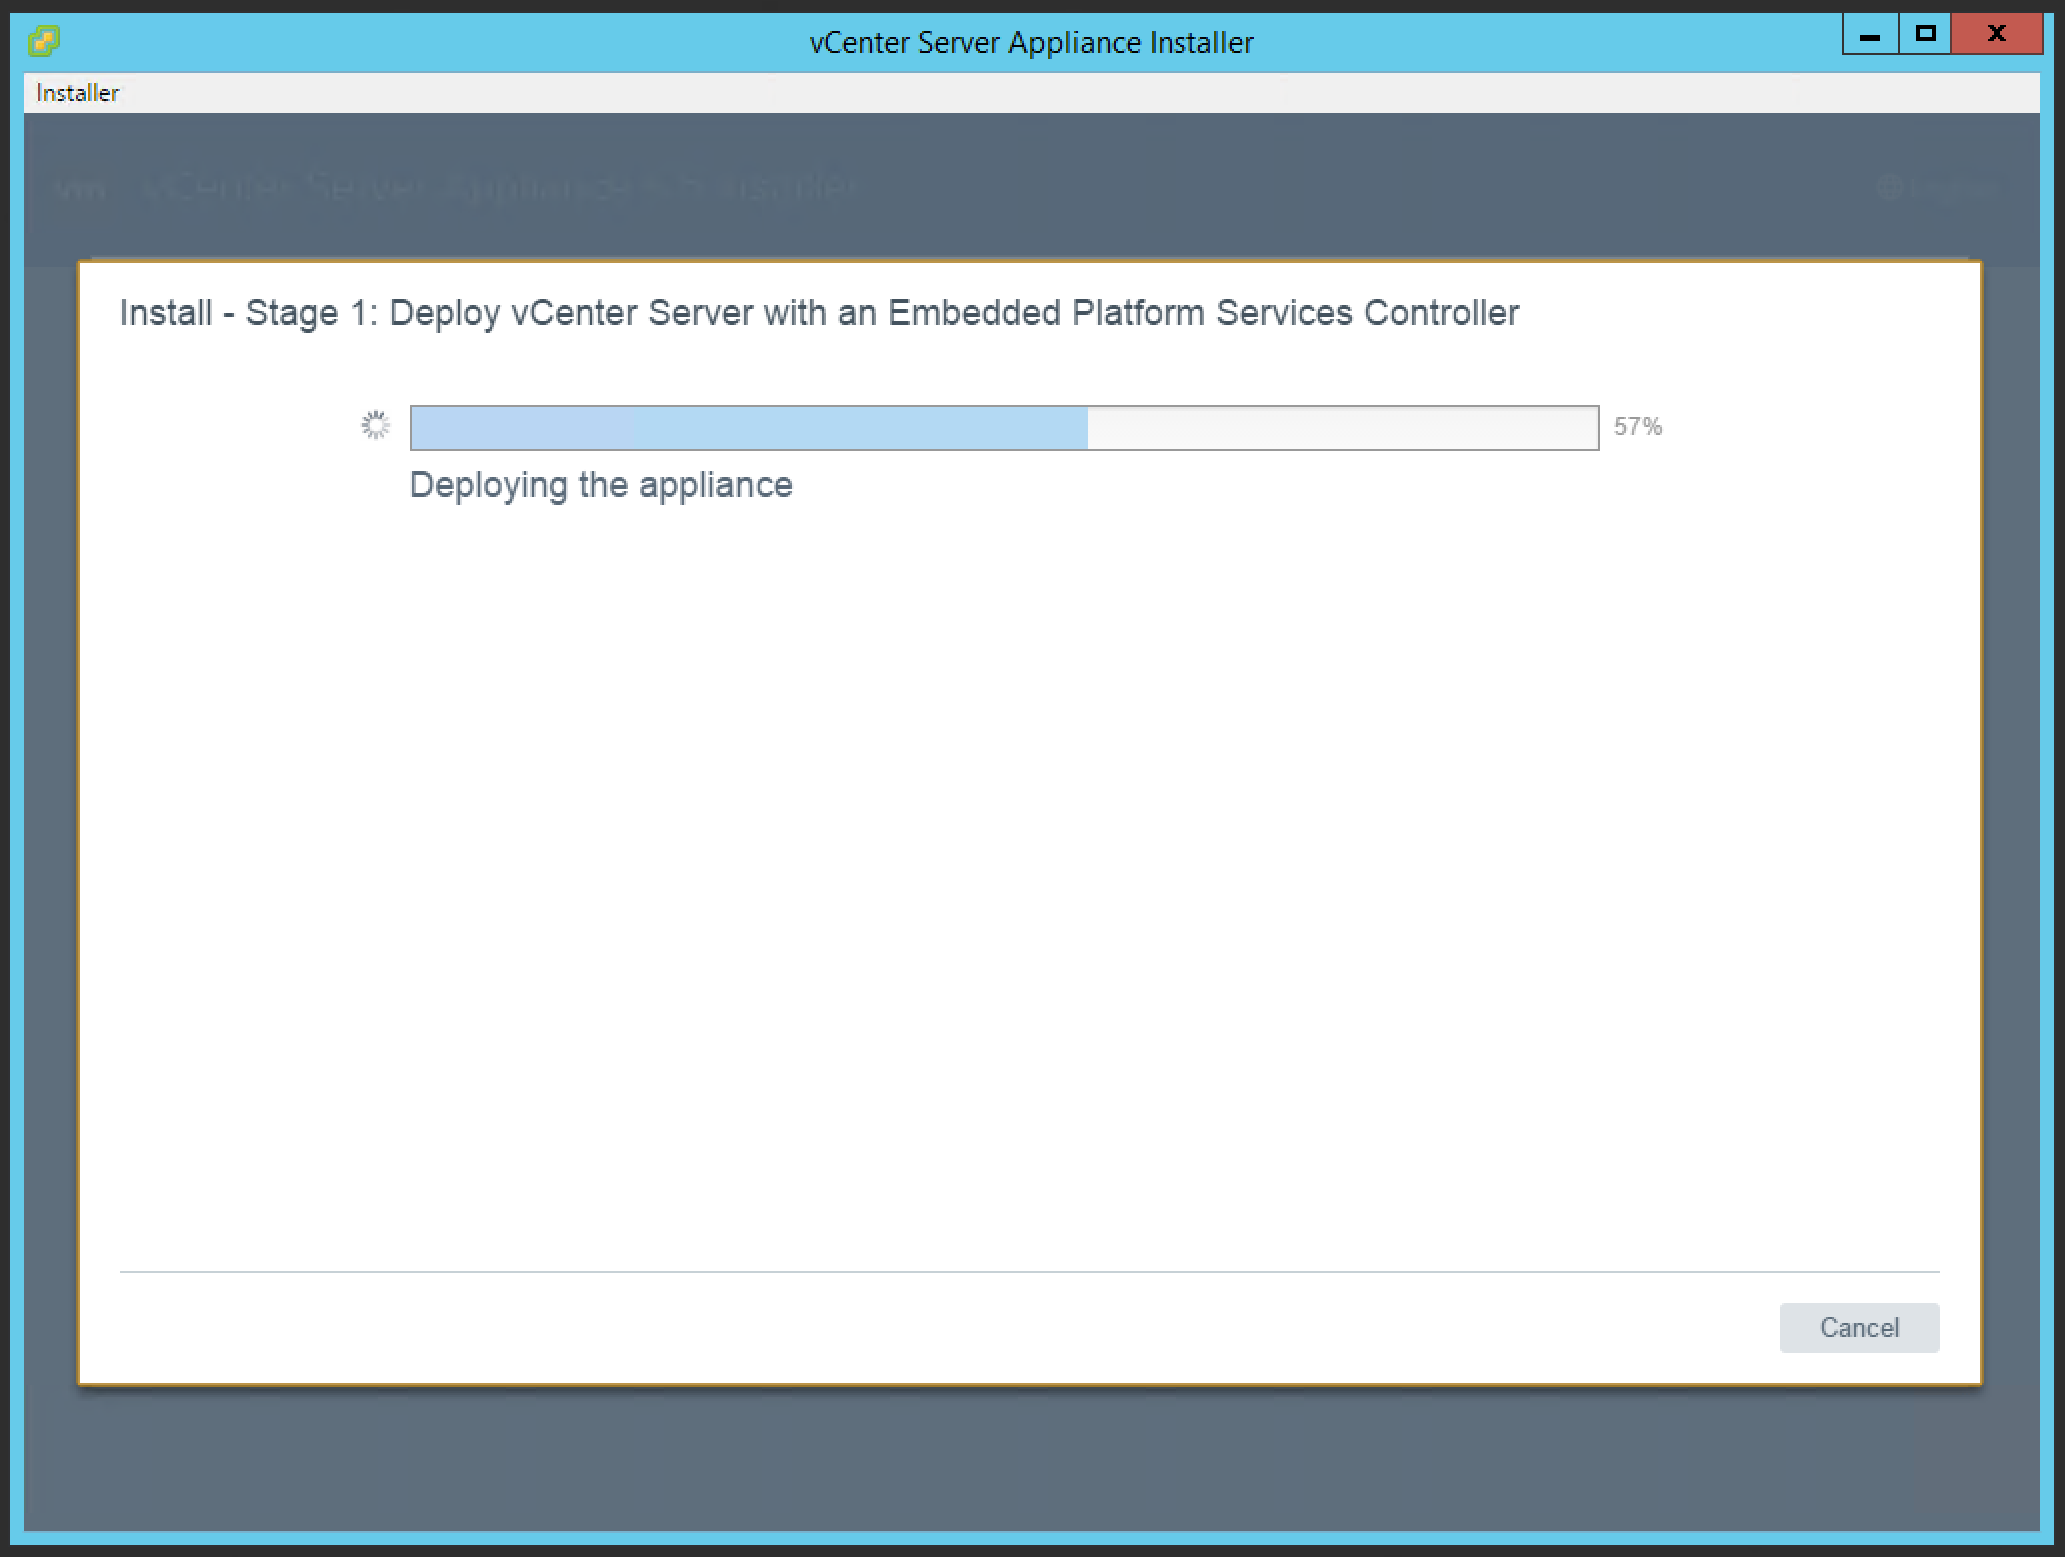
12. Once installation is complete, click Continue to configure the appliance.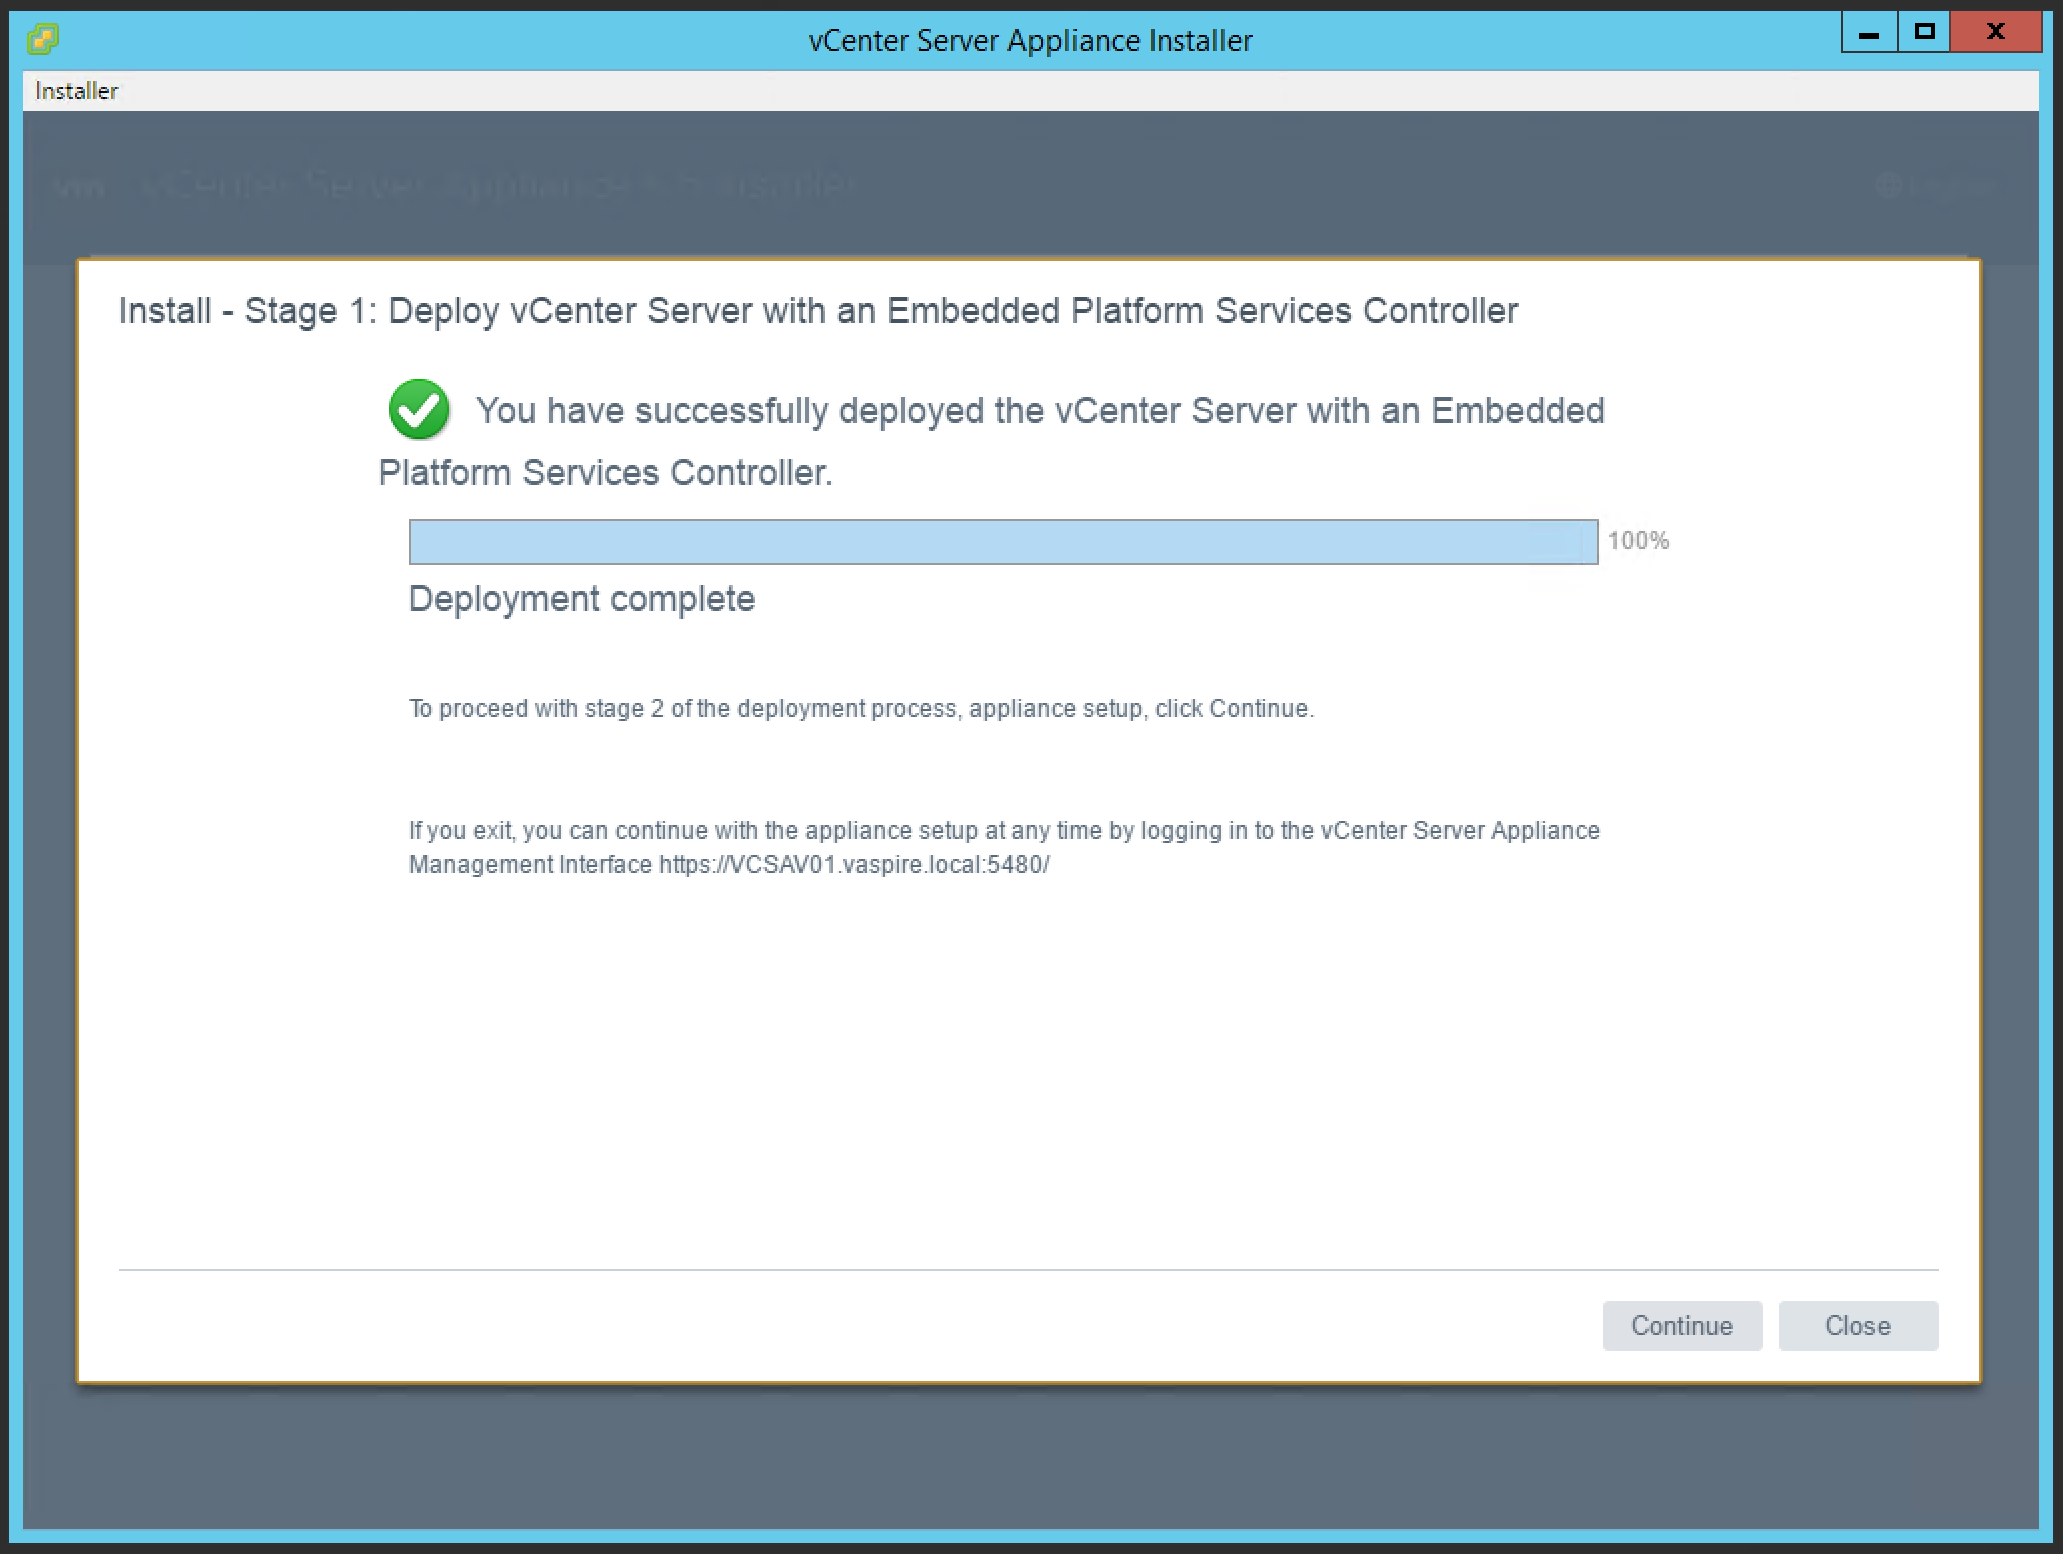
13. Click Next at the Introduction screen.
14. Configure NTP settings and click Next.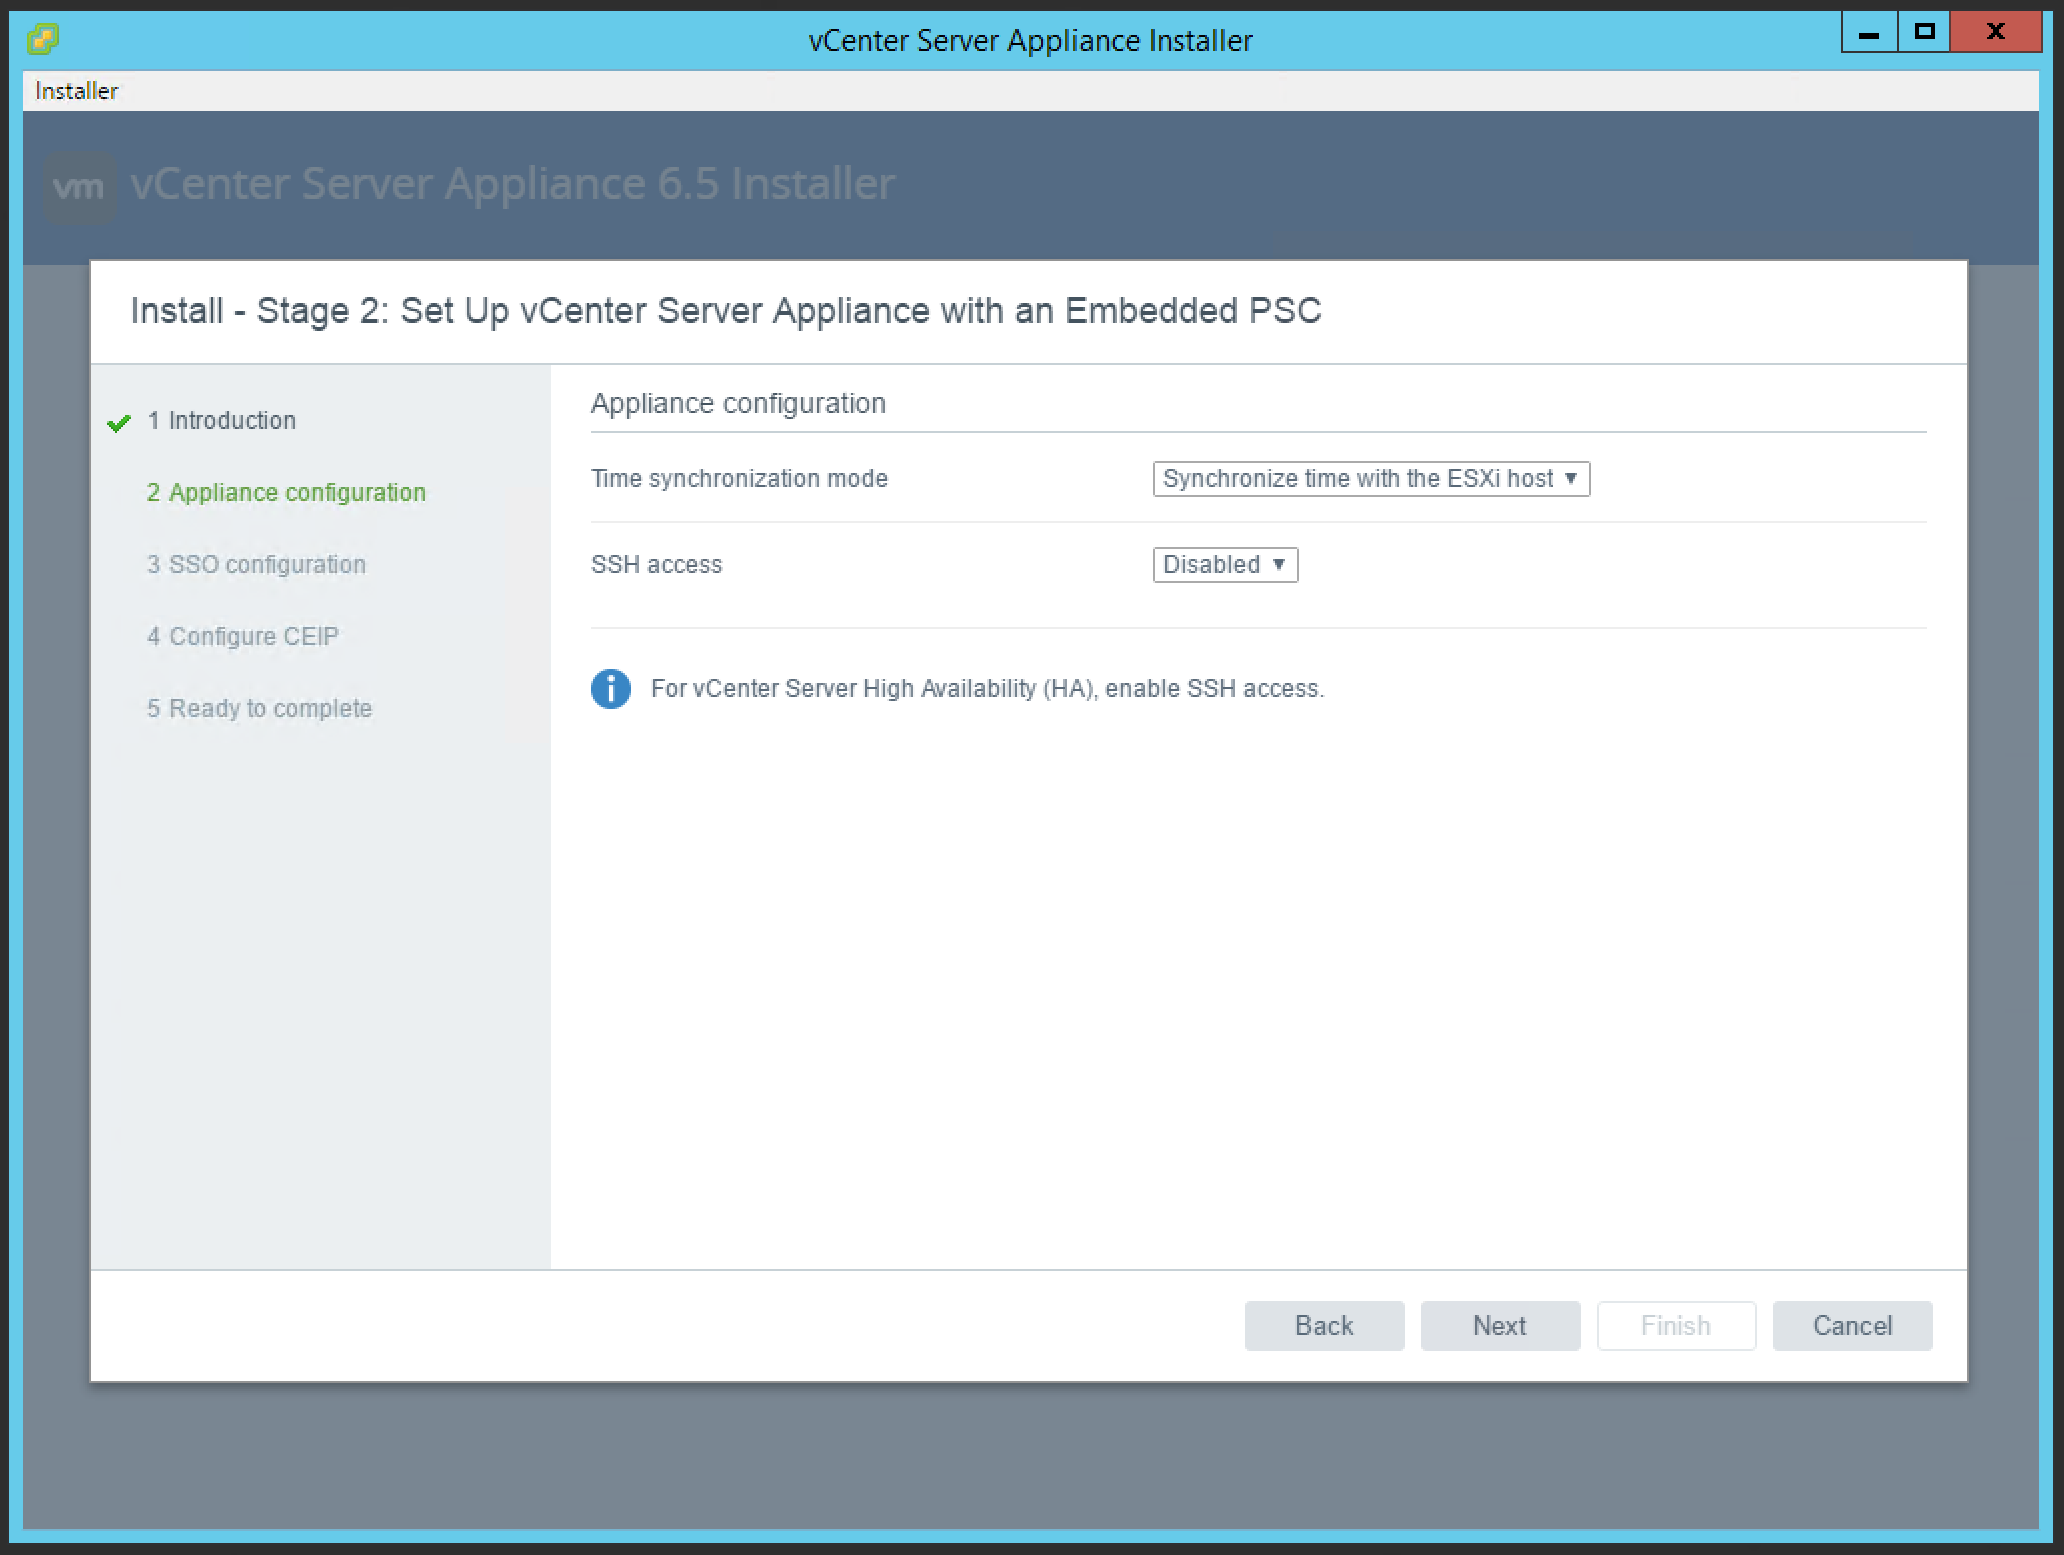
15. Complete the vCenter SSO configuration, and click Next.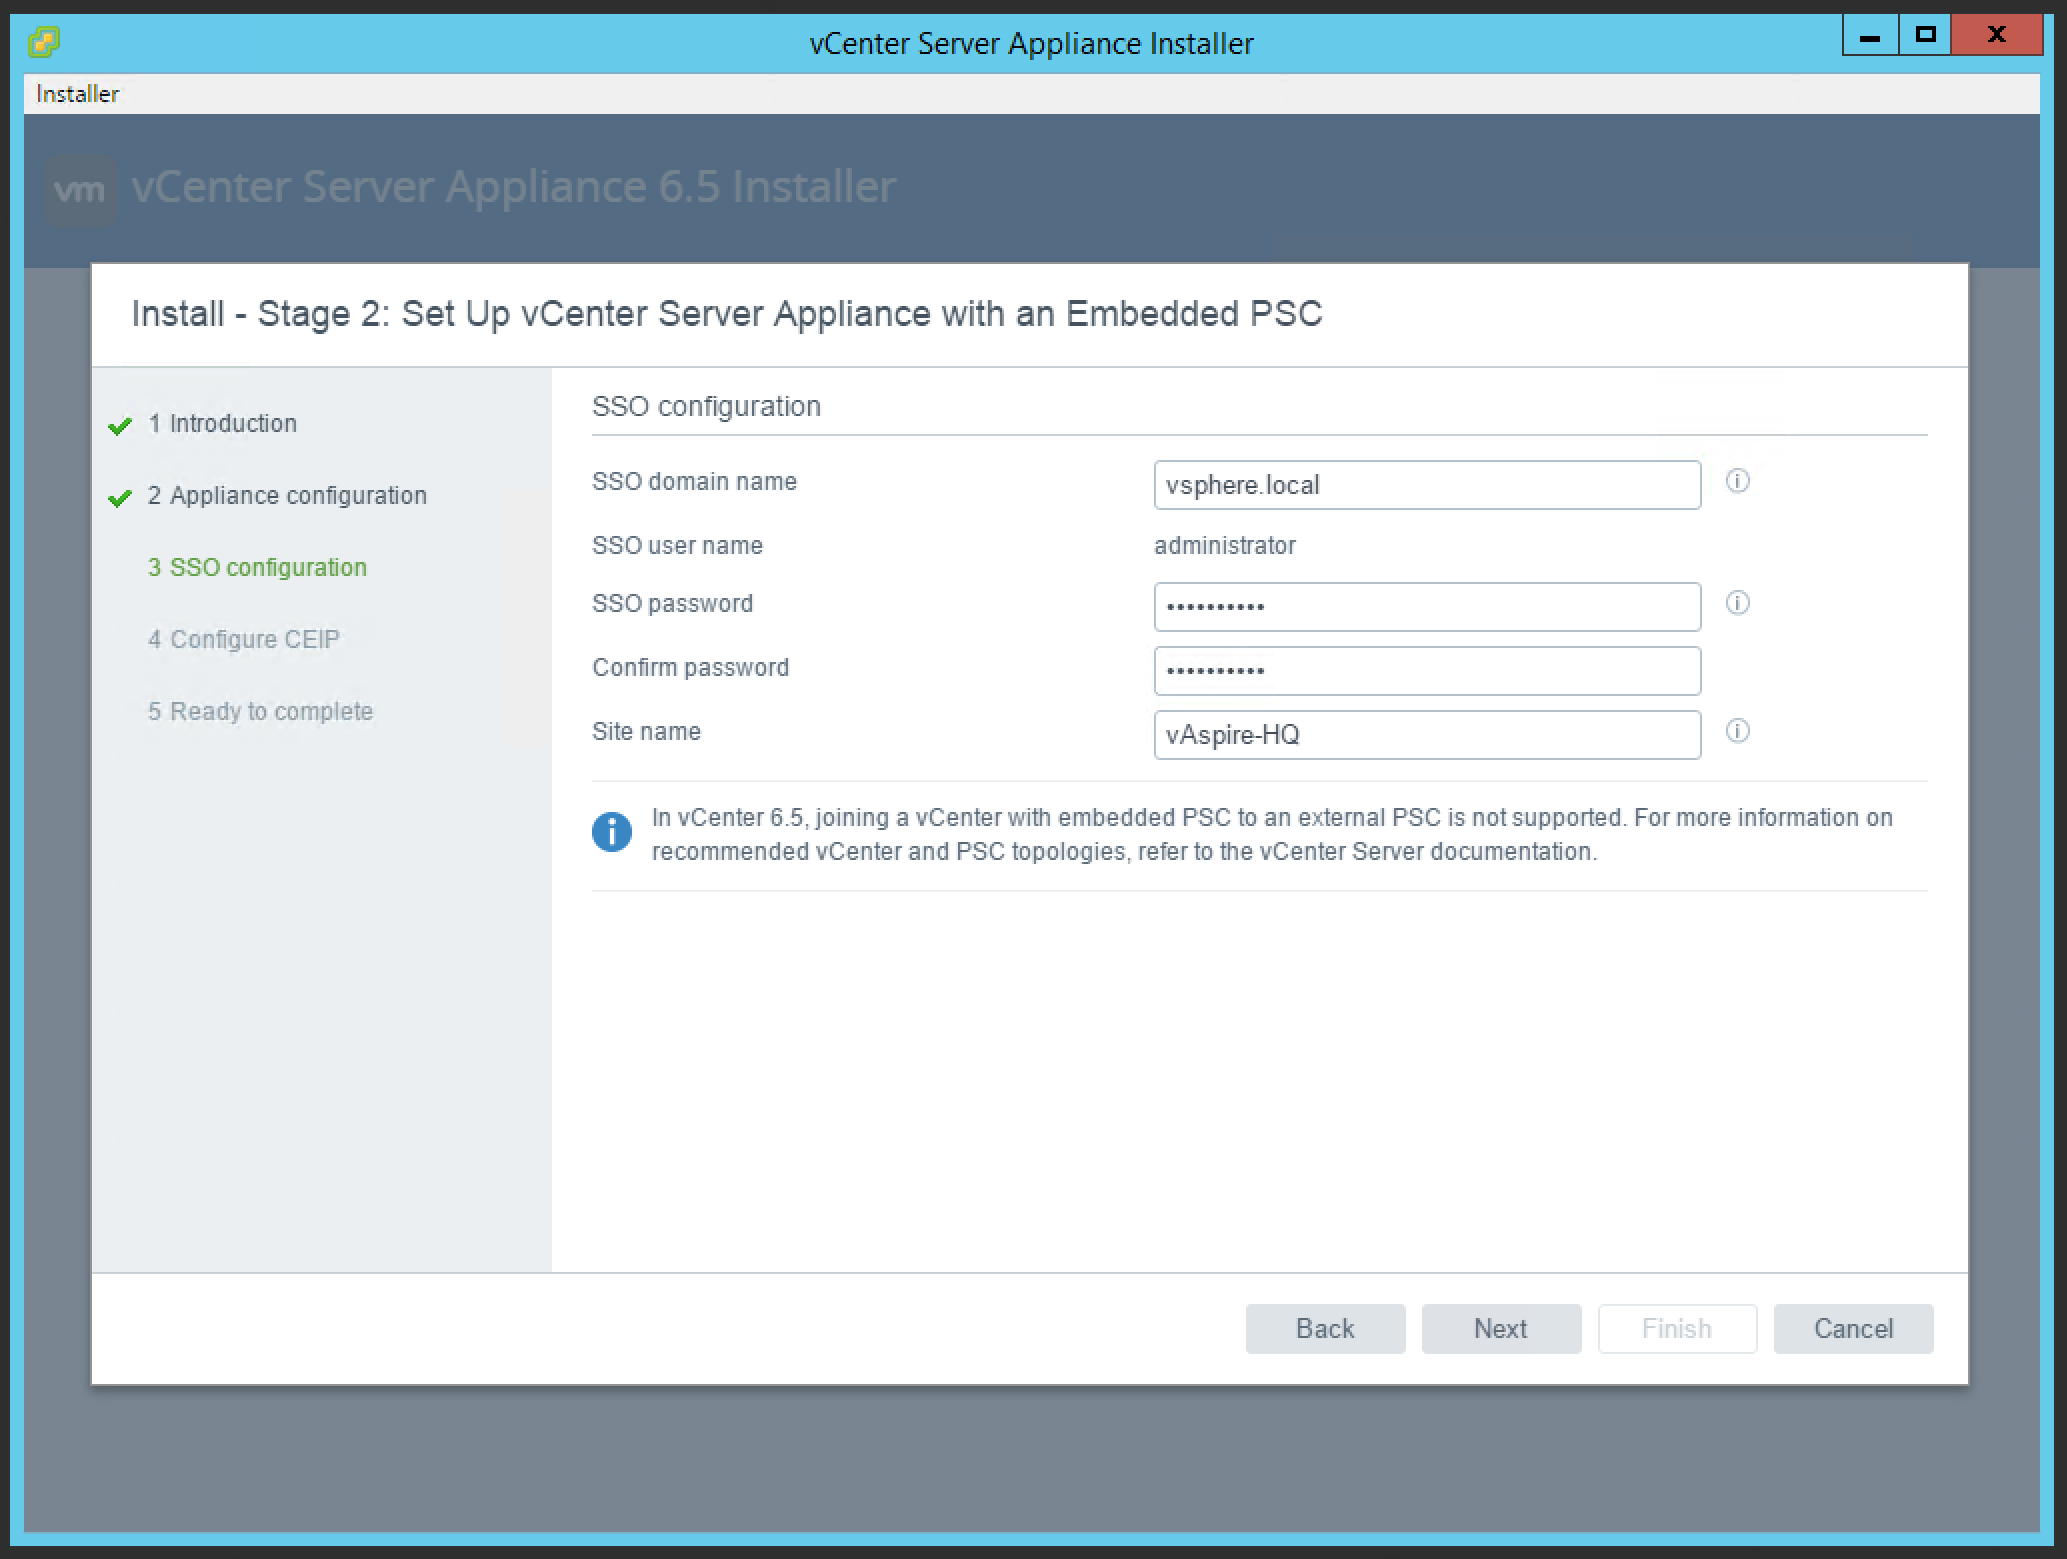
16. Opt in/out of the VMware Customer Experience Improvement Program and click Next.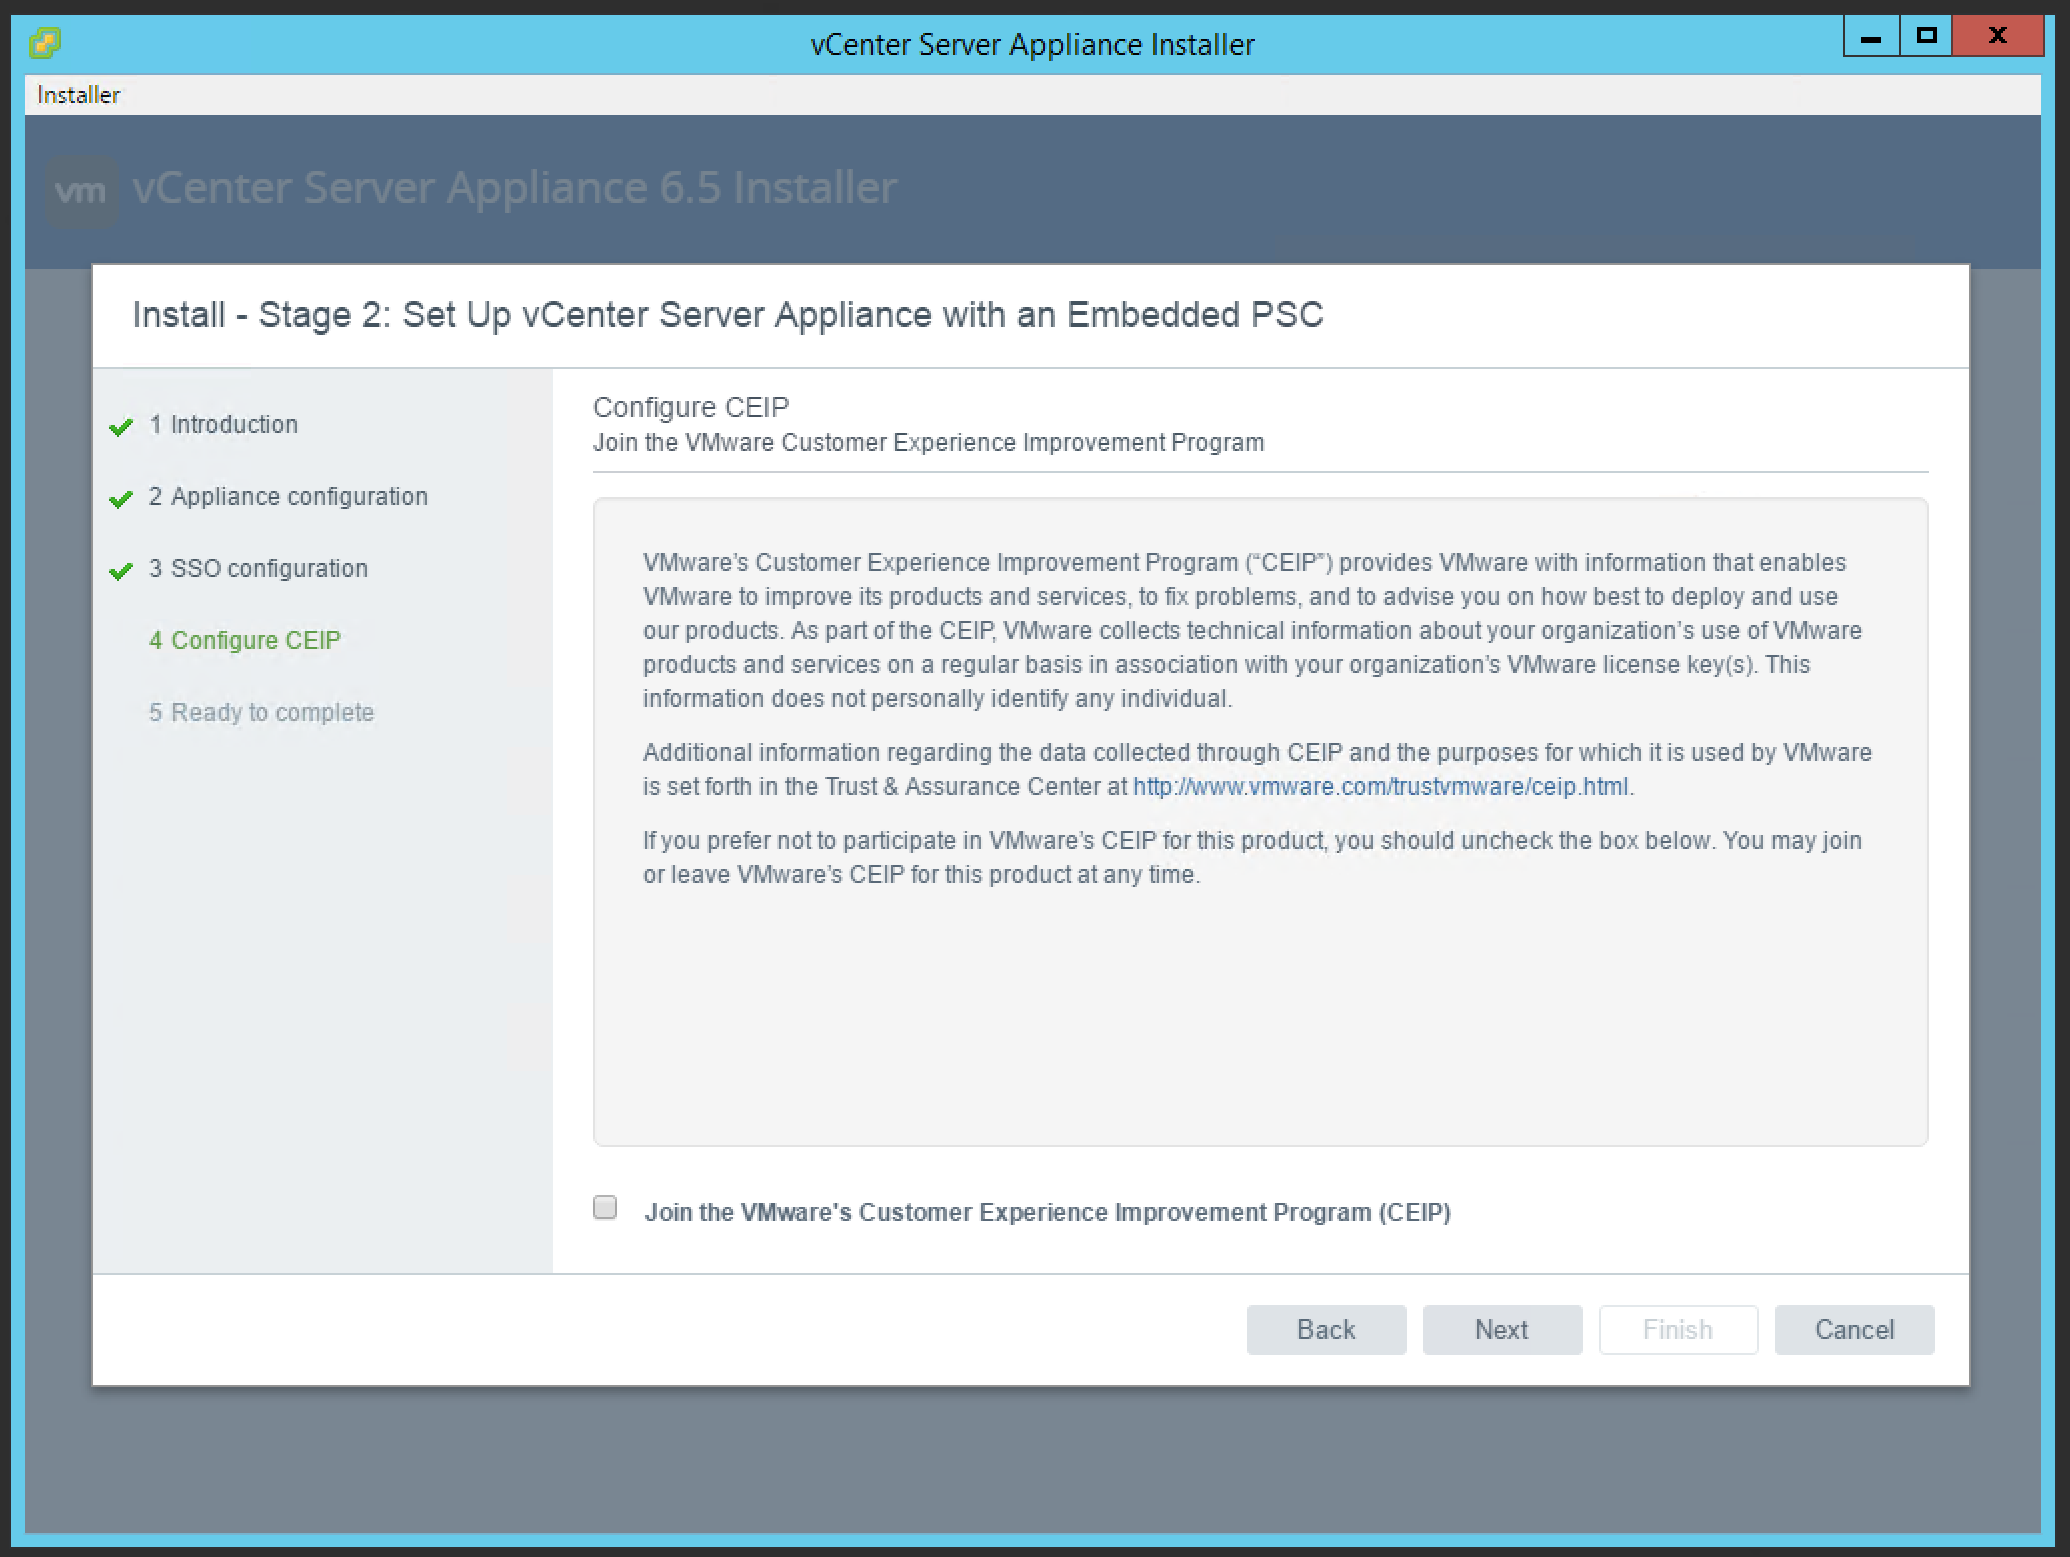
17. Review the Summary and click Finish.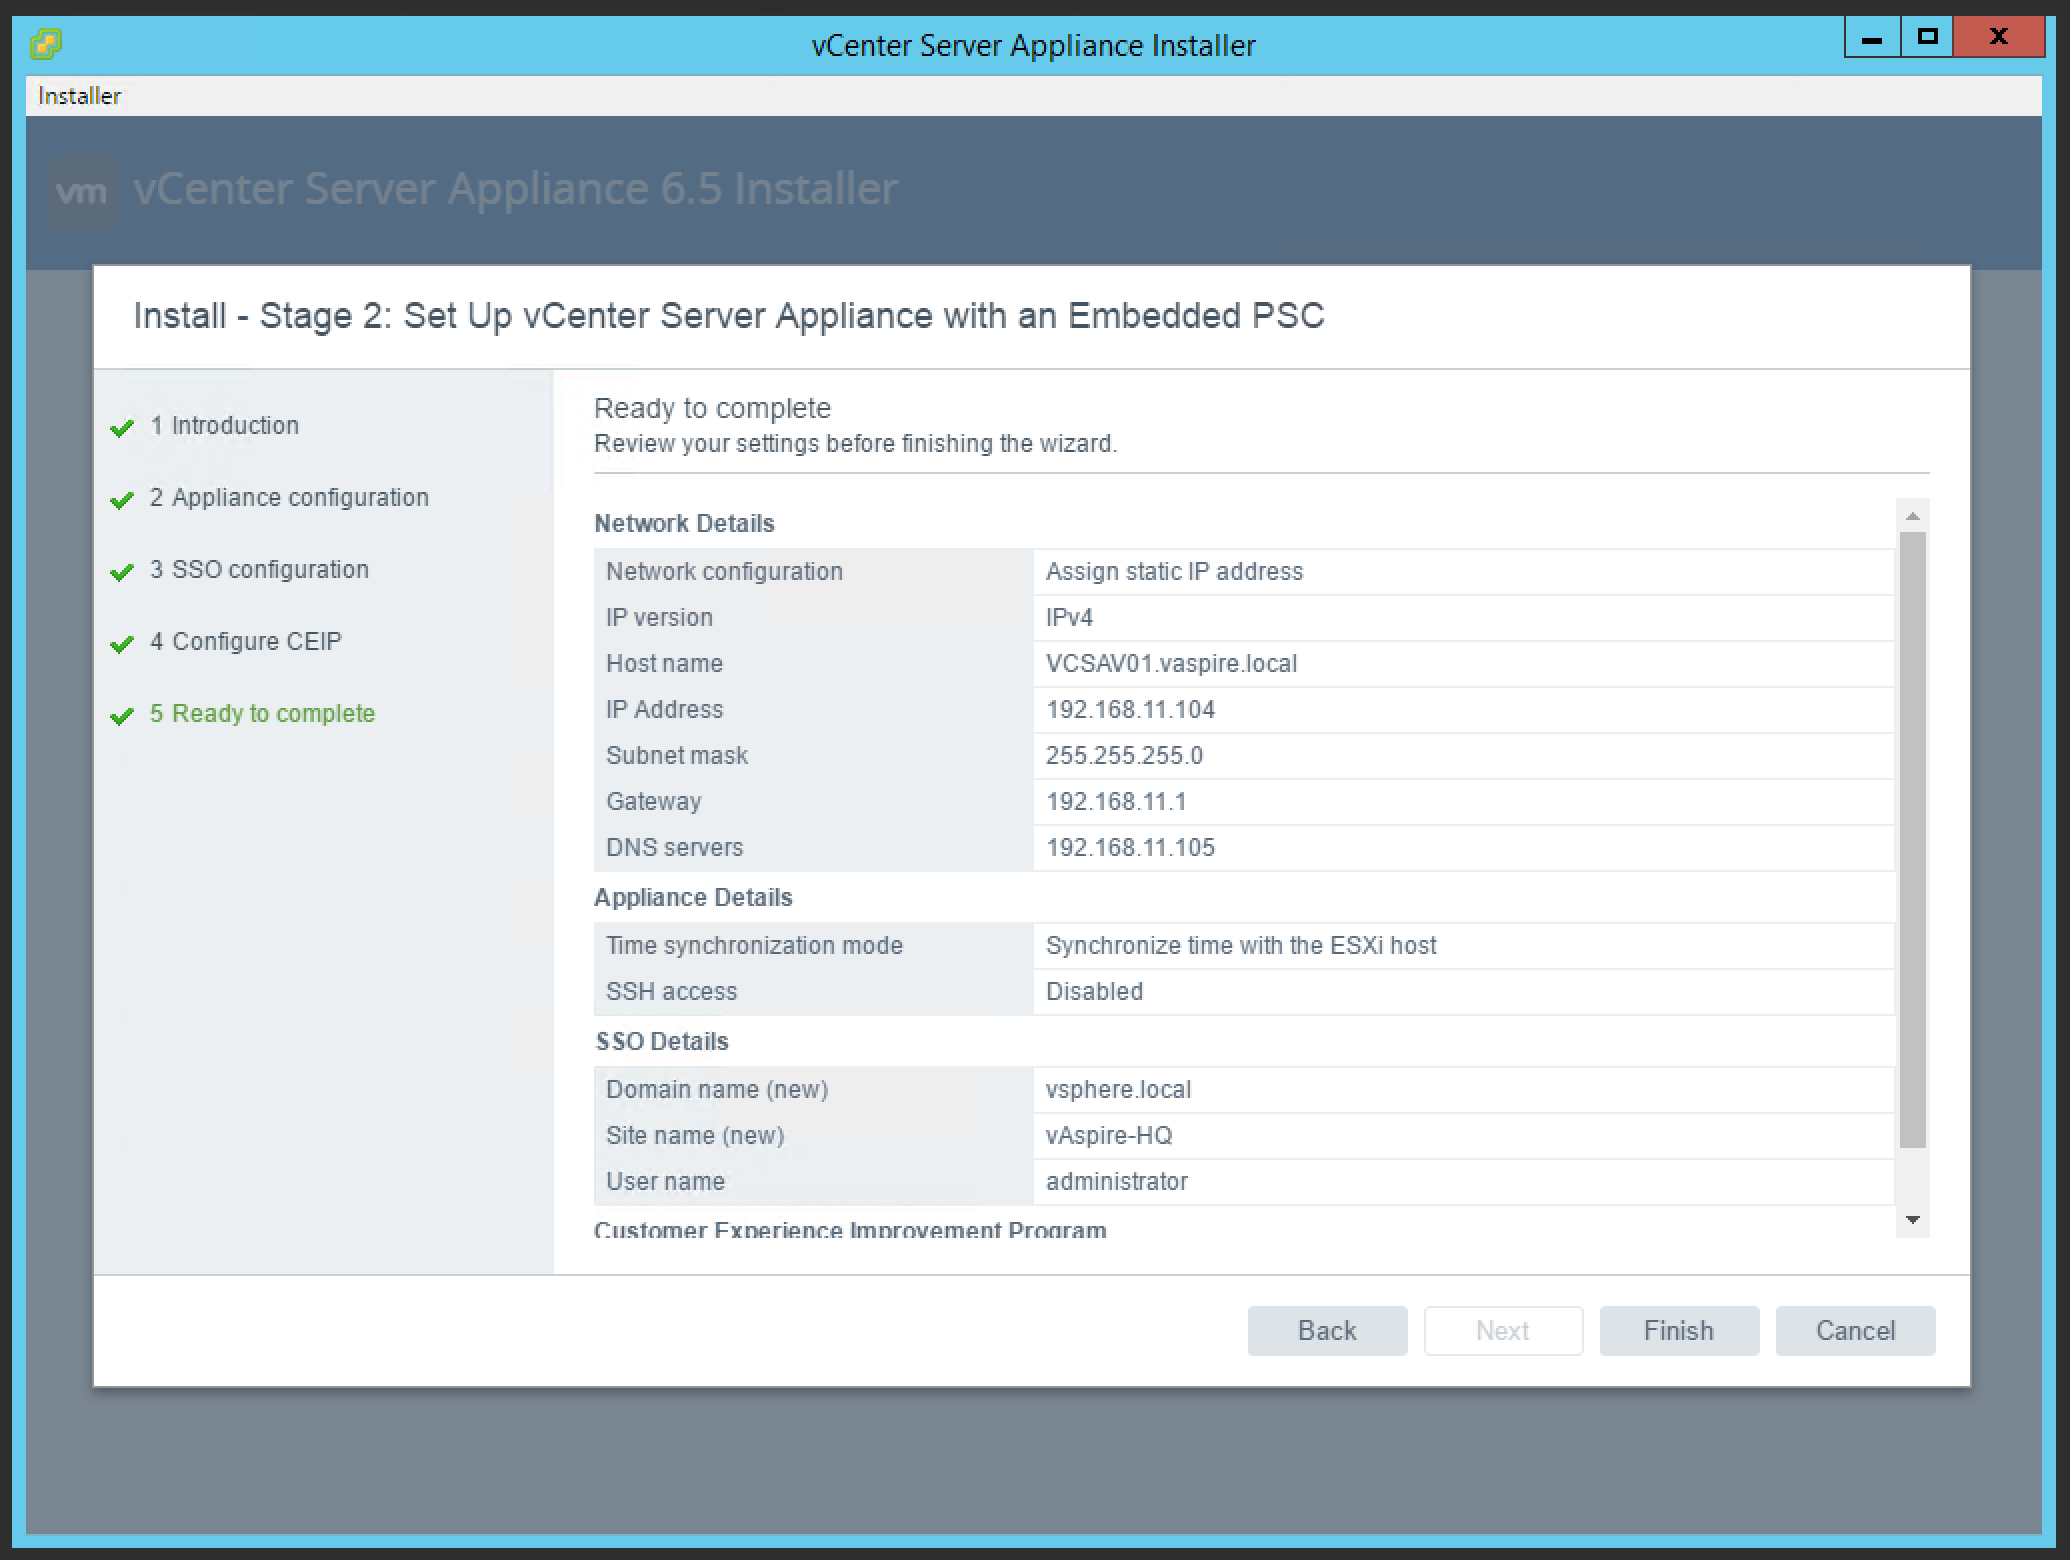
18. Stage 2 of the installation (set up vCenter Server Appliance) will now begin.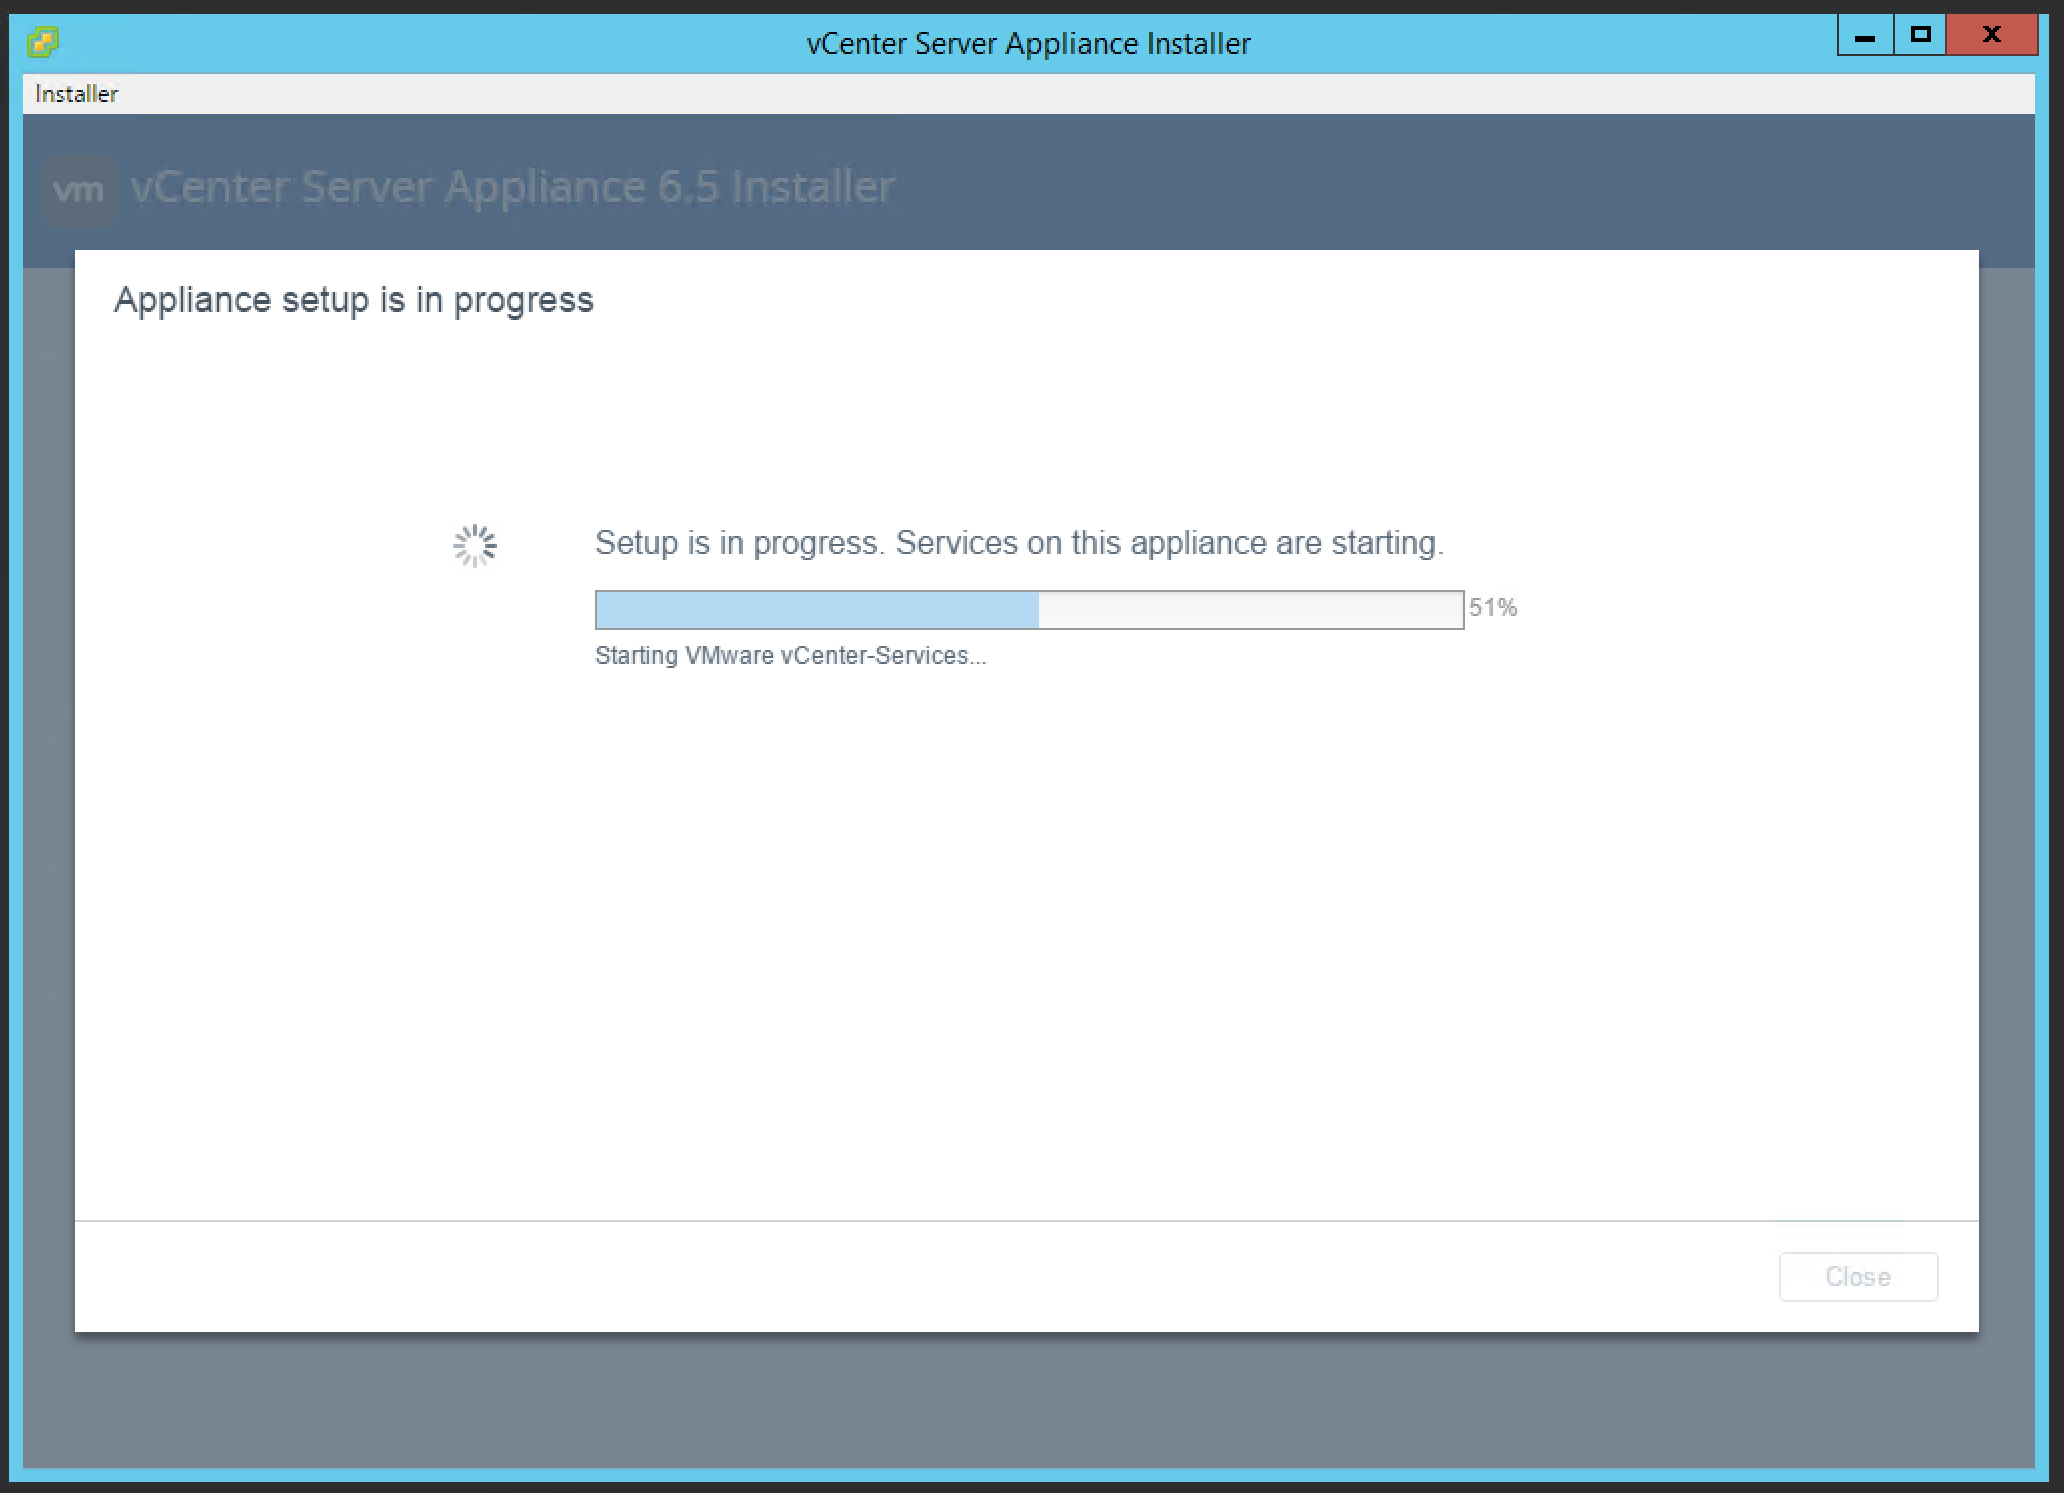
19. Once complete, you will be presented with your FQDN for your new vCenter Server.
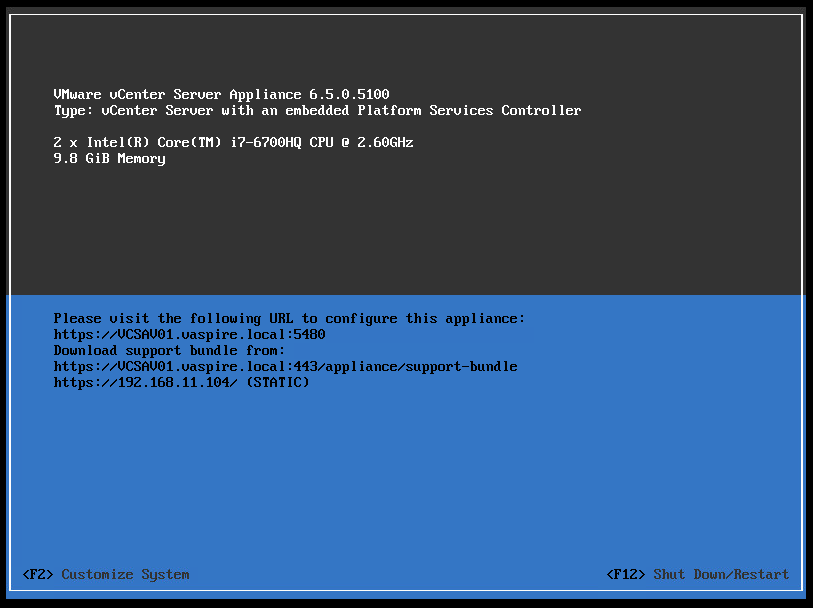
Looking at the console of the vCSA, and we are presented with a very familiar grey and blue (instead of grey and yellow) interface. Appliance URLs are visible here, as well as basic management/configuration tasks.
The new vCenter Server Appliance can now be accessed via the default URLs and, depending on your choice of interface (either the new vSphere Client or older vSphere Web Client), there are now two URLs to remember.
- vSphere Web Client – http://<vcenter_fqdn>/vsphere-client)
- vSphere Client – http://<vcenter_fqdn>/ui.
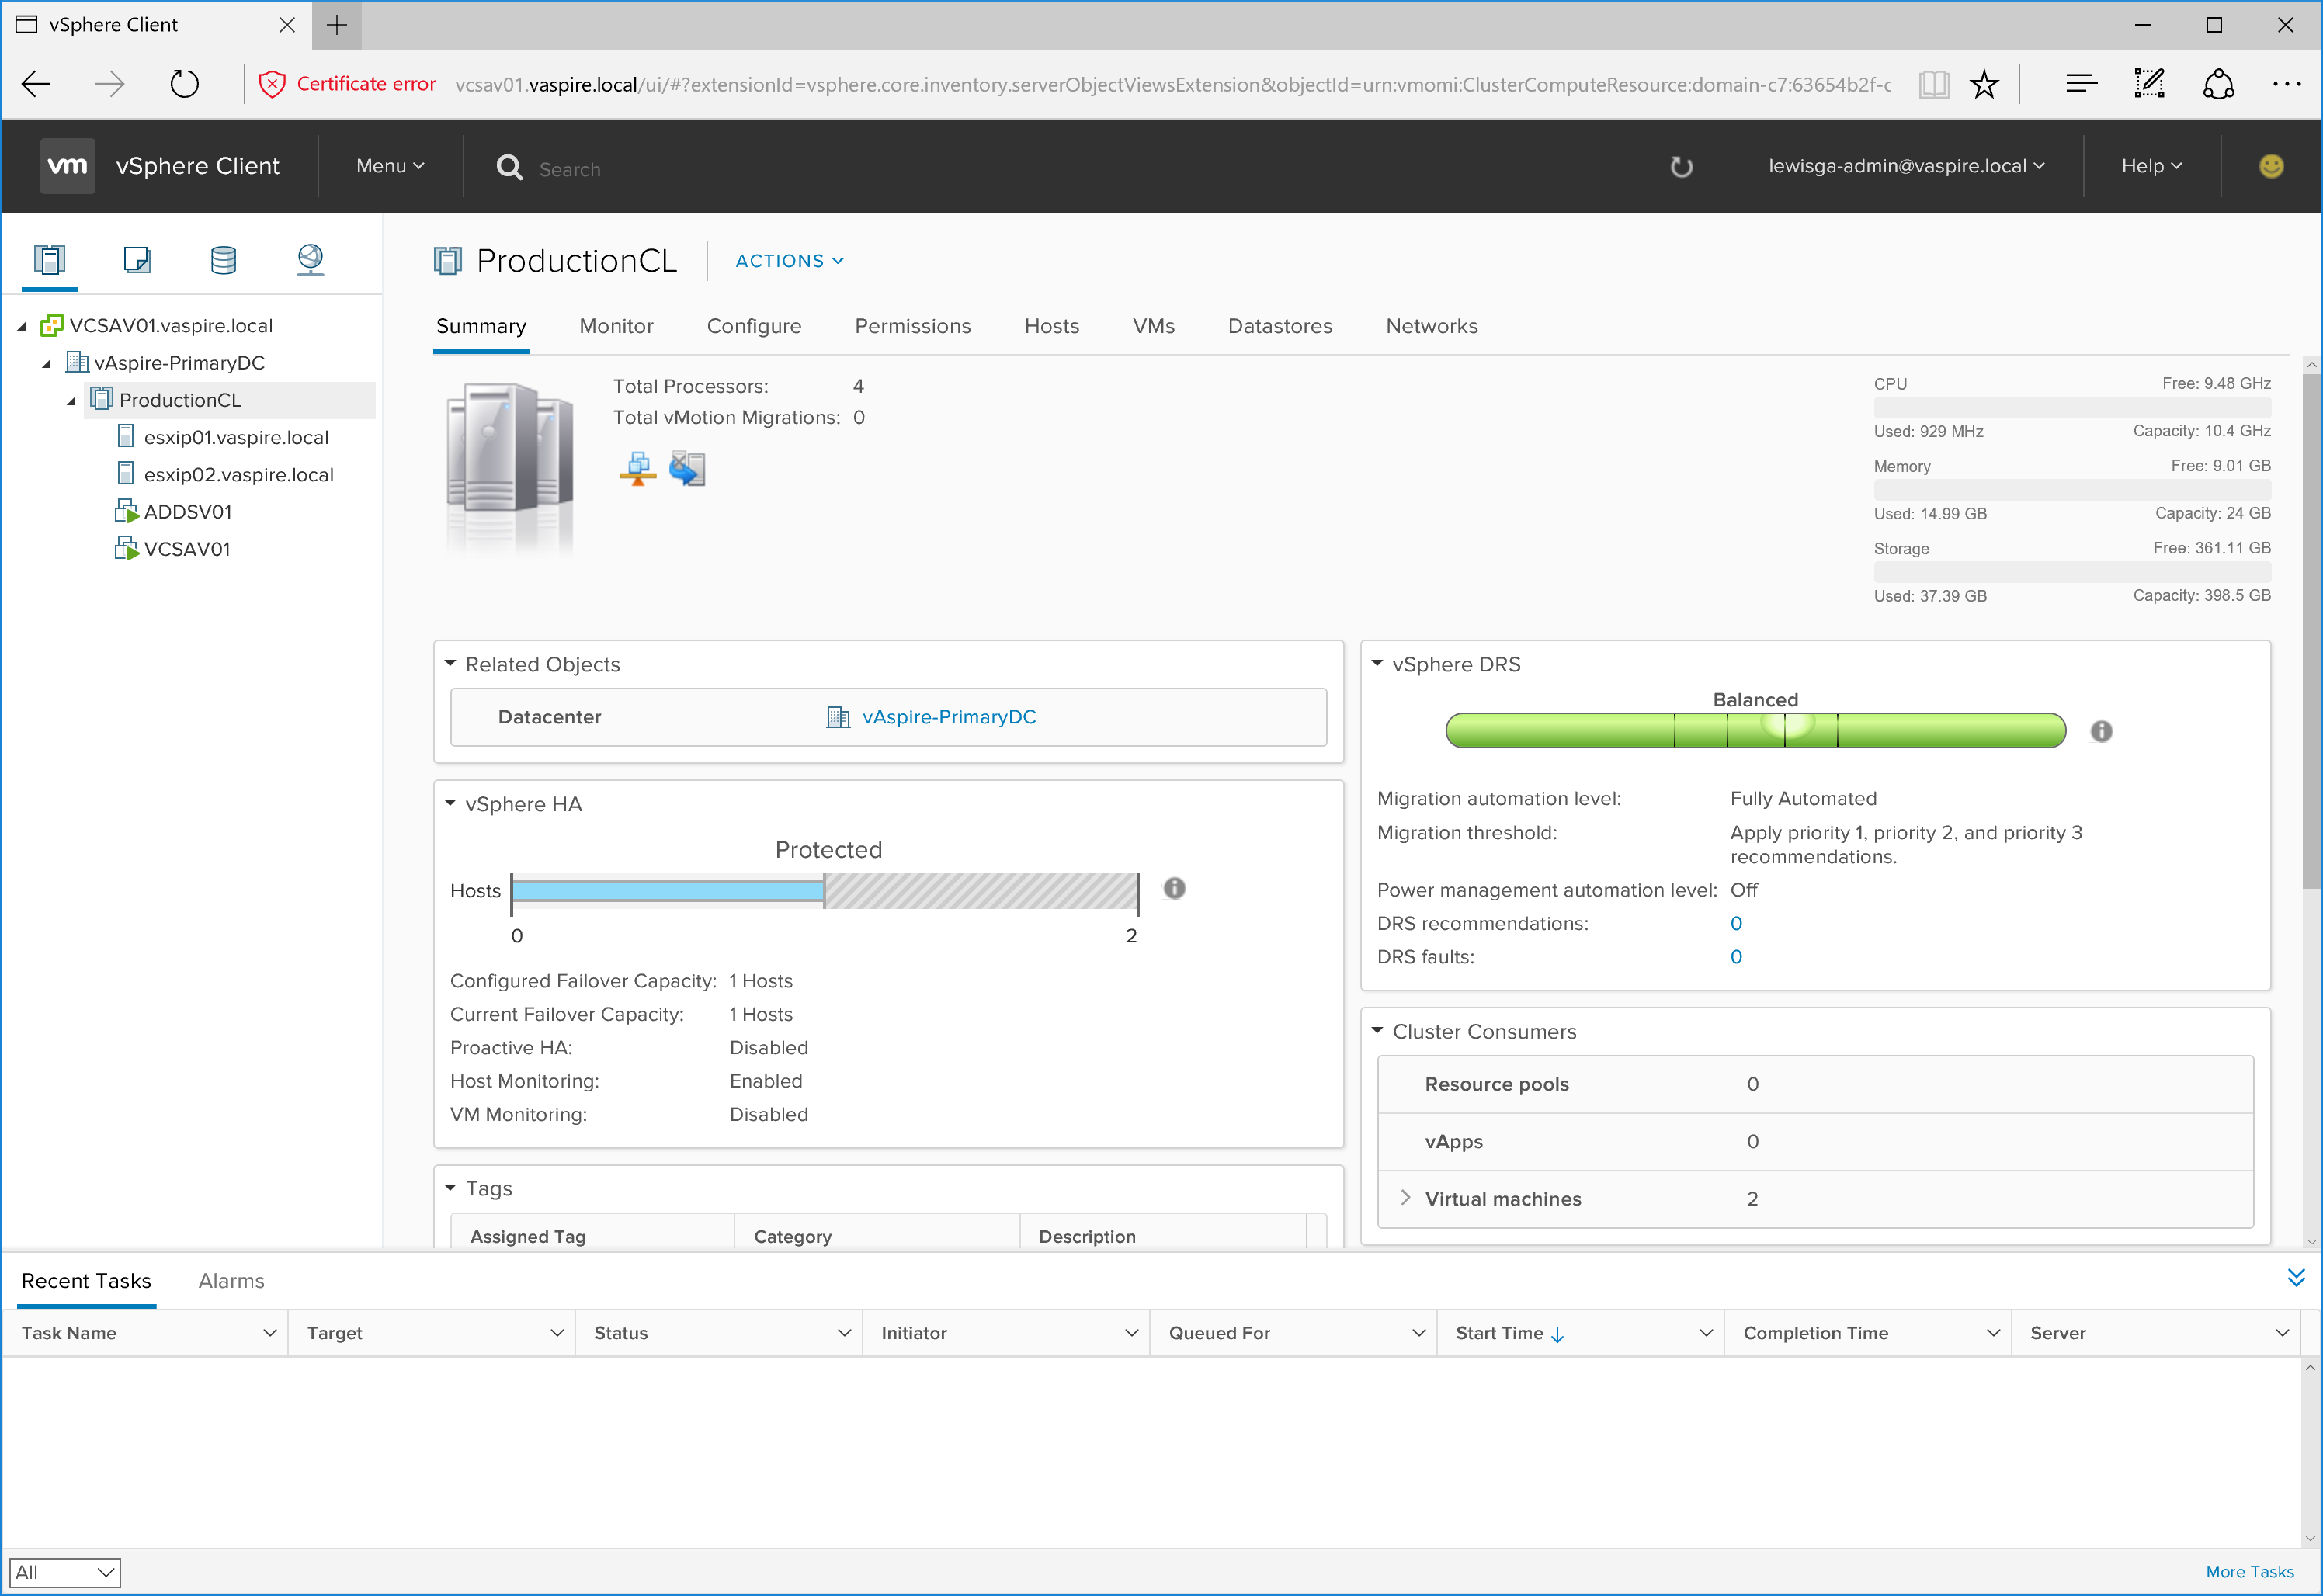
Both clients will be running in parallel until further notice, but do remember that the new vSphere Client is yet offer full functionality; VMware state they are working on this area with priority, and I’ll be interested to see how quickly the day-to-day management functionality is added.
Leave a Reply