Article Updated: 20th July 2023
In my previous post, I covered the end-to-end migration of VMware NSX for vSphere to NSX-T Data Center (VMware NSX from v4.0.0.1) via the Fixed Topology Option, however, in real life I don’t see this option utilised very often due to the limited number of supported topologies.
How then can we achieve the same in-place, end-to-end migration of unsupported topologies? This is where the User Defined Topology option comes into play, and it offers much greater flexibility by enabling customers to define/map their own logical routing topologies. This, of course, will require a design and, like the message I tried to impart in my previous post, this must be planned ahead of your proposed change/maintenance/migration window.
More in the NSX V2T Series…
- Part 1 – VMware NSX-T Migration Coordinator Report Export for Fixed Topology Migration
- Part 2 – VMware NSX for vSphere to NSX-T Migration – End-to-End Fixed Topology
- Part 3 – VMware NSX for vSphere to NSX-T Migration – End-to-End User-Defined Topology
Like the Fixed Topology option, the User Defined option will use your existing hardware, meaning no additional servers are required for the migration. The end-to-end migration will migrate the following:
- Logical networking and security configurations
- Edges
- Hosts
- Workload VMs
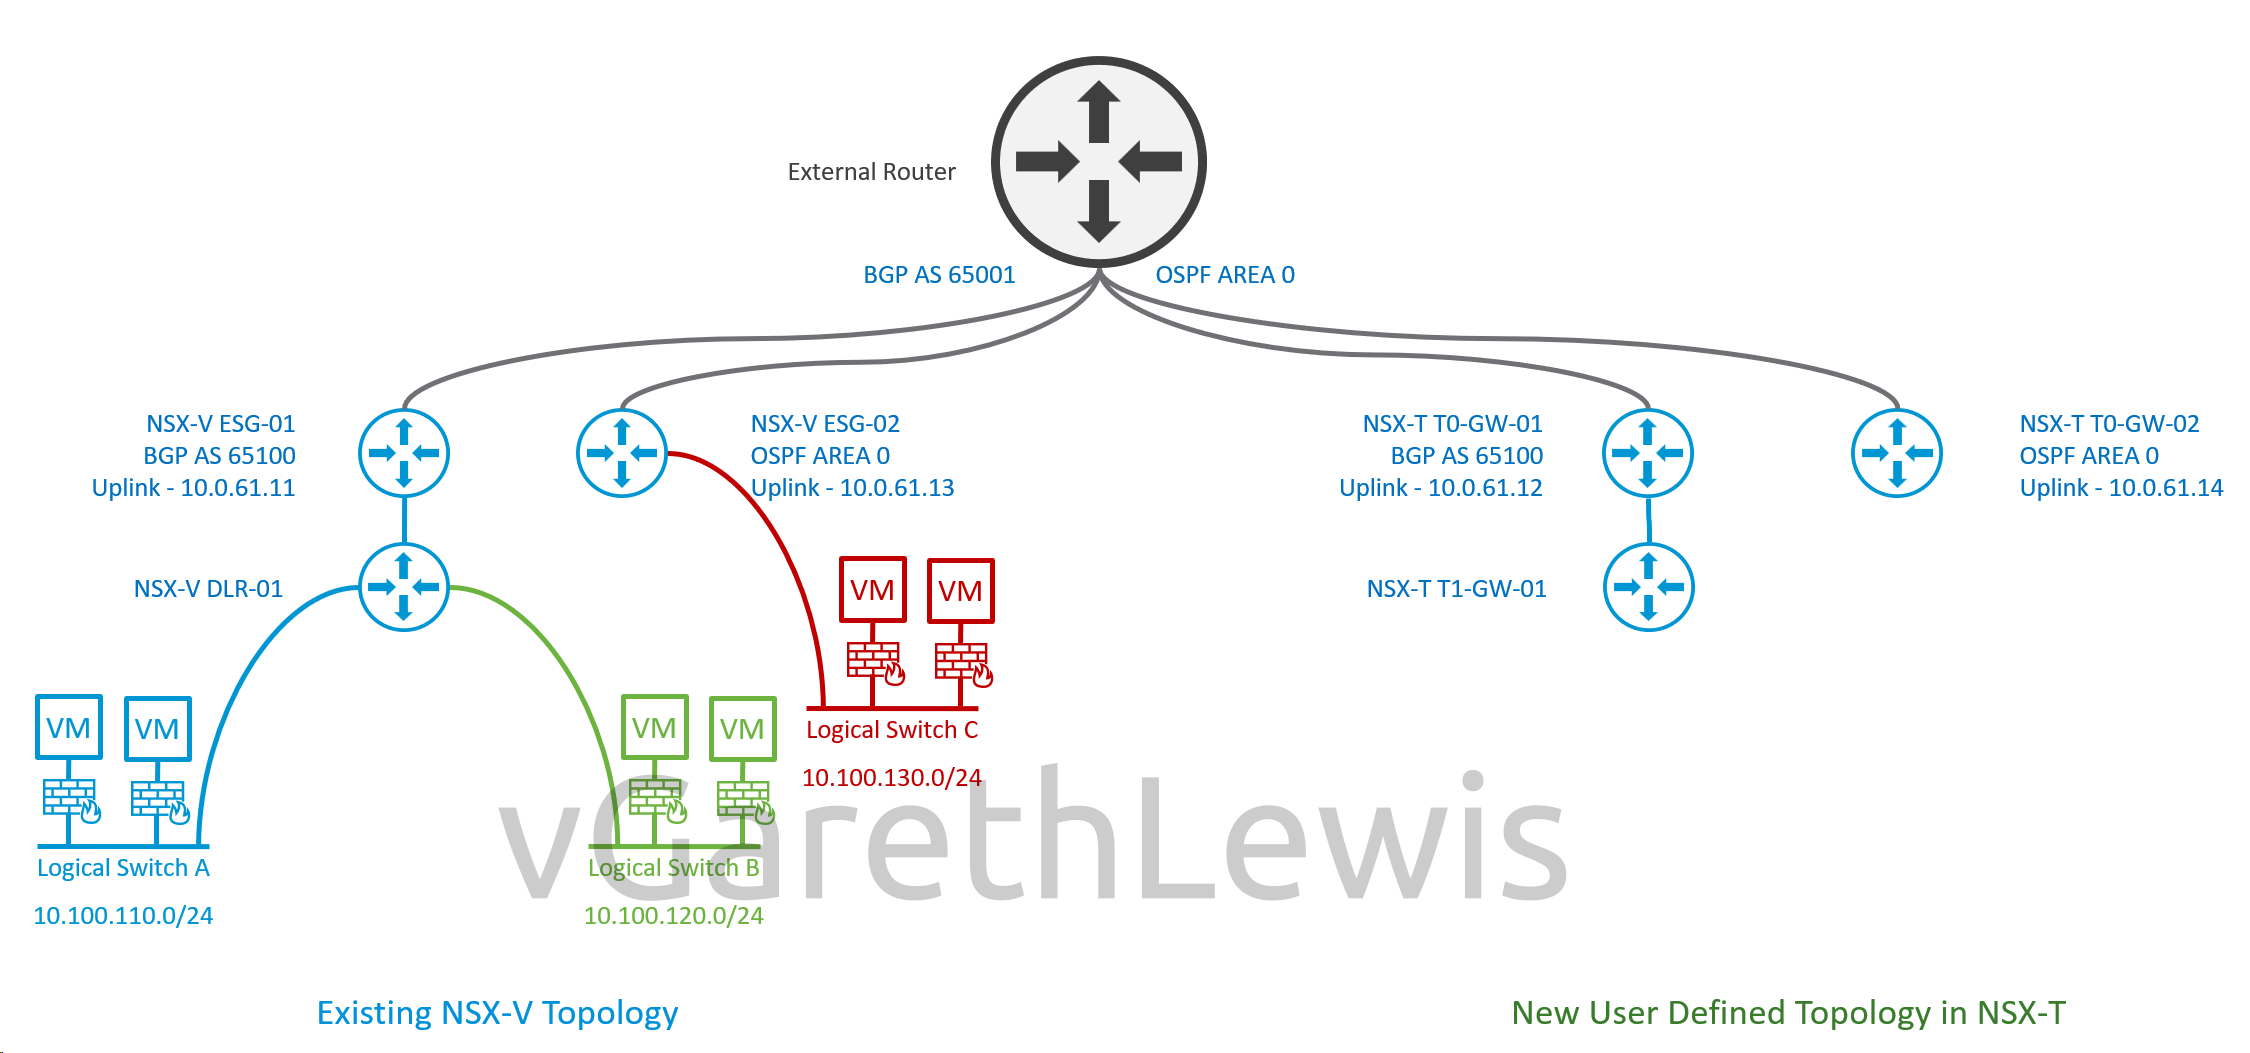
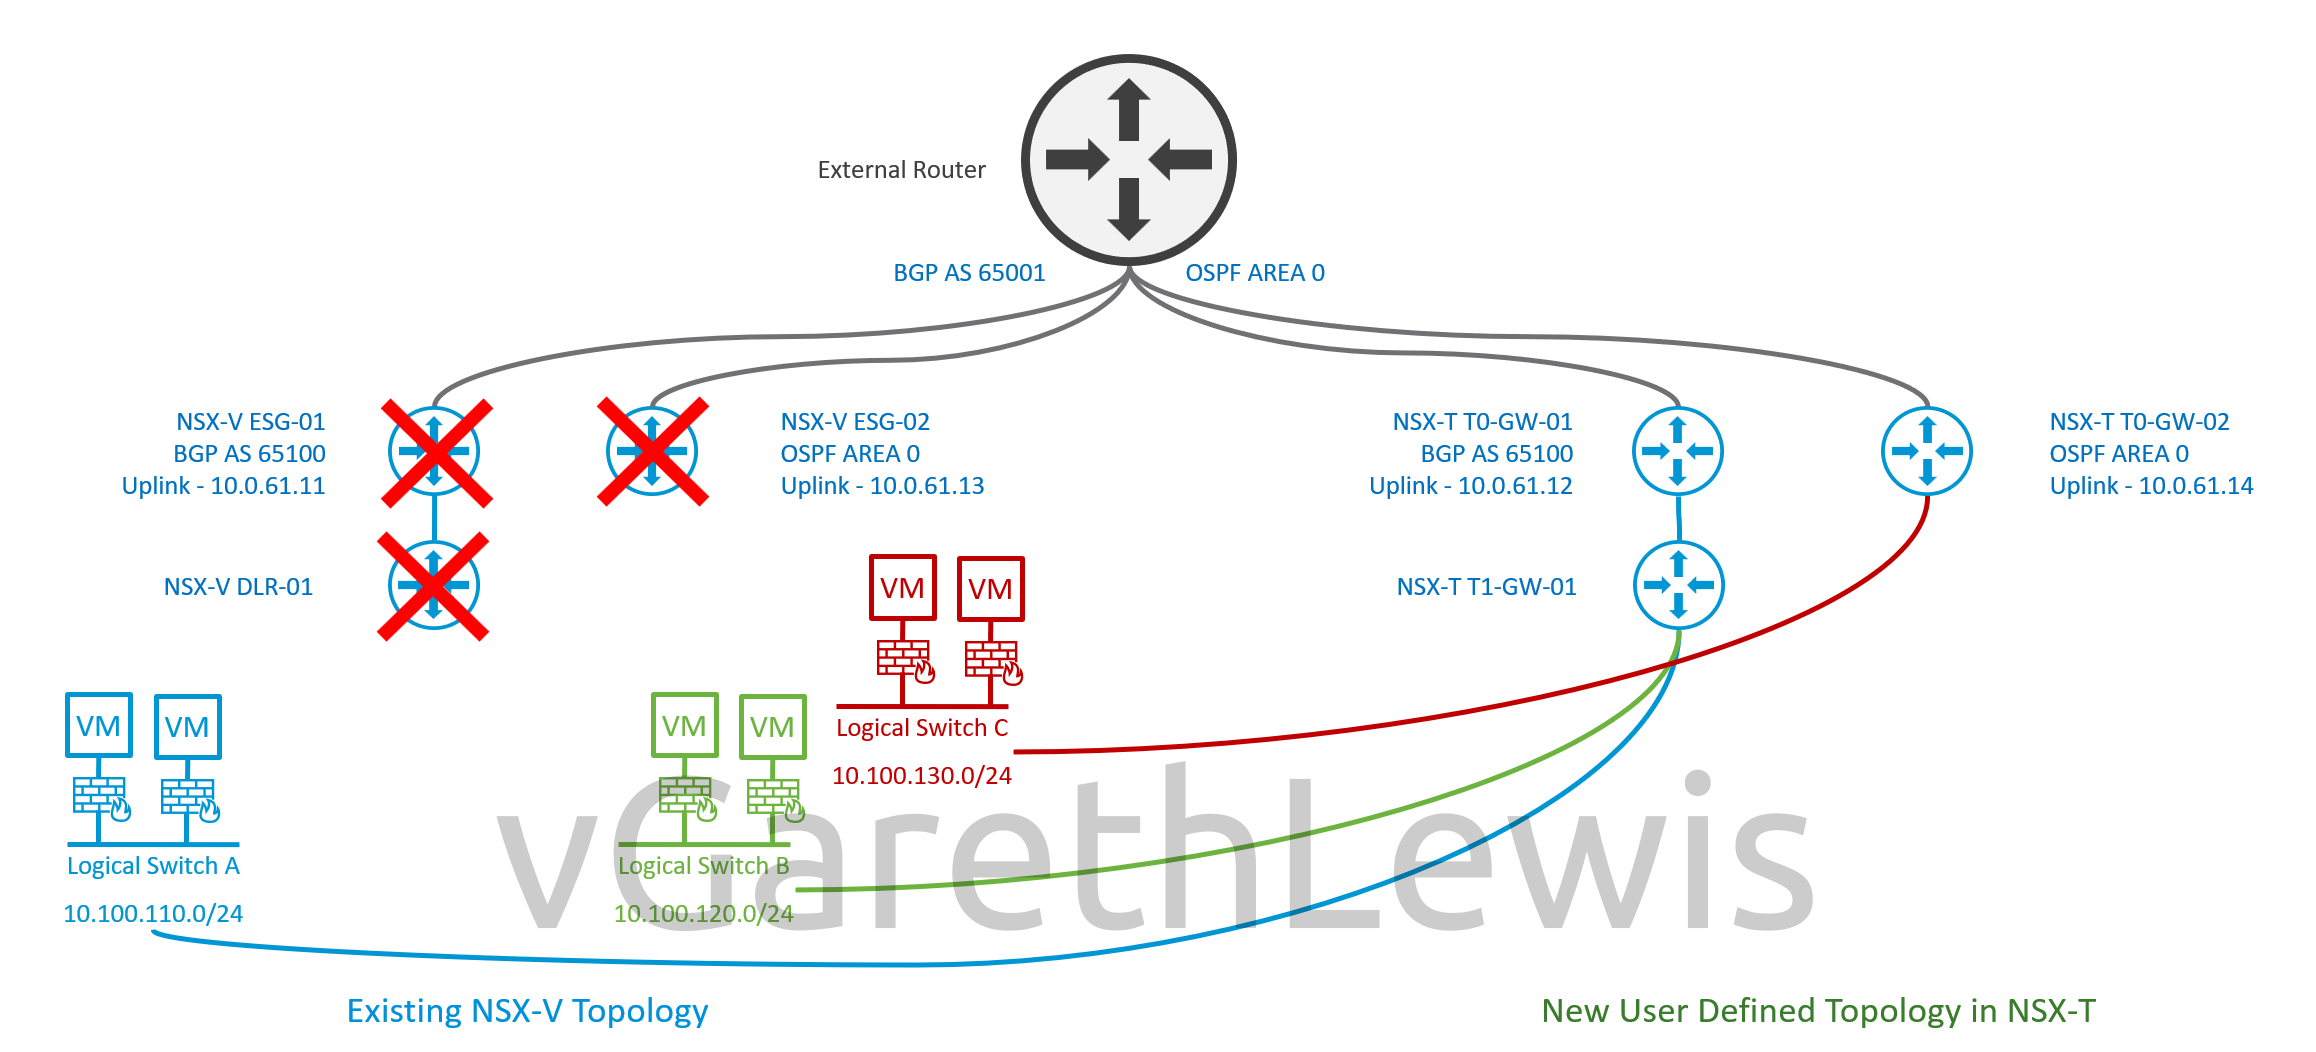
As mentioned earlier, the user-defined topology affords us much more flexibility in our migration options. In my test environment, I have multiple NSX-V ESGs, one of which is connected to a DLR, as well as multiple dynamic routing protocols in use. In practice, we can even map to VRFs.
In the below diagram, you will note the current NSX-V topology and how I will map this to NSX-T components.

IMPORTANT – As per my previous post, while the migration of your Edges and Hosts should take place during an approved maintenance/change window due to the expected workload outage, the Migration Coordinator and all steps prior to the migration of edges and hosts can be run ahead of time and with zero impact to your production workloads. It is, therefore, recommended to run the Migration Coordinator ahead of time to ensure all issues/recommendations/configurable input (Edge TEP IP Pool, Edge TEP VLAN, uplink IP addresses, etc.) are reviewed and prepared in readiness f (or the migration. When you are ready to initiate the migration itself, it is recommended to roll back fully before proceeding.
Technologies Used
- vCenter Server 7.0U3l (7.0.3.01400), 21477706
- VMware ESXi 7.0U3m, 21686933
- VMware NSX Data Center for vSphere 6.4.14, 20609341
- VMware NSX 4.1.0.2, 21761691
Prerequisites
- Ensure NSX-V is stable, with no errors or warnings.
- Ensure NSX-V backups are healthy and a recent backup has been created.
- Ensure the NSX-V VXLAN port is set to 4789 (default).
- Ensure the export version of the NSX-V DFW is set to 1000 (default).
- VDS 7.0 or higher is required.
Readiness Tasks
Like my previous post, we must ensure all prerequisites are in place to support migration activities. As we are migrating via the User Defined Topology, several new readiness tasks must be implemented ahead of the migration.
- Deploy a single NSX Manager appliance.
- Add a valid license key.
- Add a Compute Manager.
- Change the Global MTU Setting (where required).
- Create an IP Pool for Edge Tunnel End Points (TEPs).
- Create NSX-T VLAN-backed Segments for Tier-0 uplink interfaces.
- Create NSX-T Edge Clusters in readiness for later steps.
- Deploy NSX Edge Nodes via OVA.
- Create vSphere trunk distributed port groups for Edge fp-eth0, fp-eth1, etc.
- Edit Edge VM settings and map Network Adaptor(s) to appropriate vSphere trunk distributed port groups.
- Identify NSX Manager Thumbprint via Manager CLI:
- get certificate api thumbprint
- Add NSX Edge Nodes to Management Plane via each Edge’s CLI:
- join management-plane <NSX-Manager-IP-Address> thumbprint <NSX-Manager-Thumbprint> username admin
- Start Migration Coordinator service via Manager CLI:
- start service migration-coordinator
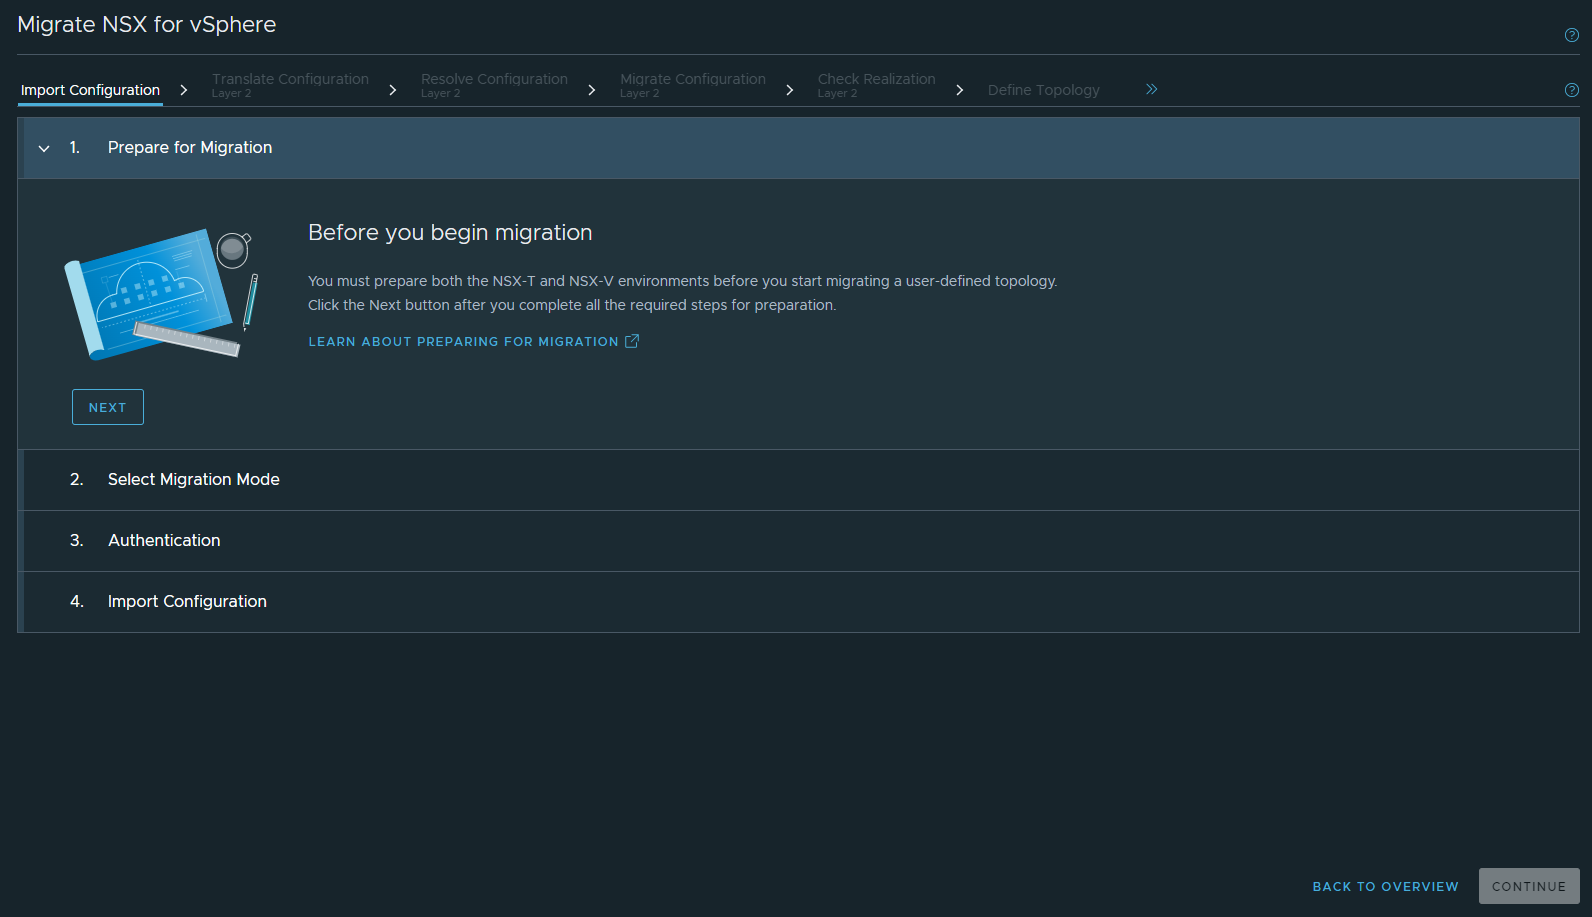
Import Configuration
Those who have read my previous post will recognise this initial section to import the NSX for vSphere configuration. At this stage, it is important that no changes to either NSX-V or NSX-T are made. If any changes are made that need to be captured/utilised during the Migration Coordinator, you will need to roll back.
Note – Rollbacks can be initiated at any time prior to the migration of hosts (i.e., even after the migration of edges). Should you make a mistake, or if you forget to create any of the prerequisites (Edge TEP IP Pool, for example), simply roll back and start again.
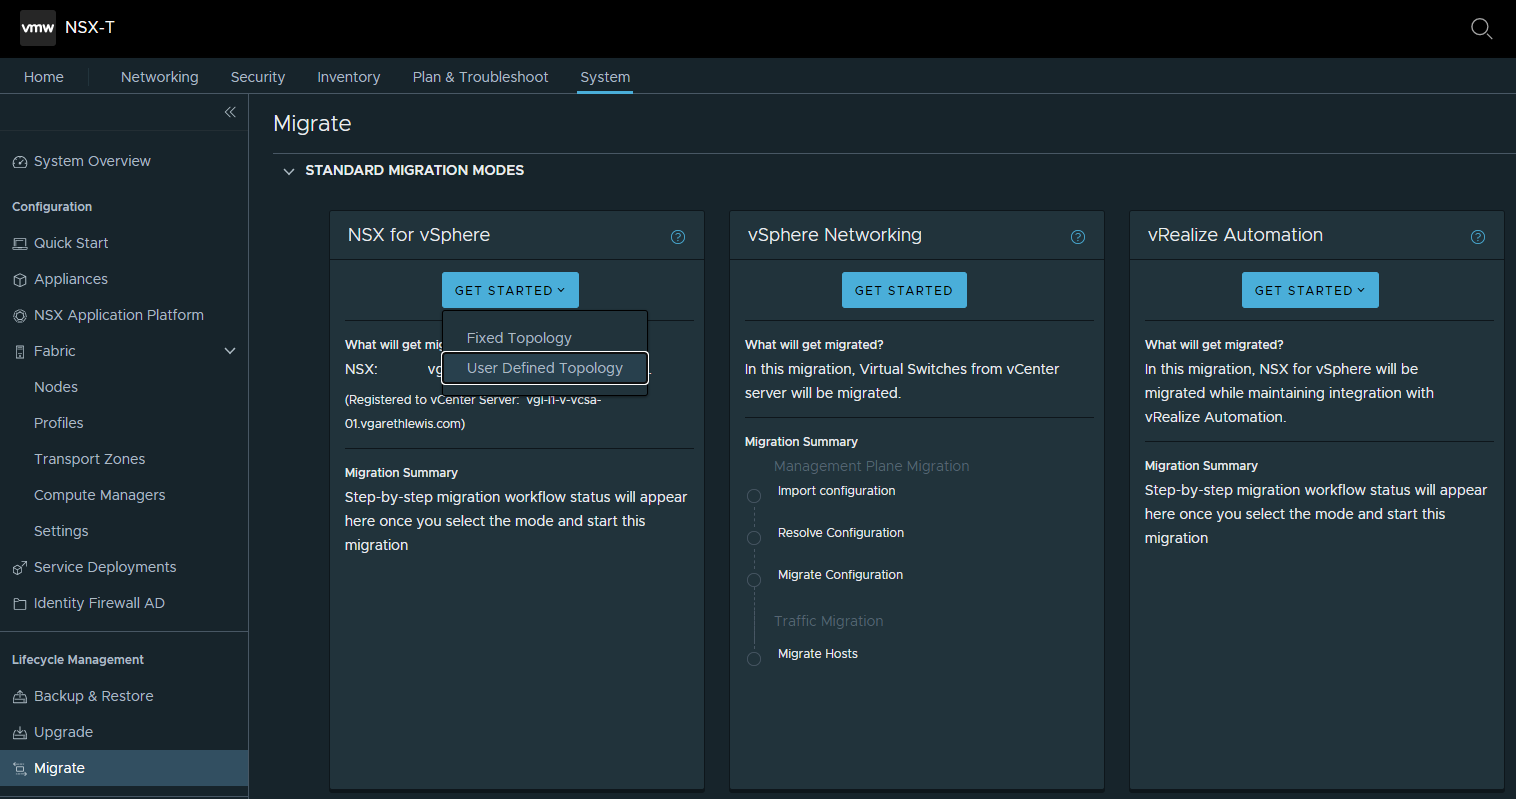
Browse to System > Lifecycle Management > Migrate, and select NSX for vSphere > User Defined Topology. When ready, click Next.
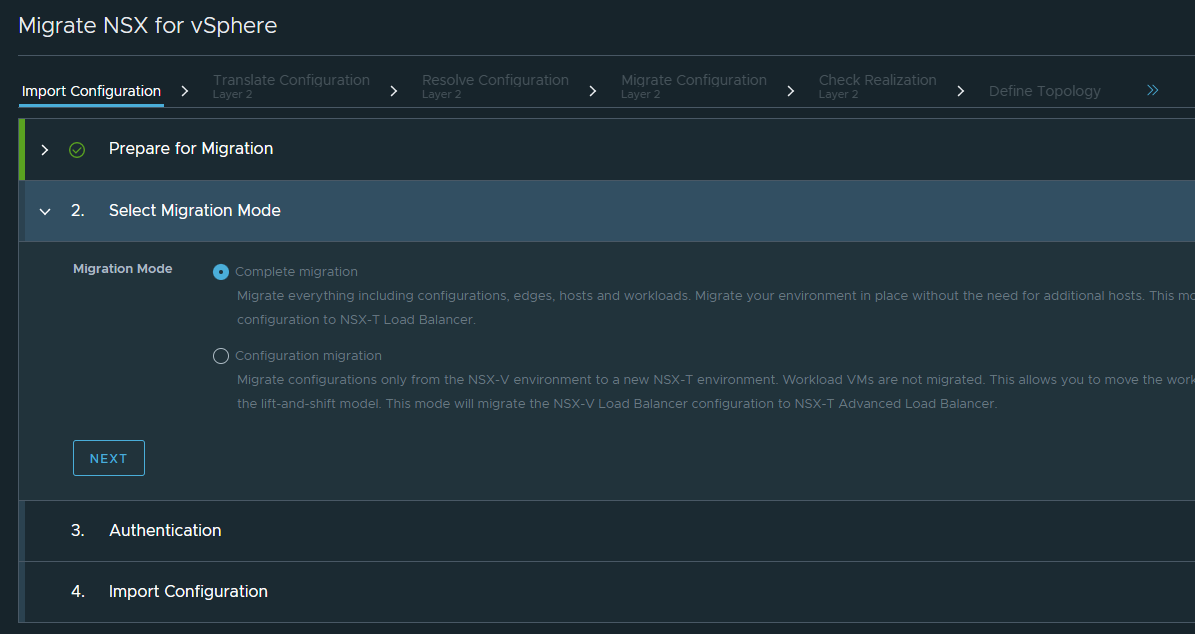
Click Next.
Select Complete Migration and click Select NSX.
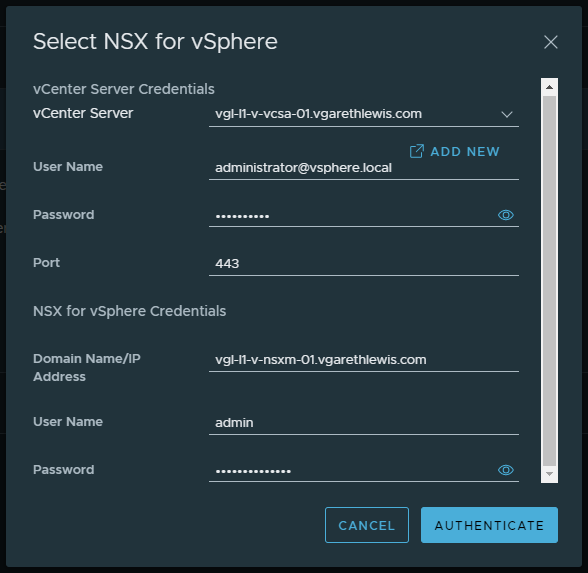
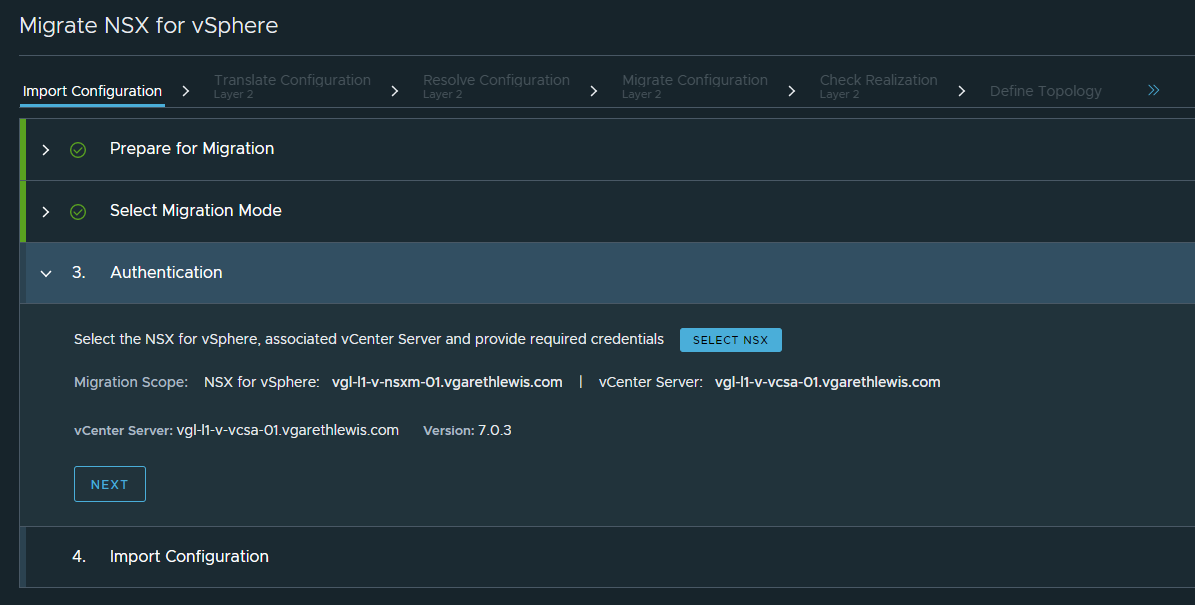
Enter both your vCenter Server and NSX for vSphere credentials, and click Authenticate.
When ready, click Next.
Click Start to check prerequisites, import vCenter and NSX for vSphere configuration, and to begin translation of the imported configuration.
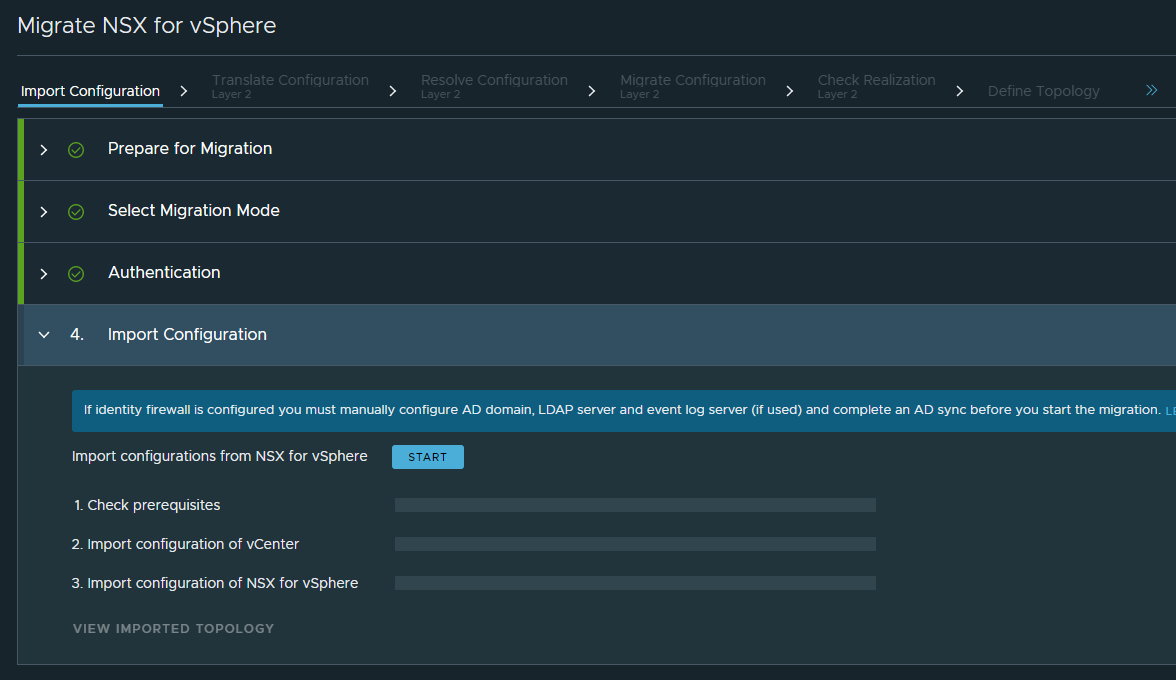
When prompted, click Continue.

If successful, click Continue. If unsuccessful, review all errors and work to resolve.

Translate Configuration – Layer 2
When ready, click Start to begin the translation of the imported L2 configuration from NSX for vSphere.

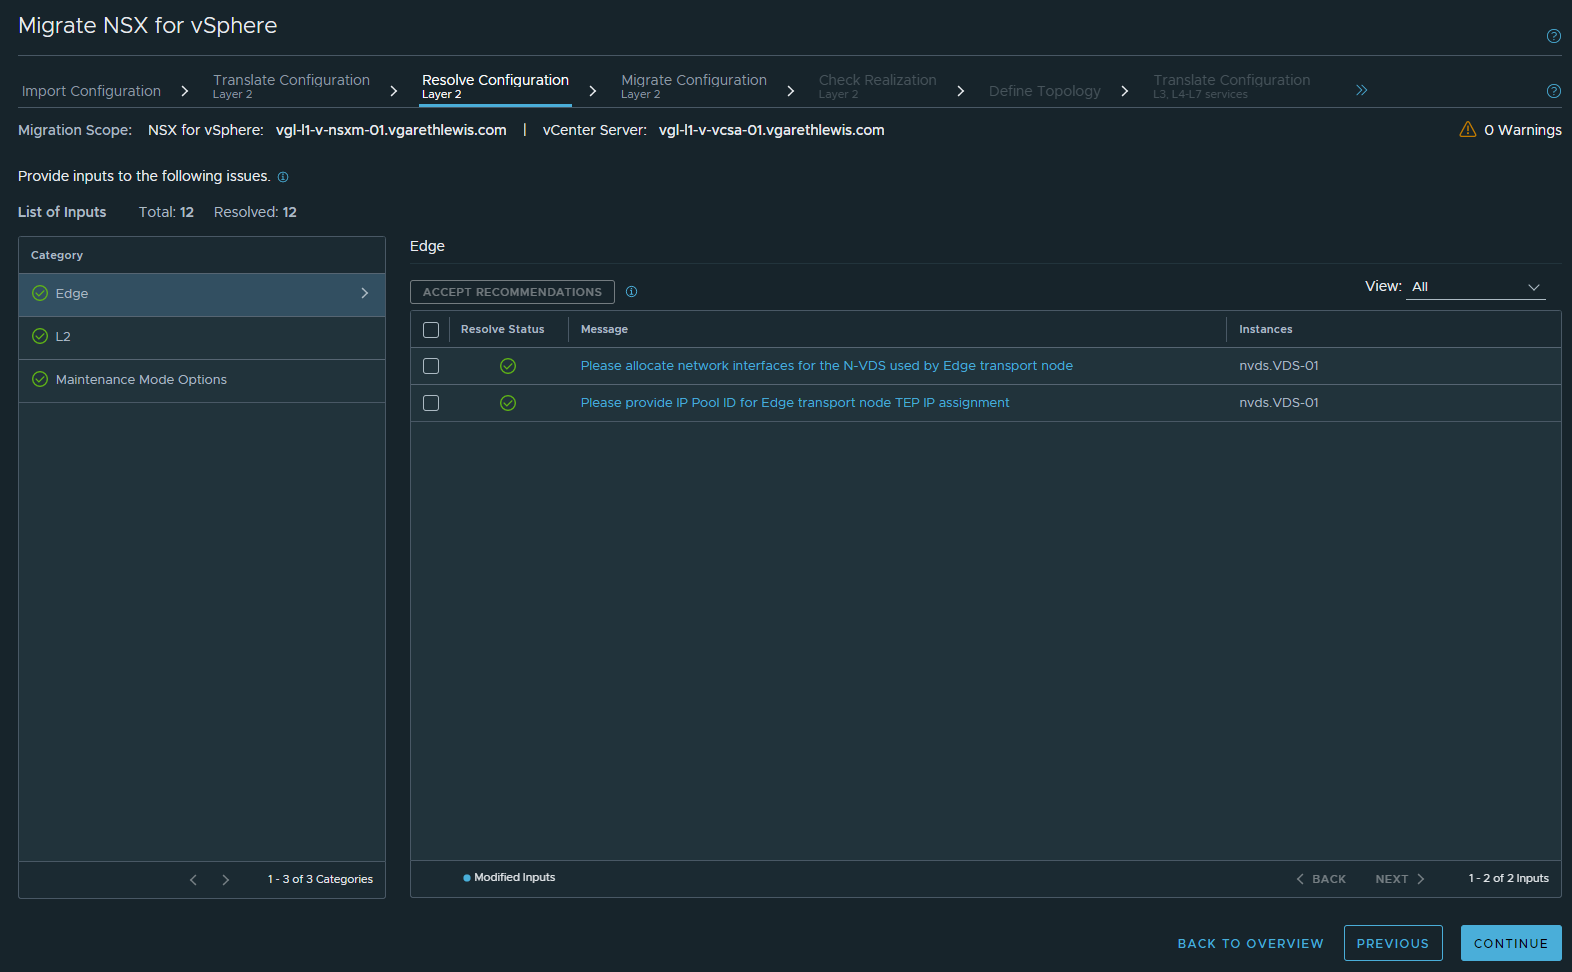
Resolve Configuration – Layer 2
This is the most important stage of the migration process. Ensure all issues identified by the Migration Coordinator are resolved, configured or skipped appropriately and that all are read and understood. As mentioned previously, these issues/queries can be viewed ahead of time, as no changes/migrations will take place until the Migrate Edges stage.
In this stage, you will be prompted to provide, among others, the name of your Edge TEP IP Pool, Edge TEP VLAN, a Tier-0 Gateway uplink interface IP address, etc., all of which should (where possible) be allocated ahead of time. Again, use this information before your change/maintenance window to ensure all of the required information has been set up in advance of the migration.
Work through the items one by one, clicking Submit if you need to save your progress or take a break.
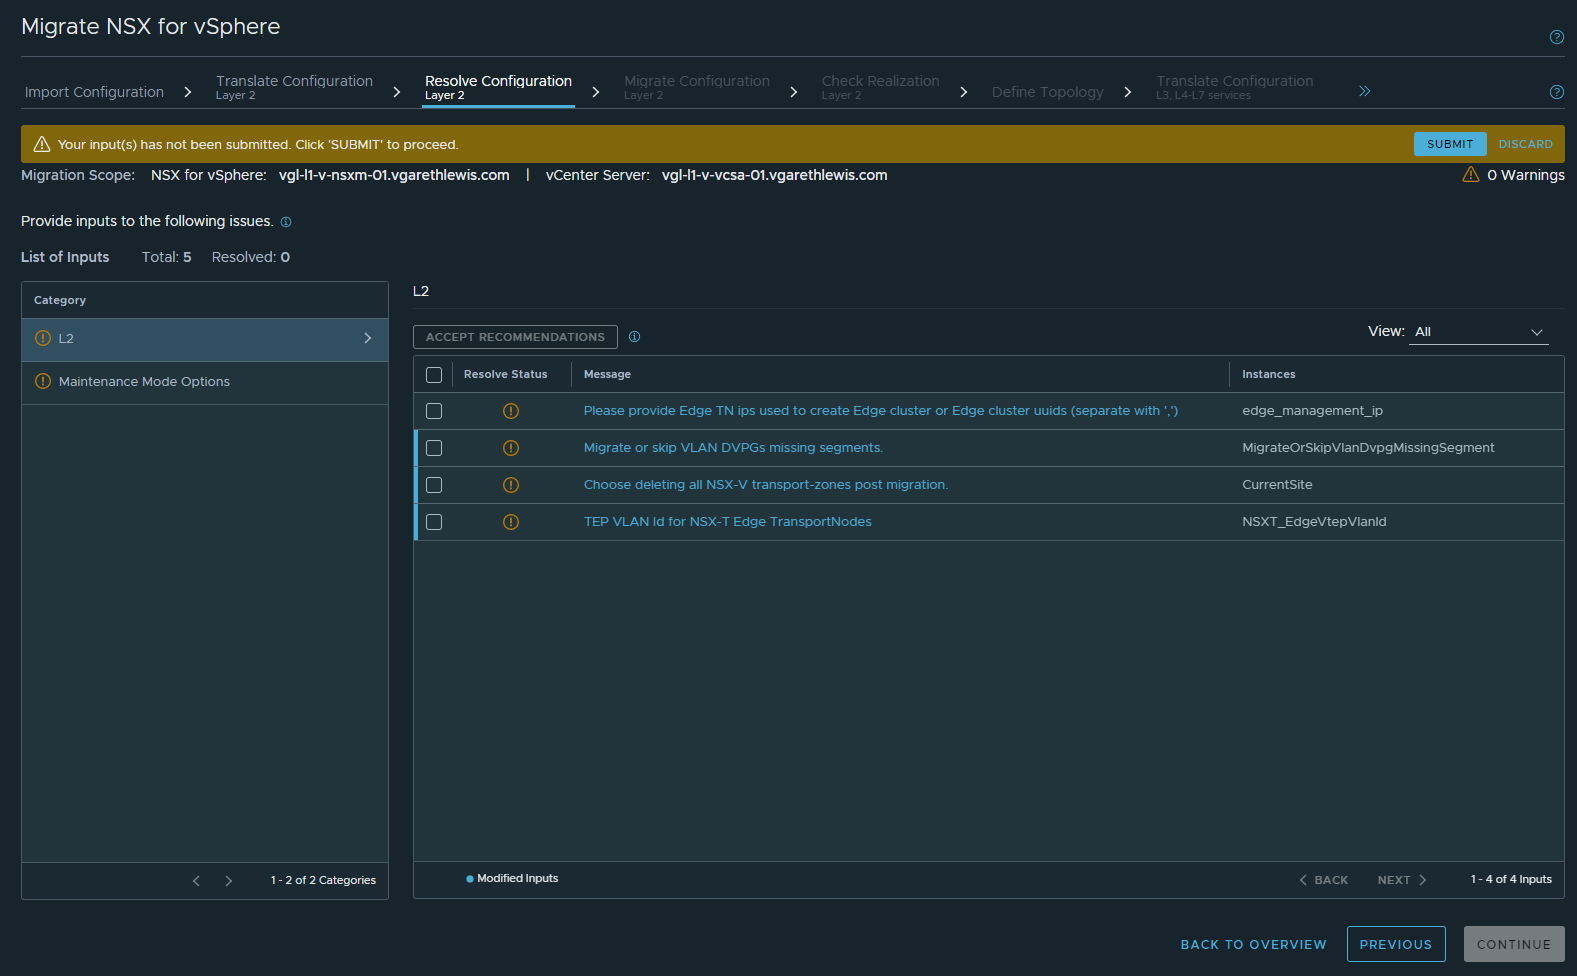
When all items are resolved/green, click Continue.
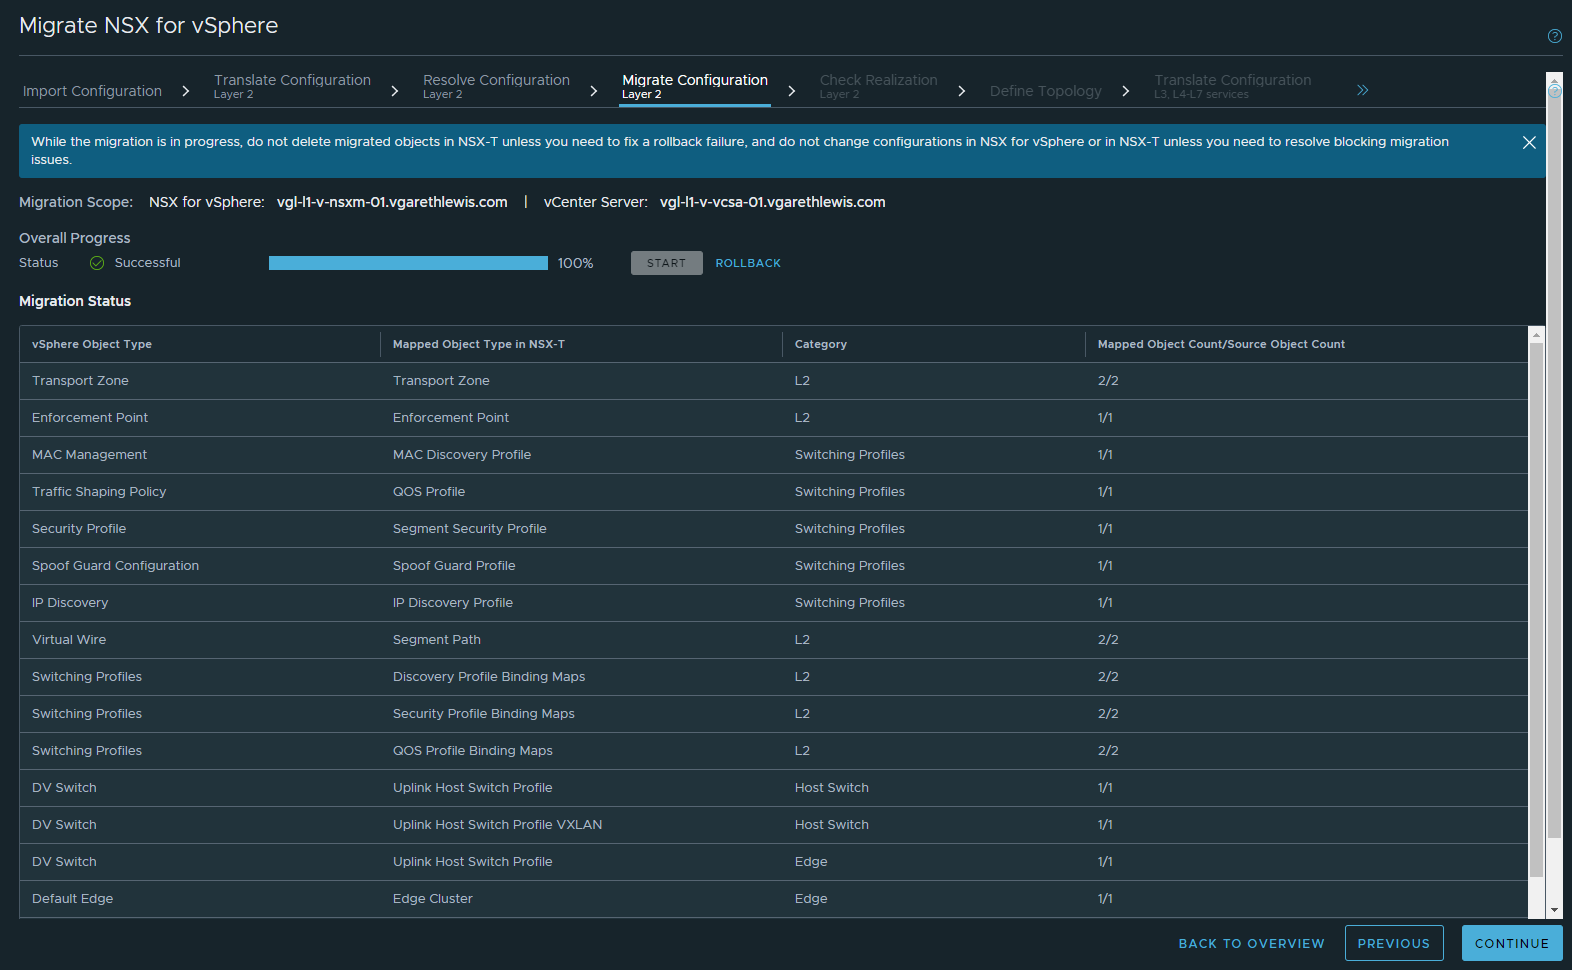
Migrate Configuration – Layer 2
This stage will see NSX for vSphere components migrated into NSX-T Data Center. Note, all workloads will continue to operate from NSX for vSphere; this stage will merely create the new constructs in readiness for the later migrations.
When ready, click Start to begin the configuration migration.

When prompted, click Migrate.

Once complete, note the object mappings. When ready, click Continue.
Check Realization – Layer 2
When ready, click Start to initiate the validation of migration L2 configurations from NSX for vSphere.

When ready, click Next.

PAUSE!! – Tier-0 and Tier-1 Gateway Creation and Configuration
At this stage, you will note that all edges have been assigned to the relevant edge clusters as per your earlier submission in the Resolve Configuration Layer 2 stage. Ensure all Edge TNs are assigned to the correct Edge Cluster in readiness for ESG/DLR to T0/T1 mappings in the next stage, Define Topology.
Likewise, all Tier-0/Tier-1 Gateway(s) should now be created (including uplink interfaces, dynamic routing, route redistribution, etc.), all of which should be assigned to the appropriate edge cluster. If you are migrating NSX-V load balancing, ensure the target T1 Gateways are configured with the appropriate service interfaces, static routes, etc.
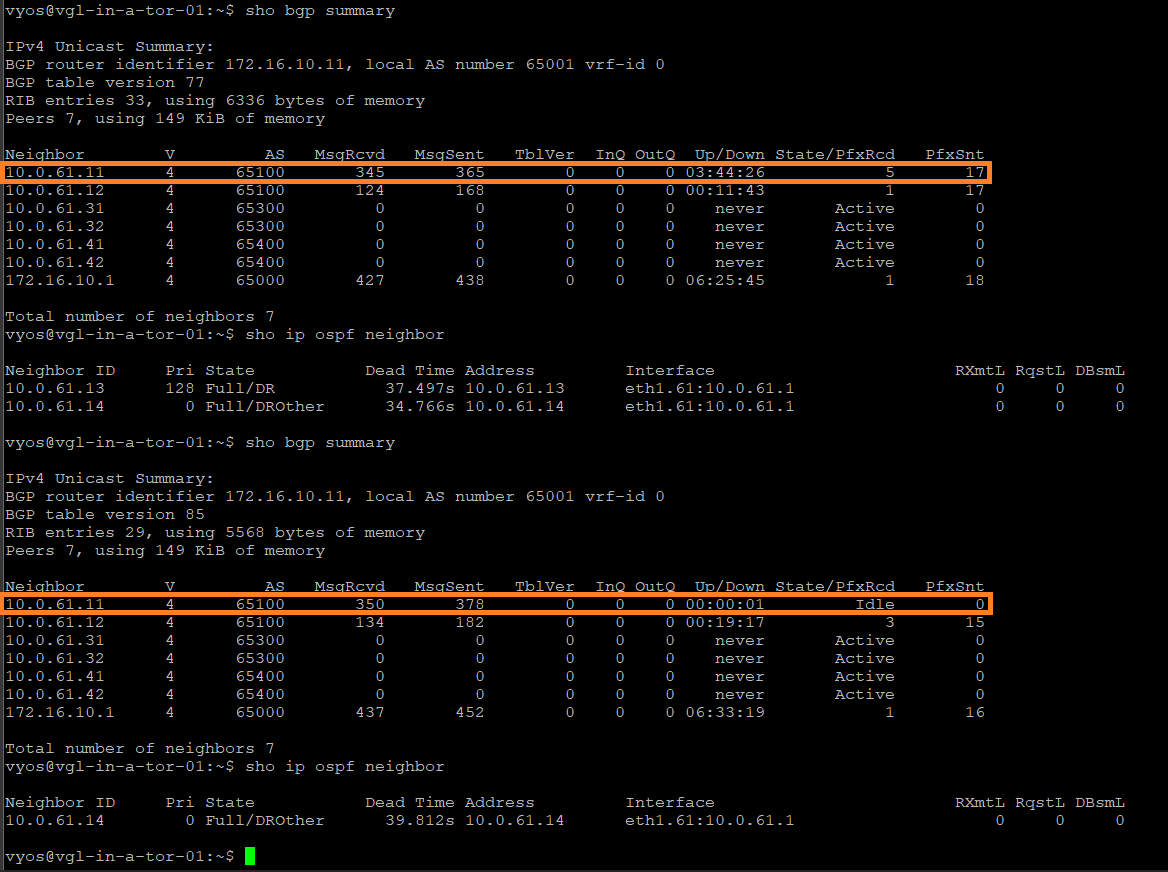
Once the T0/T1s are in place, ensure you validate dynamic routing has converged with the physical fabric, BGP sessions are established and/or OSPF neighbourships are FULL.
The screenshots below validate full convergence after creating and configuring my Tier-0 Gateways. I.e., note 10.0.61.12 is established in the lower part of the screenshot.


Migration Progress Review
Let’s take a moment to assess our progress. We have successfully deployed the new NSX-T routing components and assigned them to their Edge Clusters. Dynamic routing has been configured and verified, allowing us to move forward with the Migration Coordinator’s next phase. This involves defining our topology by mapping the legacy NSX-V components to their corresponding NSX-T counterparts.
Note – Our NSX-V environment remains unchanged, and all traffic and functions are still operating within the NSX-V realm.
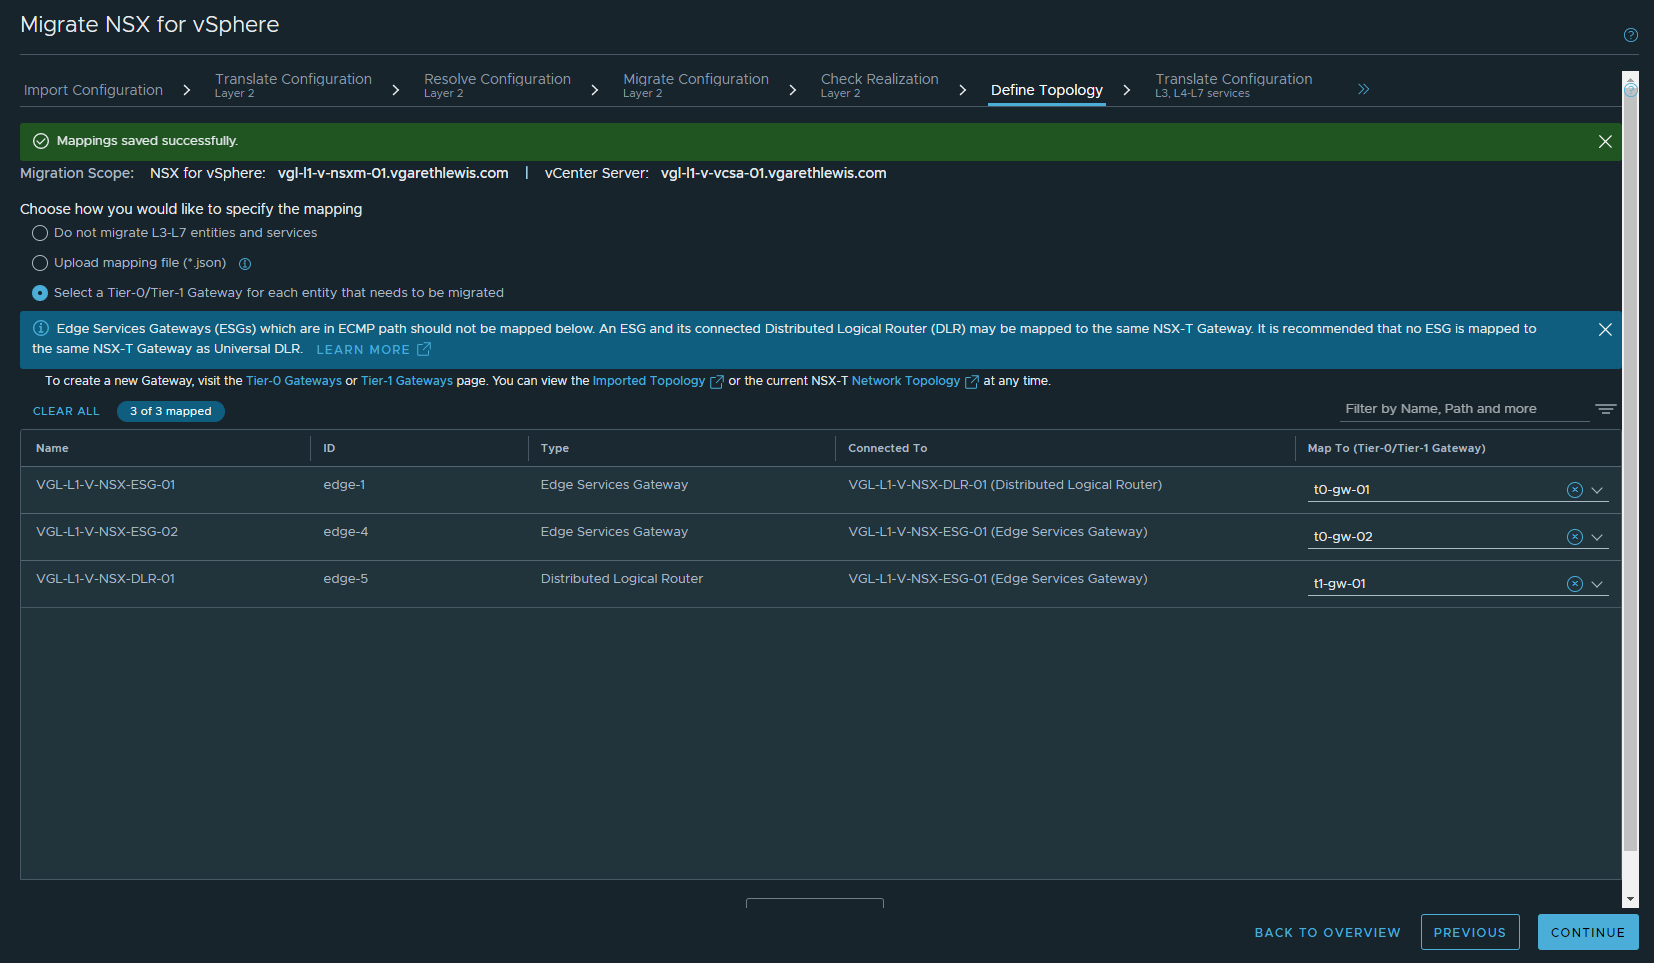
Define Topology
Now that our new NSX-T components have successfully peered with the physical fabric, we can map the NSX-V to NSX-T components.
Provide the relevant ESG/DLR to T0/T1 mappings and, when ready, click Continue.
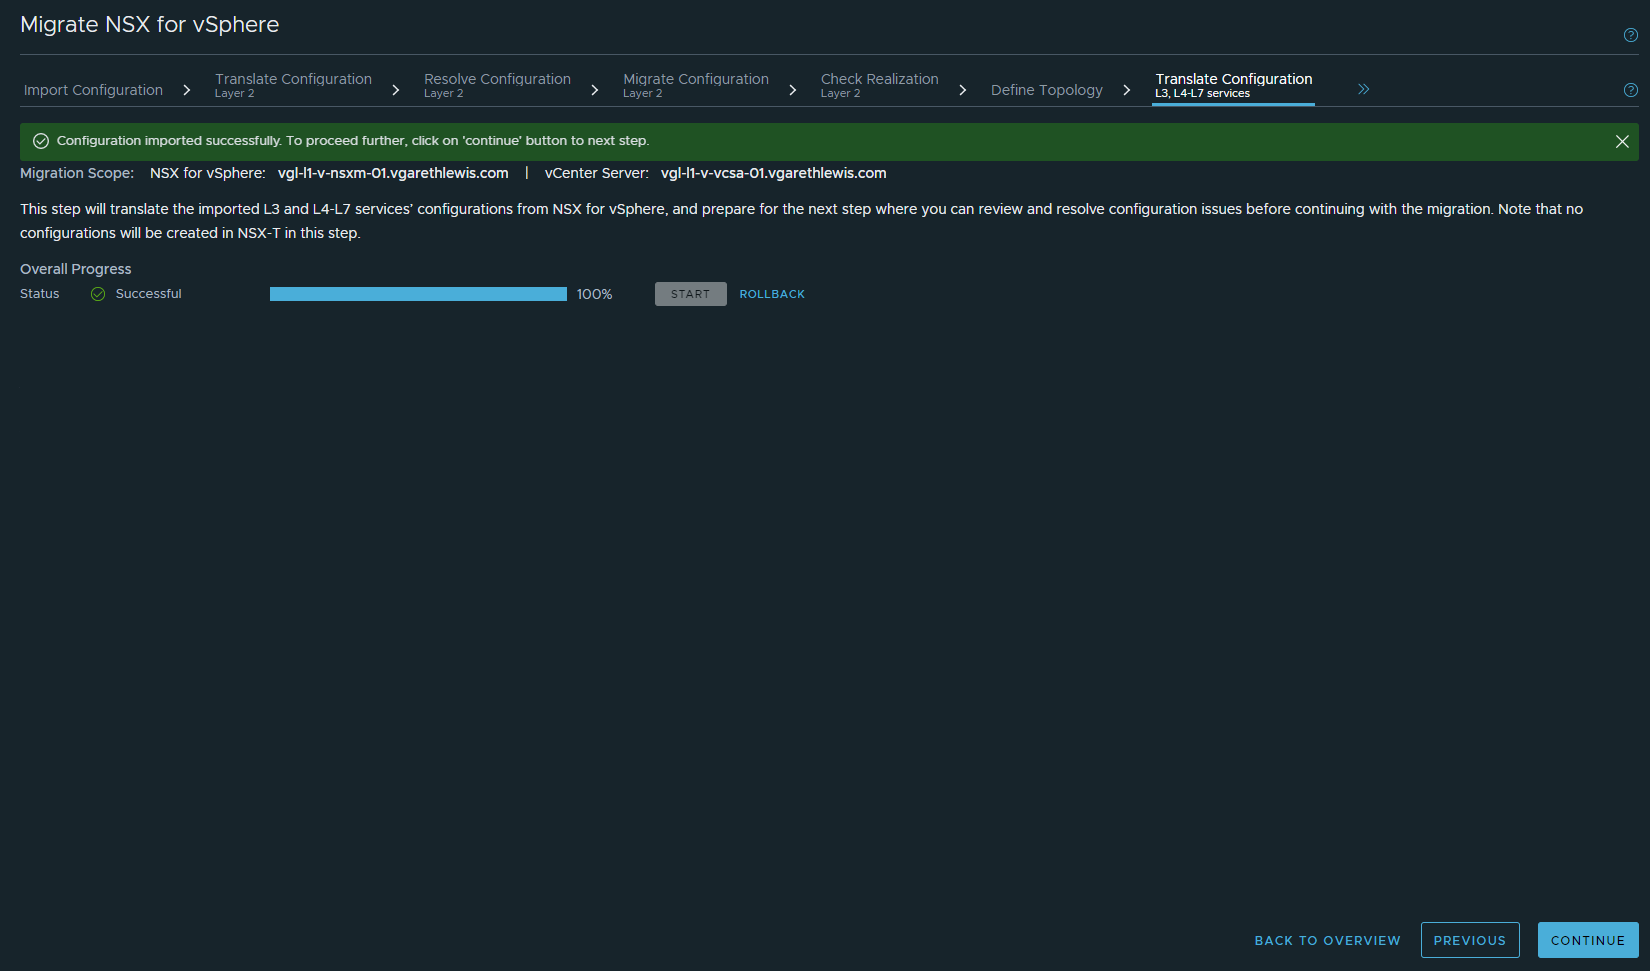
Translate Configuration L3, L4-L7 Services
When ready, click Start to translate the L3 and L4-L7 services’ configuration from NSX for vSphere.

If successful, click Continue. If unsuccessful, review all errors and work to resolve them.
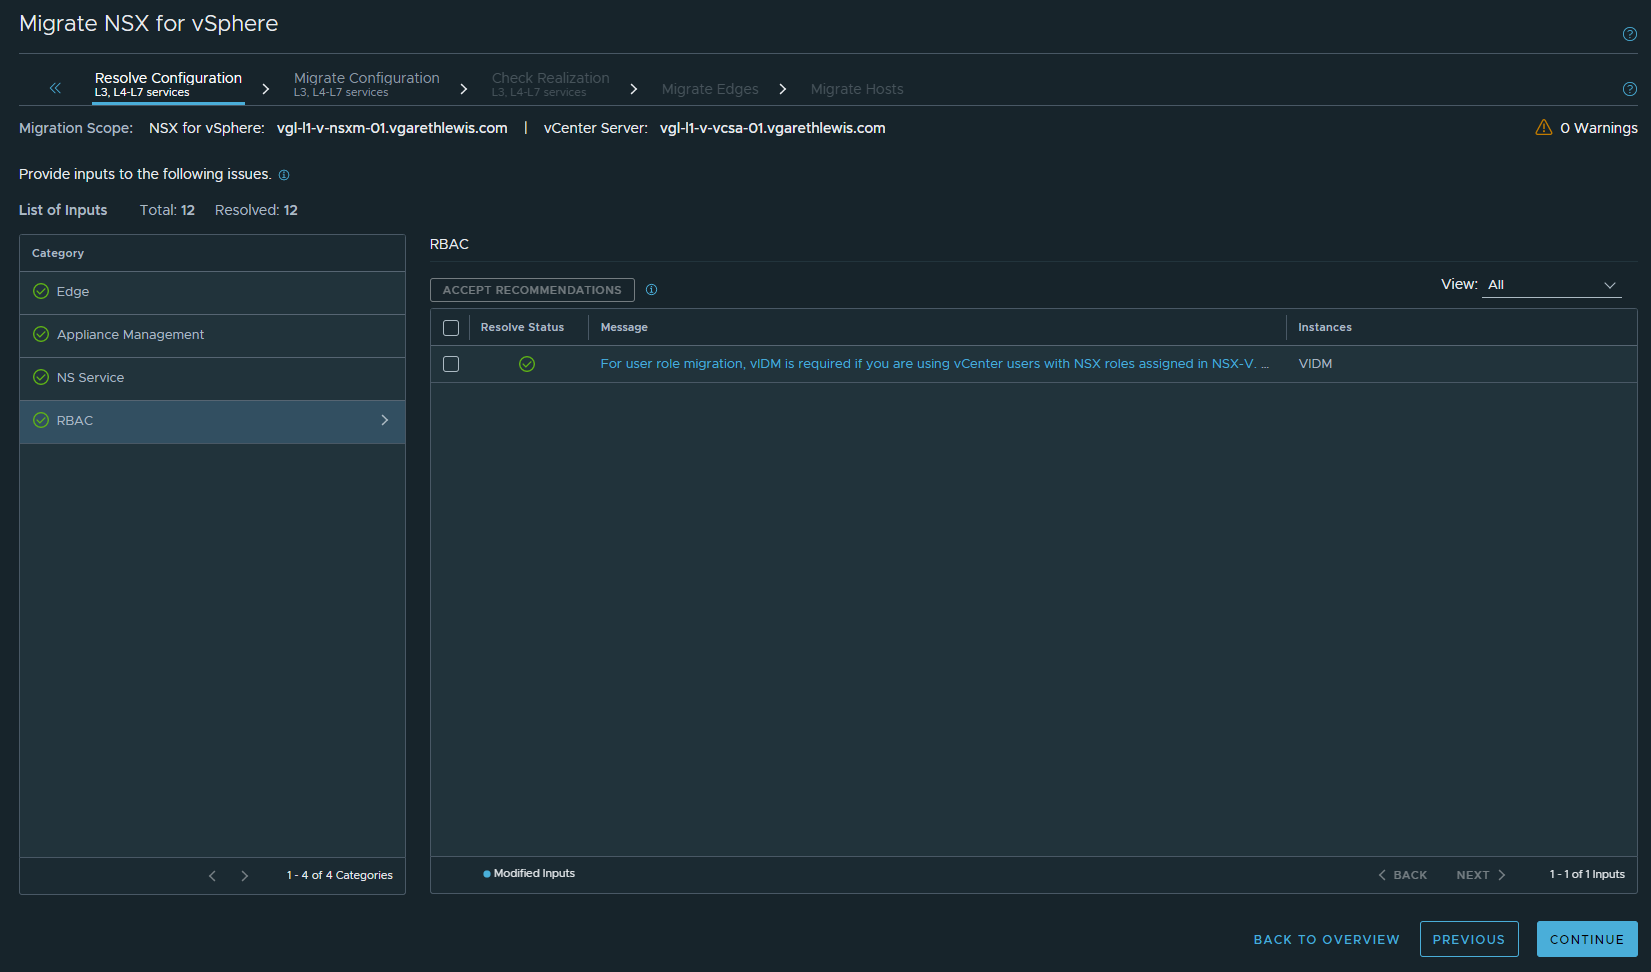
Resolve Configuration L3, L4-L7 Services
Much like the earlier Resolve Configuration Layer 2 stage, we will be prompted to resolve/provide information/skip L3, L4-L7 services. This might include items such as the configuration of ESG/DLR downlinks (those internal links which used to map to Logical Switches), static routing, RBAC, appliance management and backups, etc.
Again, ensure all items identified by the Migration Coordinator are resolved, configured or skipped appropriately. As mentioned previously, these items can/should be reviewed ahead of time, as no migrations will take place until the Migrate Edges stage.
Work through the items individually, clicking Submit if you need to save your progress or take a break.
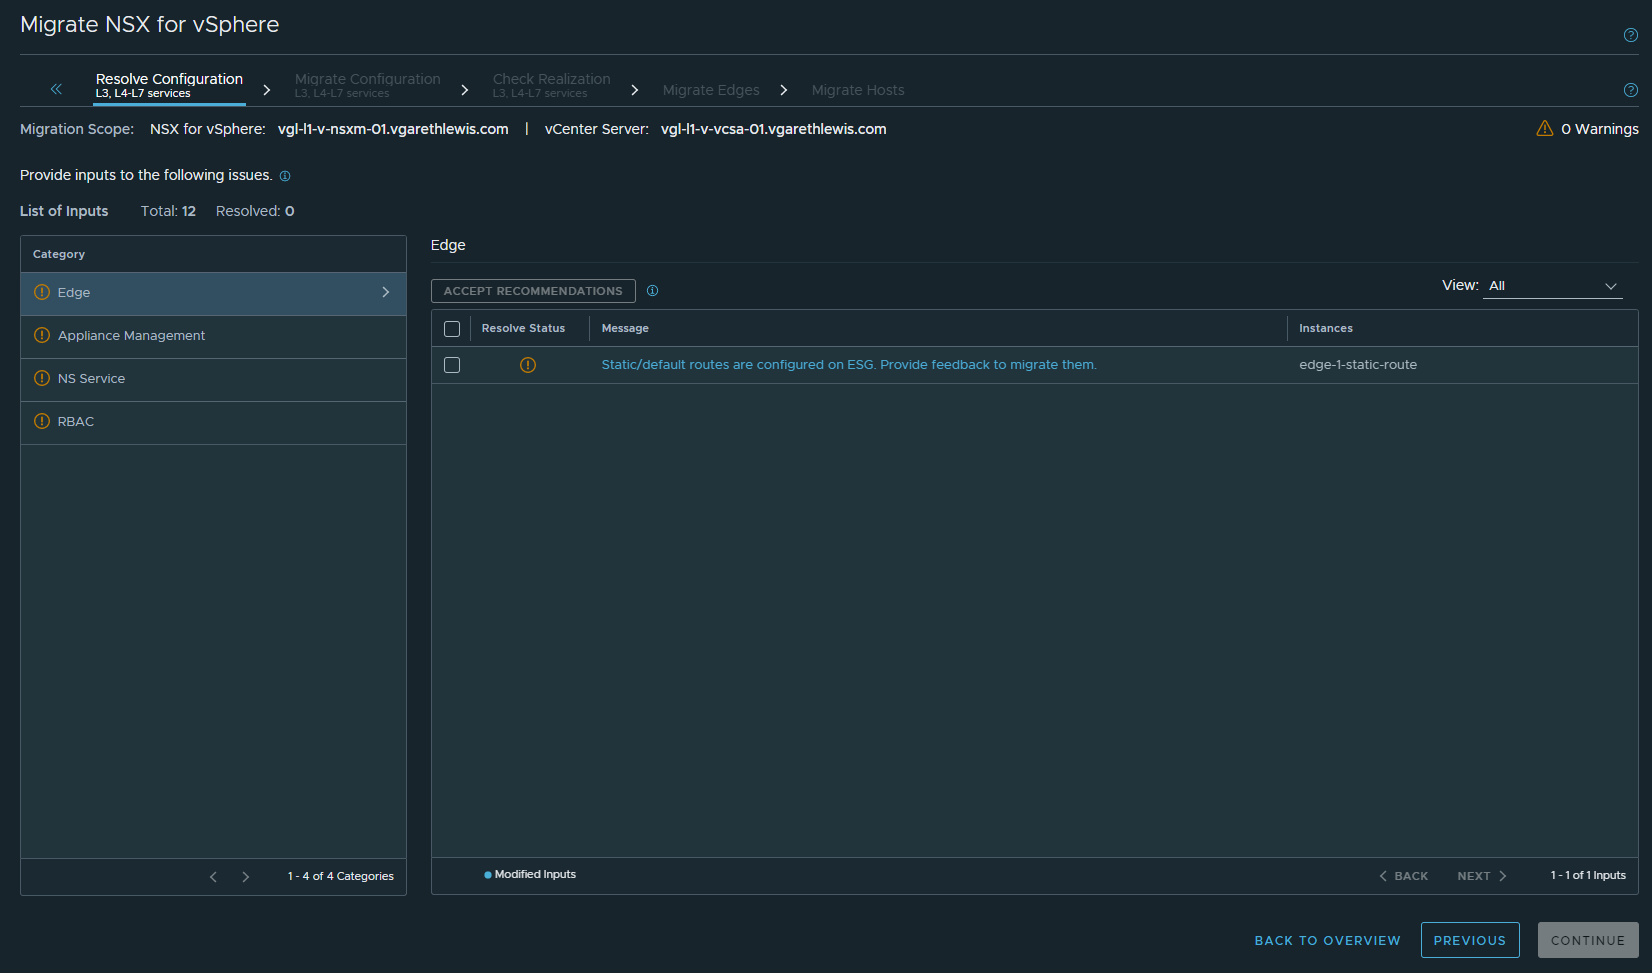
When all items are resolved/green, click Continue.
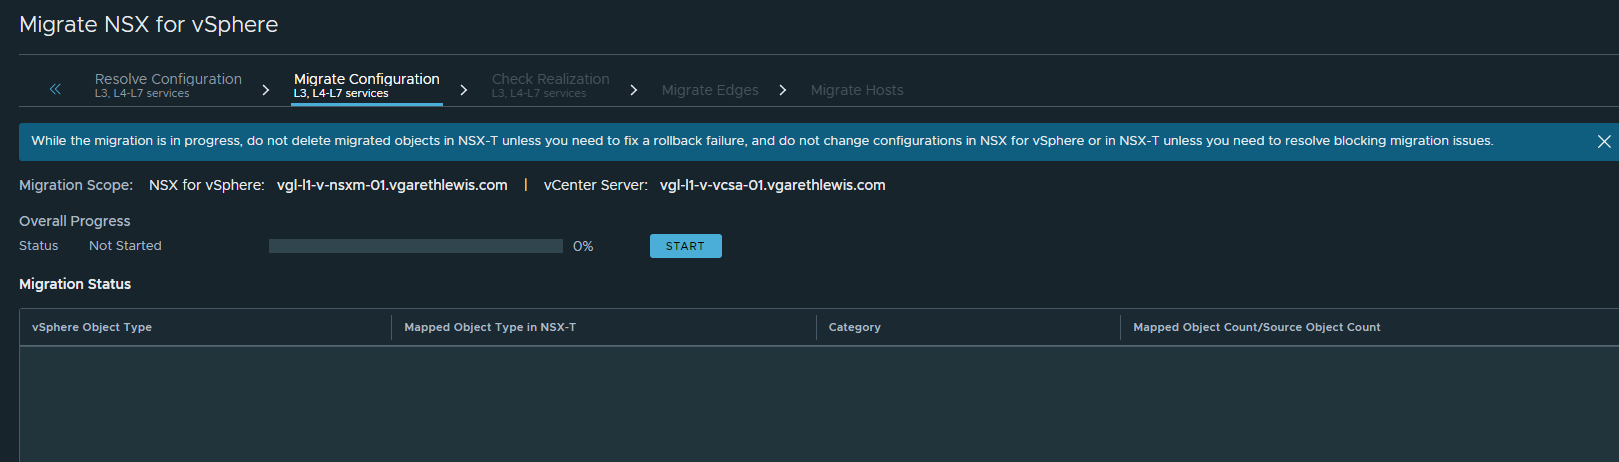
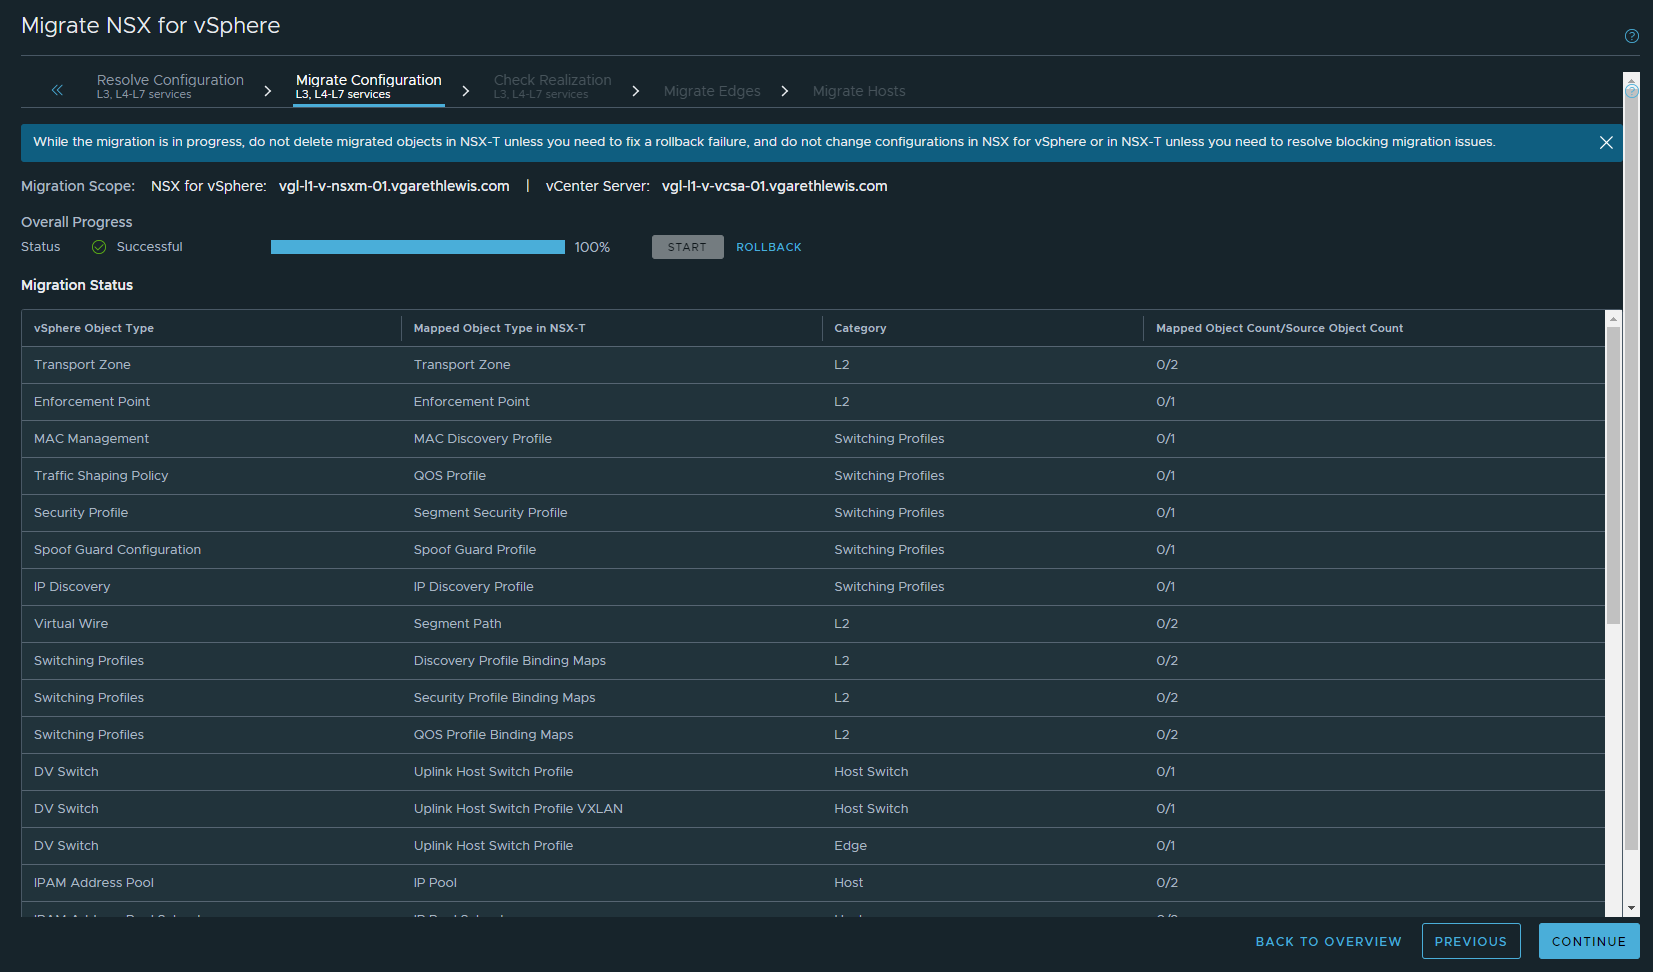
Migrate Configuration L3, L4-L7 Services
This stage will see NSX for vSphere components migrated into NSX-T Data Center. Note, all workloads will continue to operate from NSX for vSphere; this stage will merely migrate the prepared configuration in readiness for the migration stages.
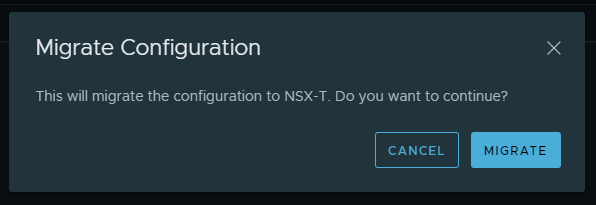
When ready, click Start to begin the configuration migration.
When prompted, click Migrate.
Once complete, note the object mappings. When ready, click Continue.
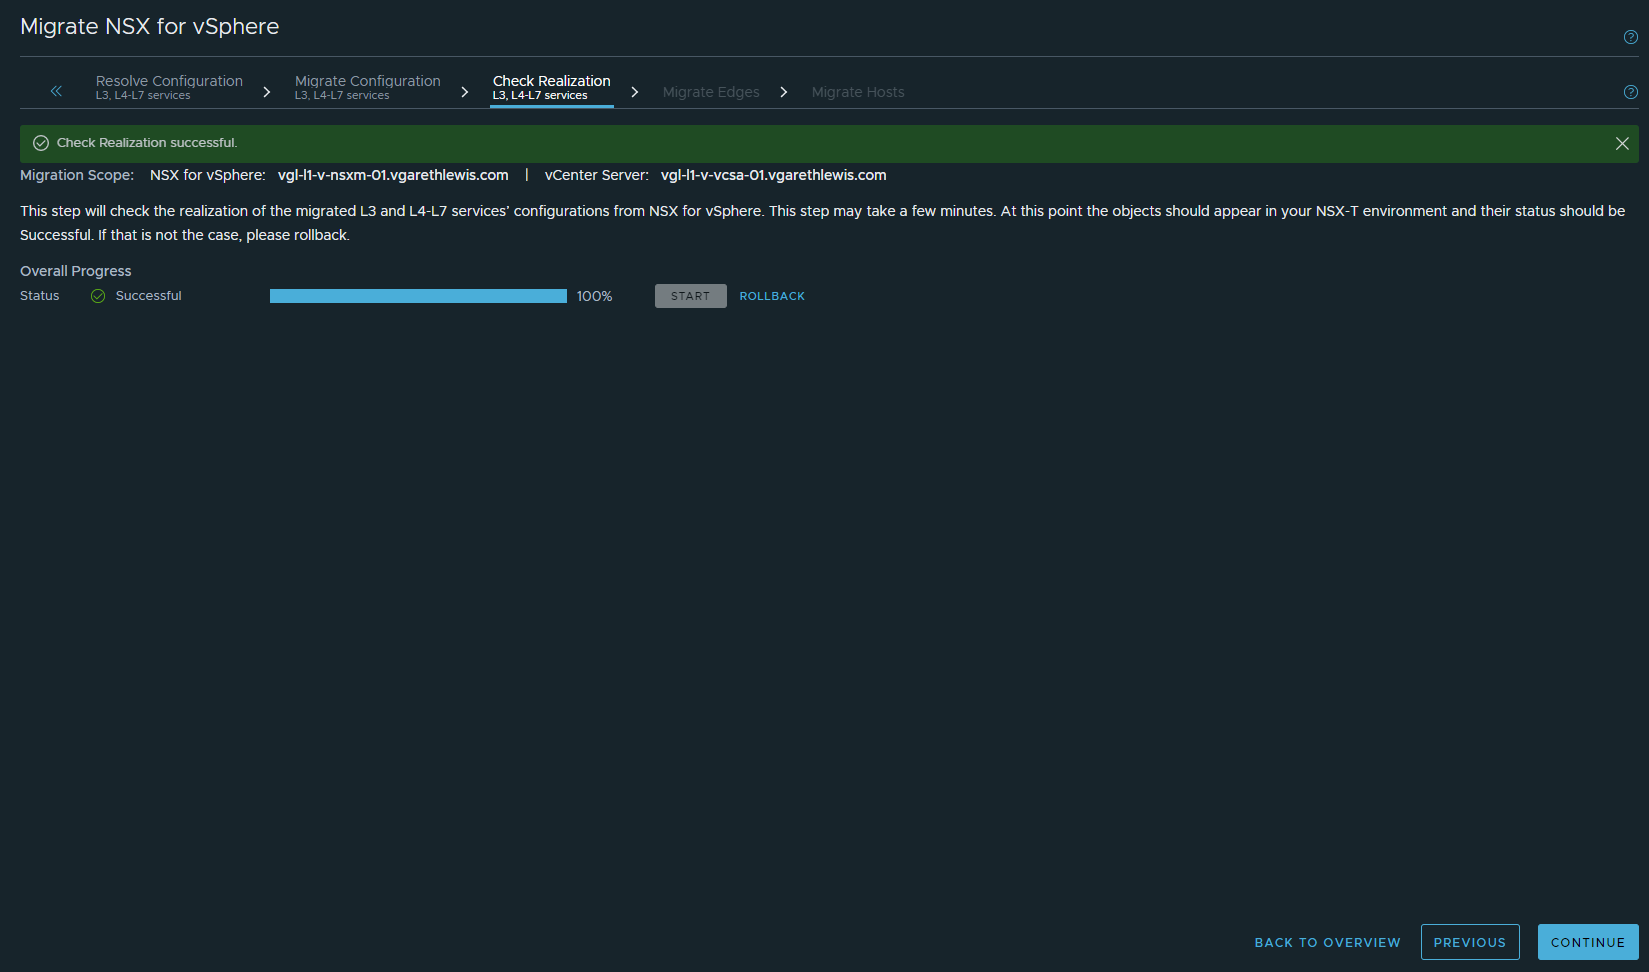
Check Realization L3, L4-L7 Services
When ready, click Start to check the realisation of the migrated L3 and L4-L7 services’ configuration from NSX for vSphere.

If successful, click Continue. If unsuccessful, review all errors and work to resolve.
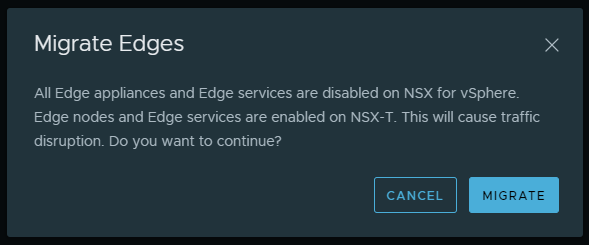
Migrate Edges
Until now, all we have done is provide information and configurations which have been used to create numerous NSX-T constructs. No migrations of edges, hosts, or workloads have taken place. Until now.
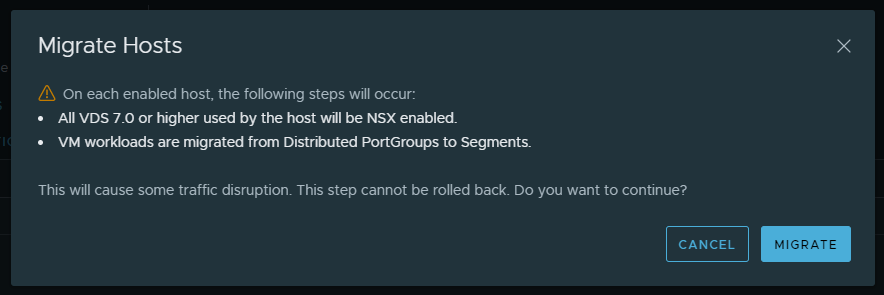
Once the edge migration is initiated, our workloads will experience a drop in connectivity. As such, uplink interfaces on our NSX for vSphere ESGs will drop. Note, due to this, it is recommended to perform edge and host migration in one maintenance window.
When ready, click Start.

When prompted, click Migrate.
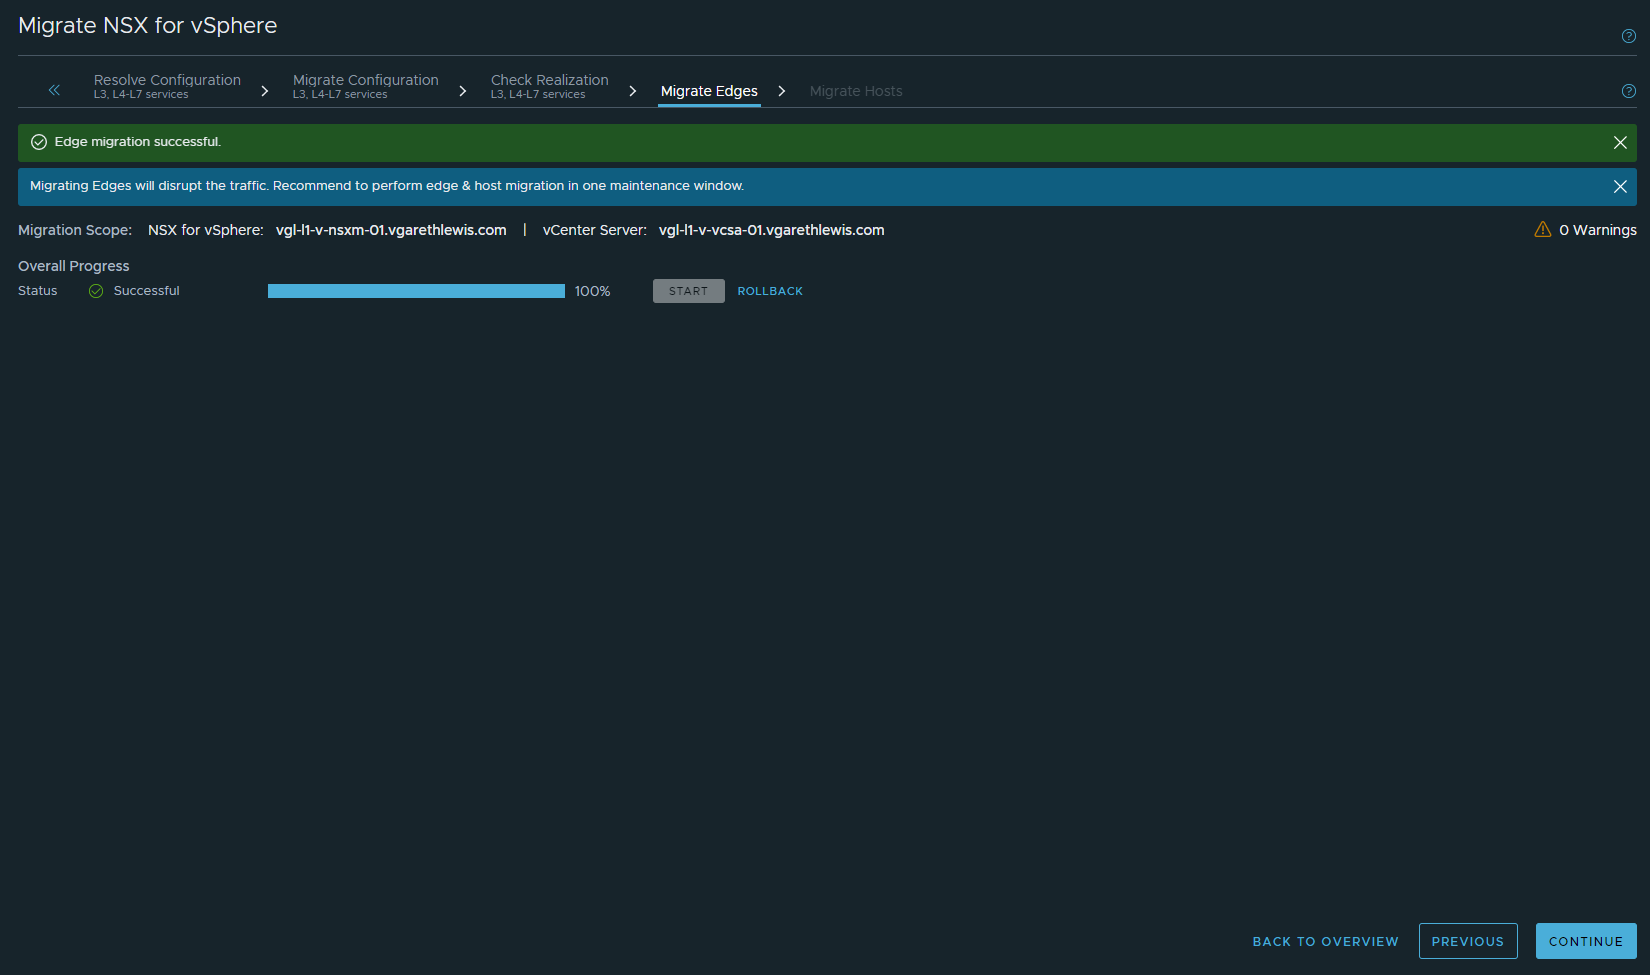
Monitor the migration process and, when successful, click Continue.
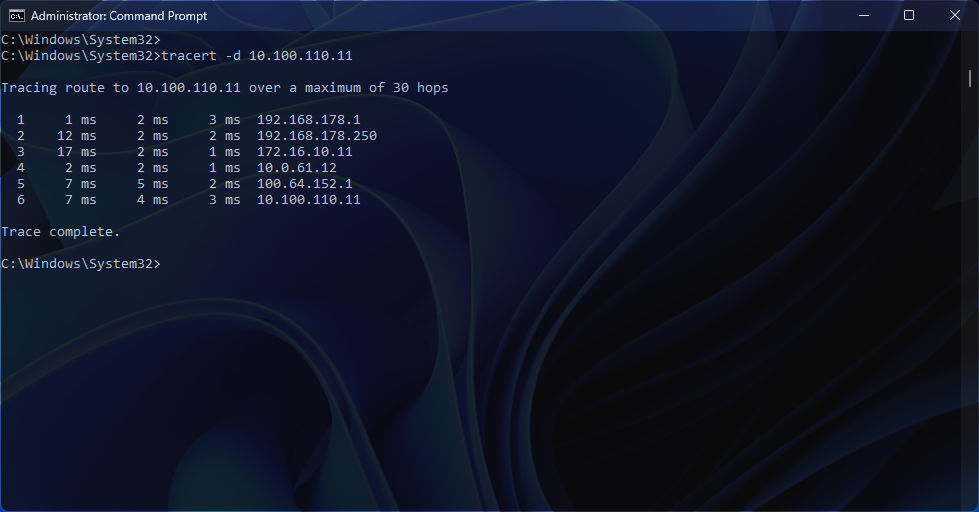
We experienced the expected packet loss during the edge migration as ESGs are powered down and the new T0s converge with the physical fabric. The below screenshot displays continuous ICMP to a VM (10.0.100.110.11) housed on a NSX-V Logical Switch.

Note – the cutover time is dependent on BGP convergence/route advertisement. I consistently experience eight (8) packet drops in my lab environment, however, in production environments, I have seen this as low as four (4). I think you’ll agree that this is pretty cool.
After successful edge migration, connectivity to the same VM is now routed via the new T0 (10.0.61.12) and T1 (100.64.152.1 = T0-T1 internal transit network) gateways.
Lastly, note dynamic routing for both of the NSX-V ESGs drops as the Migration Coordinator has powered them down. The below screenshot shows BGP peering for ESG-01 (10.0.61.11) drops, and ESG-02 (10.0.61.13)’s OSPF neighbourship is removed, leaving T0-GW-01 (10.0.61.12) as the only BGP neighbour (172.16.10.1 is my spine router) and T0-GW-02 (10.0.61.14) as the only OSPF neighbour.
Migration Progress Review
Let’s pause and review our progress. We have effectively transferred our edge functions, which means all north-south routing has moved from NSX-V ESGs to NSX-T Tier-0 Gateways. However, east-west routing continues to operate within the NSX-V domain.
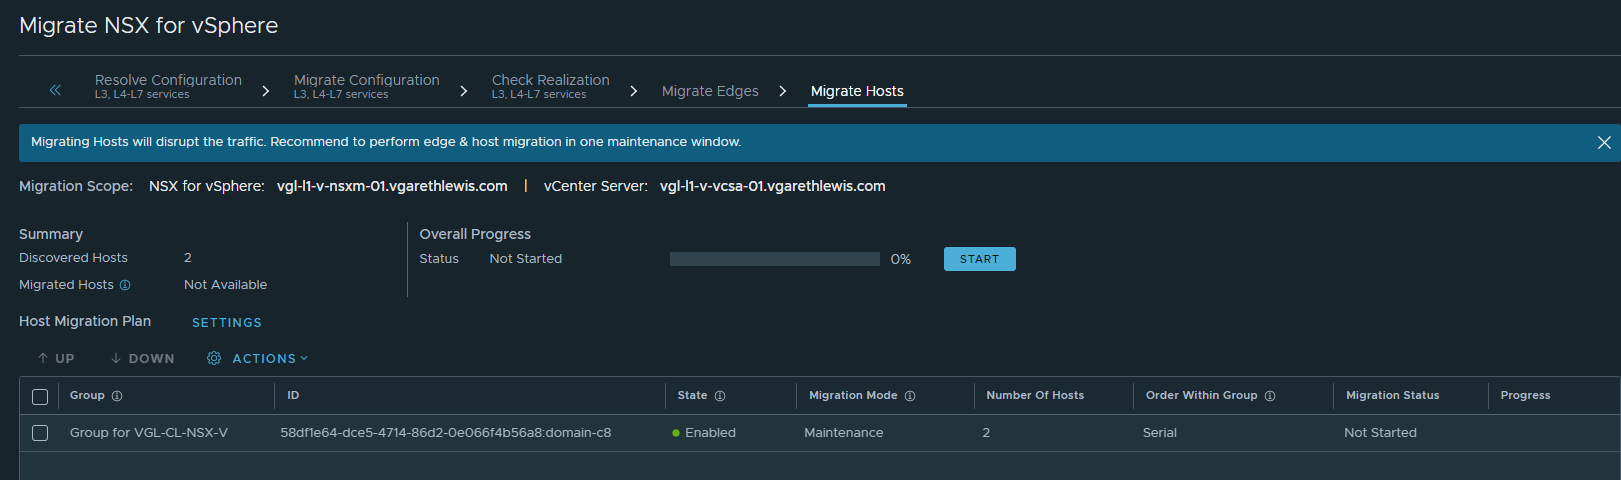
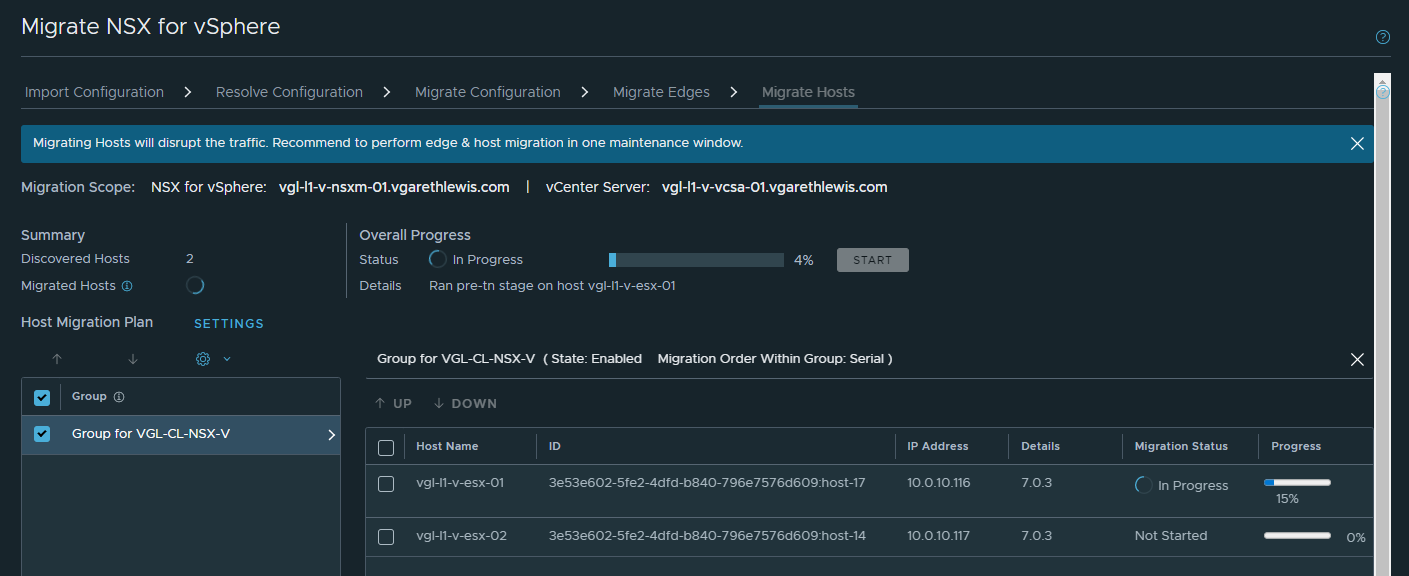
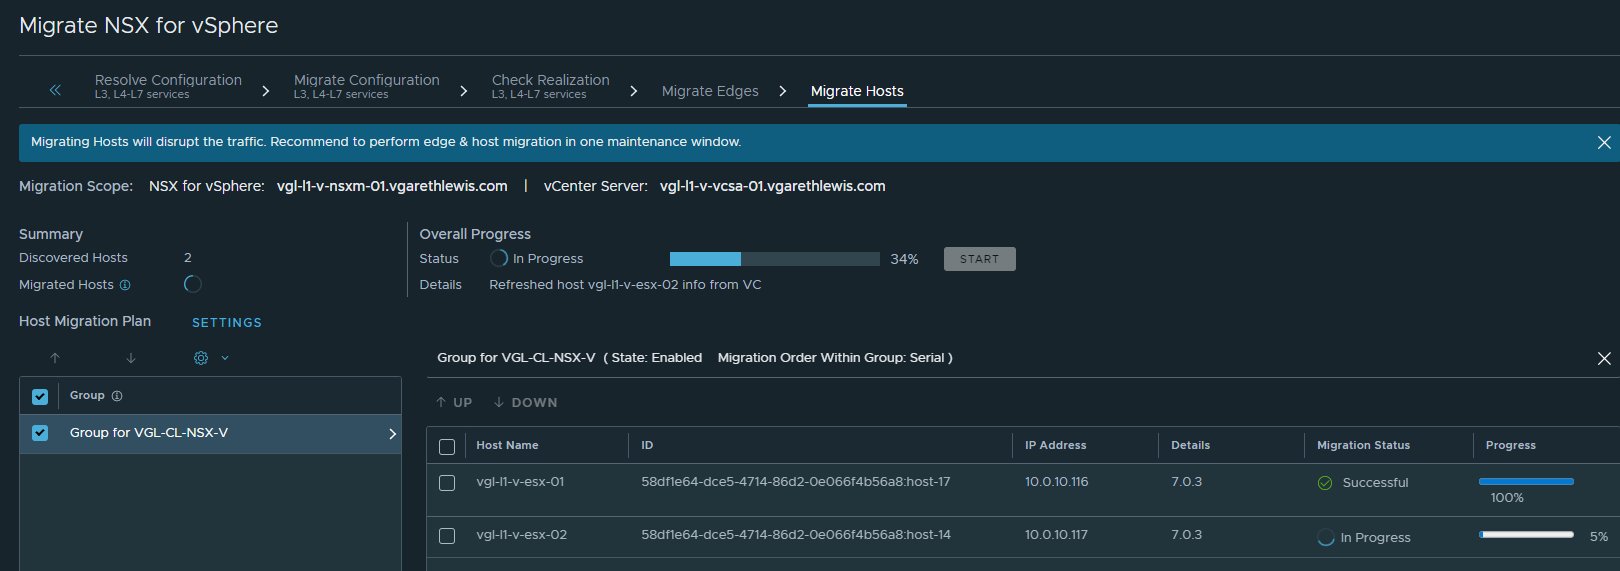
Host Migration
Our final task of the migration process is to migrate the hosts themselves. This will see all NSX-V VIBs removed and replaced with NSX-T, NSX switch configuration, etc.
When ready, click Start.
When prompted, click Migrate.
Click the relevant Host Group (vSphere Cluster) to monitor progress. In the below screenshots, you will note pre-transport node staging for specific hosts…
…as well as the removal of NSX-V VIBs.

During the process, you will note host preparation via System > Configuration > Fabric > Nodes > Host Transport Nodes.
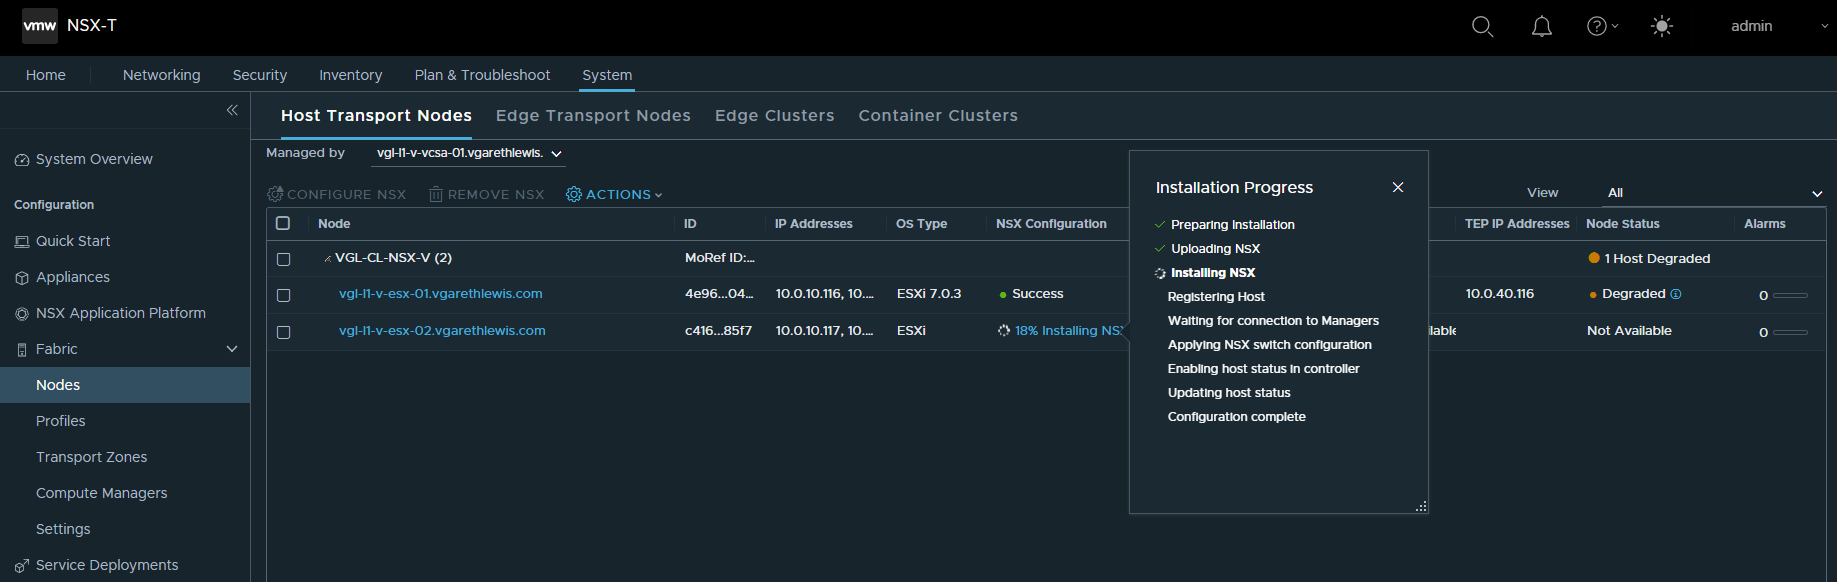
As each host is completed, note the application of a Host TEP IP address (the IP Pool for which utilises your NSX-V configured IP range), and the Node Status should change to Up.
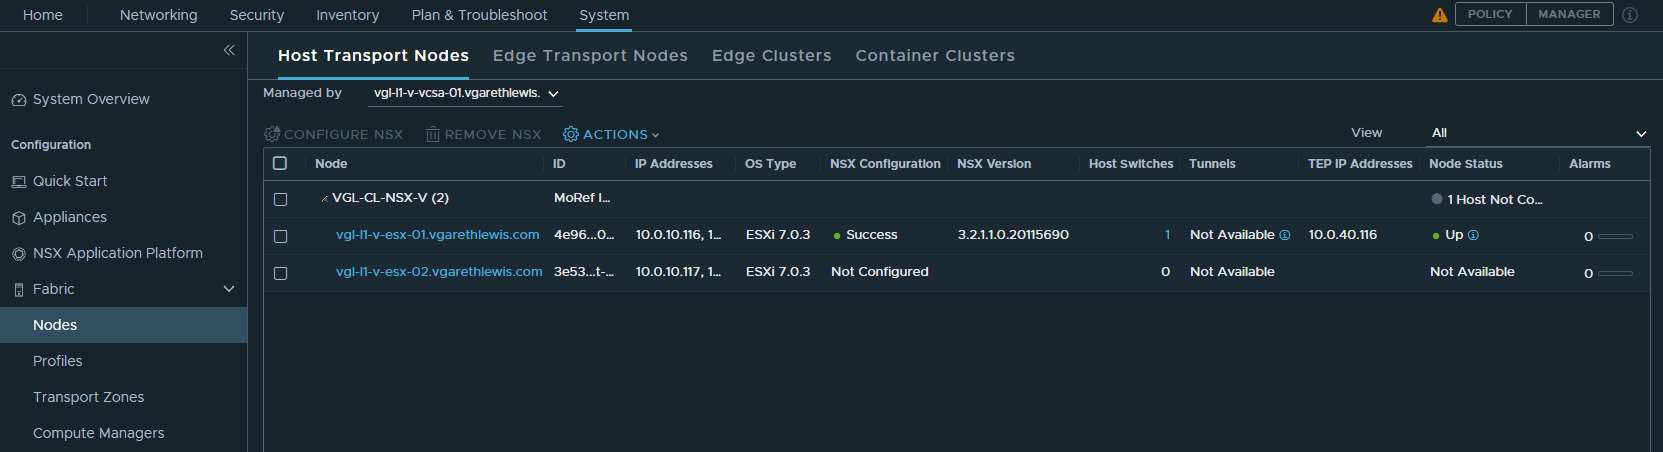
If you were to browse to NSX-V, not the communication channels drop as each host is migrated to NSX-T.

The same activities will now be processed on each of the remaining hosts.
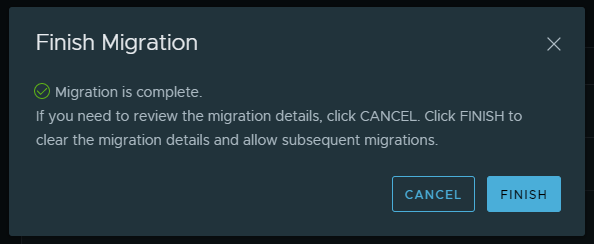
Once all hosts have successfully migrated, click Finish.
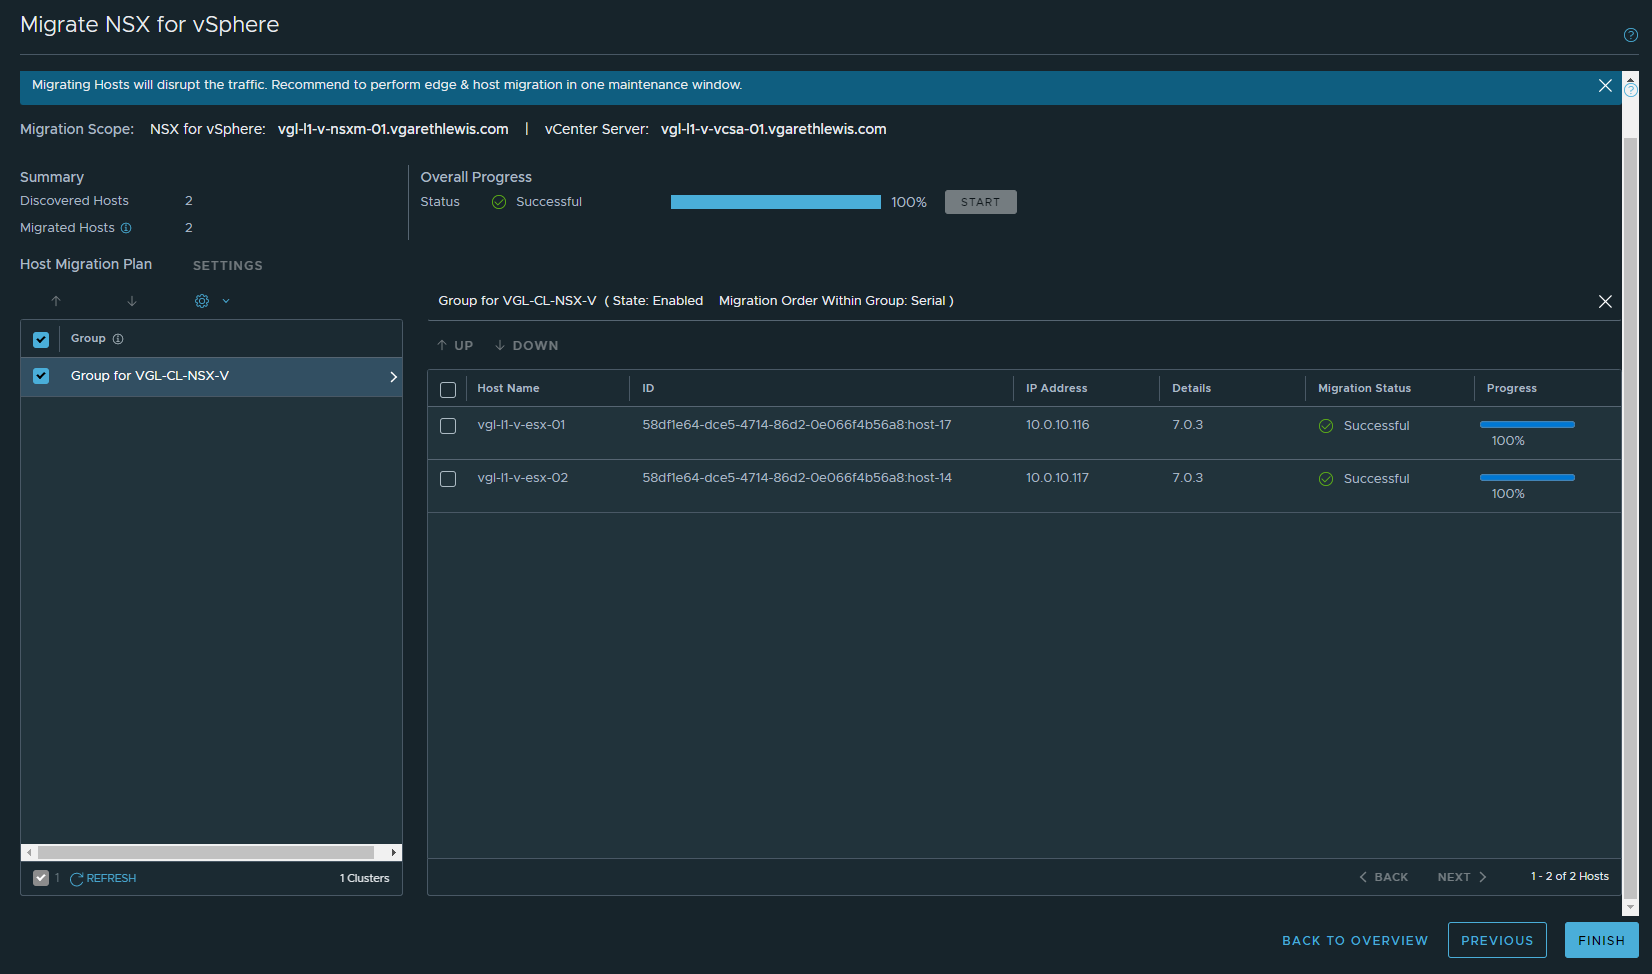
When prompted, click Finish.
Migration Progress Review
The migration has been successfully completed. The Migration Coordinator oversaw the process of placing our ESXi hosts into Maintenance Mode, removing NSX-V VIBs, and installing NSX-T. After disabling Maintenance Mode on each host, the workloads were smoothly vMotion-ed to the new NSX-T hosts. Subsequently, the workloads were migrated from NSX-V Logical Switches to NSX-T Overlay Segments.

Validation
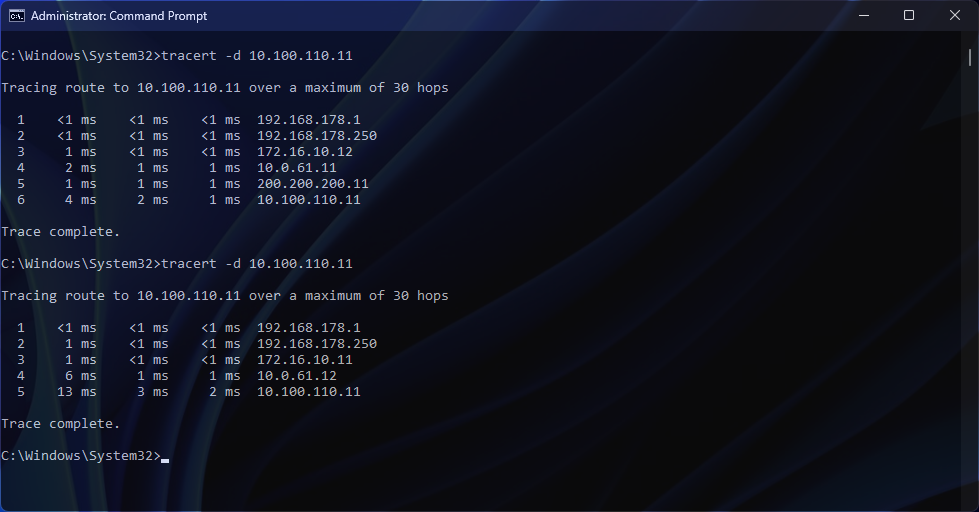
Following the successful migration of your NSX-V configuration, edges and hosts, routing and workload validation should now be actioned. BGP/OSPF peering should be confirmed as up, workload connectivity, etc., as well as ensuring your VMs are now housed on the Overlay/VLAN-backed NSX-T Segments.
Likewise, in the below screenshot, you’ll note a before/after of the routing to a workload VM (10.100.110.11) has switched from my ESG to DLR (10.0.61.11 > 200.200.200.11) to my T0 (10.0.61.12).
Post-Migration Tasks
Finally, all that is left is a few clean-up tasks, none of which will be covered in this article but are documented in detail via Post-Migration Tasks (vmware.com):
In Summary
In this article, I demonstrated the process of utilising the NSX-T Migration Coordinator to migrate an NSX-V environment to NSX-T. Specifically, I migrated end-to-end via the User-Defined Topology option. As discussed early on in the article, where you have a topology that does not match one of the fixed topologies supported for migration, the User-Defined option can be very flexible, and this is something which can also be utilised to map to VRFs.
IMPORTANT – As per my previous post, while the migration of your Edges and Hosts should take place during an approved maintenance/change window due to the expected workload outage, the Migration Coordinator and all steps prior to the migration of edges and hosts can be run ahead of time and with zero impact to your production workloads. It is, therefore, recommended to run the Migration Coordinator ahead of time to ensure all issues/recommendations/configurable input (Edge TEP IP Pool, Edge TEP VLAN, uplink IP addresses, etc.) are reviewed and prepared in readiness for the migration. When you are ready to initiate the migration itself, it is recommended to roll back fully before proceeding.
As NSX for vSphere went end of life in January 2022, the need to migrate to a supported platform is paramount. If you have any queries regarding the migration of NSX for vSphere to NSX-T Data Center (now VMware NSX from 4.0.0.1 onwards), please don’t hesitate to reach out directly.
More in the NSX V2T Series…
- Part 1 – VMware NSX-T Migration Coordinator Report Export for Fixed Topology Migration
- Part 2 – VMware NSX for vSphere to NSX-T Migration – End-to-End Fixed Topology
- Part 3 – VMware NSX for vSphere to NSX-T Migration – End-to-End User-Defined Topol
Leave a Reply