With VMware NSX for vSphere (NSX-V) having gone end of general support on January 16th 2022, there are numerous customers now busily working on migrating to VMware NSX-T Data Center (VMware NSX as of v4.0.0.1).
In future posts, I will detail the end-to-end migration process for both Fixed and User Defined Topologies utilising the NSX-T Migration Coordinator, however, before we jump in, let us look at a rather handy report which is often helpful in validating customer readiness and environmental health for those looking to migrate via the Fixed Topology option.
More in the NSX V2T Series…
- Part 1 – VMware NSX-T Migration Coordinator Report Export for Fixed Topology Migration
- Part 2 – VMware NSX for vSphere to NSX-T Migration – End-to-End Fixed Topology
- Part 3 – VMware NSX for vSphere to NSX-T Migration – End-to-End User-Defined Topol
Prerequisites
Firstly, you will need to ensure your NSX for vSphere topology meets the Fixed Topology requirements detailed via Fixed Topologies Supported for End-to-End Migration. If your NSX for vSphere topology does not meet these requirements, then you will either need to a) align your NSX for vSphere topology to a supported option or b) use the User Defined Topology. Both of these methods are detailed in future posts.
Secondly, for both the report generation and the migrations themselves, you will need a basic NSX-T environment. For this, we will deploy several NSX-T components as per the below.
- Deploy a single NSX Manager Appliance
- Add license
- Add a Compute Manager
- Change the Global MTU Setting (not required for reporting)
- Create an IP Pool for Edge Tunnel End Points (TEPs) (not required for reporting)
- Deploy NSX Edge Nodes via OVA
- Add NSX Edge Nodes to Management Plane (not required for reporting)
- Start Migration Coordinator service (start service migration-coordinator)
Generating the feedback_request.json File
Once the service has started, we’ll be able to browse to System > Lifecycle Management > Migrate which, in turn, will enable us to import the NSX for vSphere configuration. When ready, click Get Started > Fixed Topology.

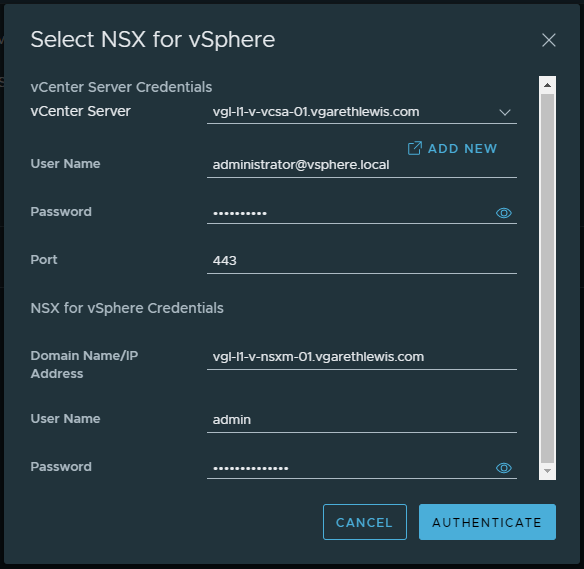
Click Select NSX.
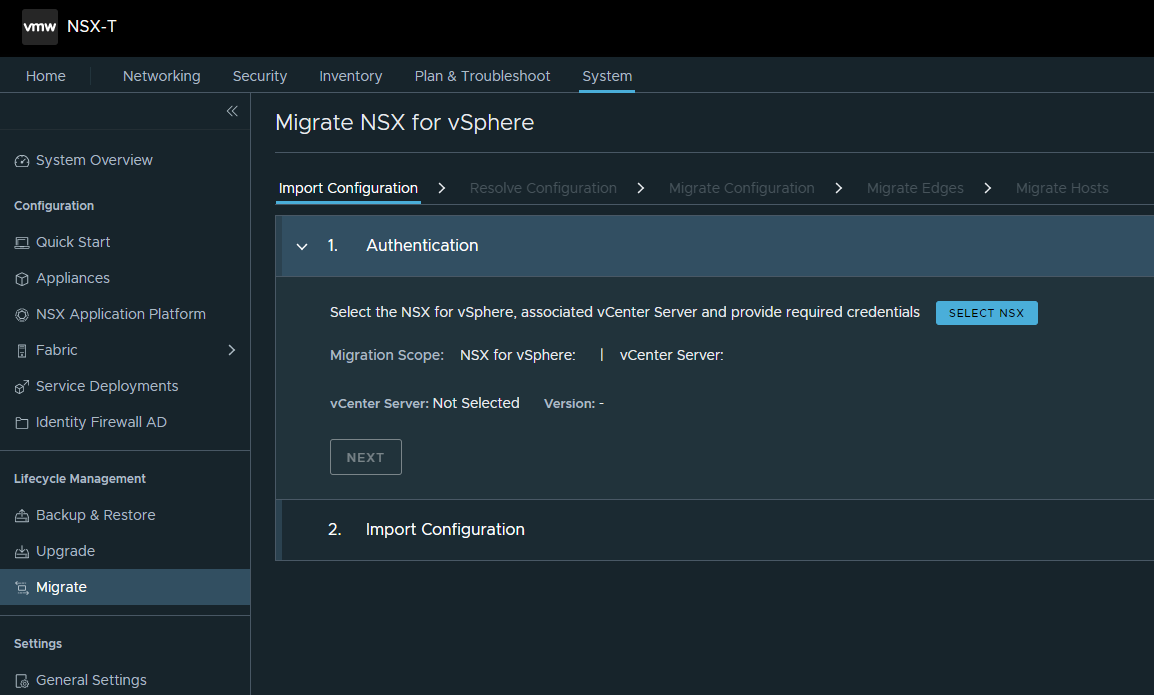
Provide vCenter Server and NSX for vSphere credentials and, when ready, click Authenticate.
When ready, click Next.

Next, we can click Start to begin the NSX for vSphere configuration import.
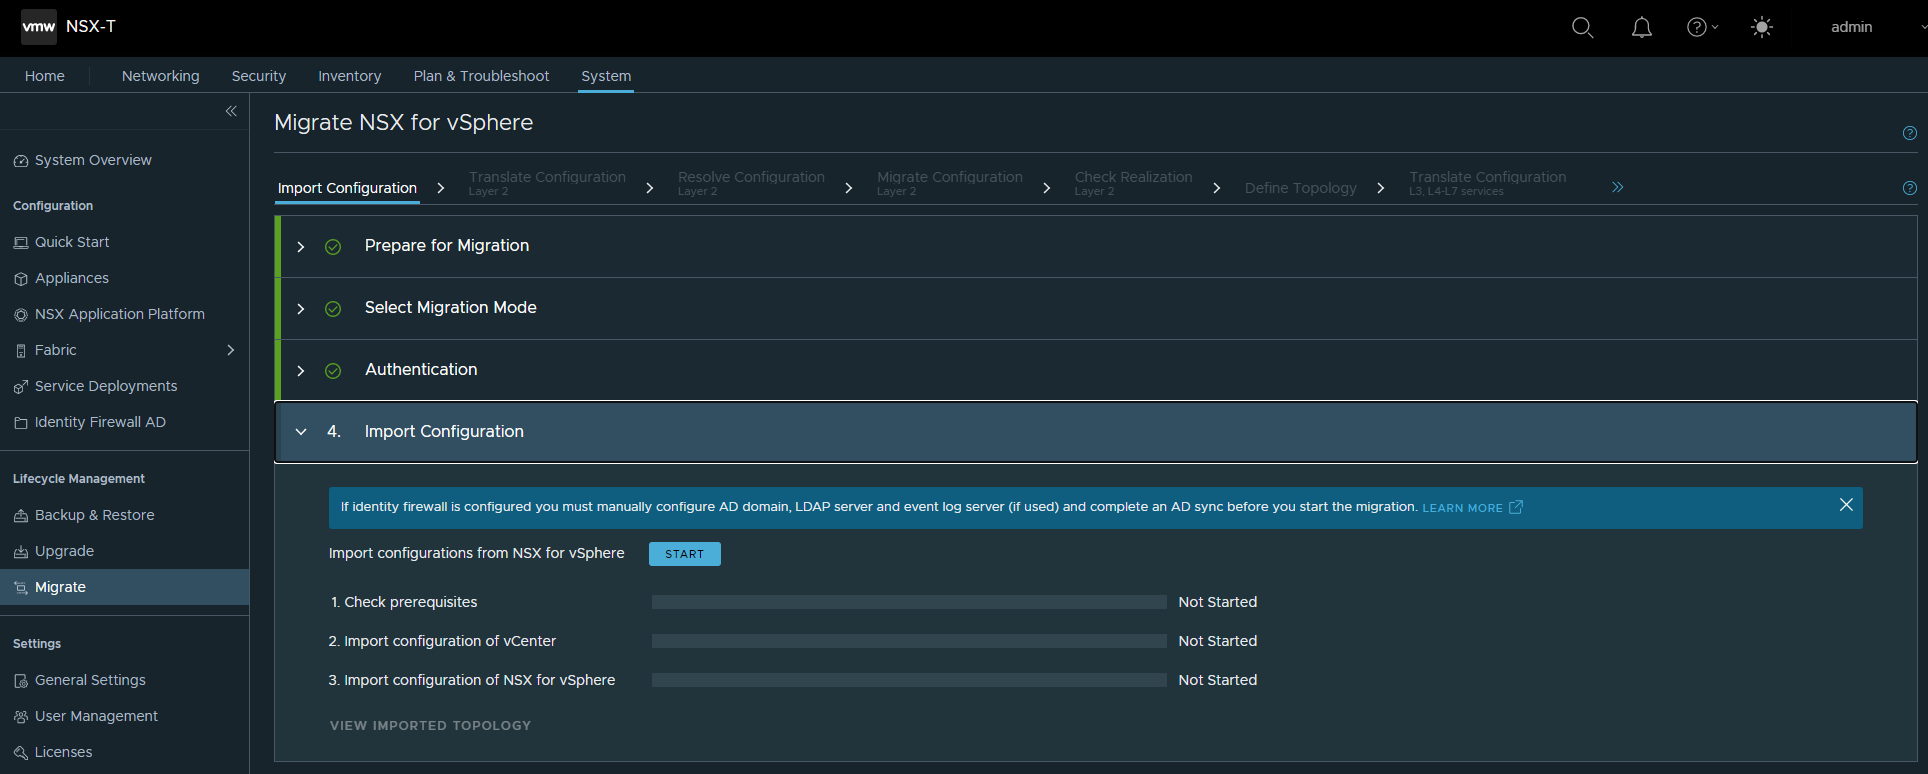
When prompted, click Continue.

Should your topology (or any components within) be identified as non-supported, such issues will be identified here for your focus and resolution.
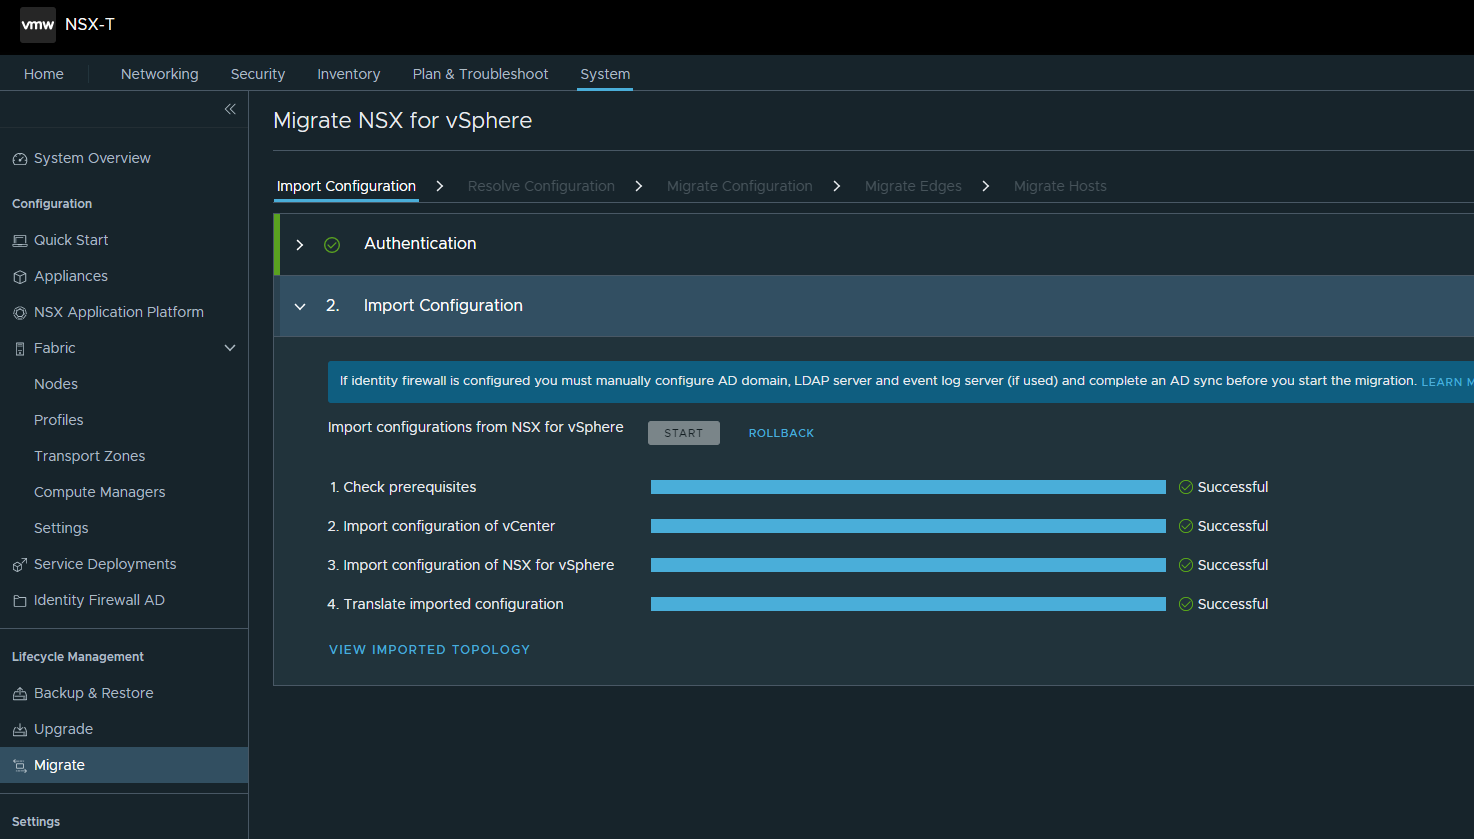
If all checks, imports and translations are successful, we can now check that the relevant JSON file has been created. Via CLI, connect to your NSX Manager and browse to /var/logs/migration-coordinator/v2t. Note the creation of a feedback_request.json file.

Use SCP to transfer the file:
scp -P 22 root@<NSX-Manager-IP-Address-or-FQDN>:/var/log/migration-coordinator/v2t/feedback_request.json <Local-Directory>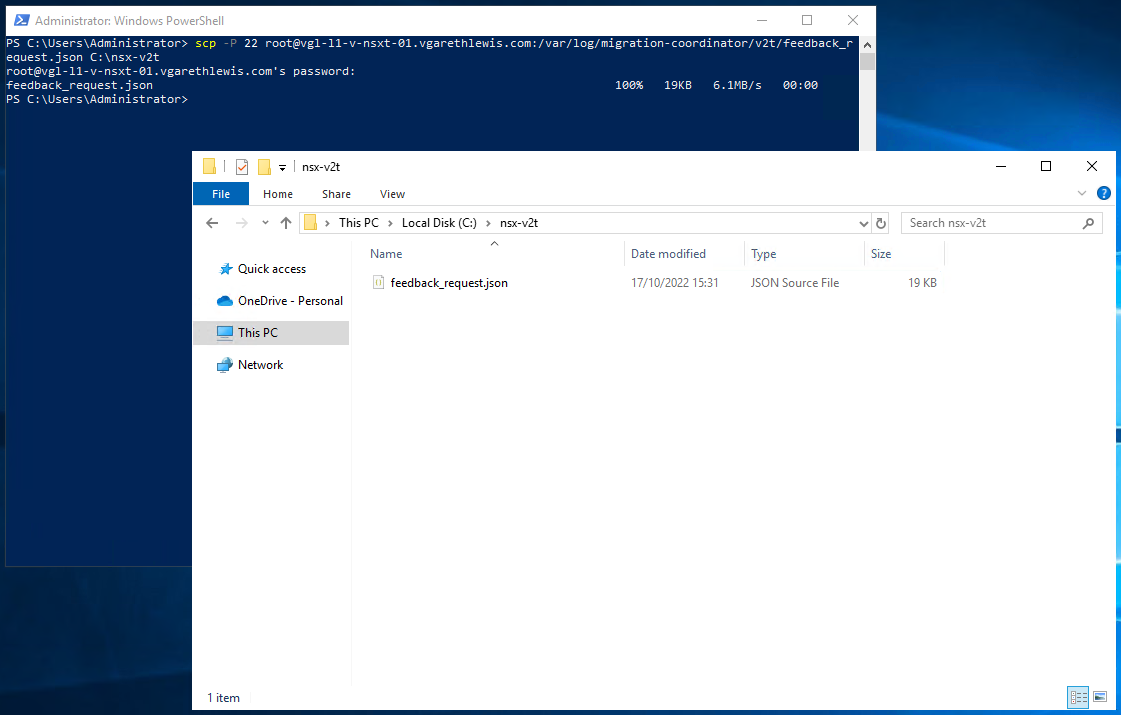
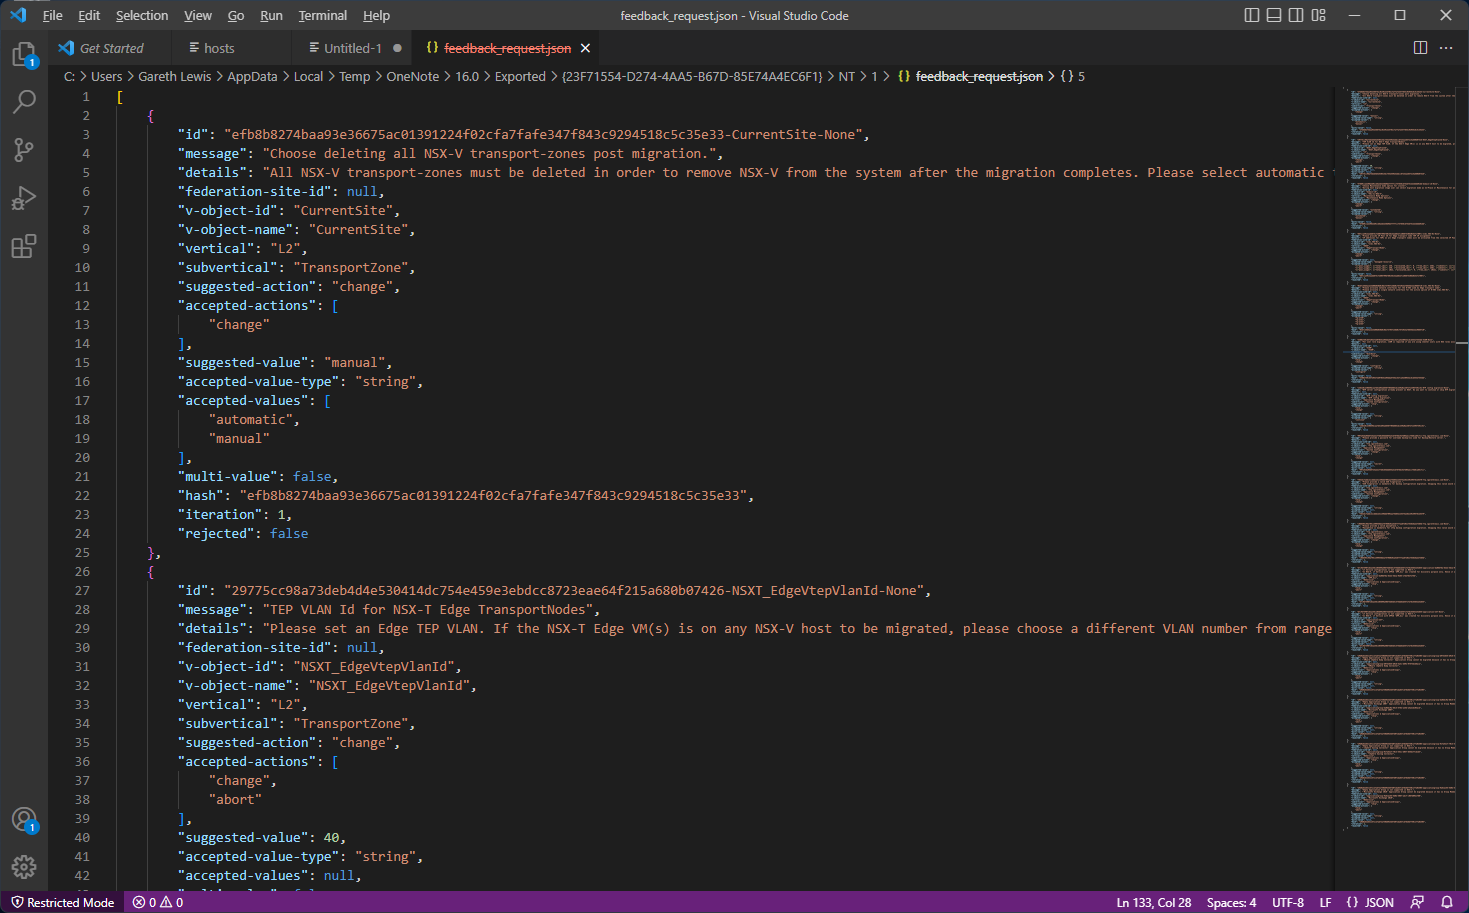
Finally, the JSON file can now be reviewed, and the output validated in readiness for any migration activities, either via the raw JSON code itself or it can be processed via a JSON to CSV converter.
In Summary
In this post we detailed the process of deploying the basic NSX-T components in order to a) import our NSX for vSphere configuration before b) creating a JSON file which can be used to validate a current environment.
As NSX for vSphere went end of life in January 2022, the need to migrate to a supported platform is paramount. If you have any queries regarding the migration of NSX for vSphere to NSX-T Data Center (now VMware NSX from 4.0.0.1 onwards), please don’t hesitate to reach out directly.
More in the NSX V2T Series…
- Part 1 – VMware NSX-T Migration Coordinator Report Export for Fixed Topology Migration
- Part 2 – VMware NSX for vSphere to NSX-T Migration – End-to-End Fixed Topology
- Part 3 – VMware NSX for vSphere to NSX-T Migration – End-to-End User-Defined Topol
Further Reading
- VMware Docs – Fixed Topologies Supported for End-to-End Migration
- VMware Docs – NSX-T Data Center Migration Guide
- VMware Docs – Overview – Migrating a Fixed Topology
- VMware Docs – Preparing the NSX-V Environment for a Fixed Topology Migration
- VMware Docs – Preparing the NSX-T Environment for a Fixed Topology Migration
Leave a Reply