In a previous post, we discussed the value of pre-migration validation checks, identifying whether a customer environment is aligned to the supported fixed topologies and the process of creating and viewing the JSON output following the successful import of NSX for vSphere configuration.
In this post, we continue on the same theme and will use the NSX-T (VMware NSX from v4.0.0.1) Migration Coordinator to migrate an NSX for vSphere environment, end-to-end, to NSX-T via the Fixed Topology option.
More in the NSX V2T Series…
- Part 1 – VMware NSX-T Migration Coordinator Report Export for Fixed Topology Migration
- Part 2 – VMware NSX for vSphere to NSX-T Migration – End-to-End Fixed Topology
- Part 3 – VMware NSX for vSphere to NSX-T Migration – End-to-End User-Defined Topology
If your NSX for vSphere environment meets one of the fixed topologies supported for migration, you can do an end-to-end migration that is simpler than migrating a user-defined topology. This migration will use your existing hardware, meaning no additional servers are required for the migration. The end-to-end migration will migrate the following:
- Logical network topology
- Logical networking and security configurations
- Edges
- Hosts
- Workload VMs
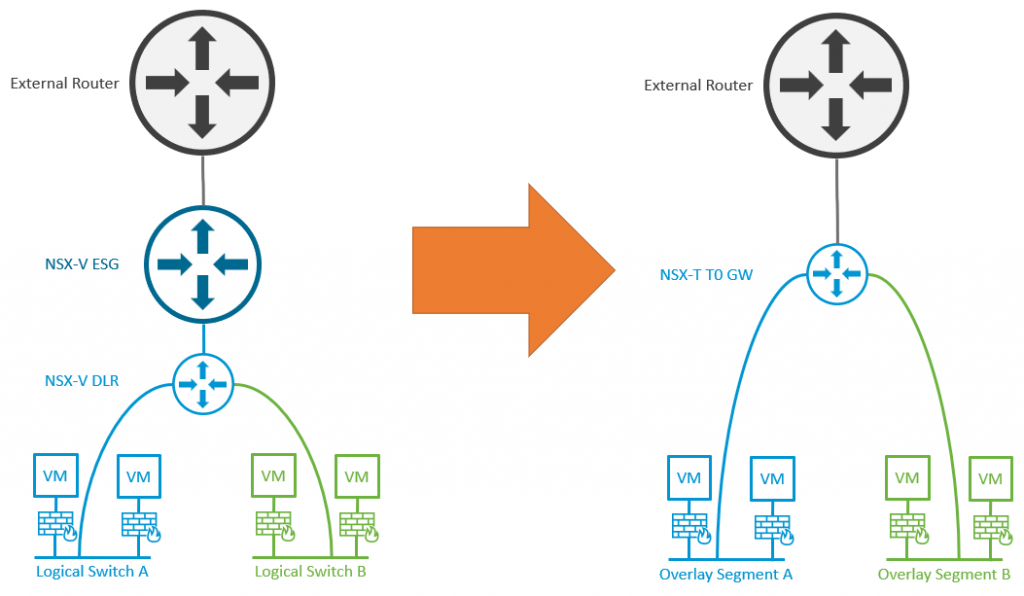
Despite the migration being simpler, you will note that the Fixed Topology constrains us slightly. From the below, notice how your two-tier logical routing architecture via ESG and DLR will be migrated to a single Tier-0 Gateway in Active/Standby, with no Tier-1 Gateways. Should you require more flexibility in regard to the logical routing architecture, then I would suggest migrating via the User Defined Topology. The User Defined migration is covered in Part 3 – VMware NSX for vSphere to NSX-T Migration – End-to-End User-Defined Topology.
IMPORTANT – As per my previous post, while the migration of your Edges and Hosts should take place during an approved maintenance/change window due to the expected workload outage, the Migration Coordinator and all steps prior to the migration of edges and hosts can be run ahead of time and with zero impact to your production workloads. It is, therefore, recommended to run the Migration Coordinator ahead of time to ensure all issues/recommendations/configurable input (Edge TEP IP Pool, Edge TEP VLAN, uplink IP addresses, etc.) are reviewed and prepared in readiness for the migration. When you are ready to initiate the migration itself, it is recommended to roll back fully before proceeding.
Prerequisites
- Ensure NSX-V is in a stable state
- Ensure NSX-V backups are healthy and a recent backup has been taken
- Ensure NSX-V VXLAN port is set to 4789 (default)
- Ensure the export version of the NSX-V DFW is set to 1000 (default)
- VDS 7.0 or higher required
Deploy NSX Manager Appliance
In my previous post, I detailed the deployment of the NSX Manager appliance, Edges Transport Nodes, etc., in readiness to support the creation of the feedback_response.json file. This time around, however, we need to ensure all prerequisites are in place and configured to support migration activities.
- Deploy a single NSX Manager Appliance
- Add license
- Add a Compute Manager
- Change the Global MTU Setting (where required)
- Create an IP Pool for Edge Tunnel End Points (TEPs)
- Deploy NSX Edge Nodes via OVA
- Add NSX Edge Nodes to Management Plane
- join management-plane <NSX-Manager-IP-Address> thumbprint (NSX-Manager-Thumbprint> username admin
- Start Migration Coordinator service
- start service migration-coordinator
Import Configuration
For those who have read my previous post, you will recognise this initial section to import the NSX for vSphere configuration. At this stage, it is important that no changes to either NSX-V or NSX-T are made. If any changes are made that need to be captured/utilised during the Migration Coordinator, you will need to roll back.
Note – Rollbacks can be initiated at any time prior to the migration of edges. Should you make any mistake, or if you forget to create any of the prerequisites (Edge TEP IP Pool, for example), simply roll back and start again.
Browse to System > Lifecycle Management > Migrate, and select NSX for vSphere > Fixed Topology. When ready, click Next.
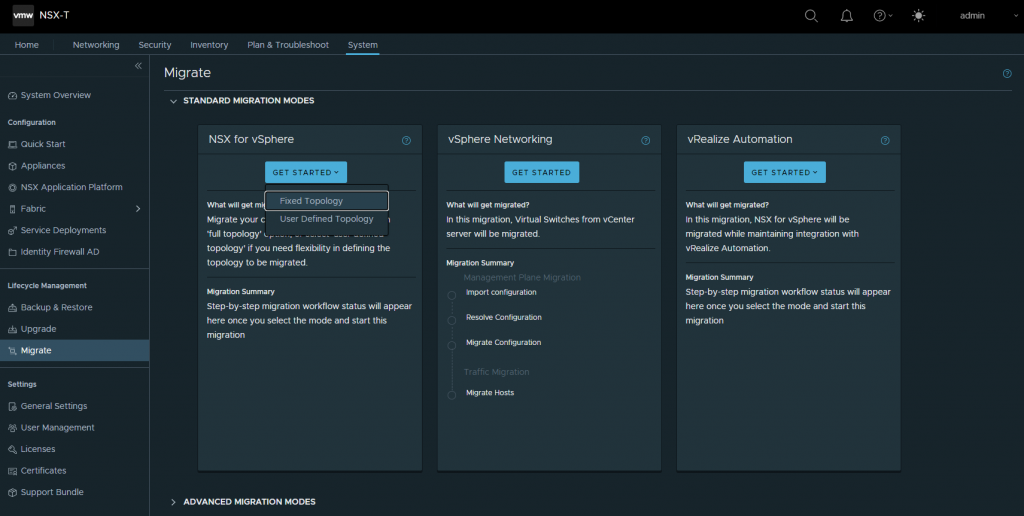
Click Select NSX.
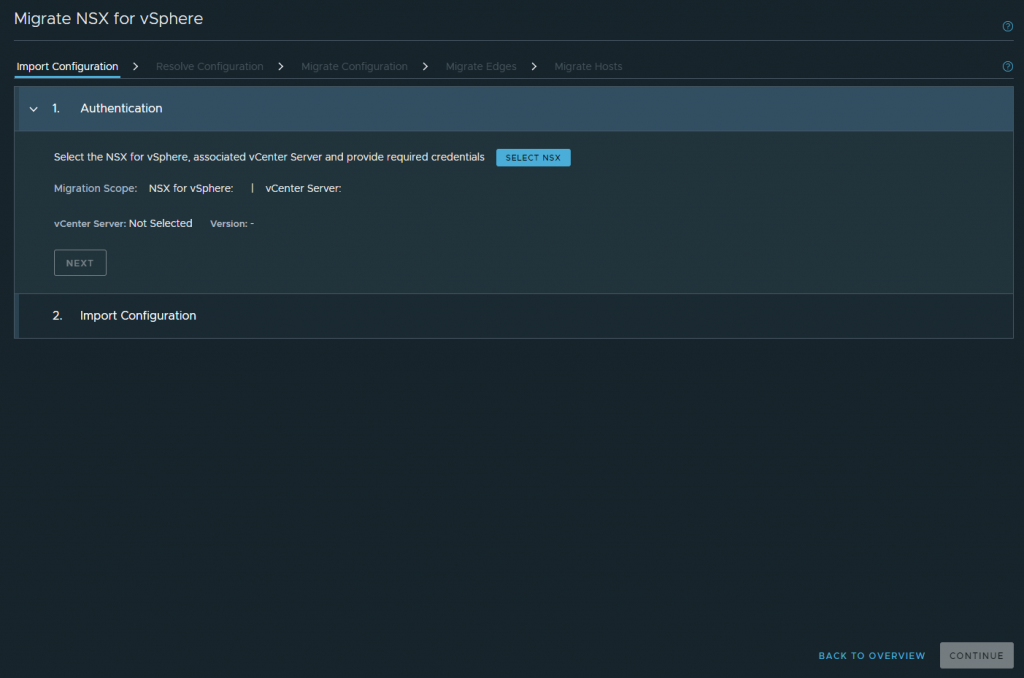
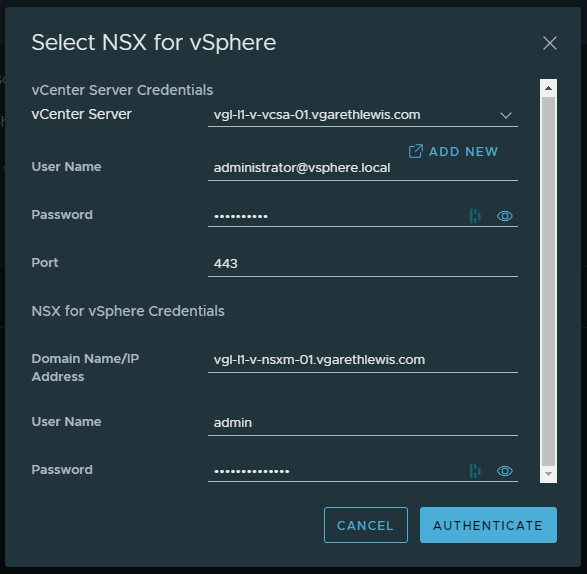
Enter both your vCenter Server and NSX for vSphere credentials, and click Authenticate.
When ready, click Next.
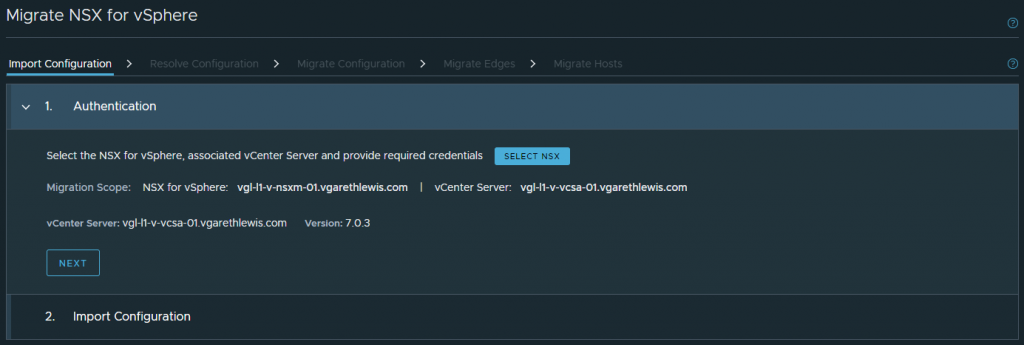
Click Start to check prerequisites, import vCenter and NSX for vSphere configuration, and to begin translation of the imported configuration.
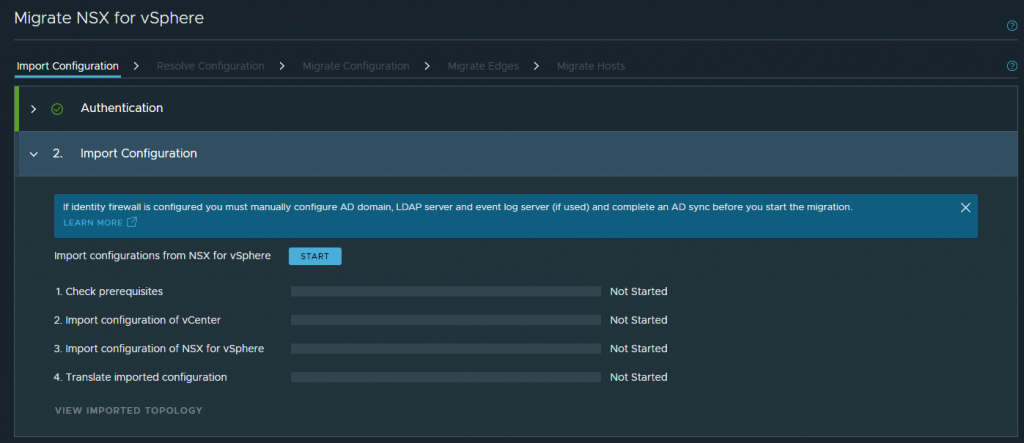
When prompted, click Continue.

If successful, click Continue. If unsuccessful, review all errors and work to resolve.
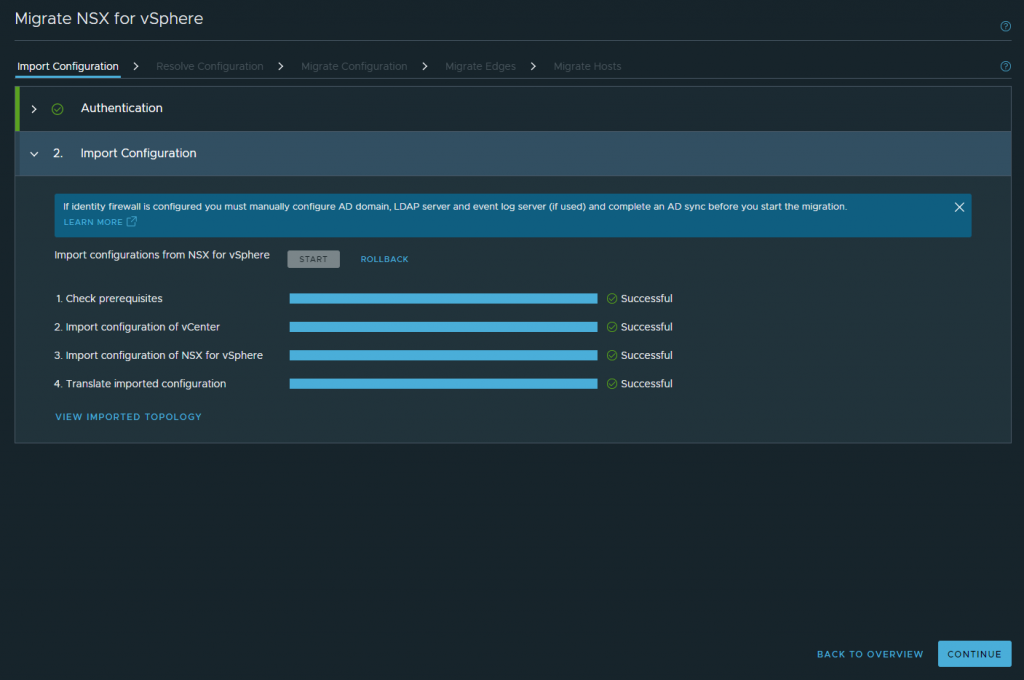
Resolve Configuration
This is the most important stage of the migration process. Ensure all issues identified by the Migration Coordinator are resolved, configured or skipped appropriately and that all are read and understood. As mentioned previously, these issues/queries can be viewed ahead of time, as no changes/migrations will take place until the Migrate Edges stage.
In this stage, you will be prompted to provide, among others, the name of your Edge TEP IP Pool, Edge TEP VLAN, a Tier-0 Gateway uplink interface IP address, etc., all of which should (where possible) be allocated ahead of time. Again, use this information before your change/maintenance window to ensure all of the required information has been set up in advance of the migration.
Work through the items one by one, clicking Submit if you need to save your progress or take a break.
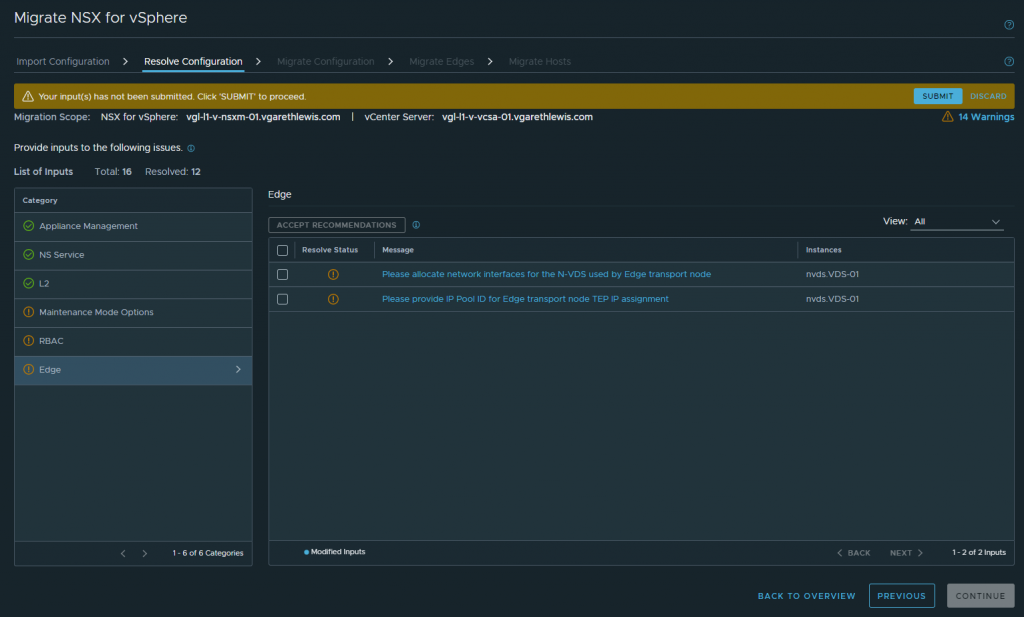
When all items are resolved/green, click Continue.
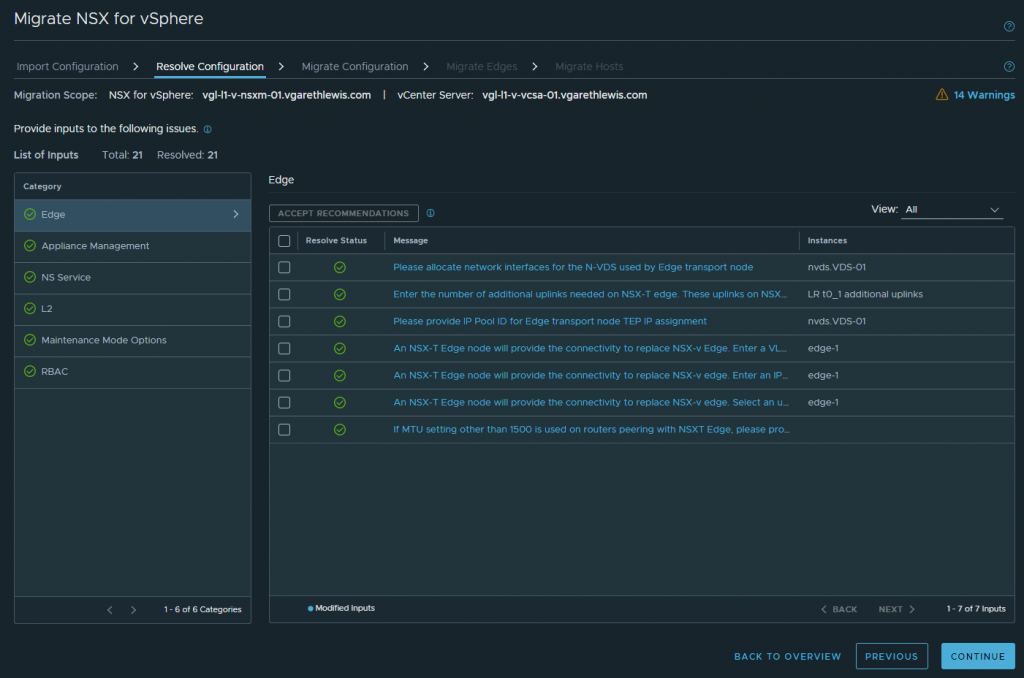
Migrate Configuration
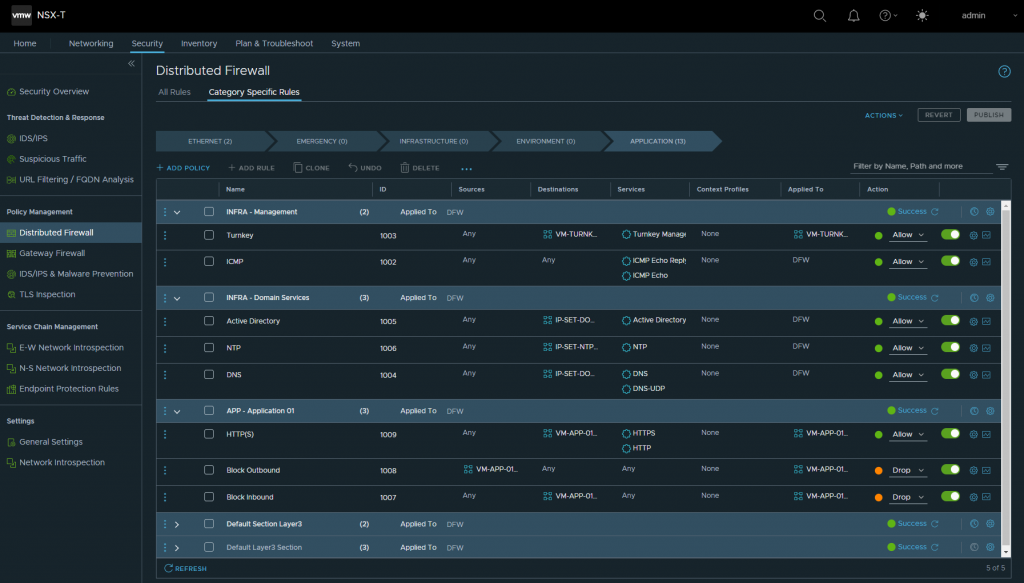
This stage will see NSX for vSphere components migrated into NSX-T Data Center. Note, all workloads will continue to operate from NSX for vSphere; this stage will merely create the new constructs in readiness for the later migrations. Once this stage is complete, you will note the creation of new Tier-0 Gateways, firewall rules that have been imported, etc.
When ready, click Start to begin the configuration migration.
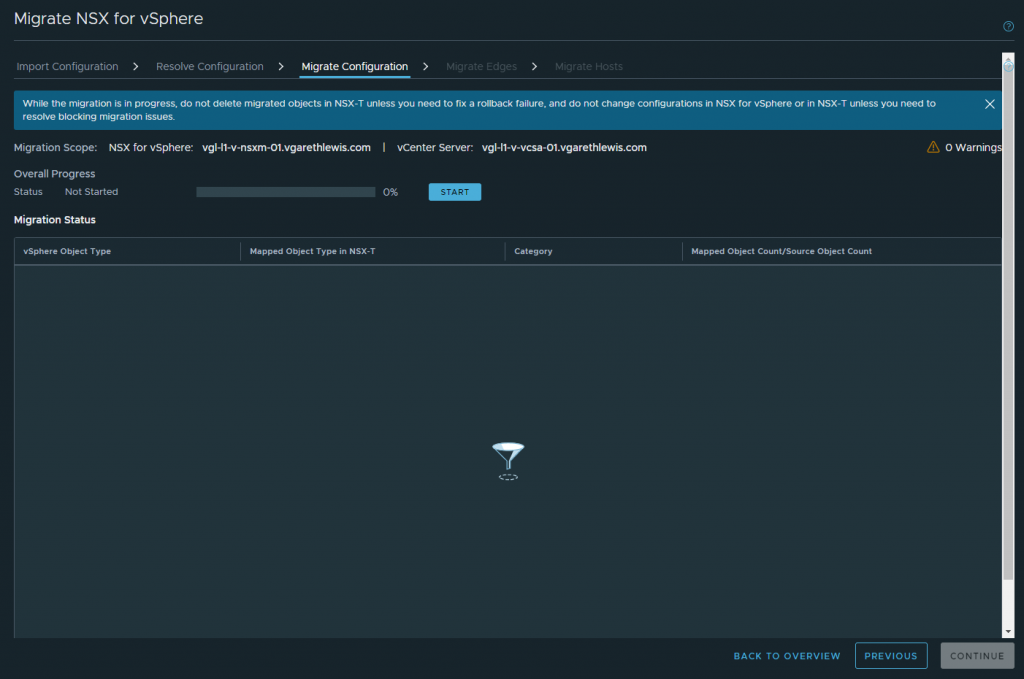
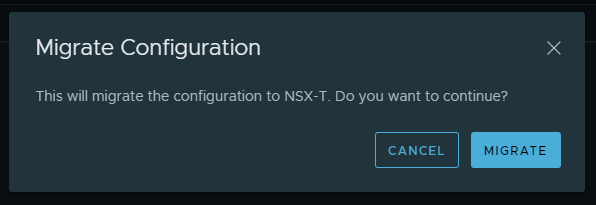
When prompted, click Migrate.
Once complete, note the object mappings. When ready, click Continue.
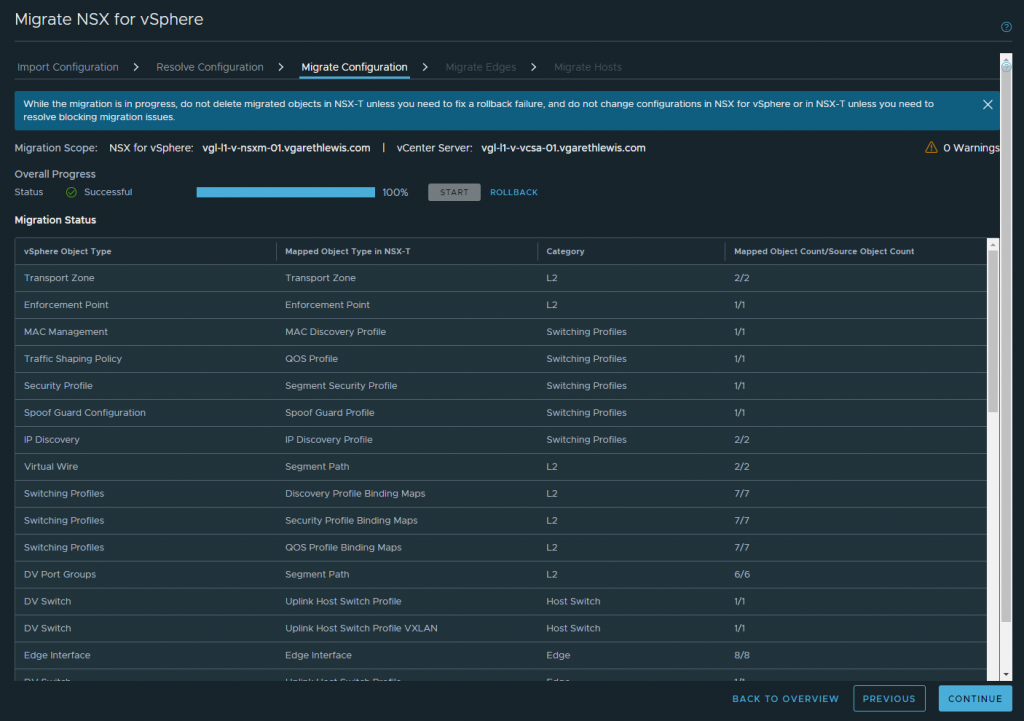
As mentioned earlier, once the configuration migration is complete, you will note the migration of, for example, distributed firewall rules…
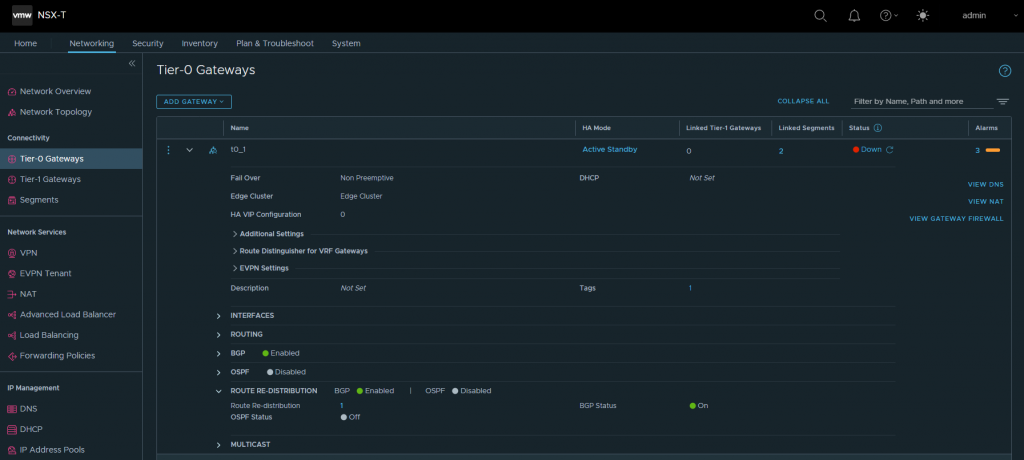
…as well as the creation of Tier-0 Gateways with dynamic routing pre-configured, etc., and you’ll also note the creation and allocation of our new edge cluster (Edge Cluster). Note, the below T0 has a ‘down’ status and, in my example, connectivity to the uplink interfaces is down. Connectivity will be brought up during the migration of the edges.
Migrate Edges
Until now, all we have done is provide information and configurations which have been used to create numerous NSX-T constructs. No migrations of edges, hosts, or workloads have taken place. Until now.
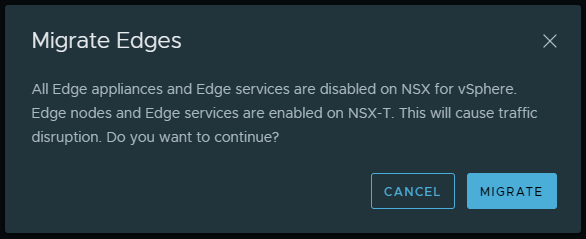
Once the edge migration is initiated, our workloads will experience a drop in connectivity. As such, uplink interfaces on our NSX for vSphere ESGs will drop and, in turn, the uplink interfaces on our new Tier-0 Gateways will come up. Note, due to this, it is recommended to perform edge and host migration in one maintenance window.
When ready, click Start.
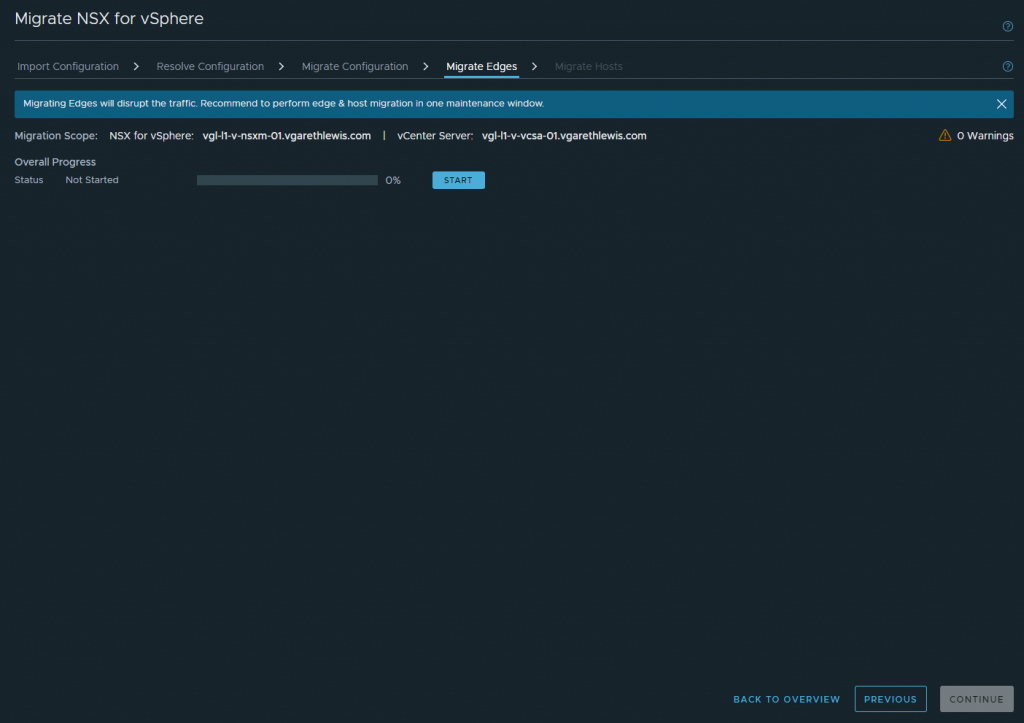
When prompted, click Migrate.
Monitor the migration process and, when successful, click Continue.
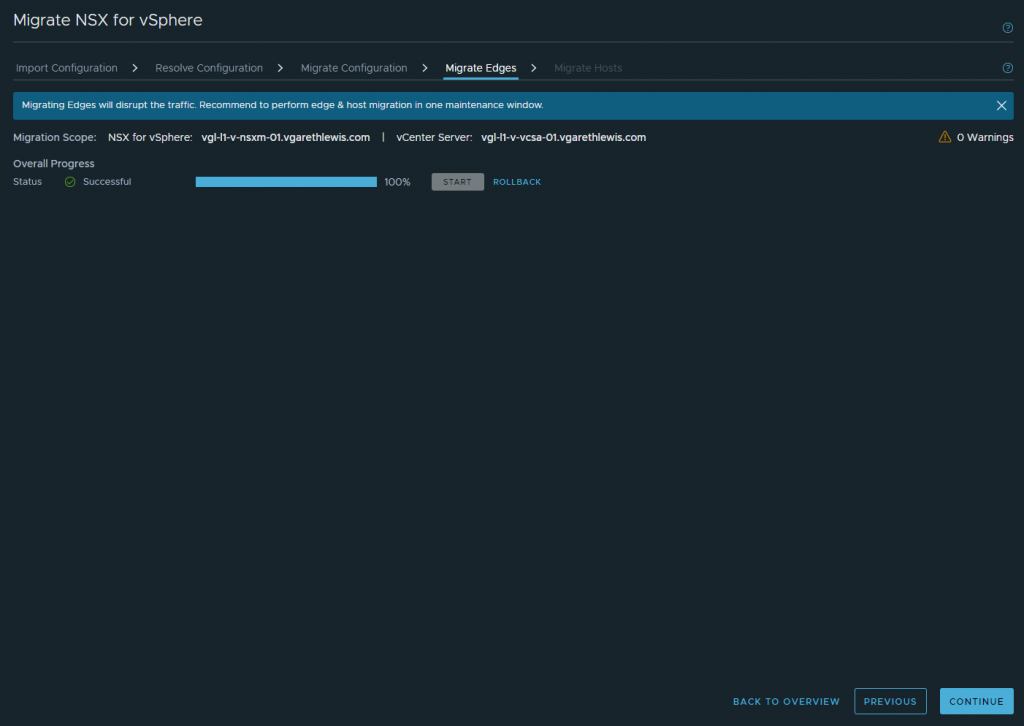
Following successful edge migration, in the below screenshot, you will note both my new Edge Transport Nodes have tunnels established…

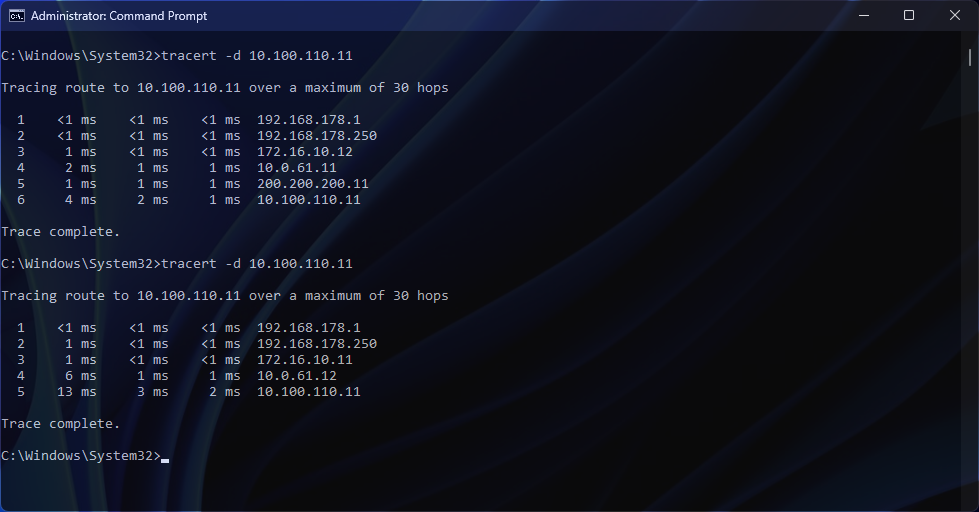
From a BGP perspective, you’ll also note my NSX-V ESG’s uplink interface (10.0.61.11) drops and my NSX-T T0’s uplink interface (10.0.61.12) establishes successfully (below screenshot shows before/after).

Migrate Hosts
Our final task of the migration process is to migrate the hosts themselves. This will see all NSX-V VIBs removed and replaced with NSX-T, NSX switch configuration, etc.
When ready, click Start.
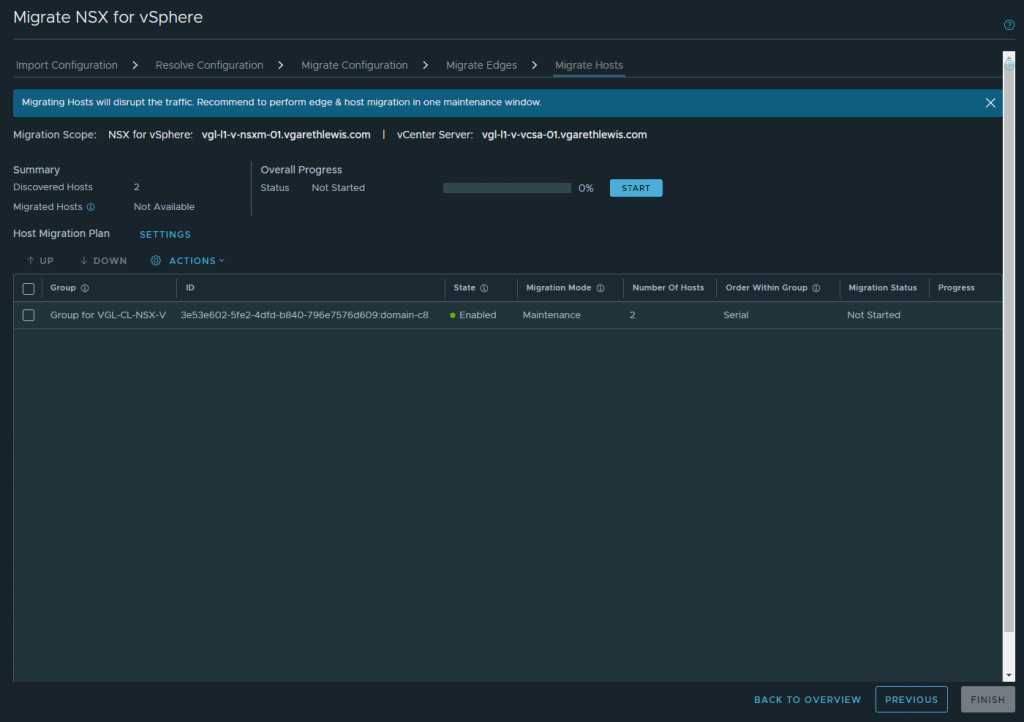
When prompted, click Migrate.
Click the relevant Host Group (vSphere Cluster) to monitor progress. In the below screenshots, you will note pre-transport node staging for specific hosts…
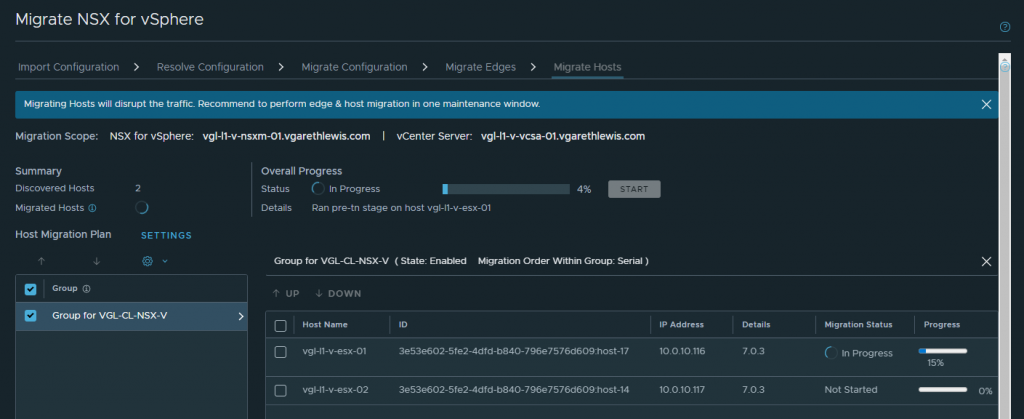
…as well as the removal of NSX-V vibs.
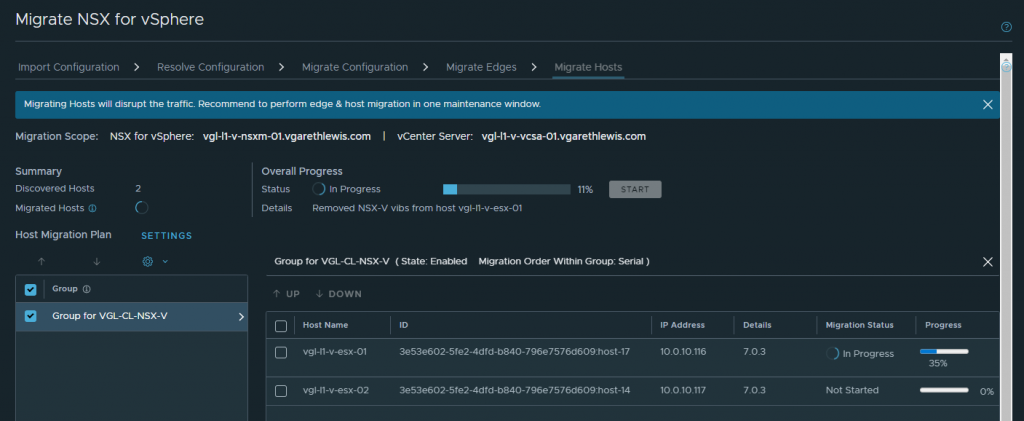
During the process, you will note host preparation via System > Configuration > Fabric > Nodes > Host Transport Nodes.
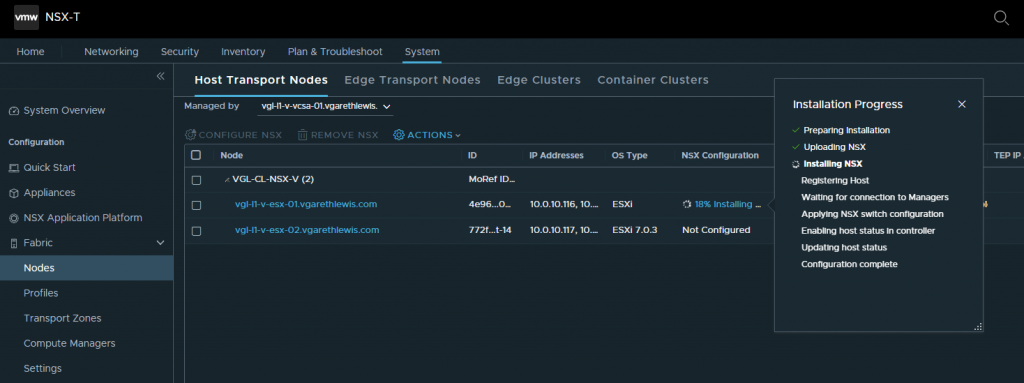
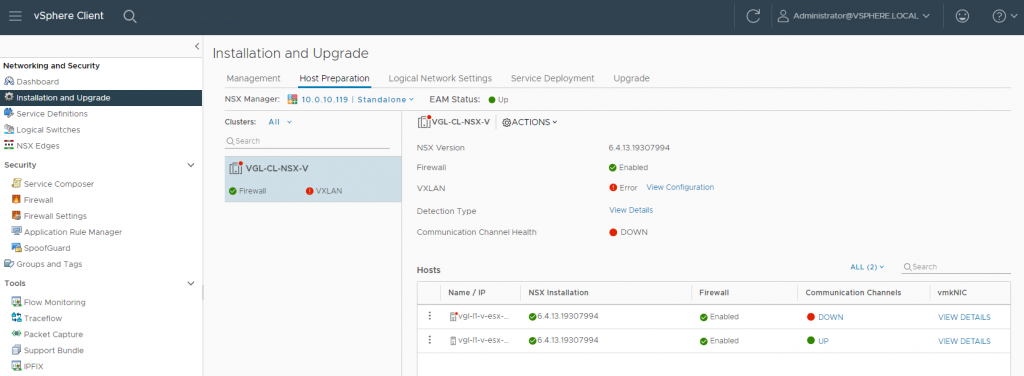
As each host is completed, note the application of a Host TEP IP address (the IP Pool for which utilises your NSX-V configured IP range), and the Node Status should change to Up.

If you were to browse to NSX-V, not the communication channels drop as each host is migrated to NSX-T.
The same activities will now be processed on each of the remaining hosts.
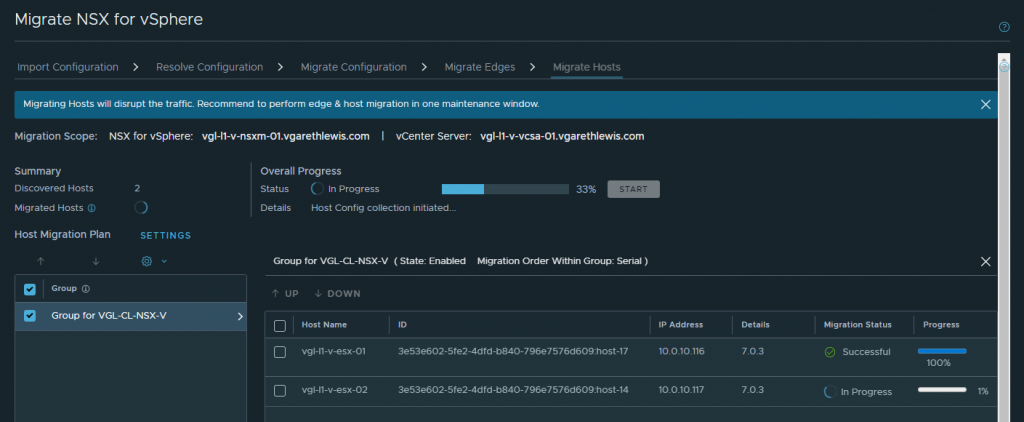
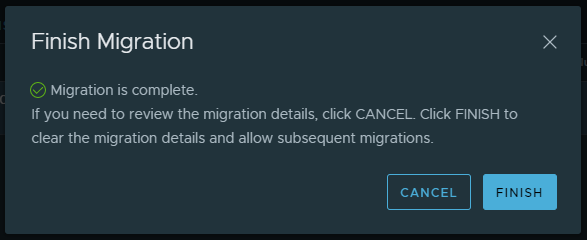
Once all hosts have successfully migrated, click Finish.
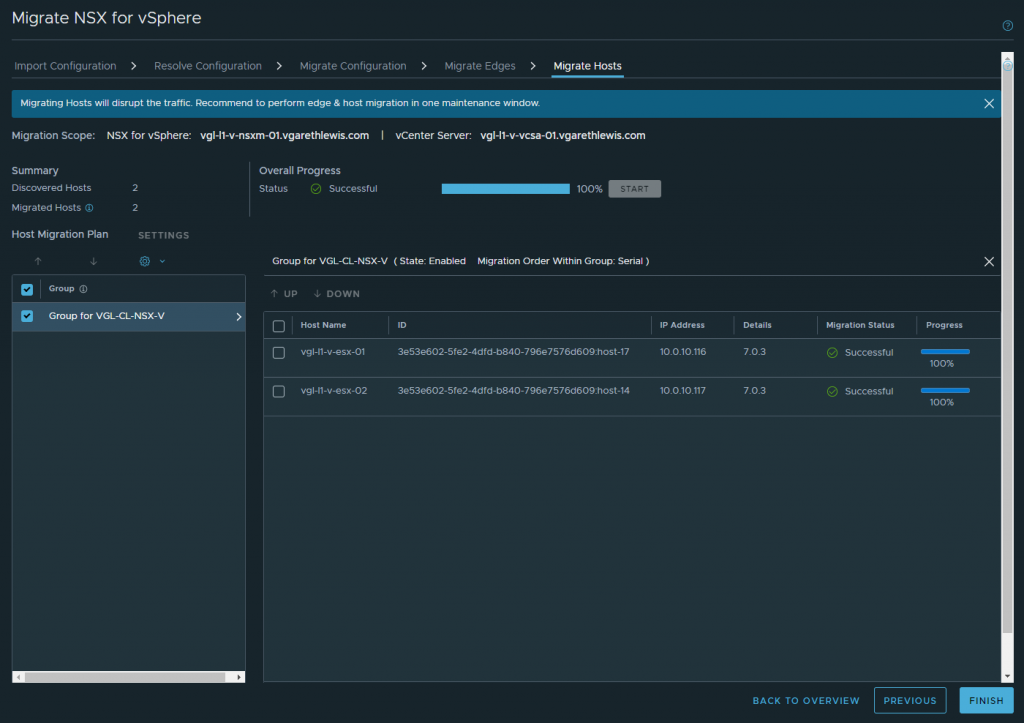
When prompted, click Finish.
Validation
Following the successful migration of your NSX-V configuration, edges and hosts, routing and workload validation should now be actioned. BGP/OSPF peering should be confirmed as up, workload connectivity, etc., as well as ensuring your VMs are now housed on the Overlay/VLAN-backed NSX-T Segments.
Likewise, in the below screenshot, you’ll note a before/after of the routing to a workload VM (10.100.110.11) has switched from my ESG to DLR (10.0.61.11 > 200.200.200.11) to my T0 (10.0.61.12).
Post-Migration Tasks
Finally, all that is left is a few clean-up tasks, none of which will be covered in this article but are documented in detail via Post-Migration Tasks (vmware.com):
In Summary
In this article, I demonstrated the process of utilising the NSX-T Migration Coordinator to migrate an NSX-V environment to NSX-T. Specifically, I migrated end-to-end via the Fixed Topology option. As discussed early on in the article, where you have a topology that does not match one of the fixed topologies supported for migration, you will need to use the User Defined Topology, an option which will be covered in my next article.
IMPORTANT – As per my previous post, while the migration of your Edges and Hosts should take place during an approved maintenance/change window due to the expected workload outage, the Migration Coordinator and all steps prior to the migration of edges and hosts can be run ahead of time and with zero impact to your production workloads. It is, therefore, recommended to run the Migration Coordinator ahead of time to ensure all issues/recommendations/configurable input (Edge TEP IP Pool, Edge TEP VLAN, uplink IP addresses, etc.) are reviewed and prepared in readiness for the migration. When you are ready to initiate the migration itself, it is recommended to roll back fully before proceeding.
As NSX for vSphere went end of life in January 2022, the need to migrate to a supported platform is paramount. If you have any queries regarding the migration of NSX for vSphere to NSX-T Data Center (now VMware NSX from 4.0.0.1 onwards), please don’t hesitate to reach out directly.
More in the NSX V2T Series…
- Part 1 – VMware NSX-T Migration Coordinator Report Export for Fixed Topology Migration
- Part 2 – VMware NSX for vSphere to NSX-T Migration – End-to-End Fixed Topology
- Part 3 – VMware NSX for vSphere to NSX-T Migration – End-to-End User-Defined Topology
Further Reading
- VMware Docs – Fixed Topologies Supported for End-to-End Migration
- VMware Docs – NSX-T Data Center Migration Guide
- VMware Docs – Overview – Migrating a Fixed Topology
- VMware Docs – Preparing the NSX-V Environment for a Fixed Topology Migration
- VMware Docs – Preparing the NSX-T Environment for a Fixed Topology Migration


Leave a Reply