In my previous post (Veeam Backup & Replication – Part 1 – Building Replication Capabilities), we discussed offsite replication jobs using Veeam Backup & Replication v10. As per the Customer’s use case, we created a replication job to ensure a business-critical VM is replicated to a secondary site (Site B) in readiness for any unforeseen failures, planned maintenance, or downtime at the primary site (Site A).
This article discusses the failover and failback options available to us utilising Veeam Backup & Replication and, more importantly, when and where they should be used. We will then demo the failover process of our protected business-critical VM from Site A to Site B, and close by failing back live operations from Site B to Site A.
In This Article…
- Design Decisions
- Topology
- Failover Types & Failover States
- Failover Scenario
- Replica Failover
- Replica Failback
- In Summary
- Further Reading
Design Decisions
- Utilise Veeam Backup & Replication to protect critical VMs by creating a single replication job to replicate a single business-critical VM from Site A to Site B.
- Utilise replica seeding using existing backup copy job data in Site B. After the initial seed, Veeam B&R will synchronise the VM replica with the source VM.
- Utilise network remapping for DR sites with different virtual networks. When a failover is initiated, the VM replica will be connected to the appropriate network(s) in the DR site, removing the need to reconfigure network settings for the VM replica manually.
- Utilise replica re-IP for DR sites with different IP addressing scheme (Windows only). Veeam B&R automates VM IP addresses reconfiguration where the IP addressing scheme in the production site differs from the DR site scheme. This is done by mounting the VM disk(s) of the replica to the backup server and changing the IP address configuration via the Microsoft Windows registry. If the failover is undone for any reason, or if you failback to the original location, replica IP address if changed back to the pre-failover state.
| Site A | Site B | |
| Subnet | 10.0.10.0/24 | 10.1.11.0/24 |
| Virtual Network | VL10-Management | VL11-Management |
Topology
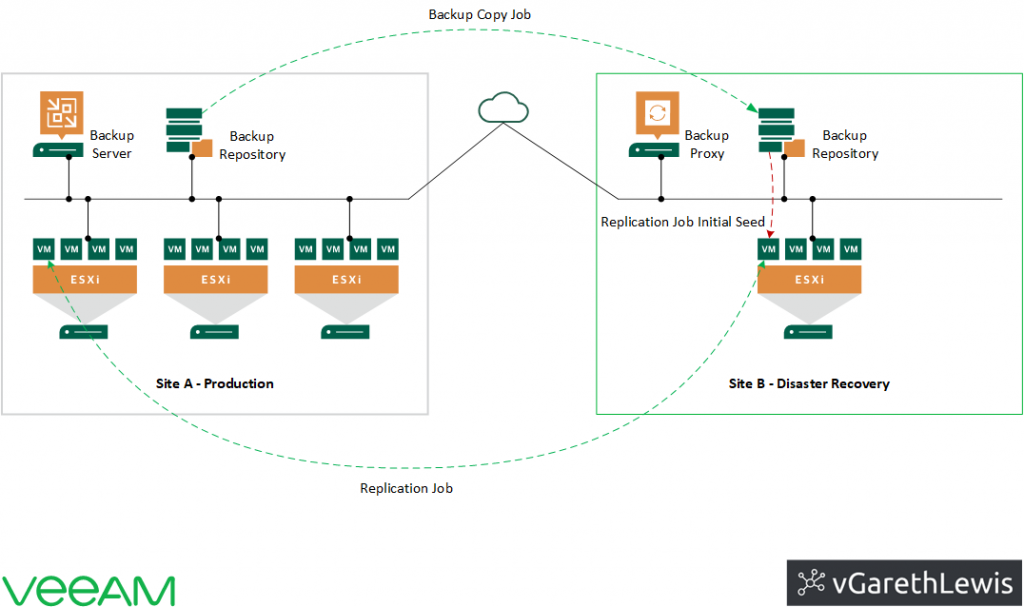
The topology is visualised via the below design diagram.
In the previous article, we discussed how the backup copy job (which copies VM backup restore points from the Veeam backup repository in Site A to Site B) was used for the replication job’s initial seed, helping to reduce the amount of VM data transferred over the network. After the initial seed, Veeam B&R synchronises the VM replica with the source VM as per the replication job’s schedule.
Replica Failover
Replica failover is the process of switching from the original VM on the source host to its VM replica on the target host. Should there be a problem with the production VM (or the production site), services can be restored by failing over to the VM’s replica in a couple of minutes. Note, the original VM will not be powered off, unlike a Planned Failover (see below), which powers off the original VM.
When would we initiate a Replica failover? When there is a problem with the production VM or production site.
Planned Failover
A planned failover allows for smooth, manual switching from a primary VM to its replica with minimal interruption. All data is transferred from the production VM to the replica VM and, as a result, no data is lost.
During a planned failover, Veeam B&R always retrieves VM data from the production infrastructure, even if the replication job uses the backup as a data source. This approach helps Veeam B&R synchronise the VM replica to the latest state of the production VM.
When would we initiate a Planned Failover? If we know that our primary VMs are due to go offline, maintenance or software upgrades at the primary site, or perhaps advanced notice of an approaching disaster that will take the primary servers/site offline.
Failover States
A failover can be defined as when a VM replica takes over the role of the original; however, the failover itself is merely an intermediate step which should be further finalised. These options are:
- Undo Failover – Switches back to the original VM. All changes made to the replica VM are discarded.
- Permanent Failover – Permanently moves live operations to the replica.
- Failback to Production – Switches back to the original VM and synchronises all replica changes to the original VM. All future replication activities are placed on hold.
- Failback to New Location – Switches to a new location by transferring all replica files or committing changes to an original VM restored from backup.
You can also utilise the following options when failing back to production:
- Undo Failback – Switches the replica back to the failover state. In the event that the production VM is not working as expected, failback can be reverted and operations moved back to the replica VM.
- Commit Failback – Finalises the recovery of the original VM and all replication activities for the original VM.
Now that we’ve discussed how a failover operates, the available options when either committing to the replica VM or failing back from a failover, let’s demo the process.
Failover Scenario
Several VMs hosted on a new vSphere Cluster at Site A have started to experience intermittent issues. One of the VMs is our business-critical SQL Server VM. The IT Operations team has decided to enact a VM failover to stabilise the service while investigations continue.
As we saw in the previous article (Veeam Backup & Replication – Part 1 – Building Replication Capabilities), the VM in question (VGL-SQL-01) is being replicated to Site B successfully and, in the below procedure, we will failover live operations to the replica VM.
As discussed earlier (and in the previous article), the virtual networks and IP subnets used in Site A and Site B are different. As such, we utilise the rather cool Network Remap and Re-IP functionality afforded to us via Veeam B&R. The configuration of these items was covered in detail in the previous article, and I will discuss further below.
Failover Procedure
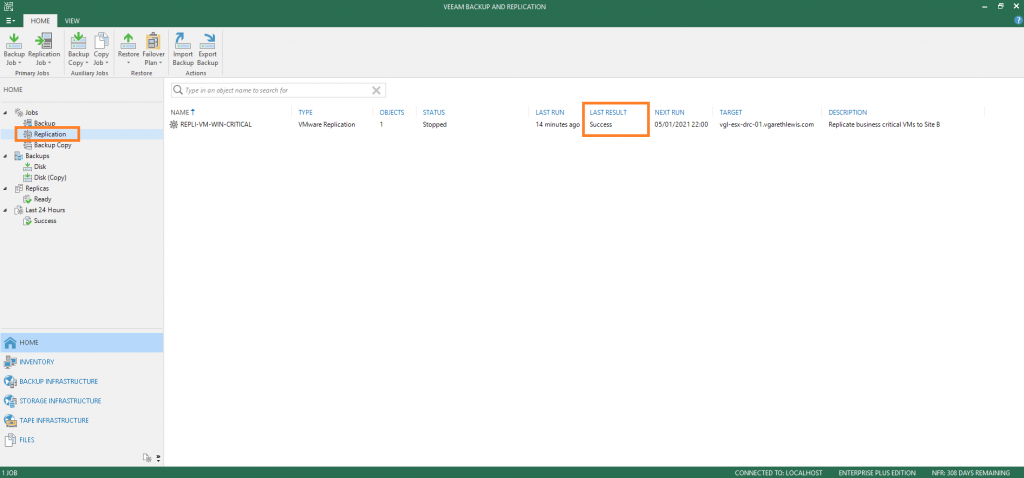
1. log in to the Veeam Backup & Replication console and browse to Home > Jobs > Replication. Ensure the last result reports success.
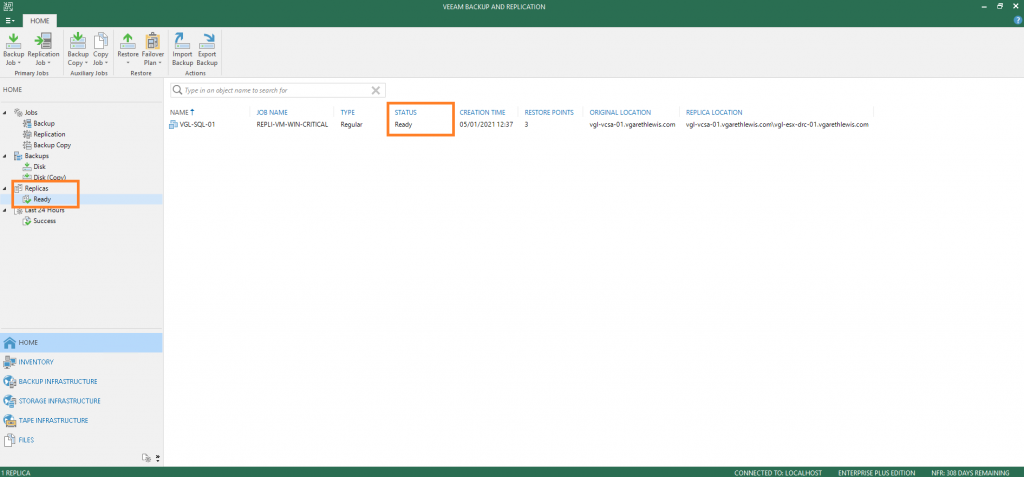
2. Browse to Home > Replicas > Ready and note the business-critical VM, configured in the previous article. Note the replica’s Status reports Ready.
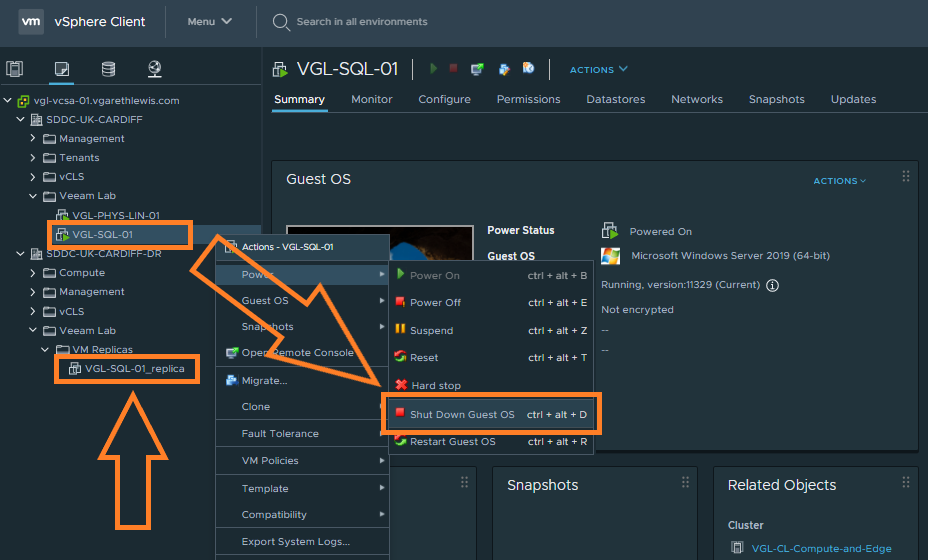
3. As mentioned earlier, the original VM will not be powered off during a failover (unlike a Planned Failover, which does power-off the original VM). As this is a lab environment, let’s shut down the original VM cleanly. Finally, from the below screenshot, note the replica VM in Site B created as per the replication job.
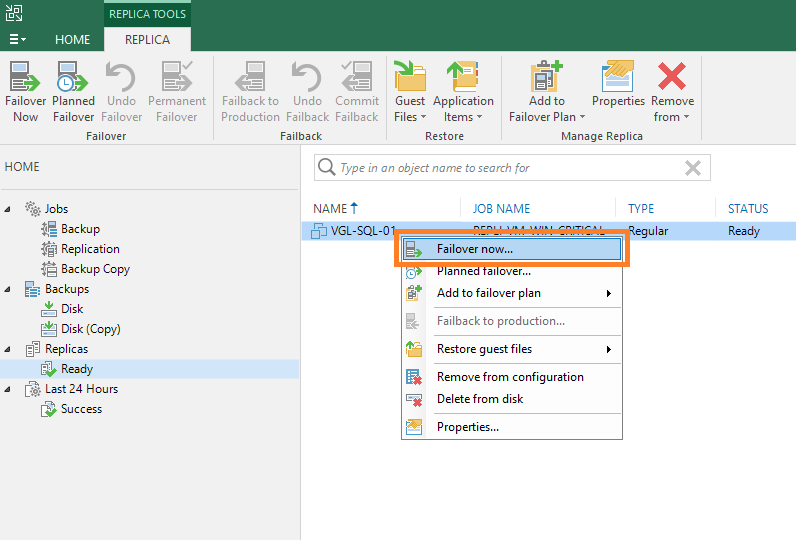
4. Once the VM is powered-off, jump back over to the Veeam Backup & Replication Console, right-click the replica, and select Failover now….
5. The VMware Failover dialogue box will launch. From the Virtual Machines tab, select the relevant restore point (I have opted to use the default, most recent), and click Next >.
6. Review the Summary tab and, when ready, click Finish.
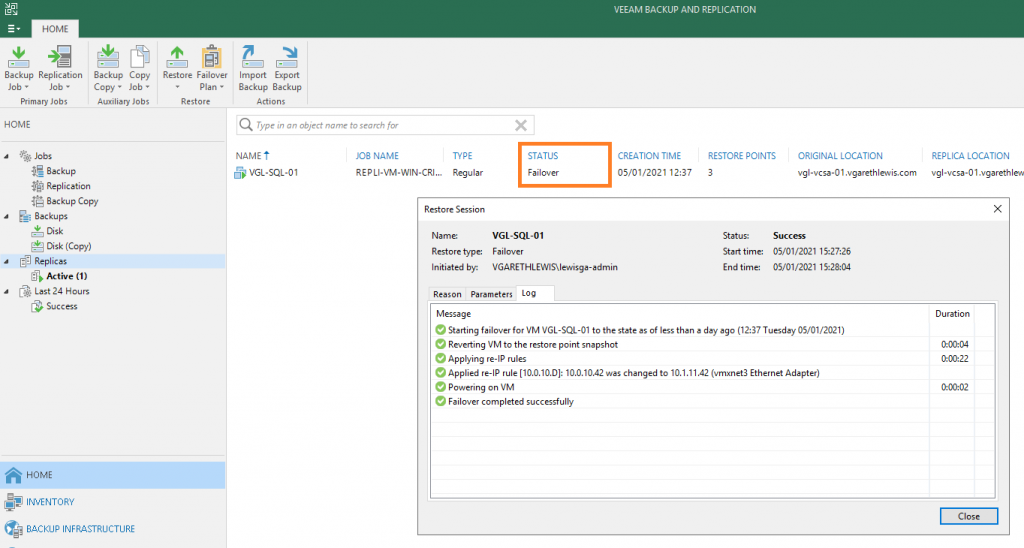
7. From the Restore Session dialogue box, note the Log tab which details the restore process and the application of re-IP rules. In this example, the restore process completed in less than one minute.
Note the replica status has now changed to Failover.
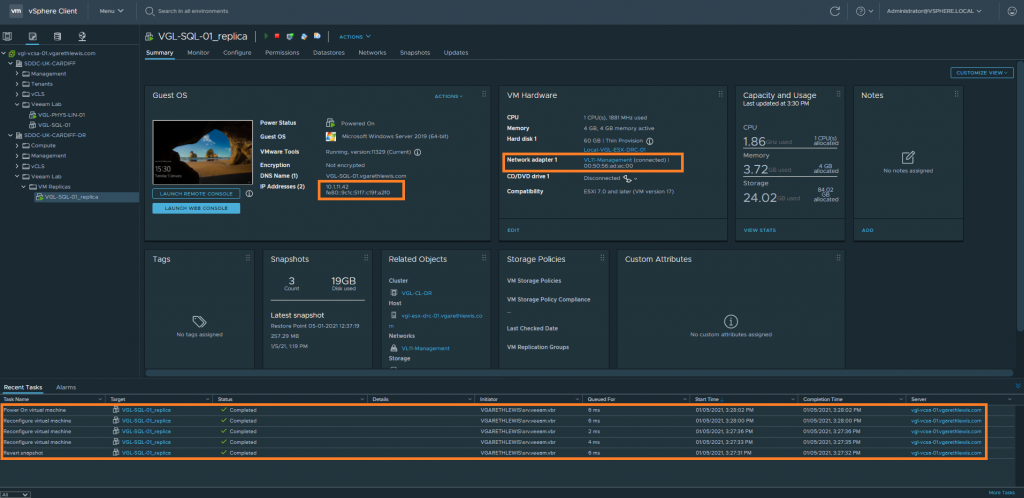
8. Jump over to the vSphere UI and note the tasks initiated by Veeam B&R. From the below screenshot you’ll note our business-critical VM has been powered on, and its IP address and virtual network changed.
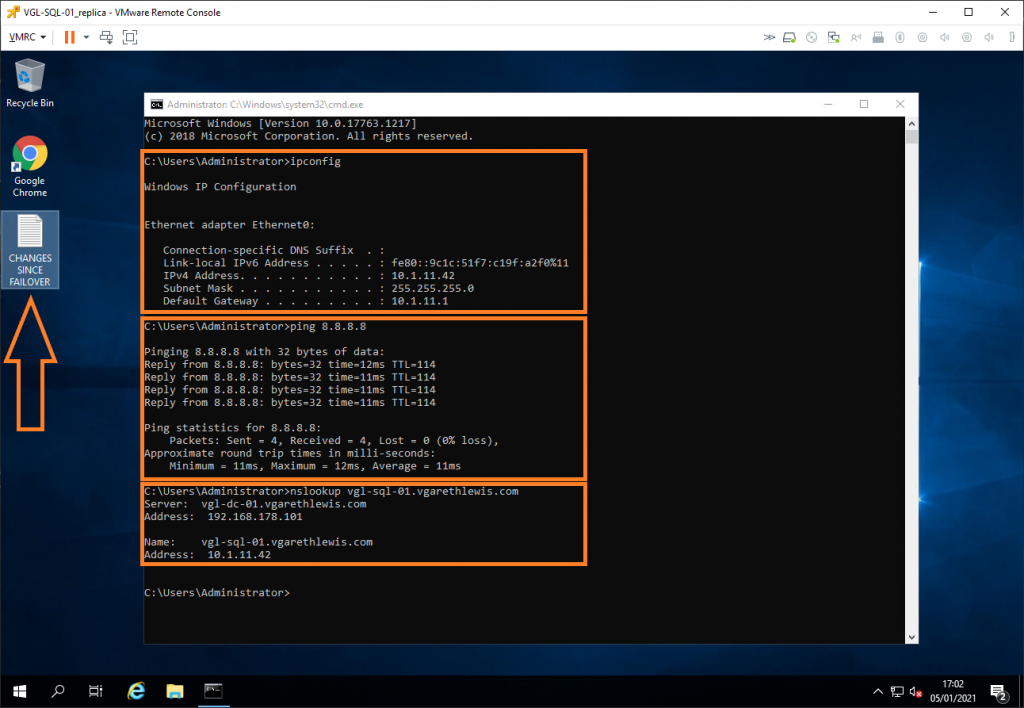
9. Finally, after logging in to the VM itself, note the new IP address, routing is up, and DNS has been updated.
Note – I have created a CHANGES SINCE FAILOVER.txt file on the Desktop. This will be discussed later when detailing the failback options.
This concludes the failover process, with services now running successfully from Site B. At this point, we have several options available with which to finalise the failover. Let’s discuss these.
Failover Finalisation Options
Were Site A’s issues to persist, we might opt to permanently move live operations to the replica in Site B using the Permanent Failover option. However, in our scenario, the Operations Team have now fixed the issues at Site A and, as a result, are ready to failback services to the original VM.
Since the VM failover from Site A to Site B, the replica VM has continued to provide SQL services. Simply hitting Undo Failover is not an option, as any/all changes written to the replica VM would be discarded when failing back to the original VM. As such, we must choose Failback to Production, allowing us to synchronise all changes written to the replica VM since failover. This will incur application downtime, so the failback operation would normally be planned outside of business hours.
Failback to Production Procedure
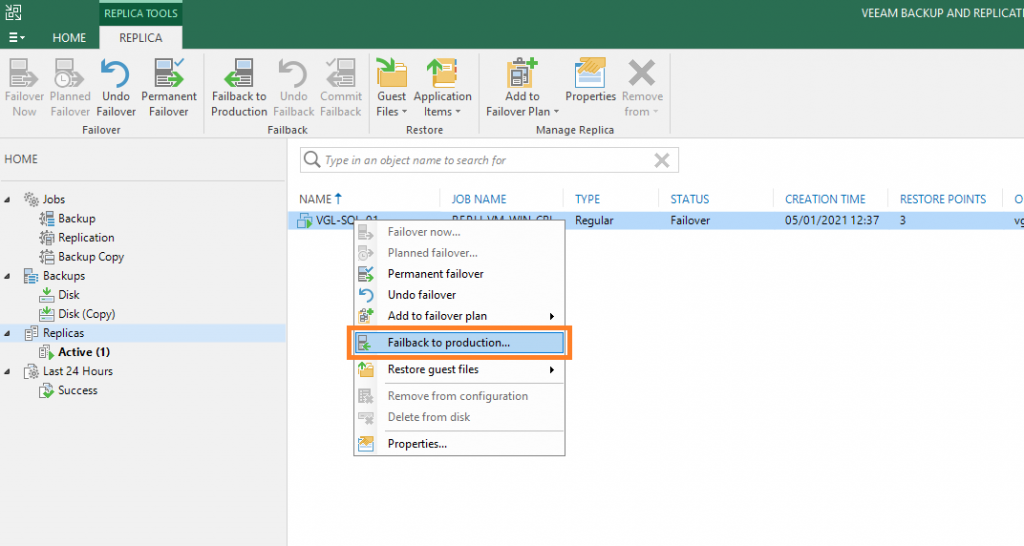
1. From the Veeam Backup & Replication Console, right-click the replica and select Failback to production….
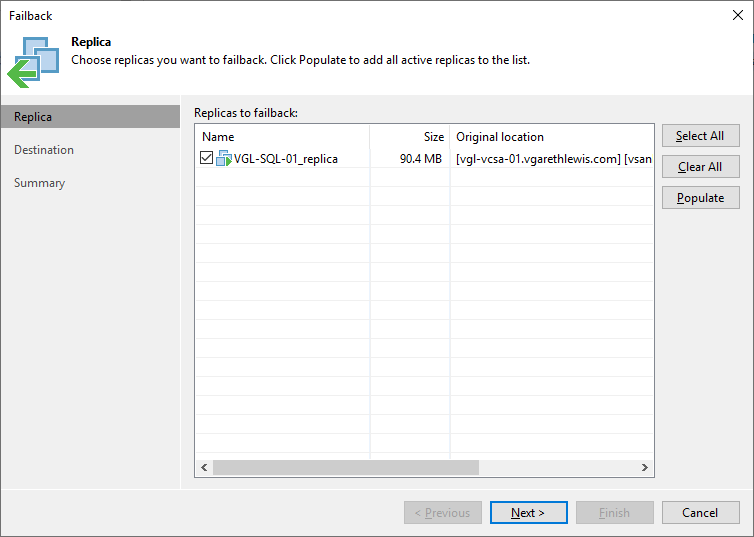
2. Select the appropriate replica to failback and, when ready, click Next >.
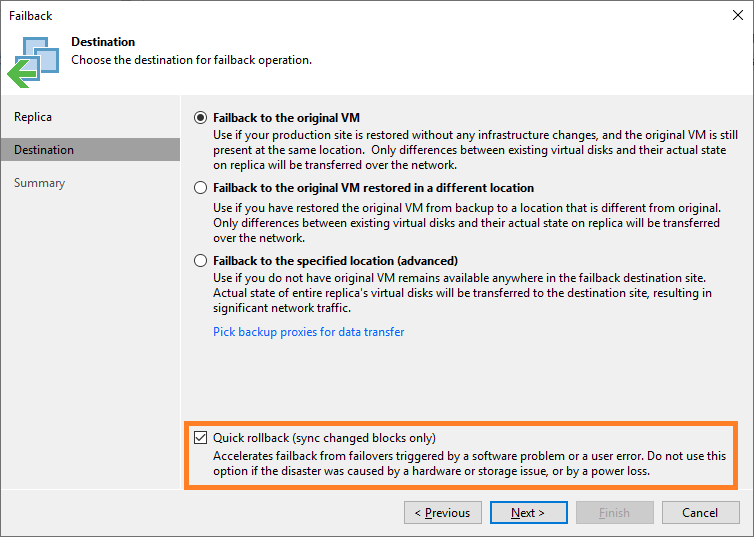
3. Via the Destination tab, we will opt to Failback to the original VM as there have been no infrastructure changes and the original VM is still present at the same location. We will also opt to sync changed blocks only by using the Quick rollback option. When ready, click Next >.
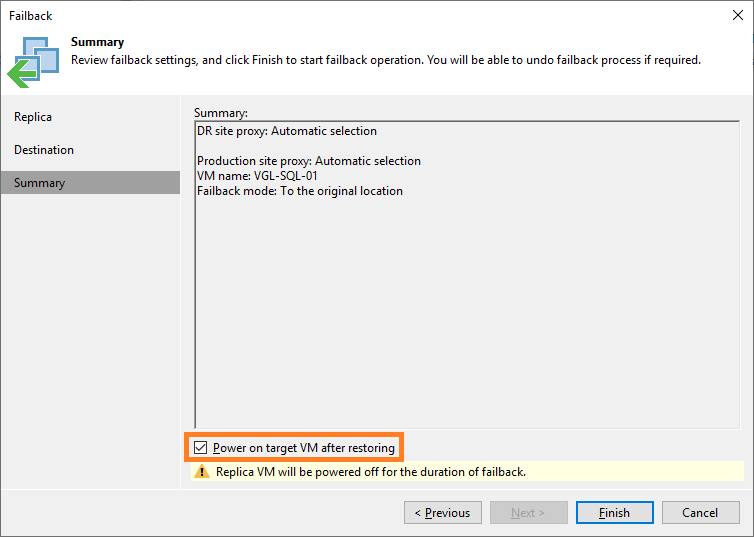
4. Review the Summary tab and, when ready, click Finish. Note, I have opted to power on the original VM following the restore process.
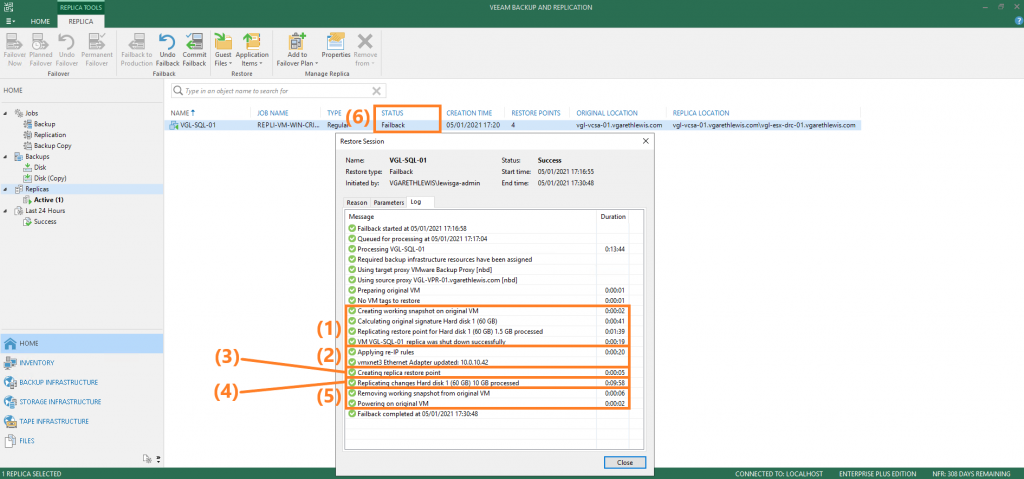
5. Let’s review the Restore Session Log in the below screenshot.
- (1) The Failback to Production option now powers-down the original VM (if running), creates a working snapshot on the original VM, and synchronise all changes to the original VM. Changed data is then transported to the original VM and is written to the delta file of the working failback snapshot on the original VM. Once complete, the replica VM is powered off.
- (2) Re-IP rules are applied to the original VM.
- (3) A failback protective snapshot is created on the replica VM, acting as a new restore point by saving the replica VM’s pre-failback state. This can be used to return to the replica VM’s pre-failback state should the original VM not function as expected after failback. More on this option later.
- (4) The replica VM and the original VM are compared one final time, with any further changes transferred to the original VM.
- (5) The working failback snapshot is then removed on the original VM with all changes written to the delta file are committed. The original VM is powered on, and all replication activities for the original VM are placed on hold.
- (6) The VM state is changed from Failover to Failback.
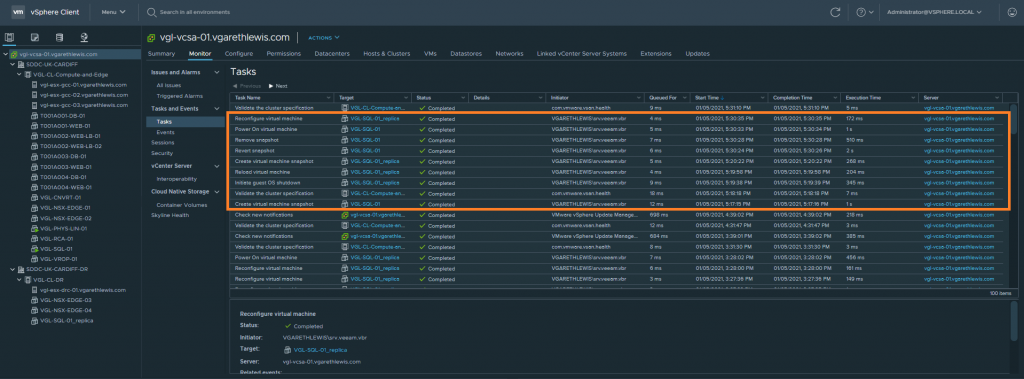
6. We can also compare the above Veeam B&R Restore Session Log with the below vSphere tasks.
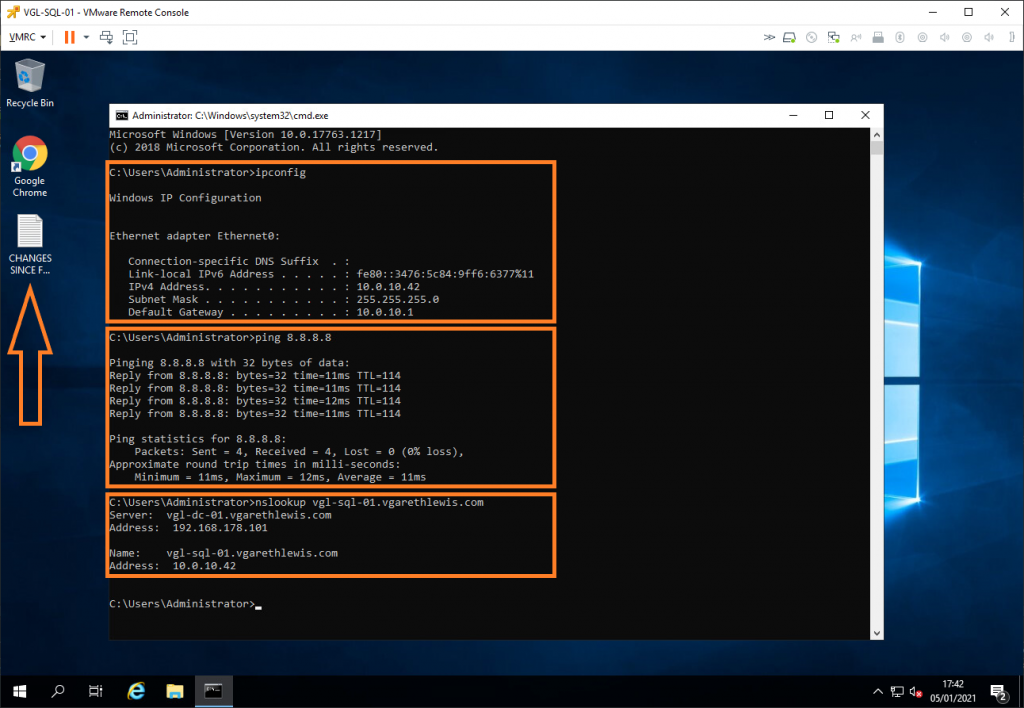
7. Finally, from the VM itself, note the reverted IP address, routing is up, and DNS has been updated. As we used the Failback to Production option, all changes written to the replica VM (including the CHANGES SINCE FAILOVER.txt file) have been transferred to the original VM.
This concludes the failback process. Services are once again running successfully from Site A, with all data written to the replica VM since failover transferred to the original VM.
At this point, we have several options available with which to finalise the fallback process. Let’s discuss these.
Failback Finalisation Options
Following the above failback action, were the VM not functioning correctly, the failback can be undone, and operations moved back to the replica VM Site B by using the Undo Failback option.
In our scenario, the VM is working as expected so we can hit the Commit Failback option. This action will finalise the original VM’s recovery and resume normal operations and replication activities for the original VM.
Commit Failback Procedure
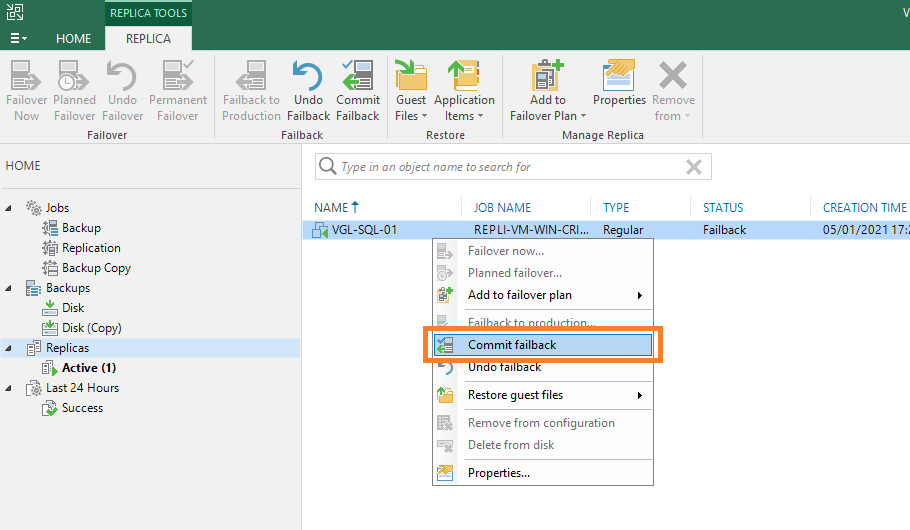
1. From the Veeam Backup & Replication Console, right-click the replica and select Commit failback.
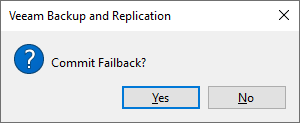
2. When prompted, select Yes to commit failback.
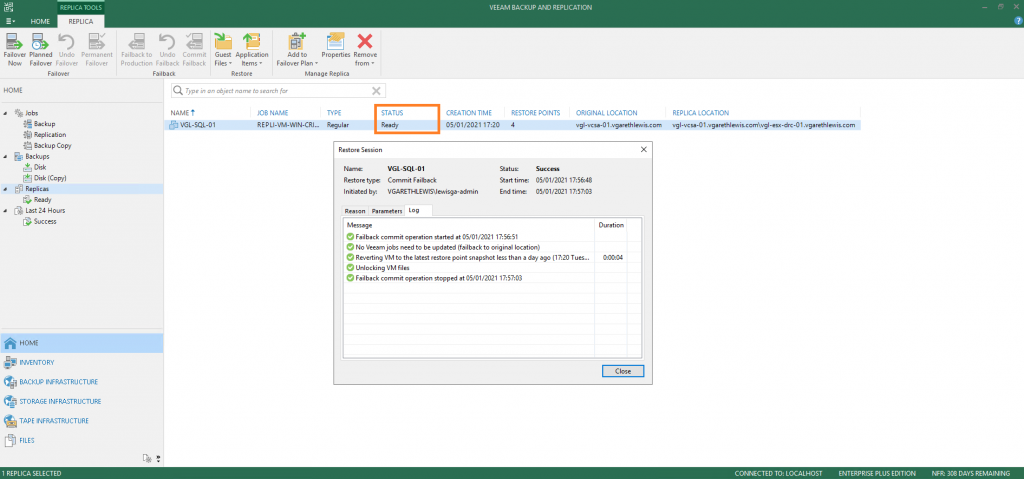
3. Monitor the Restore Session Log until completion. Once complete, note the replica status has now changed to Ready as the failback is finalised and replication activities resumed.
4. We can also compare the above Veeam B&R Restore Session Log with the below vSphere tasks.
This concludes the Commit Failback process and, subsequently, finalises all failover/failback activities. Replication activities from Site A to Site B are now resumed.
In Summary
In this article, we discussed the failover and failback options available via Veeam Backup & Replication and, more importantly, where and when to use them.
We then demonstrated the failover process for our business-critical VM following technical issues at Site A. Once the failover was complete, services were resumed (albeit, running from Site B), while the IT Operations team worked to resolve the issues at Site A. Once the Site A issues were resolved, we demonstrated the failback process, allowing operations to resume in Site A.




much informative and thanks for such post.
can you help share the process/blog in case we have linux VM and RE-IP is required in case of failover. Although Veeam does not support automatic RE-IP, how can we do this smoothly
Hi Anwar, while Veeam Backup & Replication v10 supports network mapping for VMs, the re-IP functionality is only available to Microsoft VMs. As version 11 is likely to be available this year, it will be worth keeping an eye out to see if the functionality you require becomes available. As it stands, automatically re-IP’ing Linux VMs is not supported.
VMware SRM offers the functionality you require. See the below links for more information:
– https://docs.vmware.com/en/Site-Recovery-Manager/8.1/rn/srm-compat-matrix-8-1.html#guest-operating-system-support-9
– http://partnerweb.vmware.com/programs/guestOS/guest-os-customization-matrix.pdf
Hello,
Thank you for this article but what happens if the veeam server located on the production was to crash