Back in October 2017, VMware released a number of free NSX guides. A detailed overview of the releases can be found by clicking here. Just last week the NSX Guide Library was enhanced further thanks to the release of a number of new publications. Regardless of whether you’re new to NSX or simply interested in topping up, if you work with NSX in any way, the VMware NSX Guide Library is essential reading.
With the release of vSphere 6.7 back in April 2018, a host of new enhancements, features, and goodies had the vCommunity going wild. With enhanced feature parity between the legacy vSphere Web Client and new HTML 5 vSphere Client, as well as the vCenter Server Appliance boasting performance increases of ~2X faster performance in vCenter operations per second, ~3X reduction in memory usage, and ~3X faster DRS-related operations (e.g. power-on virtual machine); these two areas alone made most of us want to upgrade. Nice.
vSphere 6.7 also boasts the new Quick Boot feature for vSphere hosts running the ESXi 6.7 hypervisor and above. This feature allows users to a) reduce maintenance time by removing the number of reboots required during major version upgrades (Single Reboot), and b) allows users to restart the ESXi hypervisor without having to reboot the physical host (essentially skipping the time-consuming hardware initialisation). Very nice!
Remember the days when you struggled to find something to do? Out of projects, with no outstanding project work, no issues to resolve, or nothing new to learn. No, I didn’t think so. Me either.
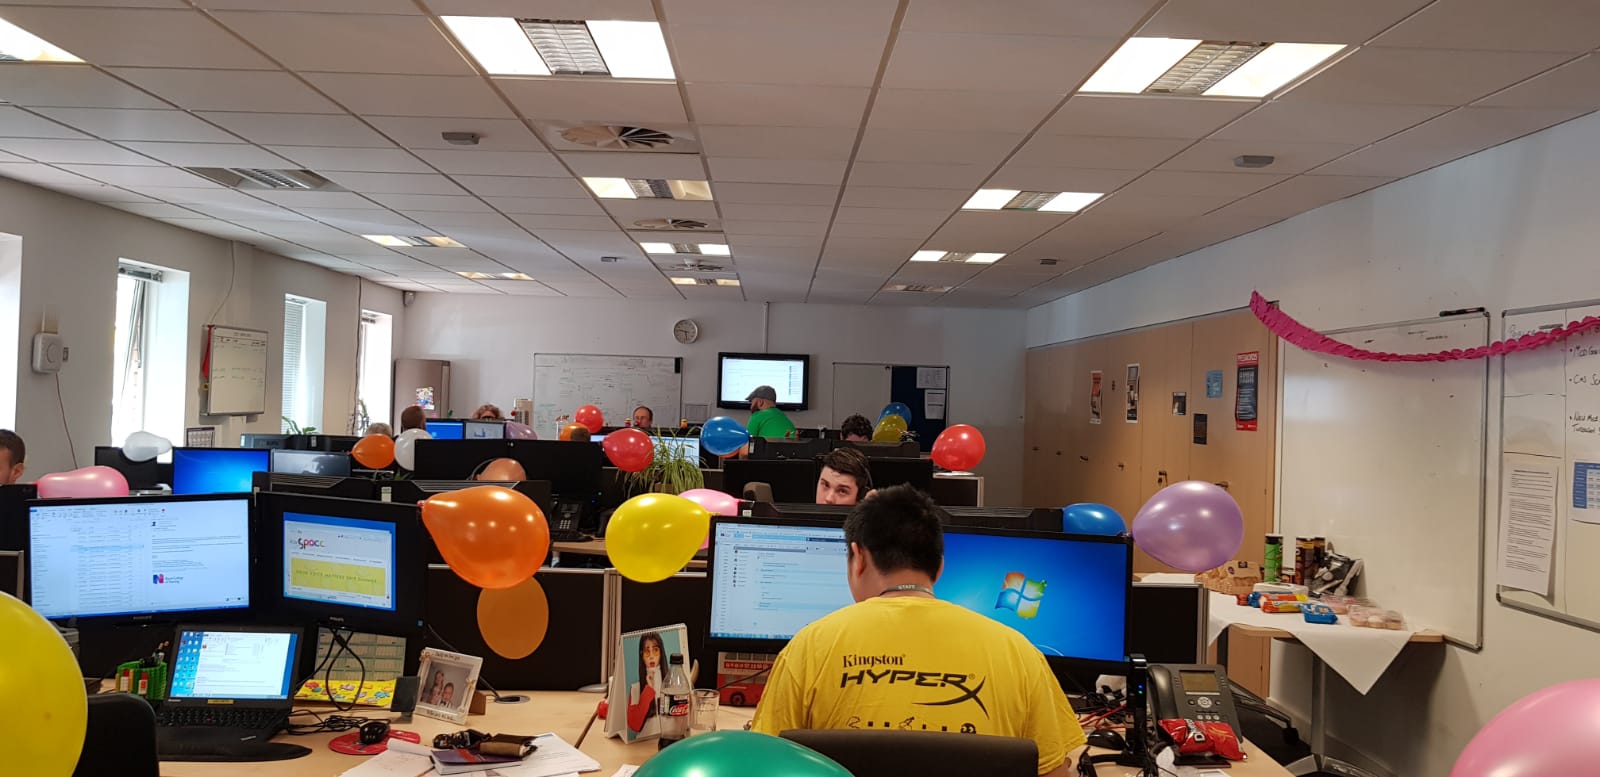
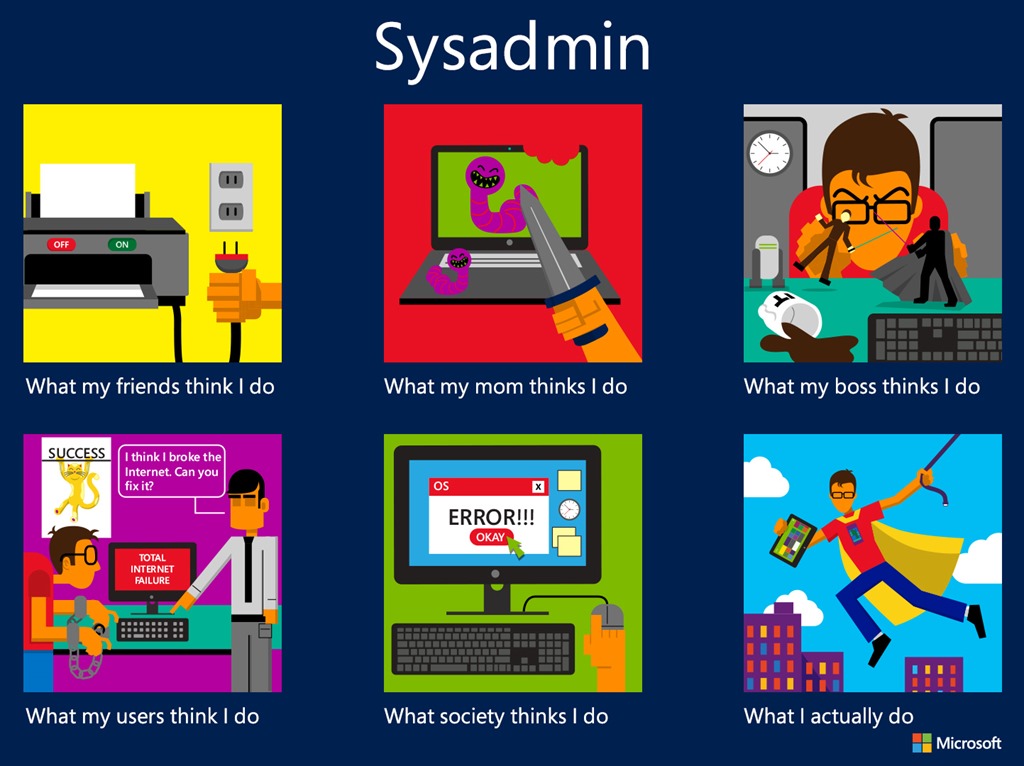
It’s been a busy 12 months. Nothing new for anyone in the ‘the’ industry. From the front-line IT Service Desk ninjas, to the as-back-of-house-they’re-in-the-car-park Storage Admins, the world of IT can often be a world of unsung heroes. So, each year, I make sure my guys are celebrated by taking part in the international System Administrator Appreciation Day.
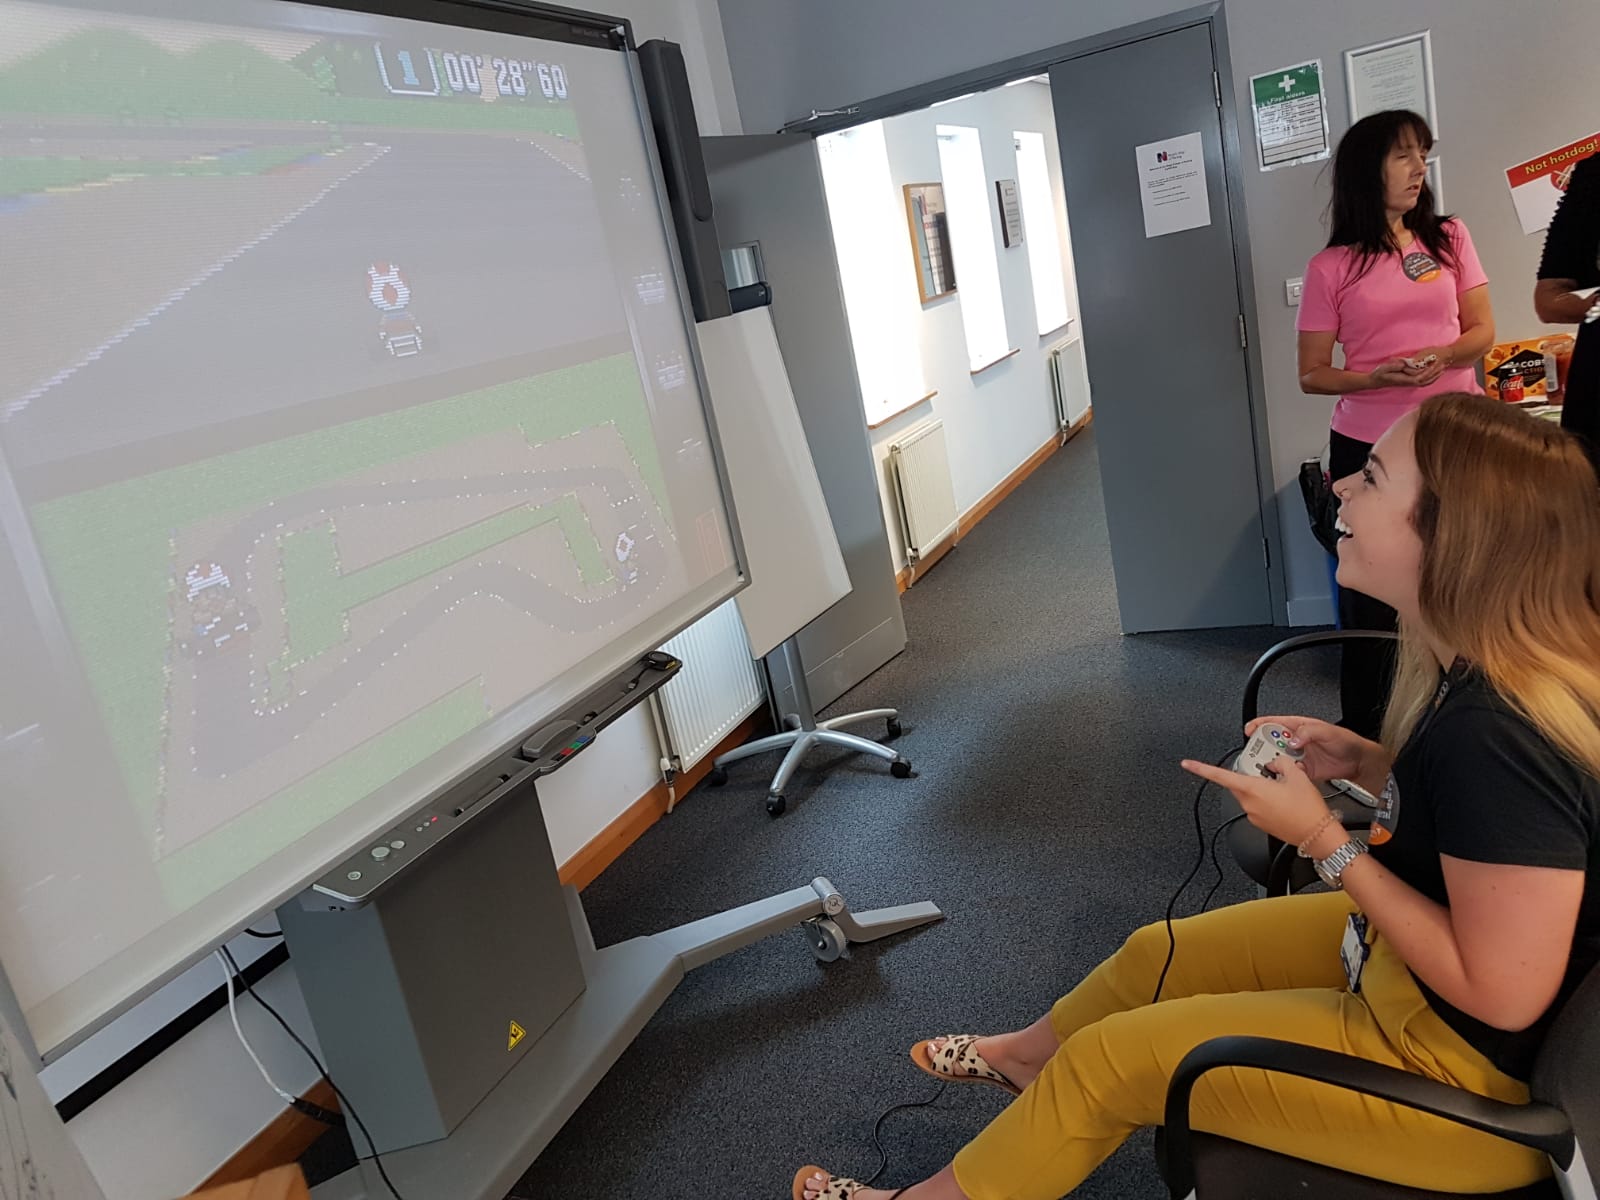
We make sure we down tools and spend a little time together, celebrating our successes over a game of Super Mario Kart, or simply celebrate with a piece of cake (did I mention there’s cake?) Whilst we all put in a huge amount of effort, dedicating so much time to those out-of-hours projects at the cost of our families and loved ones, it’s important we appreciate each other. For where would we be without our team(s)?
So, welcome to our SysAdmin Day back on 27th July 2018 . A day of retro gaming, fun, catch-ups, celebrations, and did I mention cake?
SysAdmin Day 2018: VR Fruit (and Network) Ninja, David Collins.SysAdmin Day 2018: One of our teams at Cardiff.SysAdmin Day 2018: And when our customers and users take part…it’s the icing on the…uh…cake!SysAdmin: aka, Tech Hero
In this article we’ll cover the simple process of applying the latest Veeam Backup & Replication 9.5 update, Update 3a (released July 2nd 2018), however, I’d first like to cover what’s new in Update 3a, and why you might like to upgrade.
Update 3a brings support for a host of new VMware and Microsoft features, as well as a substantial number of enhancements. With VMware vSphere 6.5 U2 and 6.7 now well into GA, the release of Update 3a is something most of us have been craving in order to obtain that final green light to upgrade our vSphere environments. From the Veeam Release Notes for Veeam Backup & Replication 9.5 Update 3a the enhancements and newly supported features are detailed below.
Yesterday (Monday 16th July 2018) VMware announced the End of Availability for vRealize Log Insight for vCenter. This enabled all vCenter Server licensees to enjoy a cool 25 OSI (Operating System Instance) usage. Sadly, the current version of vRealize Log Insight (6.4.x) will be the last version to support vRealize Log Insight for vCenter and, as such, the next release will not accept vCenter Server license keys during activation. End of General Support for vRealize Log Insight for vCenter will run until 23rd August 2019.
Please note, vRealize Log Insight standalone (part of the vRealize and vCloud Suites), Log Insight for NSX, and Log Insight for VMware Cloud Foundation will not be affected.
To restore an Exchange mailbox/folder/item via the Veeam Explorer for Exchange, the account connecting to the Exchange server will require Full Access to the mailbox in question. To perform such a restore (without having to give your entire backup admin teams Full Access to every mailbox in your estate), we will cover the process of granting Application Impersonation to your administrative staff. This procedure applies to both on premise Exchange and Office 365 and can be easily implemented via a few simple Exchange Management Shell commands.
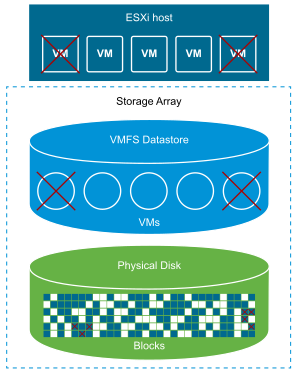
Since the release of vSphere 5.5 back in September 2013 we have been able to utilise ESXCLI to manually reclaim deleted blocks from VMFS datastores. Essentially, by using the VAAI UNMAP primitive, we can reclaim previously used blocks by releasing them back to the storage array, allowing them to be re-utilised by other devices/virtual machines. It wasn’t until the release of vSphere 6.5 in November 2016 that the much sought-after automation of disk space reclamation was announced with the availability of VMFS 6. More on VMFS 6 and automated reclamation in a future post.
In this article we will cover the manual process of reclaiming deleted blocks from a VMFS 5 (or earlier) file system via a esxcli UNMAP call.
Procedure
We have two options when making an UNMAP call on a VMFS volume:
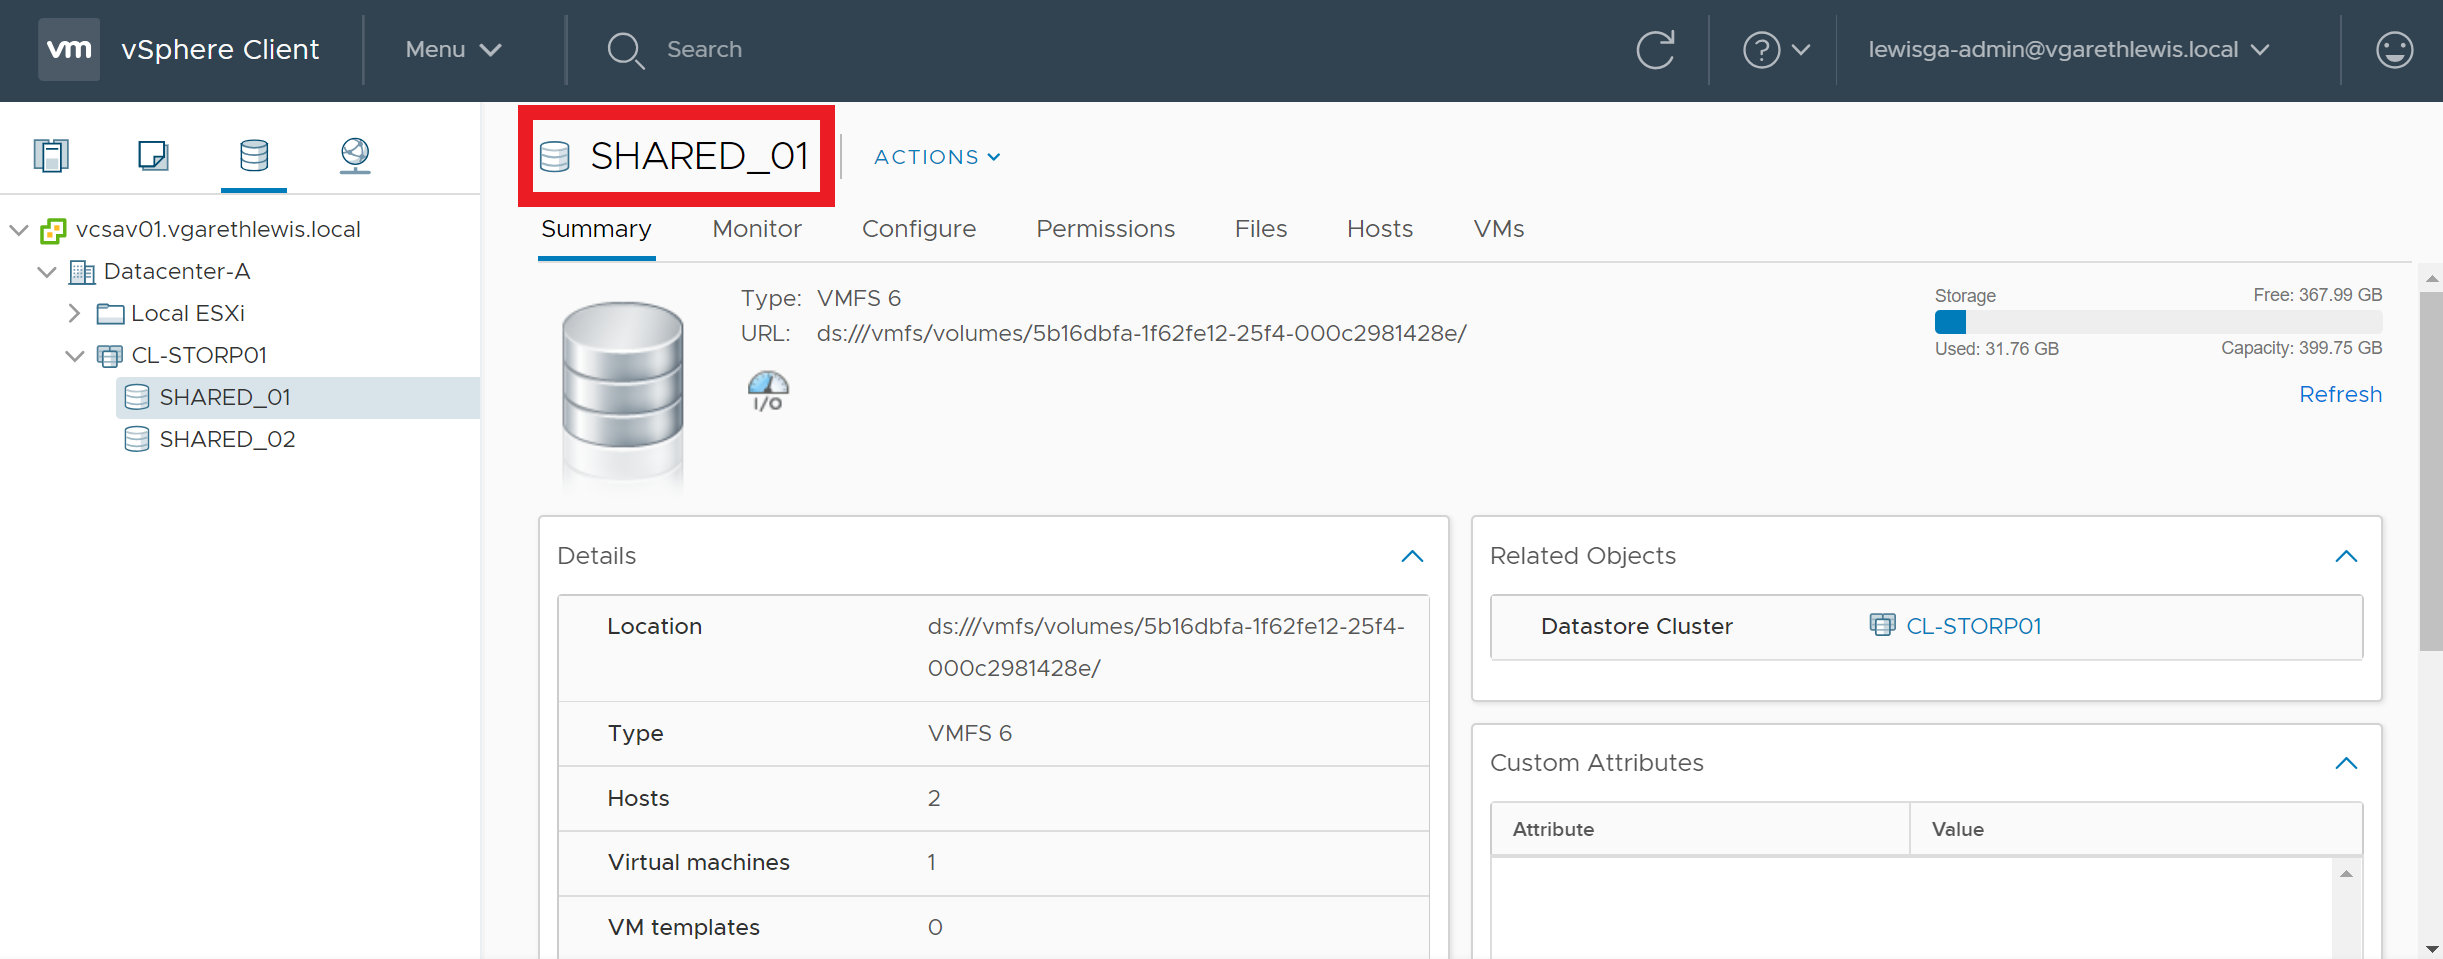
Option 1 – Reference the Volume Label
1. Identify the volume/datastore label.
2. Via SSH, connect to an ESXi host which has access to the datastore in question.
3. Run the below command to perform an UNMAP call utilising the volume label.
esxcli storage vmfs unmap -l DatastoreName
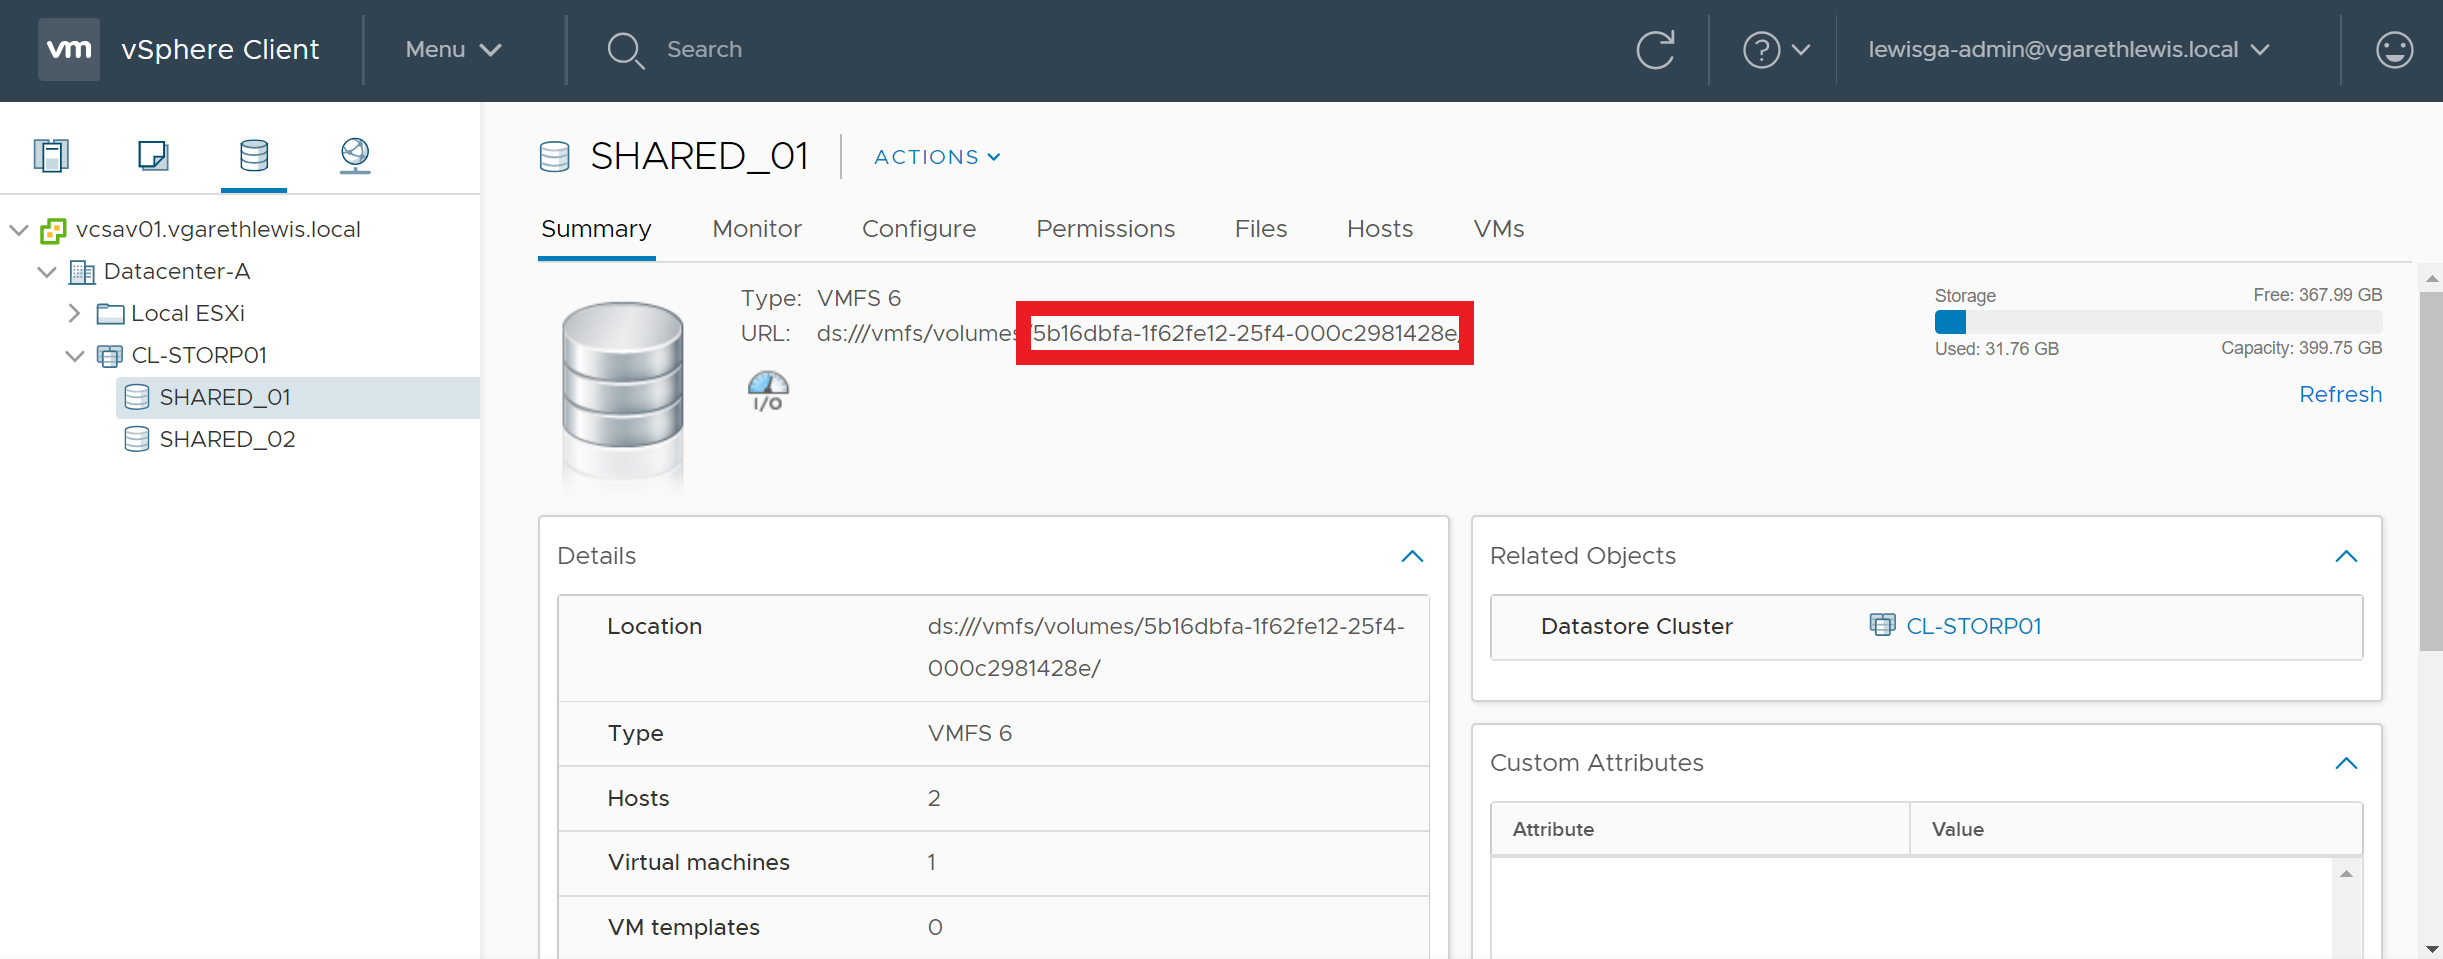
Option 2 – Reference the Volume UUID
1. Identify the UUID of the datastore/volume in question.
2. Via SSH, connect to an ESXi host which has access to the datastore in question.
3. Run the below command to perform an UNMAP call utilising the volume UUID.
As an example, the below screenshots detail a storage volume before and after an UNMAP call. Over time, the storage volume has experienced a high number of VM deletions and storage vMotions. Following either of the above UNMAP commands, the volume has reclaimed over 2 TB of deleted blocks.
Reclaim VMFS Deleted Blocks via UNMAP – BEFOREReclaim VMFS Deleted Blocks via UNMAP – AFTER
Monitoring UNMAPs via ESXTOP
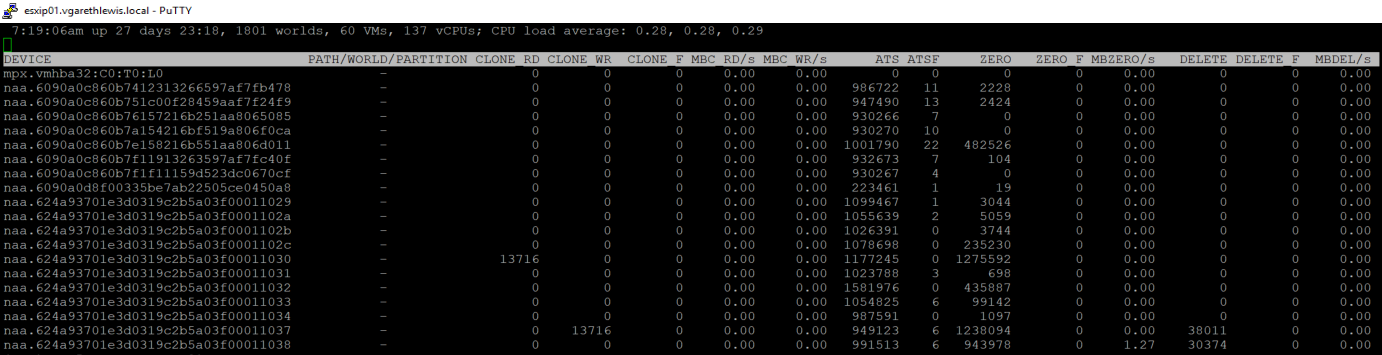
Finally, it’s nice to be able to monitor such actions and, via ESXTOP, we can. Connect to one of your hosts via SSH and launch ESXTOP. There is going to be a lot of information displayed at this point, so we’ll likely need to toggle-off some of the superfluous information. Press ‘U’ to view disks/devices, and press ‘F’ to launch the currently displayed field order. In the below screenshot I have toggled-off all columns except A, B, and O.
From the below screenshot you can see that, following a little housekeeping on two volumes in my environment, the DELETE counters display the UNMAP I/O count issued to those devices. Note, ESXTOP counters are reset with each host restart.
With VMFS 6 now available, you’ll probably want to leverage it’s automated reclamation capabilities, however, the only upgrade path is to create new datastores, migrate your workloads, and blow away the old VMFS 5 datastores. More on VMFS 6 in a future post.
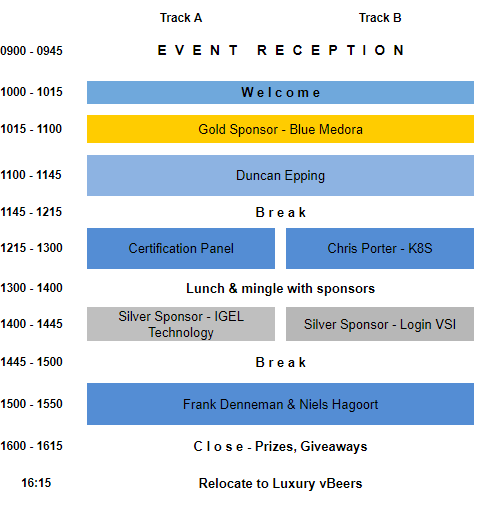
Thursday 14th June saw the latest London VMUG take place at Tech UK, London, with the User Group marking it’s third outing for 2018 in just six months! Rarely does any event see such heavy hitters as Duncan Epping, Frank Denneman, and Niels Hagoort in one place, but today, we got to see all three in attendance. Add to that line-up further awesomeness in the form of vCommunity member, Chris Porter, and this was one truly great London VMUG indeed! I’ve been to a number of VMUGs around the UK, however, this was to be my first time joining the London gang.
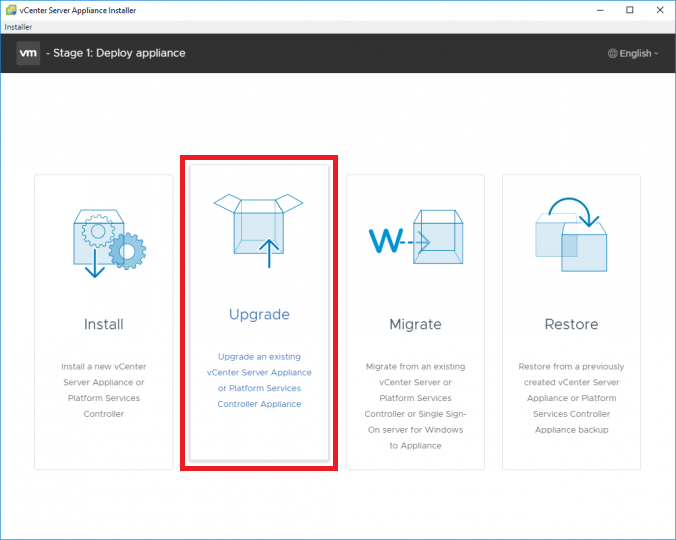
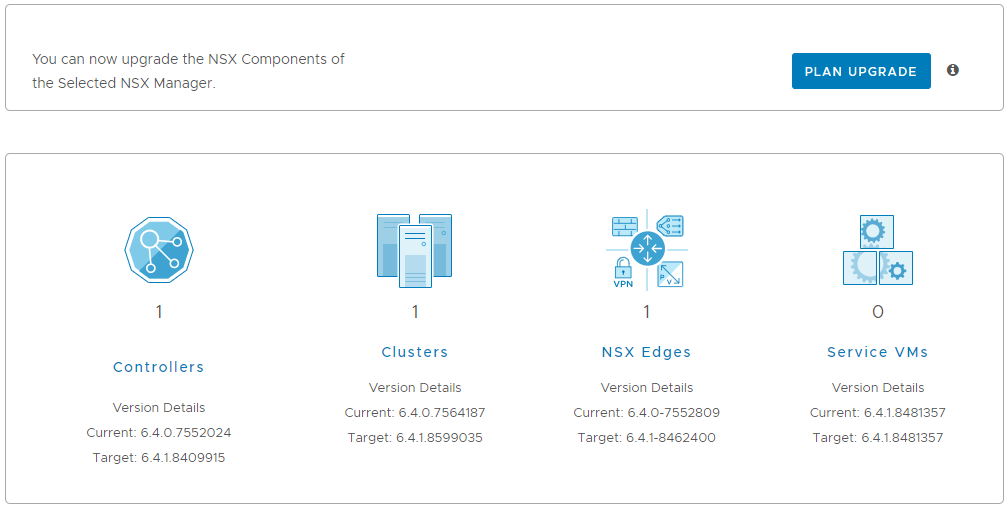
With the release of VMware NSX for vSphere 6.4.1 on May 24th 2018, interoperability/compatibility between VMware vSphere 6.7 and NSX was achieved. In addition to this, a number of nice new features were also included in the update.
In this article we will upgrade a 6.4.0 (build 7564187) lab environment to 6.4.1 (build 8599035) utilising the One Click upgrade process.
By design, there are certain virtual machines and/or appliances within vSphere which are protected to prevent editing (this can include NSX Controllers, Edges, Logical Routers, etc.) In a live/production environment, you’d not normally care about editing these appliances, however, in a lab environment (especially one where resource is tight), reducing memory and/or CPU allocation can help a lot. As such, this article will cover the process of removing the lock on protected VM in vSphere, in order to enable editing.
The scenario: a customer needs to reduce the resource allocation of an NSX Controller, however, due to the VM in question being protected/locked, editing the VM’s resources is not possible via UI or PowerCLI.
The process of removing this lock is quick and easy, however, we first need to identify the virtual machine’s Managed Object Reference (moRef ID). Please note, VMware do not support or recommend this procedure in any way. As such, this procedure should not be implemented in a production environment.
We use cookies to ensure that we give you the best experience on our website. If you continue to use this site we will assume that you are happy with it.