Page 9 of 9

VMware vCNS 5.5.4 to NSX 6.2.5 Upgrade

Reading Time: 6 minutes

VMware vCNS to NSX Upgrade

I’m a fan of upgrades that ‘just work’, but rarely do they run without a few unforeseens jumping out at you. Reading the VMware Upgrading VMware vCNS 5.5.x to NSX 6.2.x (2144620), I was surprised to see just five upgrade areas. Five? Really?? As this is a business critical system (and one with the potential of being able to turn a long day into an even longer day were things to go awry), I was a little sceptical, however, the vCNS to NSX upgrade process really is that easy.

VMware recommend the below implementation path when upgrading to NSX from vCNS, and if you’re not utilising any advanced features such as the vCNS Edges, you can cut this process down to just the first three steps.

  1. vCNS/NSX Manager
  2. Host Clusters and Virtual switches/wires
  3. vShield App (replaced by NSX Distributed Firewall)
  4. vShield Edge
  5. vShield Endpoint

Stick with me, I know you think I’m lying…

Scenario

So, a requirement exists whereby I need to replace a VMware vCNS 5.5.4 environment with VMware NSX 6.2.5 due to the former going end-of-life in Q4 2016. As I see it, I have two options; a) install NSX and migrate the vCNS workload to the new compute hardware, or b) upgrade vCNS in-place. As there aren’t any spare hosts lying around, the option will see us progressing with the in-place upgrade.

Note, configuration of NSX, as well as integration with AD Security Groups, will be covered in a future post.

Prerequisites

Okay, so there are some prerequisites (when would there not be?) Before initiating the upgrade process, you will need to ensure the below checklist has been completed:

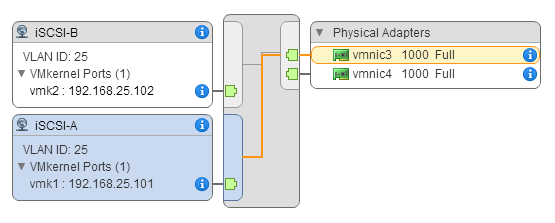
  1. Physical network must be configured with a minimum MTU of 1600 due to the VXLAN overlay.
  2. As the NSX vSwitch is based upon vSphere Distributed Switches (vDS), if you’re currently running standard virtual switches, you’ll need to migrate to vDS first.
  3. Your backups have run successfully
  4. Snapshots of both vCenter and vCNS Manager have been taken
  5. vCNS Manager – e1000 network adapter replaced with a VMXNET3 adapter
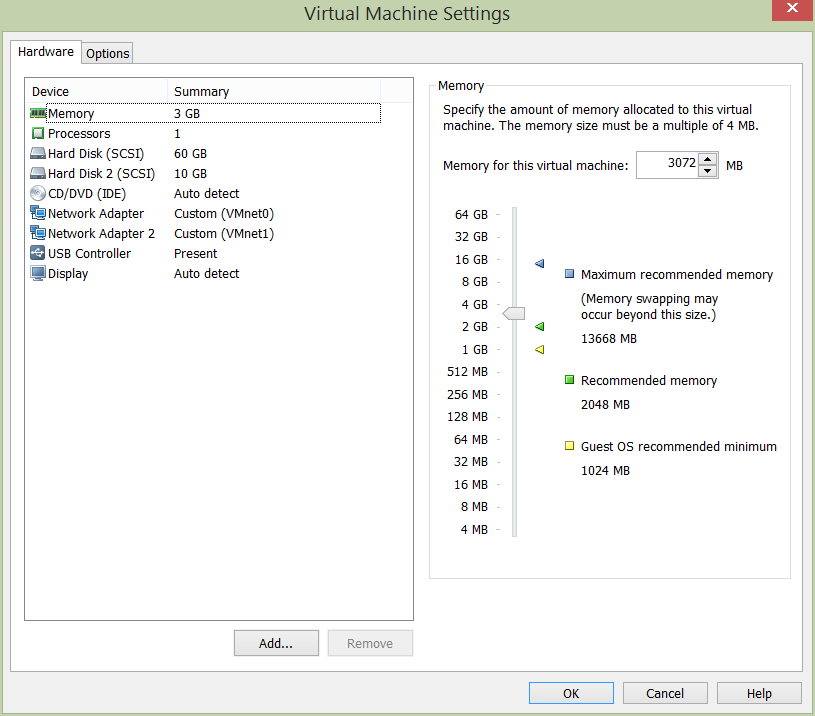
  6. vCNS Manager – configured with at least 16GB RAM
  7. vCNS Manager – Tech Support Bundle created
  8. Download the relevant vCNS to NSX Upgrade Bundle

Upgrade vCNS 5.5.4 to NSX 6.2.5

1. First of all, we will need to download the Upgrade Bundle from VMware. Login to your MyVMware account and download.

2. Next, log into vCNS Manager, and browse to Settings & Reports > Updates.

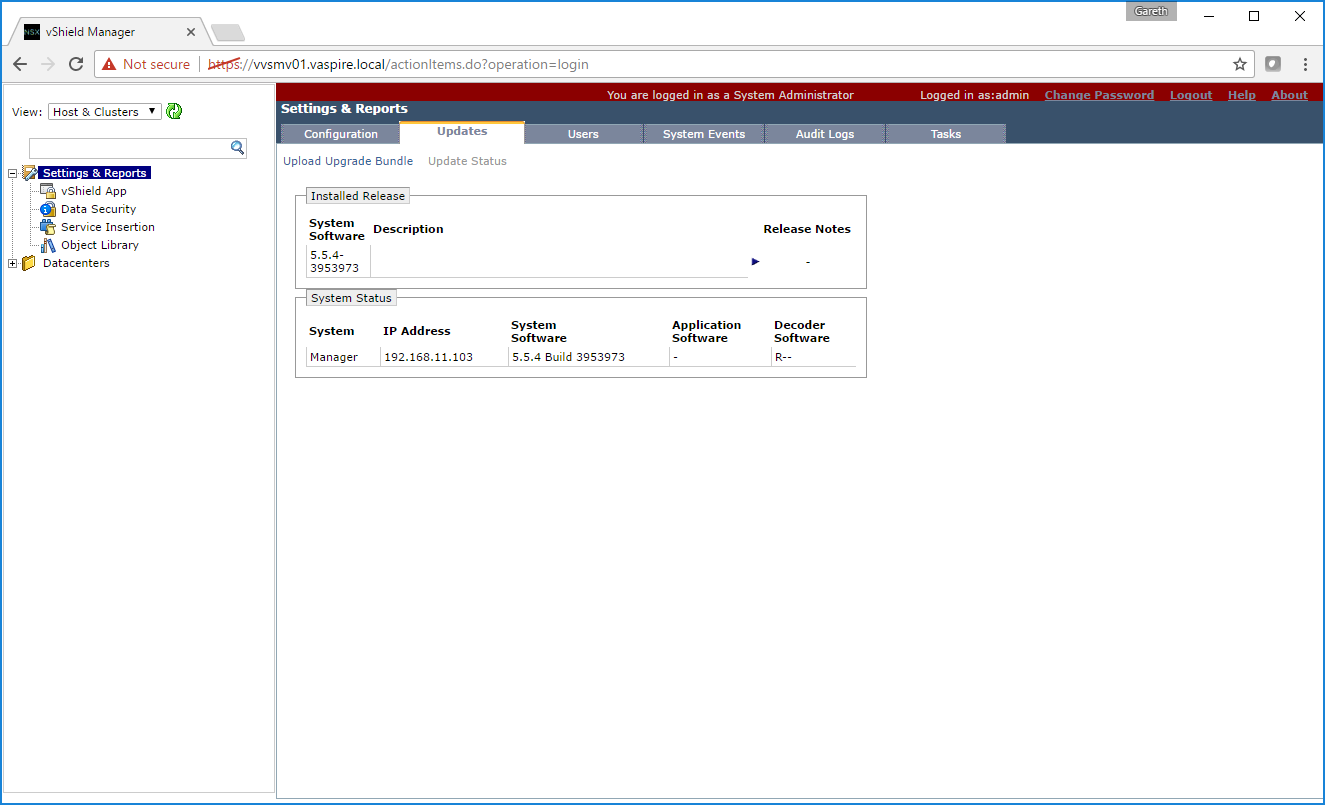
3. Click Upload Upgrade Bundle, and upload the bundle we downloaded in Step 1.

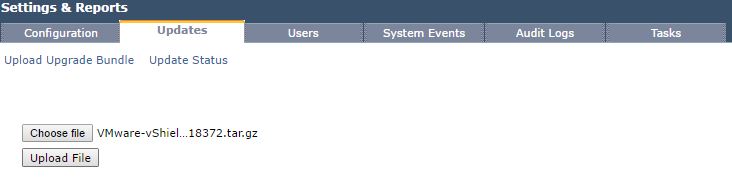
4. Once uploaded, review the version details, and click Install.

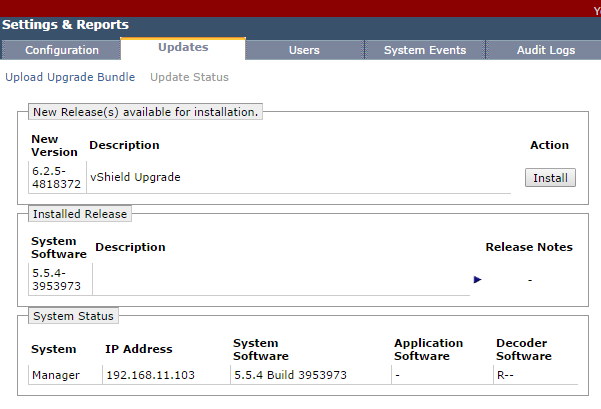
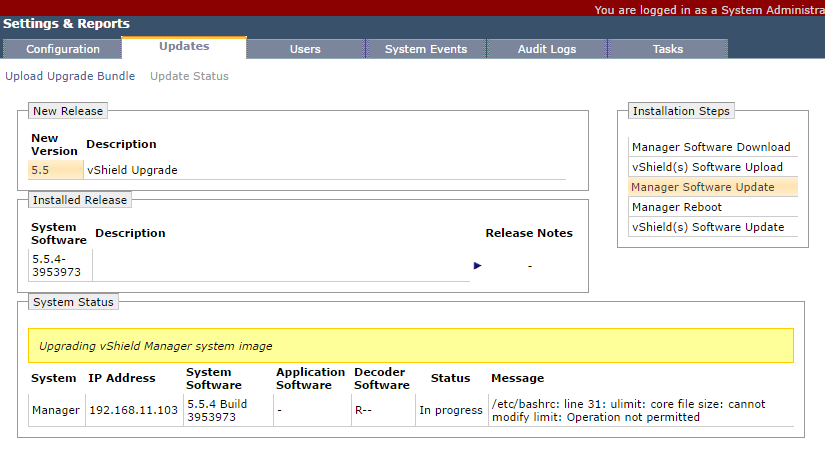
5. When requested, click Confirm Install, and monitor the progress as per the below screenshots.

6. Monitor the reboot process via the appliance’s console and, once complete, we can proceed.

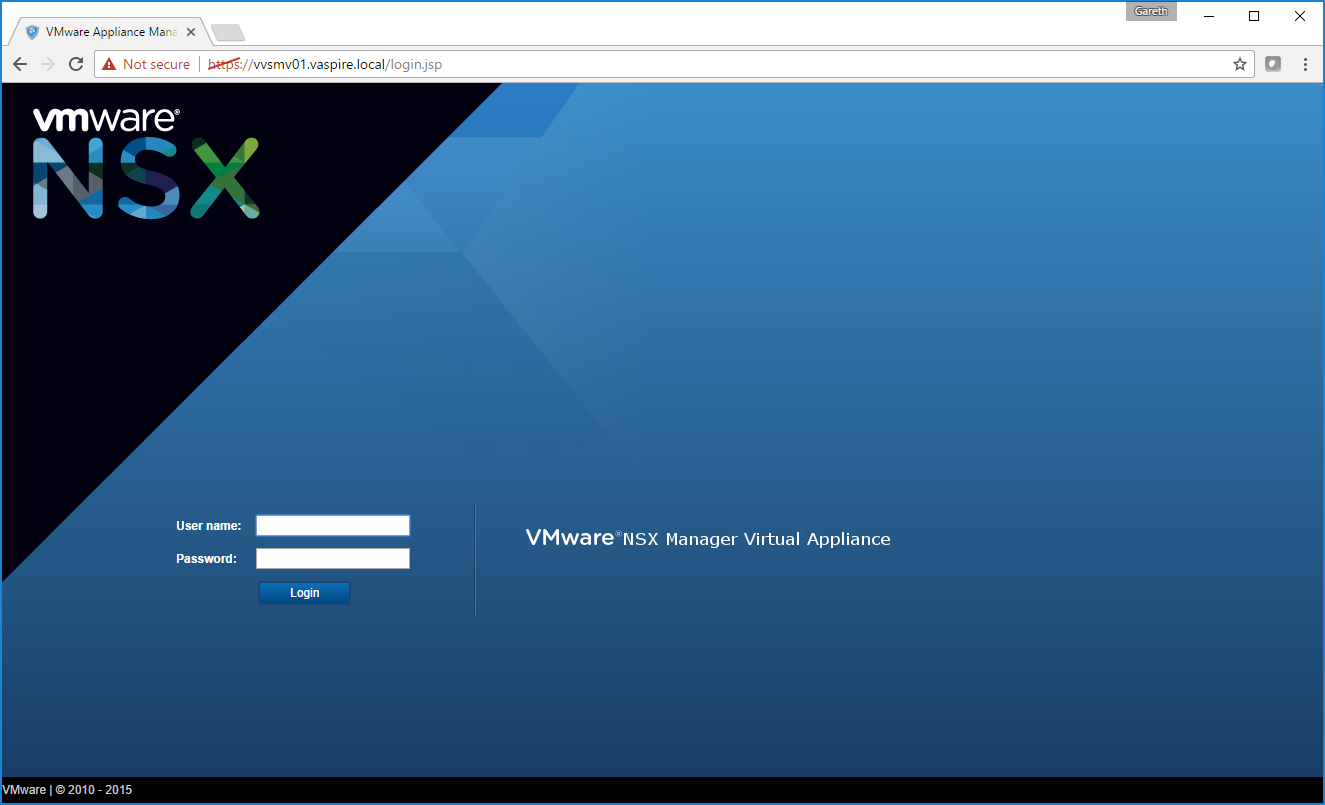
7. Following the reboot, browse to the previous vCNS Manager FQDN (https://server_name.domain.local), and you will be presented with the new NSX Manager. Note, the default admin credentials will have changed as part of the upgrade process:

  • Username – admin
  • Password – default

8. Login using the new credentials and ensure the NSX Management Service is running before proceeding. Note, this is a lab environment, hence the 4GB RAM.

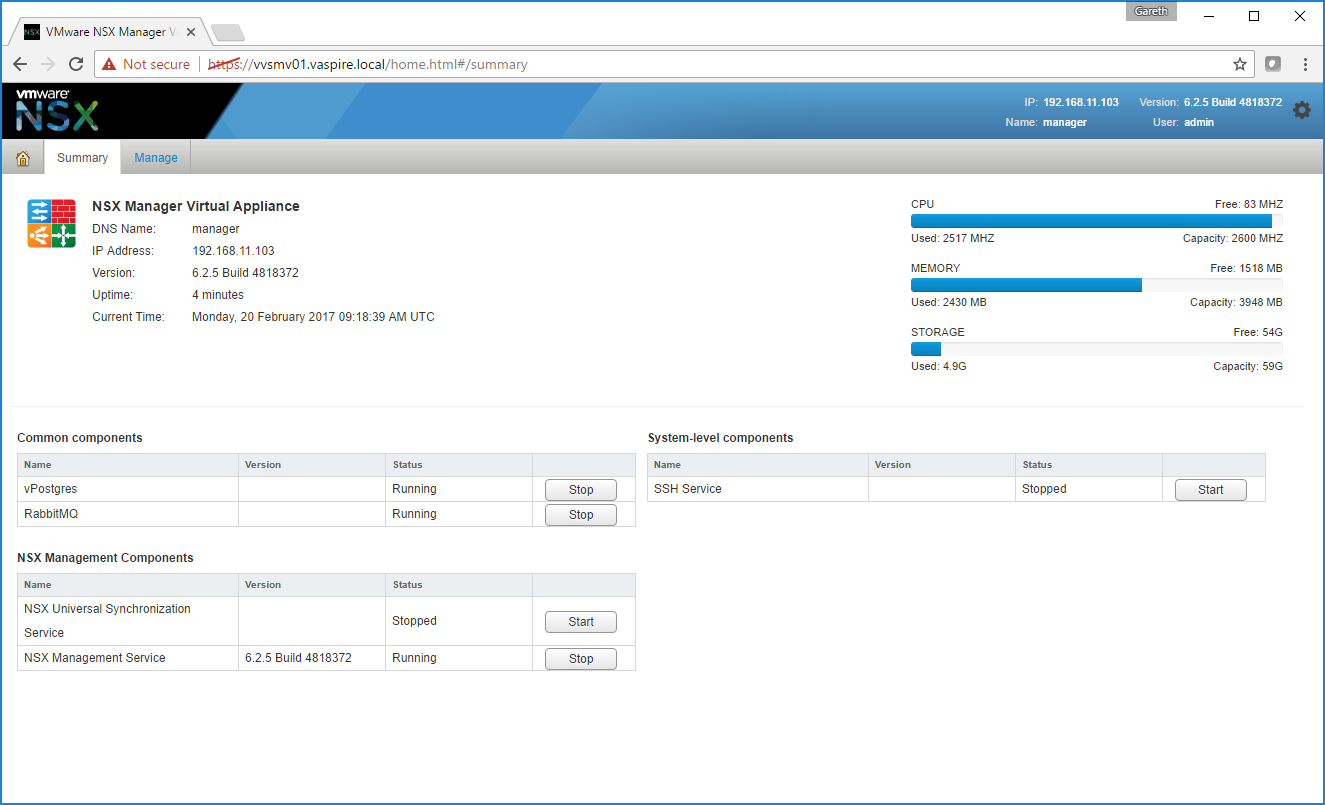
9. Browse to Manage > NSX Management Service. In the Lookup Server URL section, configure by clicking Edit.

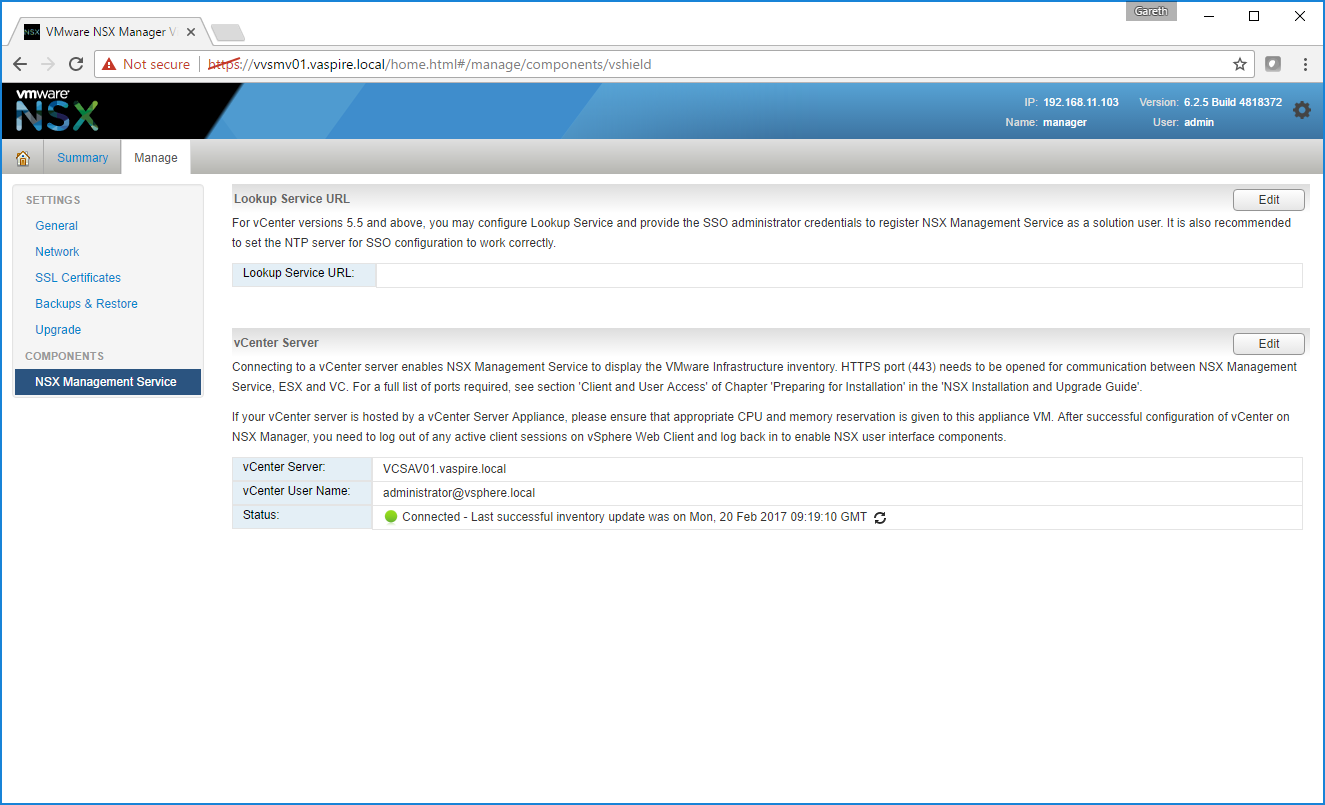
10. For this lab environment, I am configuring the lookup service to utilise vSphere SSO which, in this instance, integrates with my vCenter Server.

11. When prompted, accept the SSL certificate.

12. Ensure the Status for both Lookup Server URL and vCenter Server shows Connected.

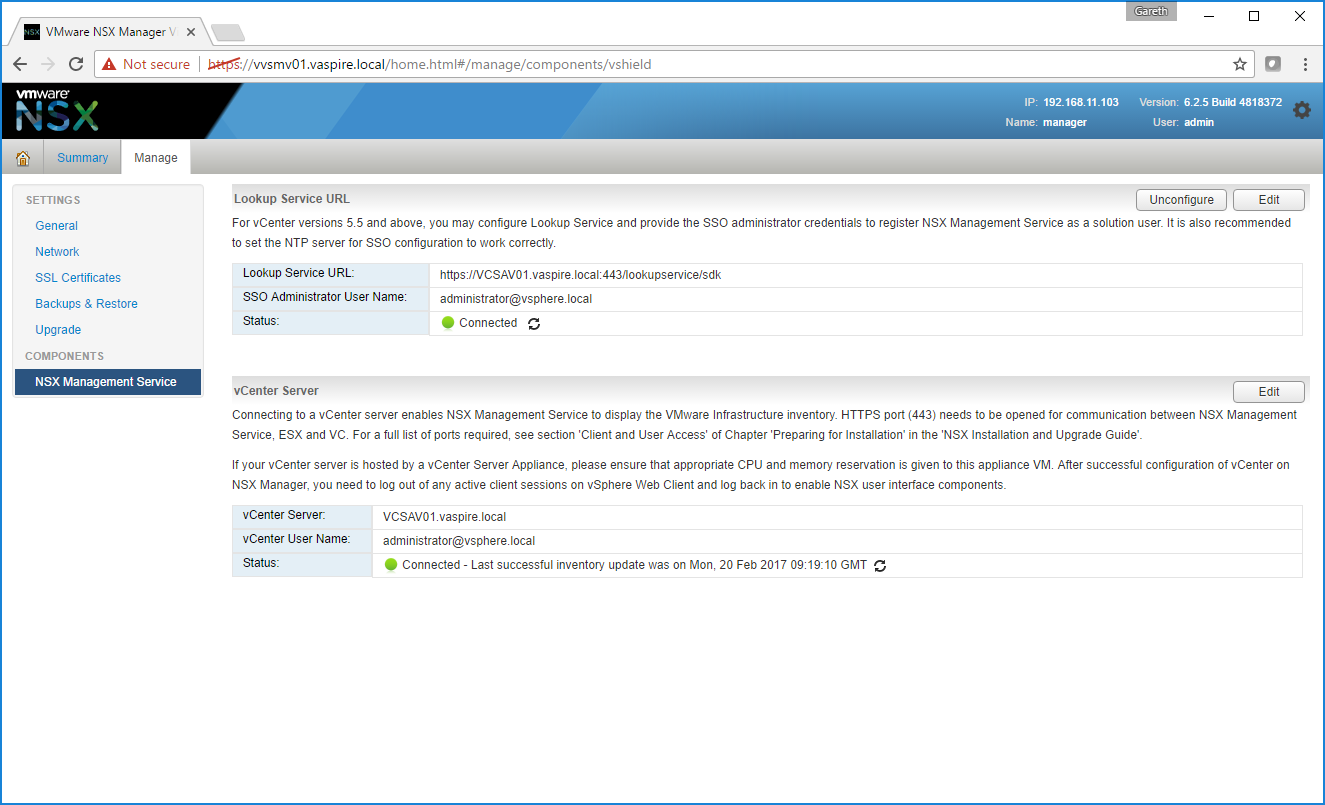
13. After logging in to the vSphere Web Client as administrator@vsphere.local (we’ll configure NSX users and groups via Active Directory in a later post), you’ll now be able to see the new Networking & Security tab.

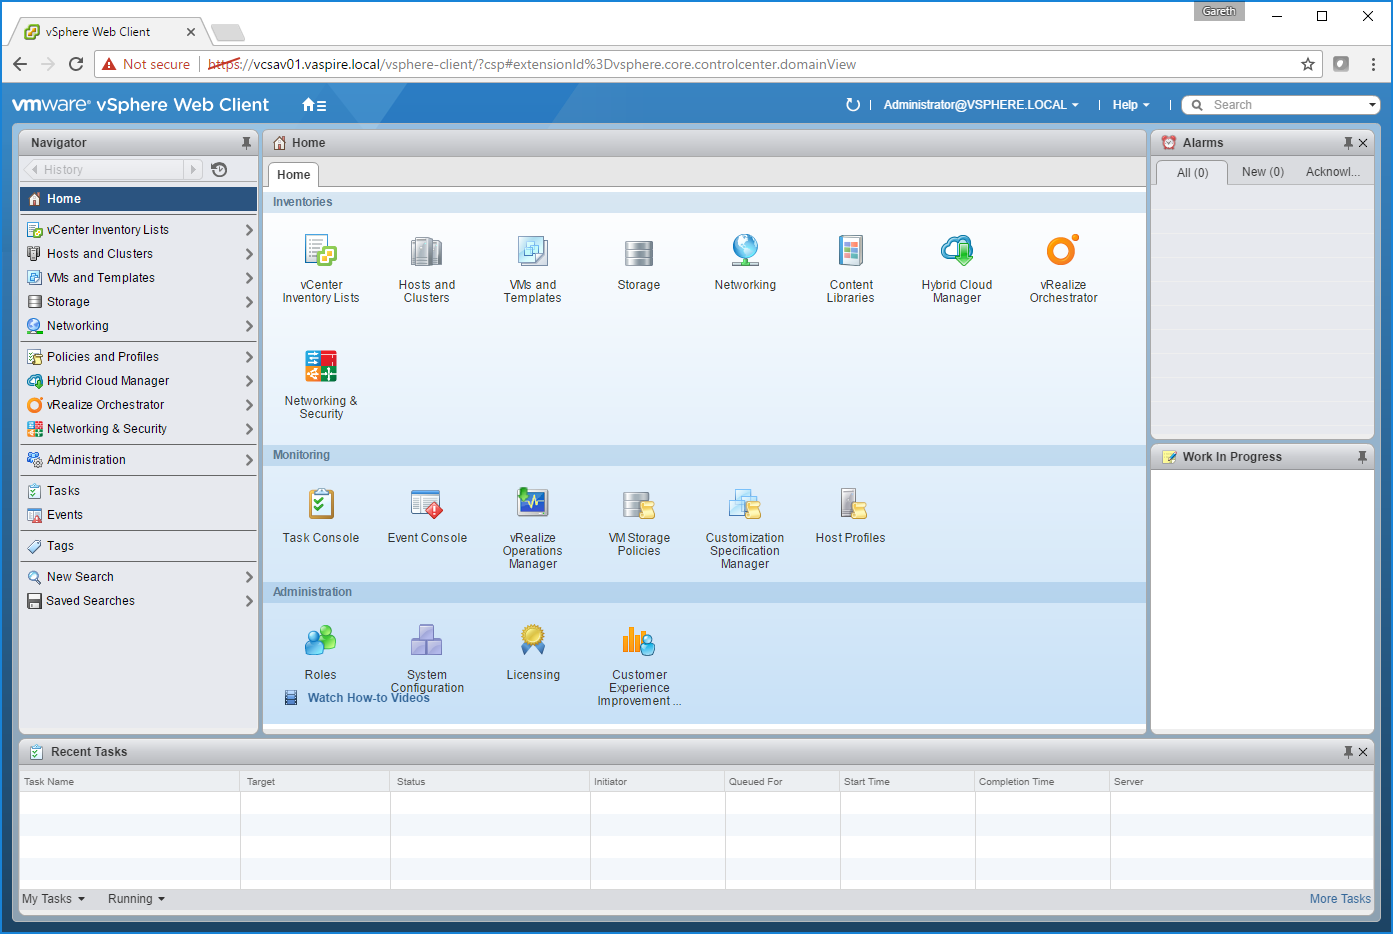
14. As this procedure details the upgrade process of vCNS to NSX, browsing to Networking & Security > Firewall, you will happily see that all vCNS Firewall rules have been retained.

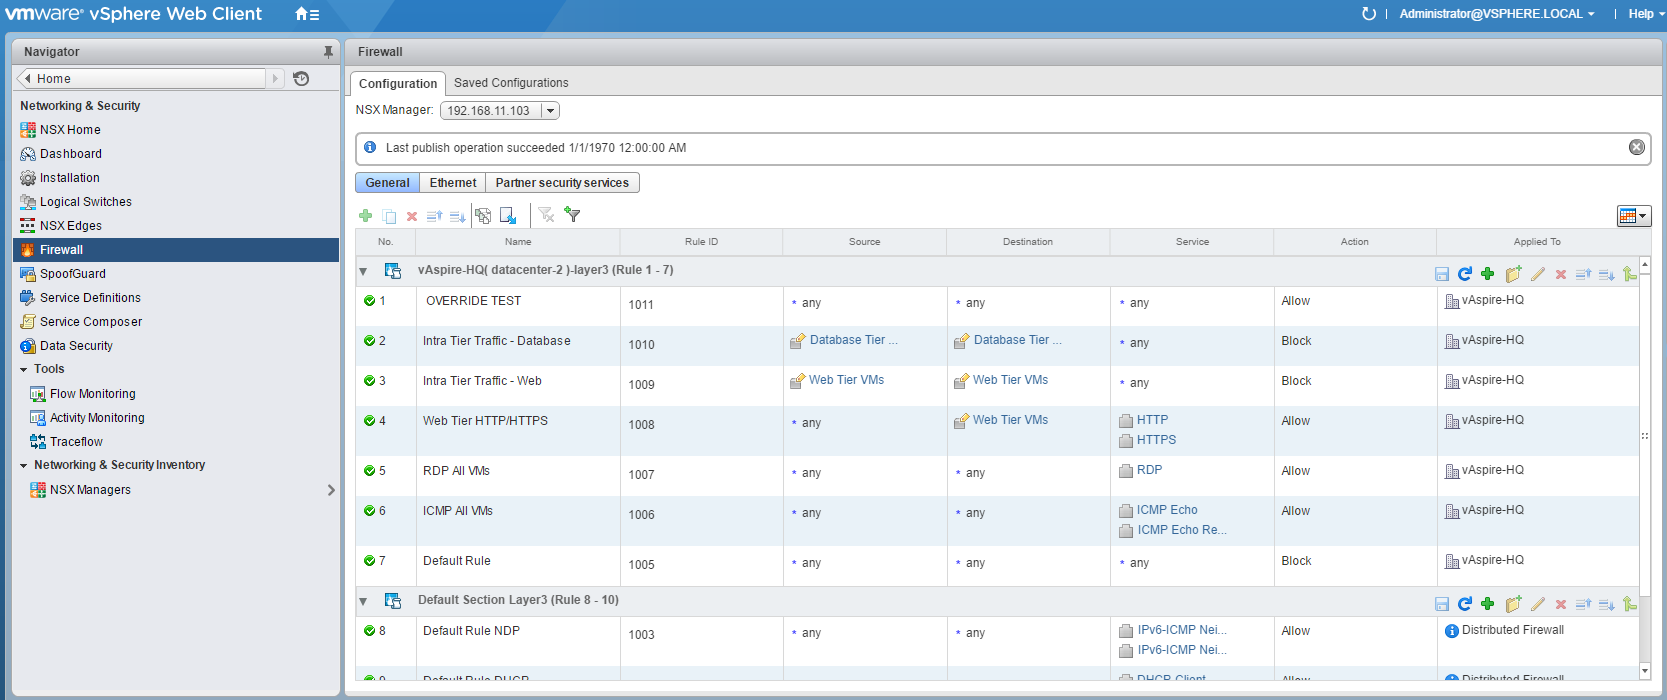
At this point we will need to apply licensing, upgrade the ESXi host VIBs, and upgrade the vCNS Firewall to the new NSX Distributed Firewall. Until this takes place, any/all firewall amendments will not be seen by the ESXi hosts.

Licensing

1. Using the vSphere Web Client, browse to Administration > Licensing > Licenses, click Add (+).

2. When prompted, enter your license keys, and click Next. 

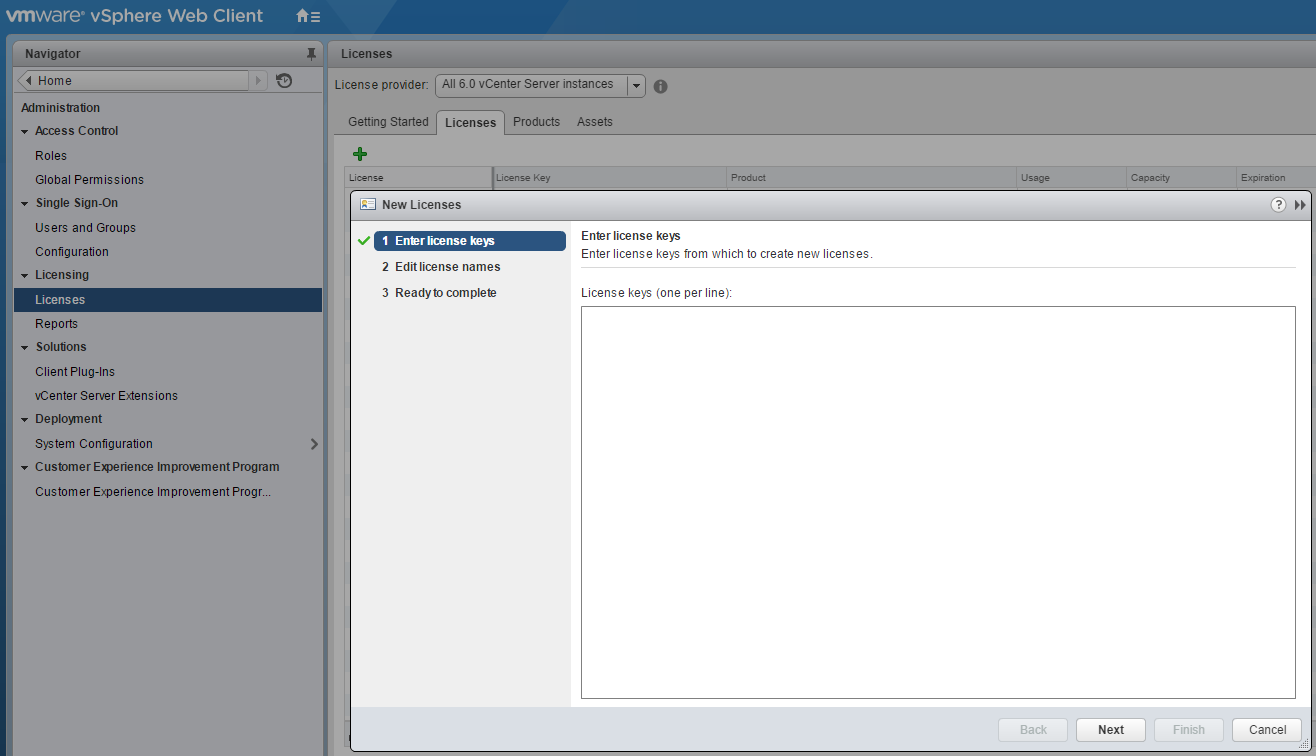
3. Confirm your license key information, amend the names where required, click Next.

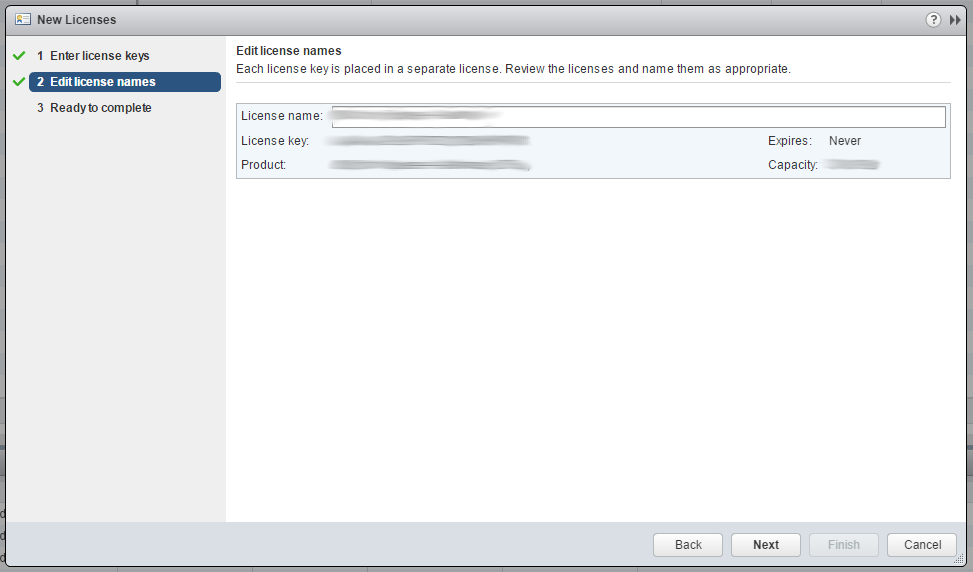
4. Review your license information and click Finish.

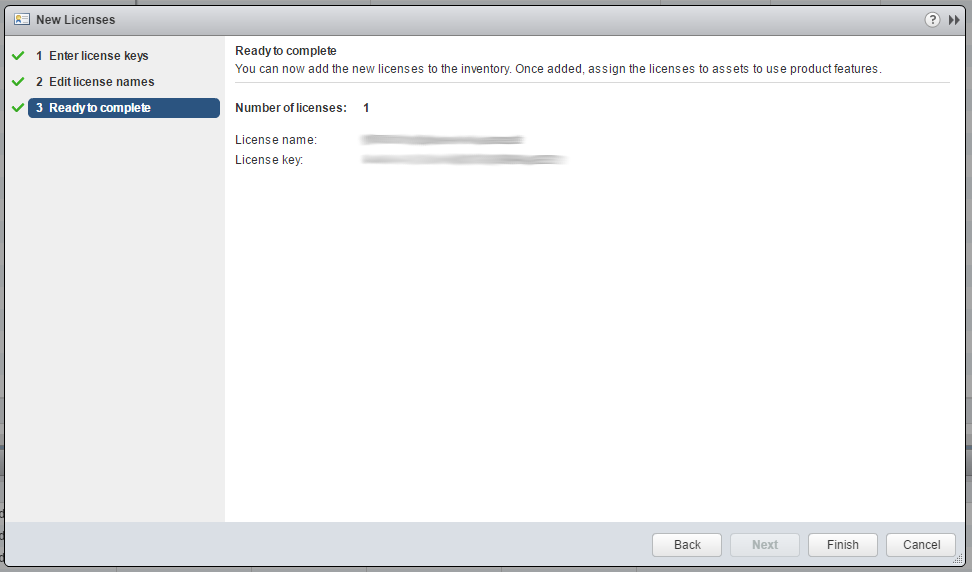
5. Browse to Administration > Licenses > Assets > Solutions, and assign the new license by clicking the Assign icon.

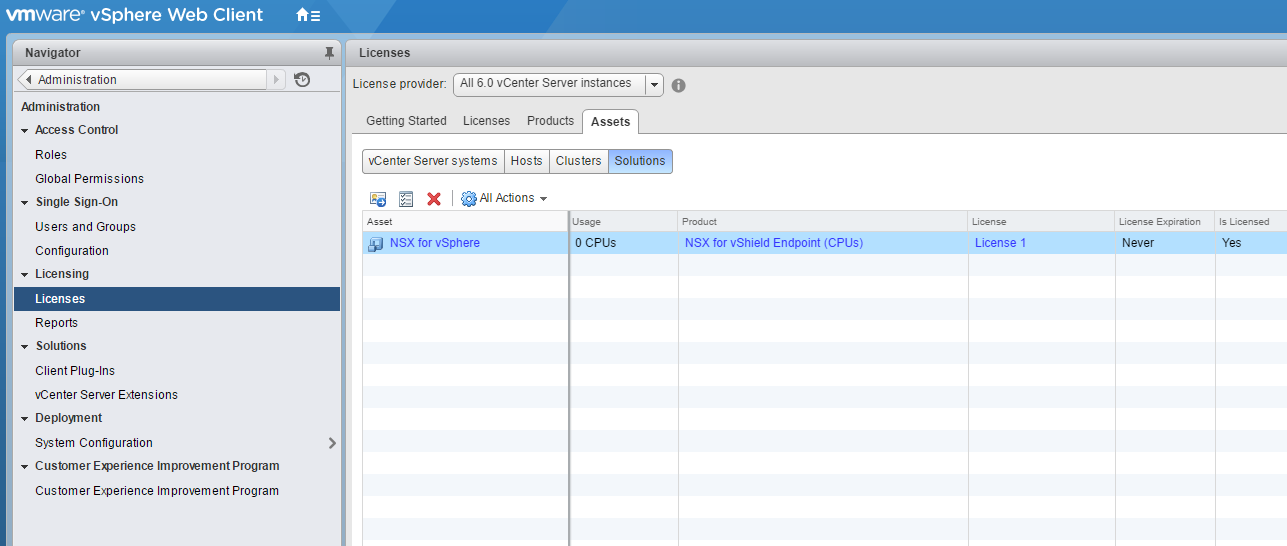
6. Select the newly added license, and click OK.
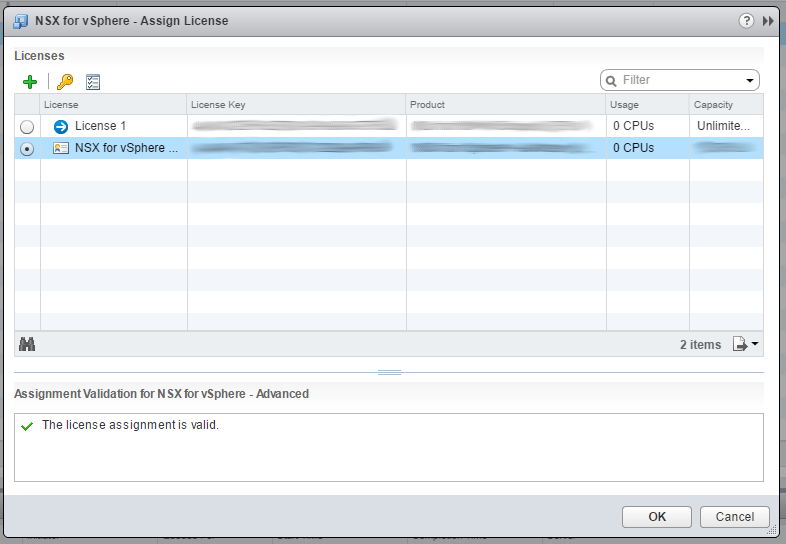
Host Preparation

1. Browse to Networking & Security > Installation > Host Preparation.

2. Select the cluster you wish to upgrade, and click Actions > Upgrade.

3. As part of the upgrade process, note the below tasks as hosts and VMs are reconfigured.

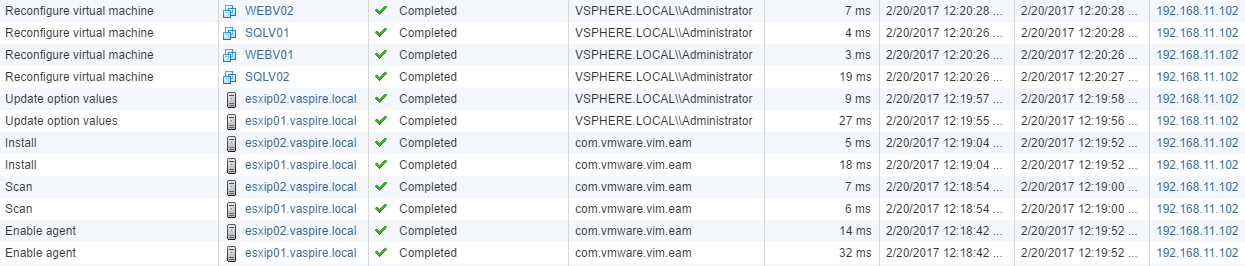
4. Once the Host Preparation is complete, you will be requested to finalise the upgrade from vShield App Firewall to NSX Distributed Firewall. When prompted, click Upgrade.

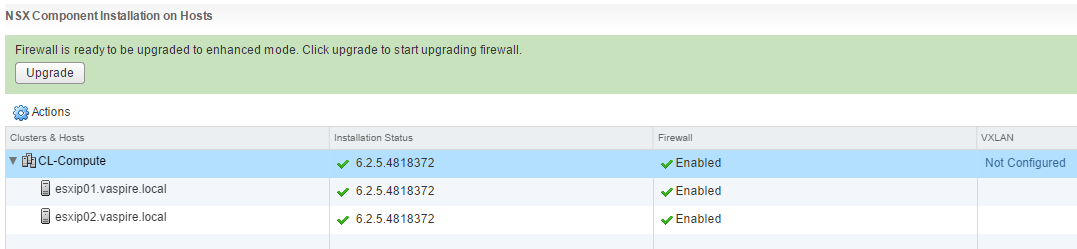
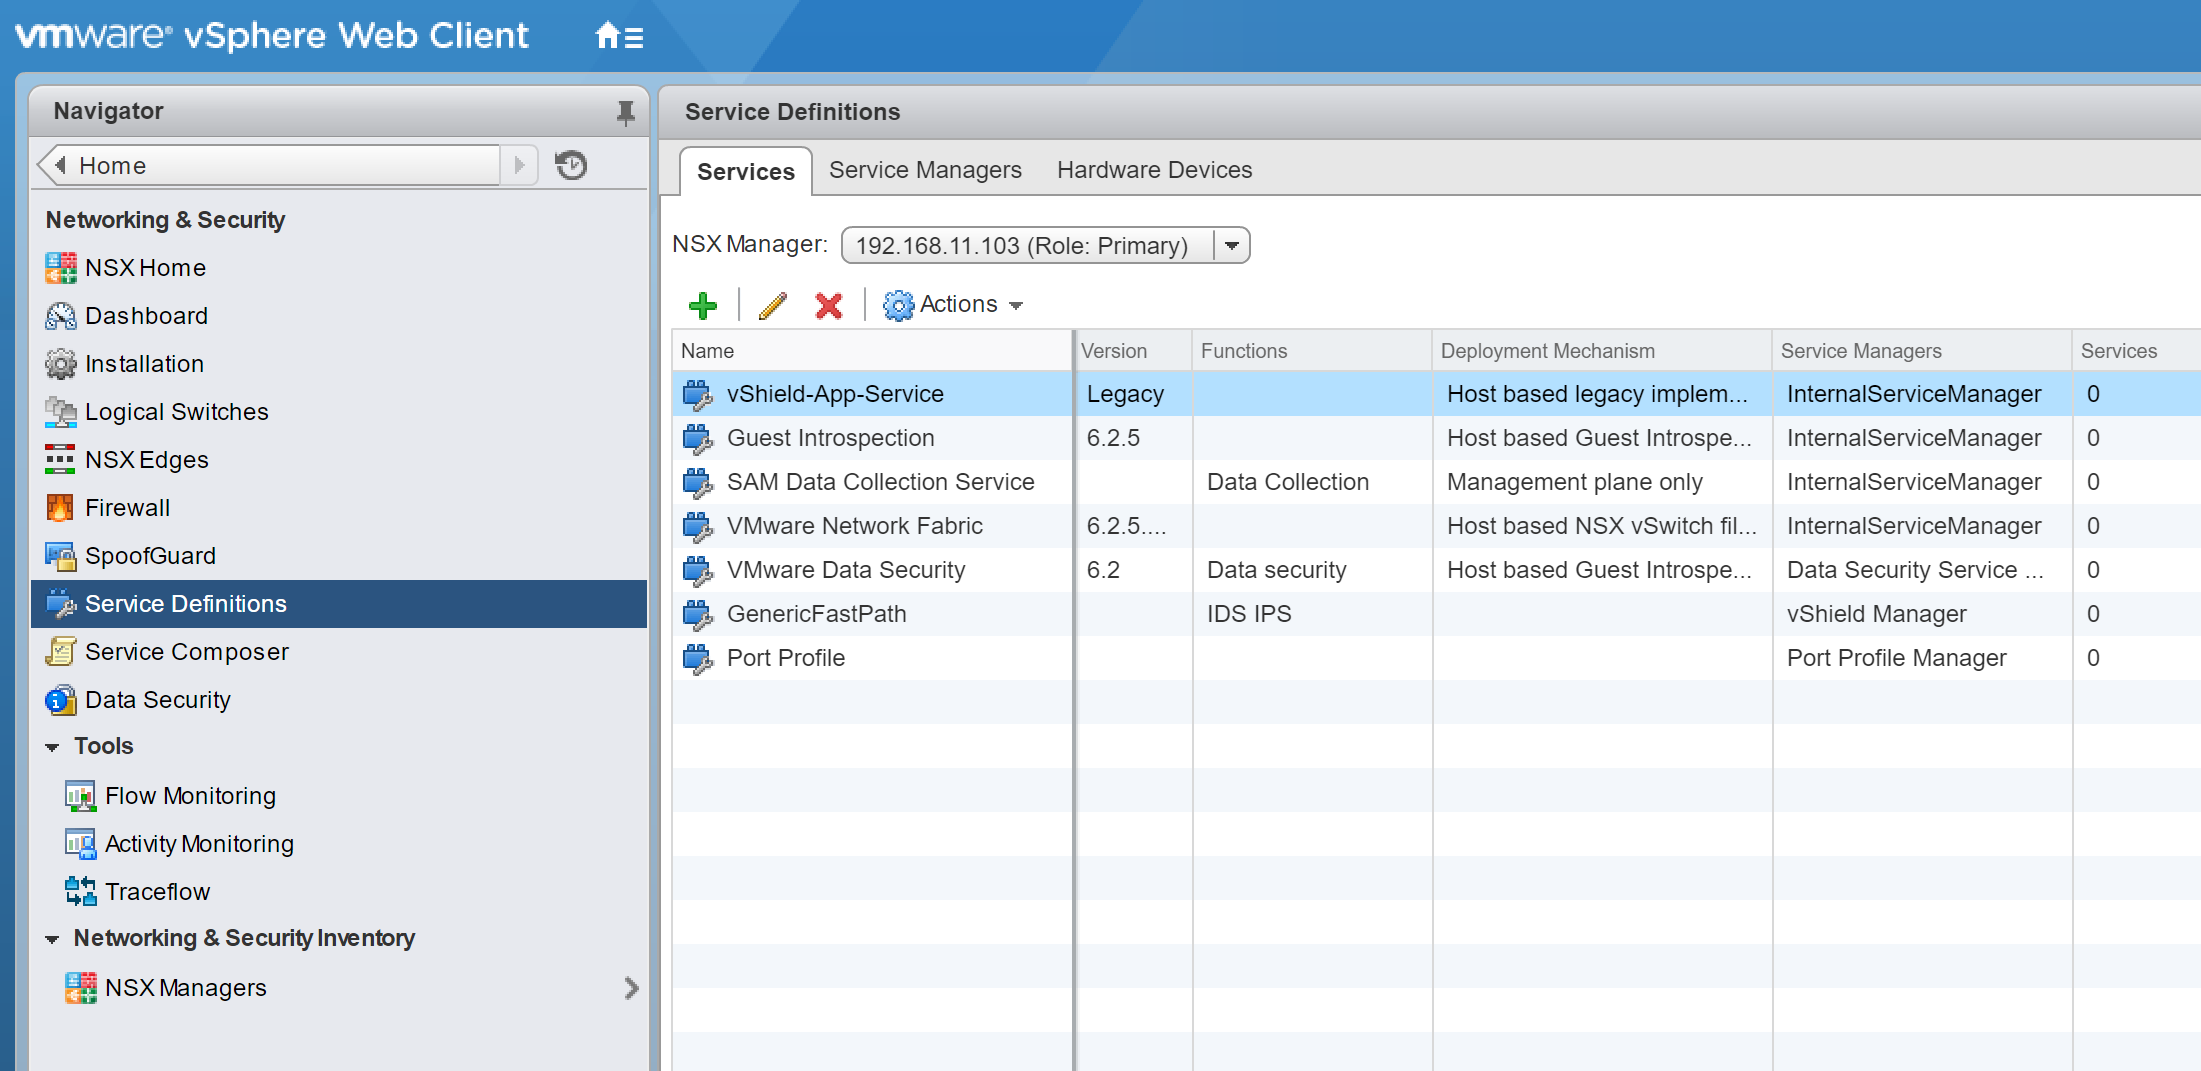
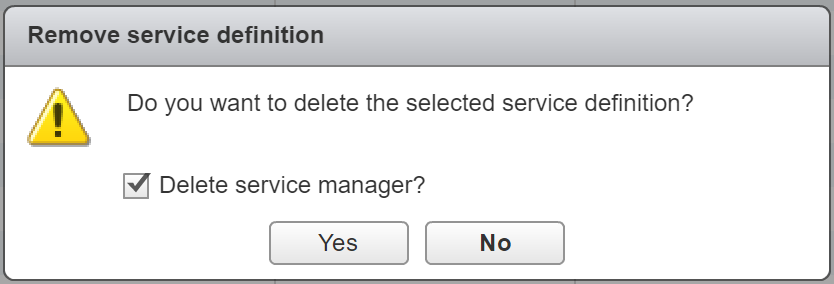
5. After the migration has finished, browse to Networking & Security > Service Definitions, and remove the now legacy vShield-App-Service.

6. If you have any Edges in play, simply browse to NSX Edges, right-click the Edge in question, and choose Upgrade Version.

This concludes the upgrade of VMware vCloud Networking & Security 5.5.4 to VMware NSX 6.2.5. In a future post, we will cover the configuration of NSX itself, as well as the management of NSX via AD Groups.

VMware Product Walkthroughs

VMware Product Walkthroughs

Reading Time: < 1 minute

VMware Product Walkthroughs

A great new range of informational overviews is available via the VMware Product Walkthroughs website. Covering a range of product overviews (from vSphere 6.5vRealize Network Insight, and more), to the specifics of vSphere 6.5 Encrypted vMotionNSX VXLAN Configuration, Virtual SAN Fault Domains. Great on so many levels, enabling us to up-skill and dry-run new products, demonstrate solutions to management and technical teams, etc.

Visit the parent website at https://featurewalkthrough.vmware.com.

Good job VMware.

VMware vSphere: Locked Disks, Snapshot Consolidation Errors, and ‘msg.fileio.lock’

Reading Time: 3 minutes

A reoccurring issue this one, and usually due to a failed backup. In my case, this was due to a failure of a Veeam Backup & Replication disk backup job which had, effectively, failed to remove it’s delta disks following a backup run. As a result, a number of virtual machines reported disk consolidation alerts and, due to the locked vmdks, I was unable to consolidate the snapshots or Storage vMotion the VM to a different datastore. A larger and slightly more pressing concern that arose (due to the size and amount of delta disks being held) meant the underlying datastore had blown it’s capacity, taking a number of VMs offline.

So, how do we identify a) the locked file, b) the source of the lock, and c) resolve the locked vmdks and consolidate the disks?

snapshot_consolidation_disklocked_01
Disk consolidation required.
snapshot_consolidation_disklocked_02
Manual attempts at consolidating snapshots fail with either DISKLOCKED errors…
...and/or 'msg.fileio.lock' errors.
…and/or ‘msg.fileio.lock’ errors.
snapshot_consolidation_disklocked_03
Storage vMotion attempts fail, identifying the locked file.

Identify the Locked File

As a first step, we’ll need to check the hostd.log to try and identify what is happening during the above tasks. To do this, SSH to the ESXi host hosting the VM in question, and launch the hostd.log.

tail -f /var/log/hostd.log

While the log is being displayed, jump back to either the vSphere Client for Windows (C#) or vSphere Web Client and re-run a snapshot consolidation (Virtual Machine > Snapshot > Consolidate). Keep an eye on the hostd.log output while the snapshot consolidation task attempts to run, as any/all file lock errors will be displayed. In my instance, the file-lock error detailed in the Storage vMotion screenshot above is confirmed via the hostd.log output (below), and clearly shows the locked disk in question.

snapshot_consolidation_disklocked_06
File lock errors, detailed via the hostd.log, should be fairly easy to identify, and will enable you to identify the locked vmdk.

Identify the Source of the Locked File

Next, we need to identify which ESXi host is holding the lock on the vmdk by using vmkfstools.

vmkfstools -D /vmfs/volumes/volume-name/vm-name/locked-vm-disk-name.vmdk

We are specifically interested in the ‘RO Owner’, which (in the below example) shows both the lock itself and the MAC address of the offending ESXi host (in this example, ending ‘f1:64:09’).

snapshot_consolidation_disklocked_04

The MAC address shown in the above output can be used to identify the ESXi host via vSphere.

snapshot_consolidation_disklocked_05

Resolve the Locked VMDKs and Consolidate the Disks

Now the host has been identified, place in Maintenance Mode and restart the Management Agent/host daemon service (hostd) via the below command.

/etc/init.d/hostd restart

snapshot_consolidation_disklocked_06

Following a successful restart of the hostd service, re-run the snapshot consolidation. This should now complete without any further errors and, once complete, any underlying datastore capacity issues (such as in my case) should be cleared.

snapshot_consolidation_disklocked_07

For more information, an official VMware KB is available by clicking here.

VMware vCenter Server Appliance 6.5: Installation & Configuration

Reading Time: 4 minutes

Following the general release of VMware vSphere 6.5 last month (see my What’s New in VMware vSphere 6.5 post), I’ll be covering a number of technical run-throughs already in discussion throughout the virtual infrastructure community.

We’ll be starting with a fresh installation of the new and highly improved vCenter Server Appliance (VCSA), followed by a migration from the Windows-based vCenter Server 6.0; the latter task made all the easier thanks to the vSphere Migration Assistant. More on this to come. Lastly, I’ll be looking at a fresh installation of the Windows-based product, however, the experience throughout all of these installation/migration scenarios has been vastly improved.

Continue reading → VMware vCenter Server Appliance 6.5: Installation & Configuration

VMware vSphere 6.5

What’s New in VMware vSphere 6.5

Reading Time: 2 minutes

VMware vSphere 6.5

With the release of vSphere 6.5 back in October, VMware have finally been able to offer a true HTML 5-based experience via their new vSphere Client (something that has been on the cards for quite a number of years), and I must say, I’m rather (very) pleased. Add to this the fact that the older C# Client has been pushed even closer to the Decommission Bin due to the release of the new ESXi Embedded Host Client (more on this in a future post), things are looking very good indeed.

esxi_embedded_host_client
The brand new ESXi Embedded Host Client offers a much welcomed move away from the legacy C# Client thanks to the new HTML5 and JavaScript UI.

The new vSphere Client will run alongside the older vSphere Web Client and is an inbuilt feature of both Windows and Appliance versions of vCenter Server 6.5. Don’t jump out of your seats just yet, however, as the reason for running the two interfaces in parallel is due to the new vSphere Client not offering full functionality. VMware state that their teams are looking to flesh-out the new Client with priority, so we hopefully won’t have to wait long. For all full-functional requirements, you’ll still be able to access the vSphere Web Client via standard means (http://<vcenter_fqdn>/vsphere-client), with the new vSphere Client accessible via http://<vcenter_fqdn>/ui.

vcsa-6_5_installation_22
Like the new ESXi Embedded Host Client, the new vSphere Client offers a fantastic HTML 5/JavaScript experience, but is lacking in some functionality at time of writing.

Other features of vSphere 6.5 and the vCenter Server Applicance include a fully integrated vSphere Update Manager, file-based backup and recovery, native VCSA high availability, and performance improvements of up to 3xHTML5-based web clients outlined above; security enhancements including VM disk-level encryption, vMotion encryption, as well as the addition of a secure boot model (enabling VMware to now offer ‘Secure Data, Secure Infrastructure, and Secure Access’).

For further details regarding vSphere 6.5, and a full list of the improvements and new functionality, simply visit https://blogs.vmware.com/vsphere/2016/10/whats-new-in-vsphere-6-5-vcenter-server.html.

Microsoft Exchange 2013

Microsoft Exchange Server 2013 – Installation & Configuration

Reading Time: 5 minutes

Microsoft Exchange 2013

One of the major upcoming projects this year will see the upgrade and possible redesign of our Exchange environment, and this will mean upgrading our current Exchange 2010 solution to Exchange 2013. With this comes a number of differences (the management GUI to name just one), and I aim to capture my initial thoughts of the product in this and upcoming posts. In future posts we’ll cover various topics including the creation of database availability groups (DAGs), load balancing, and general all round resilient goodness!

So, back in the home lab, the idea was to get a better feel for the product by building a lightweight demo solution, but one which still offers HA capabilities. As the Outlook Web App now offers near-Office 365 functionality, the need for multiple Outlook clients running on Windows OS’s in the lab is no longer the case; this means I am able to run one domain controller, a Client Access server, and two mailbox servers all on a single laptop running VMware Workstation. All VMs will be running trial versions of Microsoft Windows Server 2012 R2, and all will be housed on a Crucial BX100 250GB SSD for best performance.

Network Prerequisites

Before building any lab-based solution, I always start with the networking requirements, and the great thing about working with VMware Workstation means VLANs can be created and configured quickly and easily.

We’ll be using two VLANs in order segregate different traffic types; the first VLAN is for our server LAN traffic, and the secondary for Exchange replication traffic (more on the latter shortly).

Network Configuration

  • VMnet0 – VLAN 20 – LAN Traffic – 172.22.20.0/24
  • VMnet1 – VLAN 25 – Replication Traffic – 172.22.25.0/24

Domain Controller Configuration – ADDSV01

Domain Controller Configuration

Client Access Server 01 Configuration – EXCAV01

Client Access Configuration

Mailbox Database Server Configuration – EXMBV01 & EXMBV02

Mailbox storage requirements will see an additional 10GB disk added to each of the mailbox servers (as seen in the below VM configuration). The new disk will be used to house our mailbox databases. In production we would obviously add appropriately sized disks and span our databases across them, however, a single thin-provisioned 10GB disk in each of our mailbox servers will be perfectly acceptable for a lab environment.

Mailbox Role Configuration

In the below screenshot I’ve brought the new disk online and created a volume accordingly:

Mailbox Disk Configuration

Lastly, we’ll be adding an additional NIC to each of the mailbox servers. I’ll be covering this in depth in my next post when I configure a database availability group (DAG); specifically, the NICs will be used to segregate replication traffic from our production network. Below shows our newly added NIC for replication traffic. The additional mailbox server NICs will be configured as such:

  • EXMBV01 – 172.22.25.102/24
  • EXMBV02 – 172.22.25.103/24

Mailbox Role NIC Configuration - Replication Network

Note, a requirement of Exchange replication means the new NIC must have no gateway, no DNS servers, and DNS registration must be disabled (see below IP configuration for EXMBV02). Ensure the relevant fields are left blank and disabled.

Replication NIC Configuration_02

Windows Server Manager now shows our NICs as below (EXMBV02):

Replication NIC Configuration_02

Installating Microsoft Exchange Server 2013

Now our prereq work is complete, we can move on to the actual installation.

Once the ISO has been loaded and its pre-installation checks complete, installation across the three servers was very easy. For resilience, Client Access and Mailbox roles were segregated onto their own VMs. Installation of the Client Access role onto EXCAV01 took just 10 minutes, with the Mailbox role installing on EXMBV01 and EXMBV02 even quicker. All in all, the three roles were installed in just under 45 minutes. Not bad at all; but this is where flash storage comes into its own.

The below screenshots show just how ‘clean’ the the 2013 installation process is and, to ensure we install only the roles we require, ensure you select ‘Don’t use recommended settings’:

Exchange Install

For the Client Access role, we select the relevant option for EXCAV01:

Exchange Install - Client Access Role

…and likewise for the Mailbox role on both EXMBV01 and EXMBV02:

Exchange Install - Mailbox Role

Following the readiness checks, installation proceeded without any fuss.

Post Installation Checks

And that’s it. If everything always went this easily, it’d be an easy life!

Following the installation of the Mailbox roles we’re now able to login to the new Exchange Control Panel. Unlike previous versions, this is now solely web based, and so allows us to login from anywhere on the network:

Exchange Control Panel

Likewise, we’re also able to login to the Outlook Web App, again, from anywhere on the network:

Outlook Web App

Browsing to ‘Servers > Servers’, we see that our three newly built Exchange servers are displayed, each with it’s role clearly indicated:

Servers

Final Task – Ensuring Database Health

Our last task is to ensure that our databases are mounted and in a healthy state. This can be confirmed by a) browsing to ‘Servers > Databases’, or b) via the Exchange Management Shell by running the cmdlet ‘Get-MailboxDatabaseCopyStatus’:

Database Health Check

Get-MailboxDatabaseCopyStatus

From the above screenshots, we see the three new databases I have created, all of which are housed on one of our Mailbox servers (in this case, EXMBV01).

To create a database, simply browse to ‘Server > Databases’, and click the ‘+’ symbol:

Create New Mailbox

Simply give your new mailbox a name, select one of the new mailbox servers on which to store it, and set the file path (for which we need to point at the secondary 10GB disk).

And that is it. Mail is now flowing nicely and, in the next post, we’ll look at enabling replication between the mailbox servers in order to ensure resilience in the event of a server/network failure.

See you in the next post…

Testing Network Connectivity Between VMkernel Ports

Reading Time: 2 minutes

Configuring VLANs within vSphere is a simple enough task, however, testing outgoing ICMP traffic between hosts is a must when you find yourself unable to communicate with another VMkernel port on another host. Using the vmkping CLI command, we are able to test outgoing traffic via specific VMkernel ports, perfect for those attempting to troubleshoot connectivity issues on different subnets and/or vSwitches.

Testing Basic Network Connectivity

  1. Connect to an ESXi host via SSH.
  2. Via command shell, run the below command (where x.x.x.x is the hostname or IP address of the server that you wish to ping):
    # vmkping x.x.x.x

In my example below, I test connectivity between the Management Networks on two ESXi hosts in my lab. Specifically, I connect to Host A (192.168.20.101) via SSH, and ping Host B (192.168.20.102):

vmkping

Testing Network Connectivity via a Specific VMkernel Port

ESXi 5.1 and up allows us to test outgoing ICMP traffic on specific vmkernel ports by adding the -I switch, followed by vmkX (where X is the VMkernal number):

# vmkping -I vmkX x.x.x.x

In my example below, I test ICMP traffic between two VMkernel ports which have been configured for iSCSI traffic (vmk1 on both hosts). Specifically, I SSH on to Host A and test  ICMP traffic between the specific VMkernel ports (Host A = 192.168.25.101, Host B = 192.168.25.103):

iSCSI Network

vmkping -I