You may have noticed that your usual Active Directory user account (which might afford you full administrative access in vCenter) doesn’t get you very far when attempting to manage NSX for vSphere. This is by design, as NSX access is not governed or controlled by vCenter Server roles.
NSX utilises it’s own predefined security roles for role based access, all of which can be assigned to Active Directory Users and/or Security Groups. This is great for larger teams with clearly defined areas of demarcation and responsibilities, smaller teams of administrators and read-only support teams, and even one-off auditor visits.
In this post, I detail the procedure for implementing AD integration in VMware NSX for vSphere 6.4.2, however, the procedure is the same for NSX 6.X. Before we start, let’s take a look at the six NSX Security Roles:
NSX Security Roles
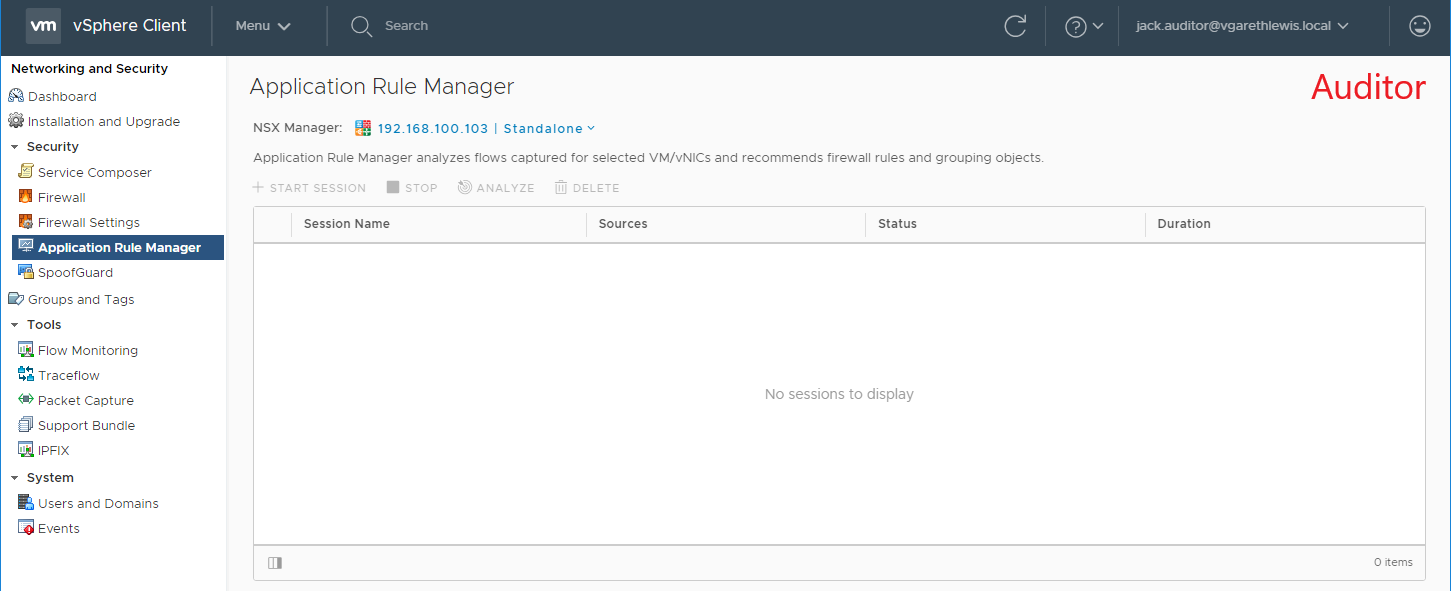
- Auditor – Users in this role can only view system settings and auditing, events and reporting information and will not be able to make any configuration change.
- Security Engineer – Users in this role can perform all security tasks, such as configuring policies and firewall rules. Users have read access to some networking features, but no access to host preparation and/or user account management.
- Network Engineer – Users in this role can perform all networking tasks, such as routing, DHCP, bridging, etc. Users have read access to endpoint security features, but no access to other security features.
- Security Administrator – Users in this role can configure security compliance policies in addition to viewing the reporting and auditing information in the system.
- NSX Administrator – Users in this role can perform all tasks related to deployment and administration of this NSX Manager instance.
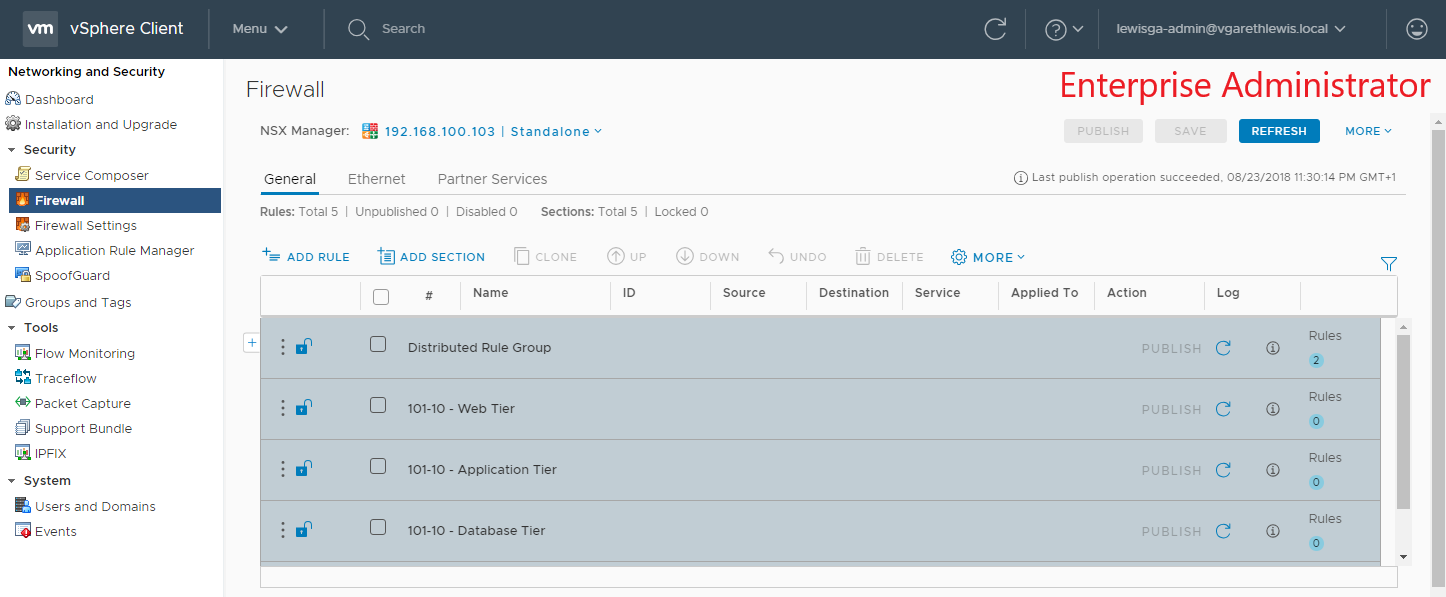
- Enterprise Administrator (God Mode) – Users is this role can perform all tasks related to deployment and configuration of NSX products and administration of this NSX Manager instance.
Procedure
Please note, due to current feature parity differences between the vSphere Web Client (Flex) and vSphere Client (HTML 5), the below procedure will need to be performed utilising the vSphere Web Client (Flex).
1. Create your required AD Security Groups, naming accordingly.

2. Log in to the vSphere Web Client (Flex) as administrator@vsphere.local.
3. Browse to Networking & Security > System > Users and Domains.
4. Via the Users tab, click the Add icon.
5. Select Specify a vCenter group and enter the AD Security Group name as per above AD Objects. When ready, click Next.
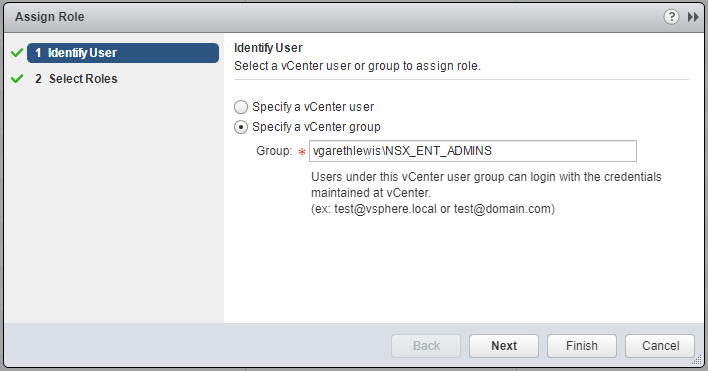
6. Select the appropriate NSX Security Role to associate with the AD Security Group and click Finish.

7. Repeat steps 4 – 6 until all required AD Security Groups have been added.
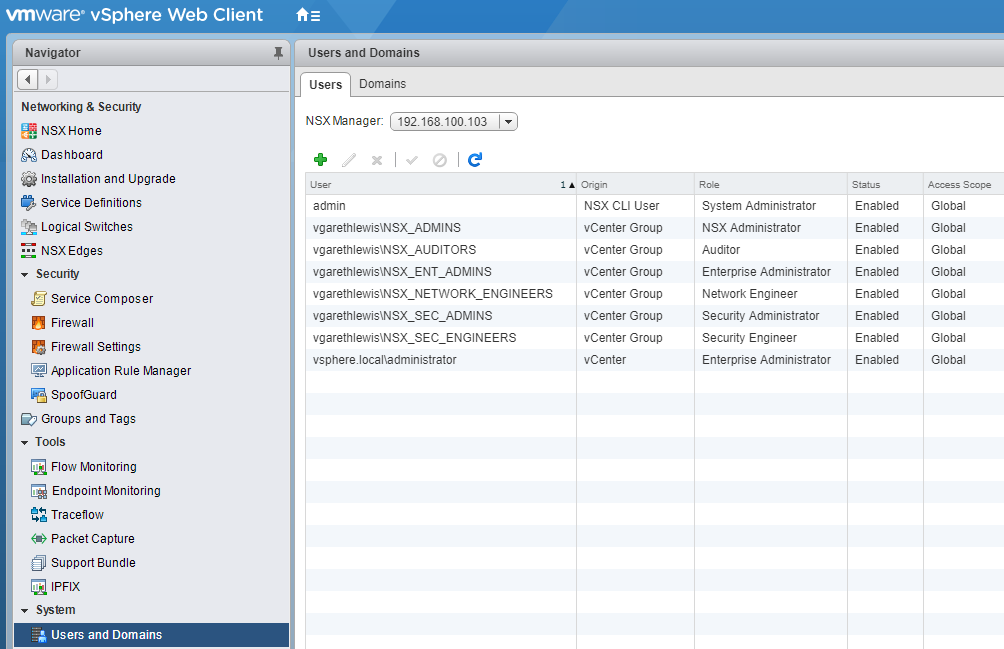
8. Confirm successful addition of all NSX Security Roles. At this point, you can assign further AD Users/Security Groups, disable or enable accordingly, and delete.
9. Log in to either the vSphere Web Client or vSphere HTML5 Client as a user associated to one of the newly added AD Security Groups and test access. Below I detail an example of both Auditor and Enterprise Administrator roles.
Further Reading
Leave a Reply