In a nutshell, vRealize Network Insight delivers intelligent operations for software-defined networking and security. It enables customers to build an optimised, highly-available, and secure network infrastructure across multi-cloud environments. It accelerates micro-segmentation planning and deployment, enables visibility across virtual and physical networks, and provides operational views to manage and scale the VMware NSX deployments.
Welcome to the first in a five-part series which sees us cover everything from the installation of vRNI, to how we can manually implement micro-segmentation by using the NSX-T Distributed Firewall following an analysis of vRNI’s collected data flows. I recommend following each article in the series, as each one sets up the next. If you’d prefer to jump to a specific article, simply use the below links.
Full vRNI Series
- VMware vRealize Network Insight (vRNI) – Part 1 – Installation
- VMware vRealize Network Insight (vRNI) – Part 2 – Configuration
- VMware vRealize Network Insight (vRNI) – Part 3 – Identity & Access Management via LDAP
- VMware vRealize Network Insight (vRNI) – Part 4 – Application Discovery
- VMware vRealize Network Insight (vRNI) – Part 5 – Data Flow Analysis & Micro-Segmentation
- VMware vRealize Network Insight (vRNI) – Part 6 – Importing Recommended Firewall Rules into NSX-T via Python Script
There are two main flavours of vRNI – an on-premises installation or VMware’s SaaS offering, Network Insight Cloud. The latter comes with all the benefits of a cloud-based solution (namely managed updates, integration with the suite of VMware Cloud products, etc.); however, the two flavours have the same functionally.
This article focuses on the on-premises flavour and, specifically, version 5.3.0 (released 2020-07-14).
Prerequisites
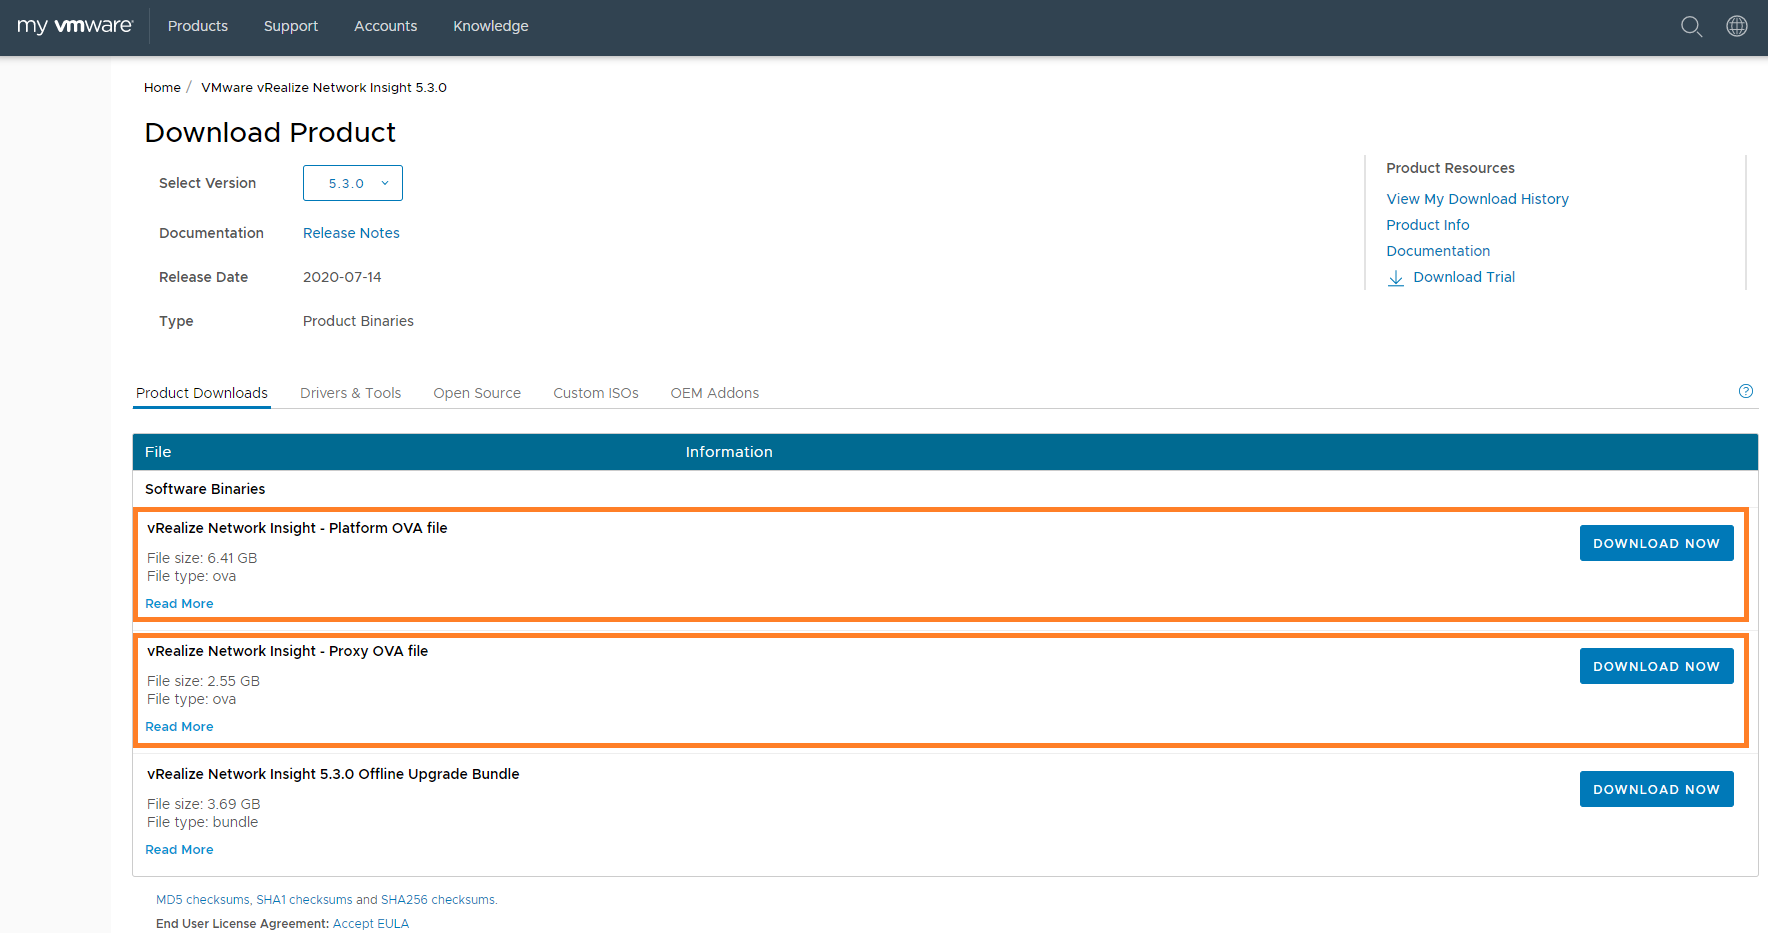
Firstly, you’ll need to download the OVA files required to get this solution up and running. Visit your My VMware account and download both the Platform and Proxy (Collector) OVA files as shown in the below screenshot.
First of all, we’ll need to deploy the Platform appliance. This is the brains of the operation, and where all that nice data you collect will be stored. The Platform appliance also provides the analytics, user interface and data management for Network Insight.
The other component is the Proxy VM (aka – Collector appliance) which is used to connect to the various data sources supported by Network Insight – vCenter Server, NSX, as well as physical network devices.
The hardware requirements of the various ‘brick’ sizes for a single platform and a single Proxy/Collector appliance are as follows:
| Brick Size | Cores required for 2.1 GHz CPU | Cores required for 2.3 GHz CPU | Cores required for 2.6 GHz CPU | RAM | Disk |
|---|---|---|---|---|---|
| Medium | 10 | 9 | 8 | 32 GB | 1 TB |
| Large | 15 | 14 | 12 | 48 GB | 1 TB |
| Extra Large | 20 | 18 | 16 | 64 GB | 2 TB |
Note, the reservation for the CPU speed and RAM for each node must be 100% of the value specified above.
Platform Appliance Deployment
1. From vSphere, deploy a new OVF Template and browse to the Platform OVA file you downloaded earlier. Progress through the usual deployment requirements – assign the VM to a suitable VM Folder, select an appropriate compute resource, accept EULA, deployment configuration, storage, network, etc.
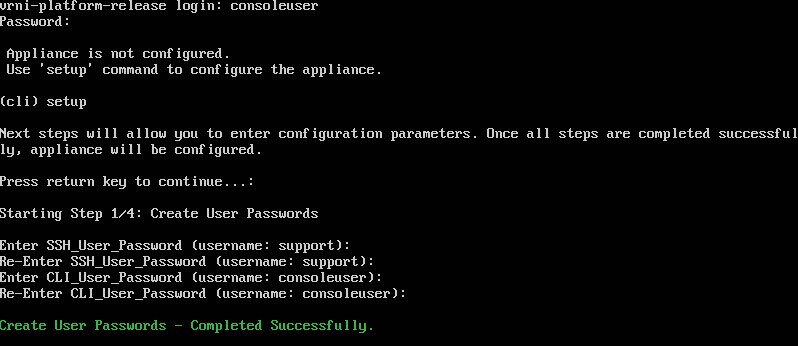
2. Once the appliance has successfully deployed, power-on and open a console window. When prompted, log in using the default Network Insight credentials – Username: consoleuser, Password: console.

3. When prompted, create passwords for the support and consoleuser users.
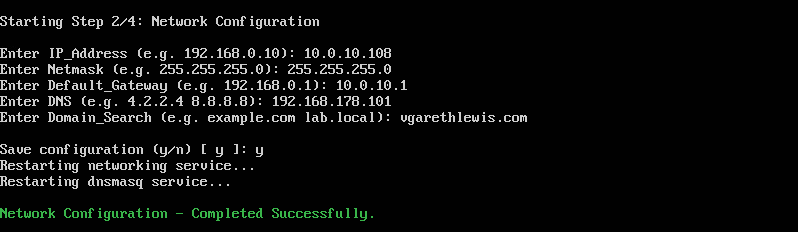
4. Enter the appliance’s IP address, subnet mask, default gateway, DNS, and domain accordingly.
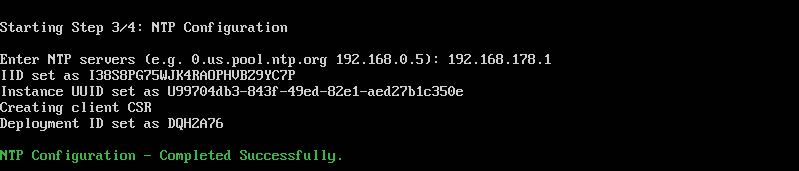
5. Enter your NTP server information.
6. If appropriate, enter your web-proxy details.
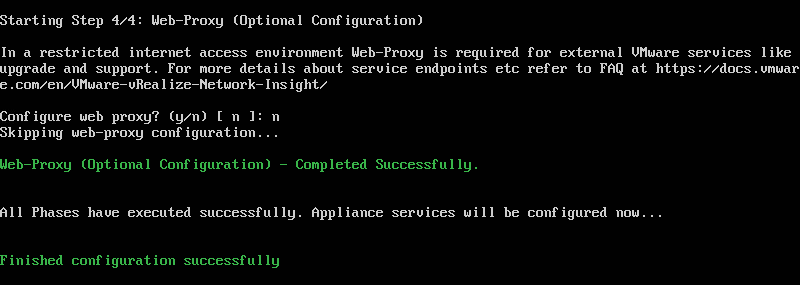
7. NTP will now sync and, once complete, will finalise the last of the configuration steps.
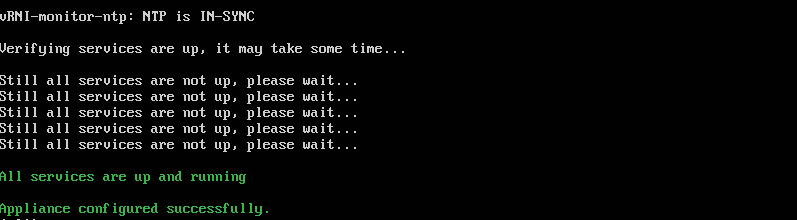
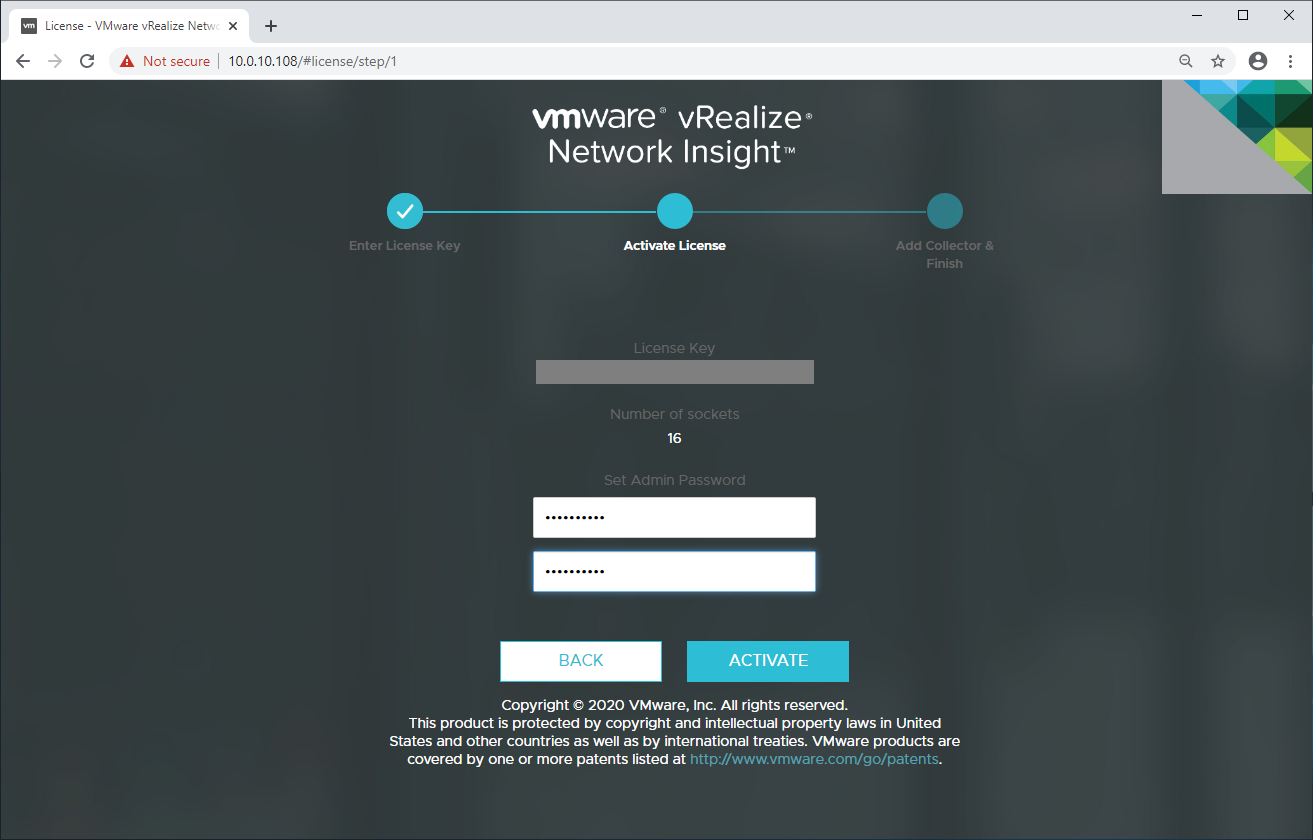
8. Once the appliance reports that it has been successfully configuration, open a web browser and browse to the appropriate FQDN/IP address of the appliance. When prompted, provide the license key and click Activate.
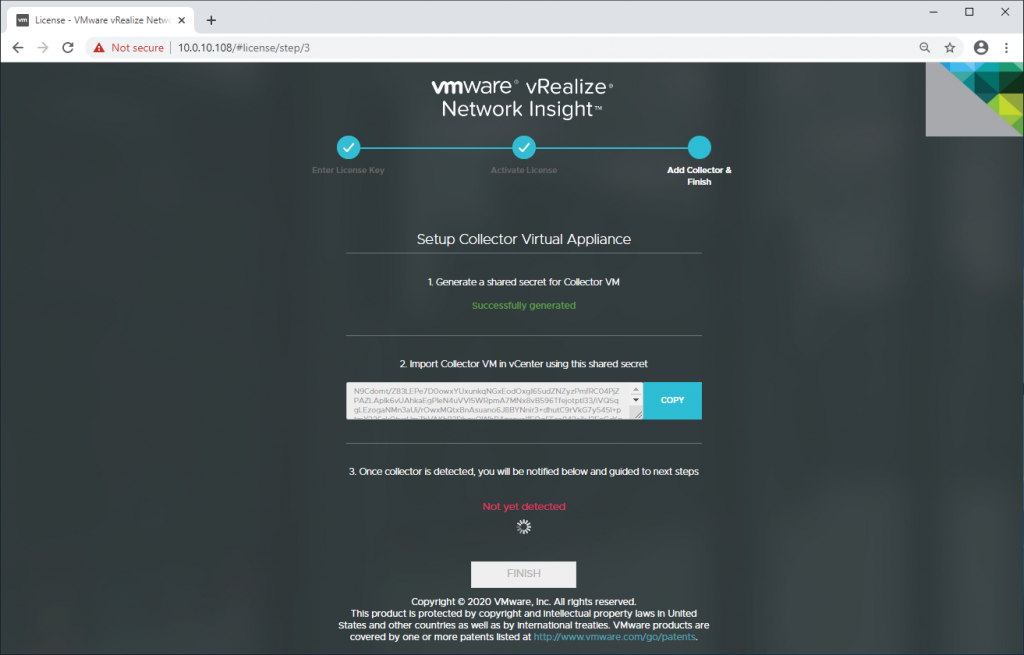
9. You will now be presented with a Collecter VM Shared Secret. This will be required when deploying the Collecter (Proxy) appliance in the next set of steps. Keep this screen running while we look at deploying the Collecter appliance.
This concludes the deployment of the Platform VM.
Collector (Proxy) Deployment
1. From vSphere, deploy a new OVF Template and browse to the Proxy OVA file you downloaded earlier. Progress through the usual deployment requirements.
IMPORTANT – When prompted to enter a shared secret, copy the Shared Secret from Step 9 above and paste into the Shared Secret for Proxy field.
Once complete, click Next.
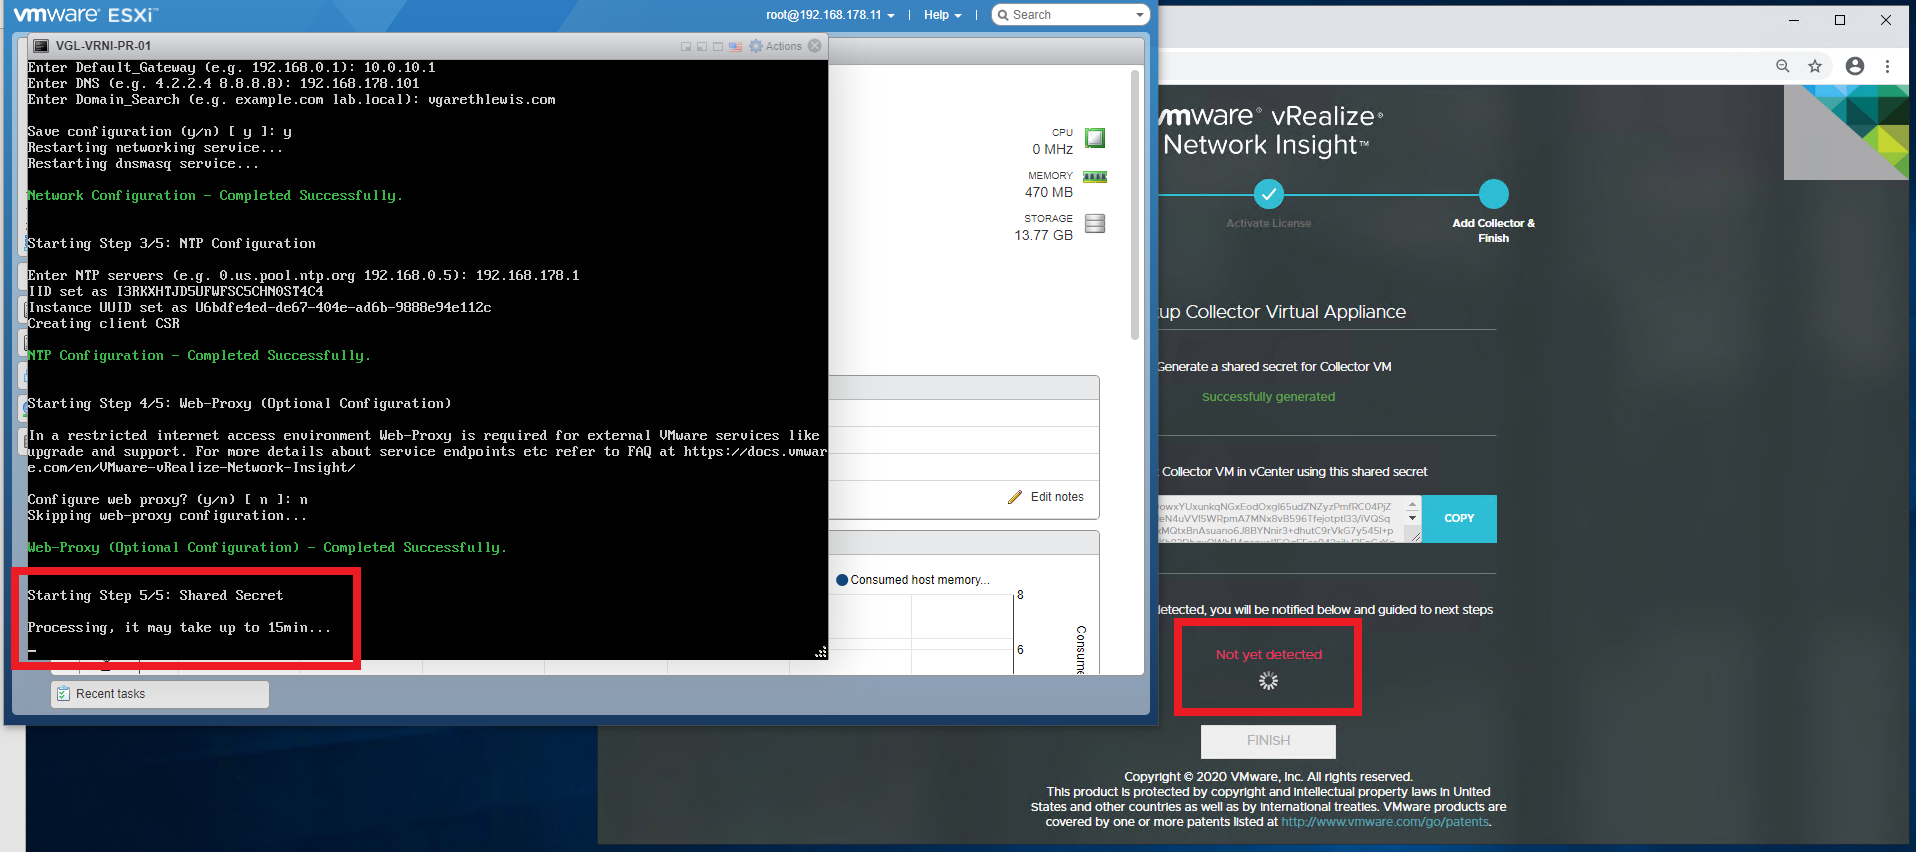
2. Once the Proxy/Collector appliance has successfully deployed, power-on, and open a console window. When prompted, log in using the displayed credentials, and run through the same configuration as the Platform appliance.
3. Once complete, the Proxy appliance will begin processing the Shared Secret provided earlier. Grab a coffee and monitor both consoles until the Platform appliance detects the Proxy/Collector.
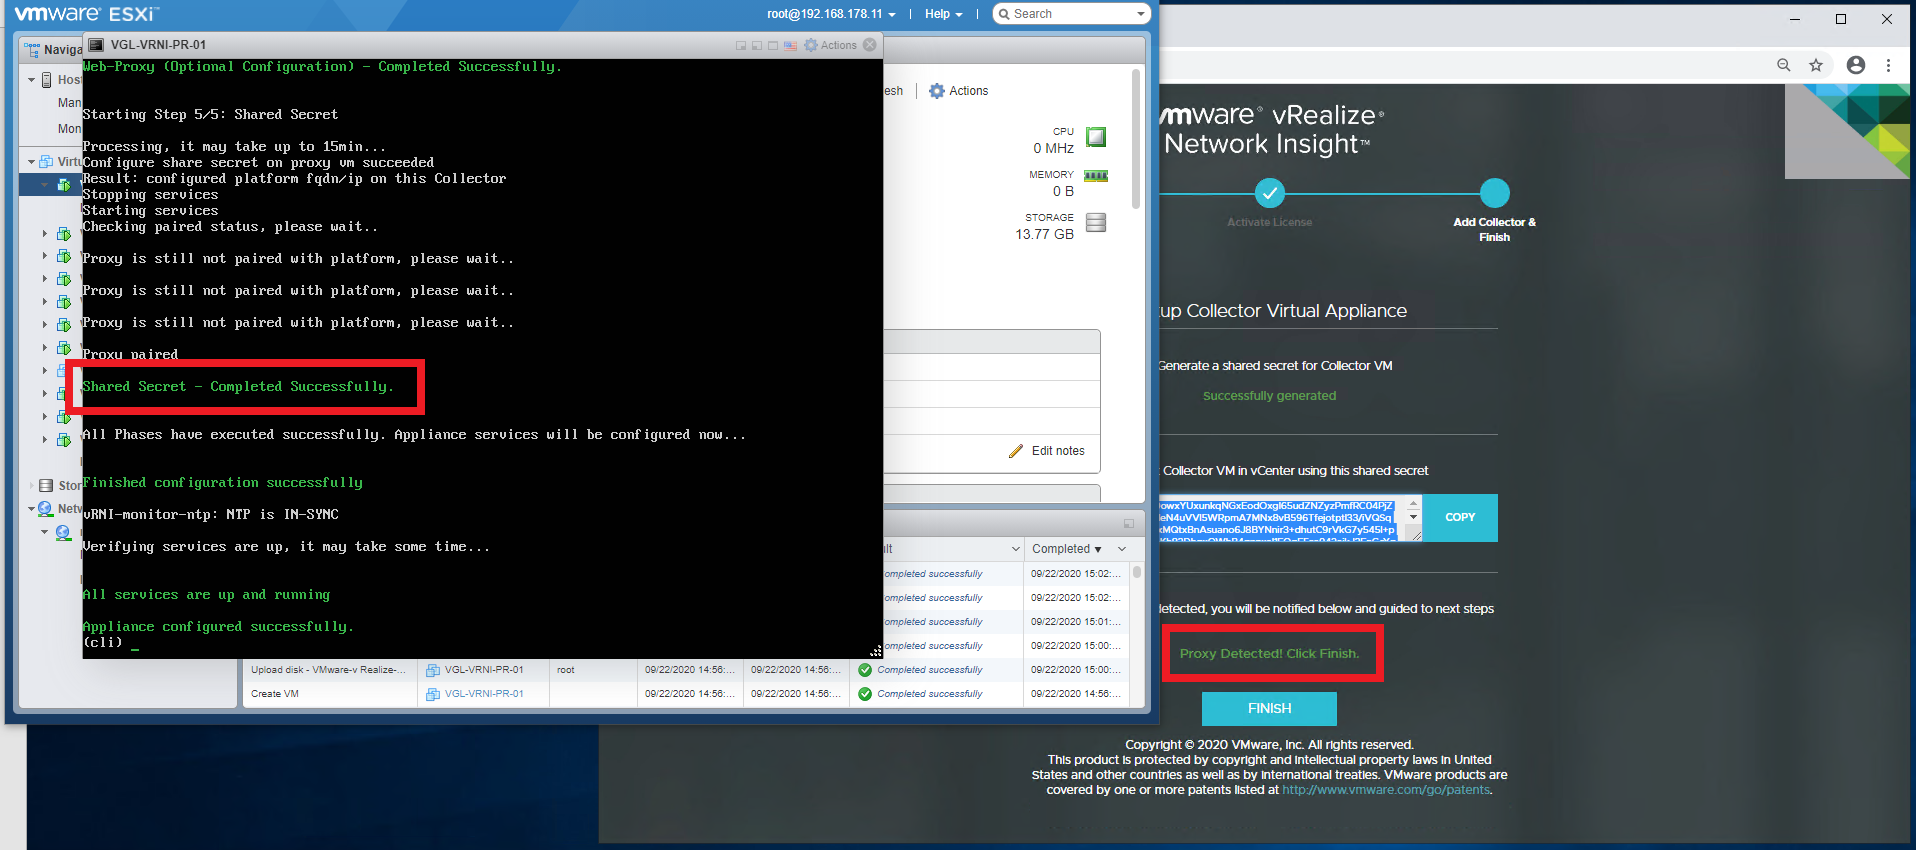
…Back to the Platform Appliance User Interface
1. As the Proxy/Collector appliance is now visible, click Finish.
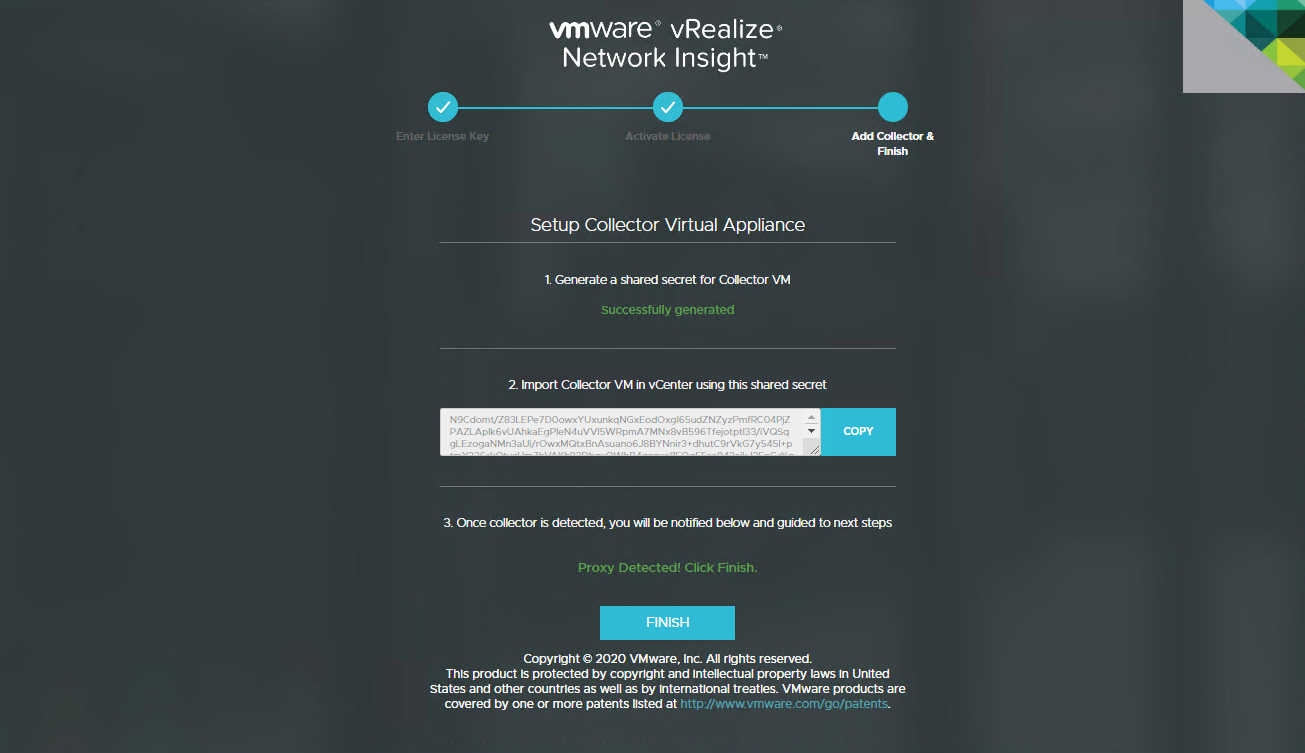
2. Finally, login utilising the admin@local credentials defined during deployment.

This concludes the deployment of the VMware vRealize Network Insight Platform and Proxy/Collector appliances.
In Summary
In this article, we performed a simple deployment of the on-premises vRNI Platform and Proxy/Collector appliances.
In Part 2 (VMware vRealize Network Insight (vRNI) – Part 2 – Configuration) we will add our vCenter Server(s) and NSX-T Managers as data sources before, in Part 3 (VMware vRealize Network Insight (vRNI) – Part 3 – Identity & Access Management via LDAP), configuring identity and access management via LDAP to enable users to login with domain credentials.
In Part 4 (VMware vRealize Network Insight (vRNI) – Part 4 – Application Discovery) we will begin discovering our applications and, Part 5, we begin analysis the collected traffic flows (VMware vRealize Network Insight (vRNI) – Part 5 – Data Flow Analysis & Micro-Segmentation).
Full vRNI Series
- VMware vRealize Network Insight (vRNI) – Part 1 – Installation
- VMware vRealize Network Insight (vRNI) – Part 2 – Configuration
- VMware vRealize Network Insight (vRNI) – Part 3 – Identity & Access Management via LDAP
- VMware vRealize Network Insight (vRNI) – Part 4 – Application Discovery
- VMware vRealize Network Insight (vRNI) – Part 5 – Data Flow Analysis & Micro-Segmentation
- VMware vRealize Network Insight (vRNI) – Part 6 – Importing Recommended Firewall Rules into NSX-T via Python Script
Leave a Reply