VMware NSX has offered load-balancing capabilities since its inception as VMware NSX for vSphere v6.0 way back in October 2013. Since then, the technology was superseded by VMware NSX-T 1.0 in May 2016 (later rebranded to VMware NSX-T Data Center (v2.2) and again to VMware NSX (v4.x)), thanks to VMware’s $1.26B acquisition of Nicira in 2012. VMware NSX-T brought us (and still does) truly hypervisor-agnostic networking, security, and native load-balancing capabilities.
In 2019, VMware acquired Avi Networks, leaders in software-defined application delivery services for the multi-cloud era. Furthermore, the VMware NSX Advanced Load Balancer (v18.2) was announced in November 2019 following this acquisition.
So, what about the NSX native load balancer? VMware will deprecate this feature in an upcoming release of VMware NSX (likely 5.x), but see below update for more information), however, no date has yet been released. However, VMware advises that customers take appropriate steps to migrate to the NSX Advanced Load Balancer (for which there is a free tier with appropriate VMware NSX licensing) as soon as possible.
We are giving advanced notice now to allow existing customers who use the built-in NSX load balancer time to migrate to NSX Advanced Load Balancer (Avi). Support for the built-in NSX load balancer for customers using NSX-T Data Center 3.x will remain for the duration of the NSX-T Data Center 3.x release series. Support for the built-in NSX load balancer for customers using NSX 4.x will remain for the duration of the NSX 4.x release series. Details for both are described in the VMware Product Lifecycle Matrix. We do not intend to provide support for the built-in NSX load balancer beyond the last NSX 4.x release.
VMware
In this article, the first in a quick two-part series, we focus on the initial setup, prerequisites, and creation of an ALB NSX-T Cloud in readiness for the second article, focussing on the creation of a virtual service which will load balance traffic to two frontend web servers.
Advanced functionality, such as troubleshooting, Global Server Load Balancing (GSLB), will not be covered in this series. Also, please note that my VMware NSX ALB controllers have already been deployed, so we will solely focus on the virtual service prereqs and configuration.
NSX Advanced Load Balancer (ALB) – Basic Virtual Service Series
- Part 1 – This Article – Initial Setup, Prerequisites and Creating an NSX-T Cloud
- Part 2 – Creating a Virtual Service – COMING SOON
Technologies Used
- vCenter Server 8.0.1.00000, 21860503
- VMware ESXi, 8.0.1, 21813344
- VMware NSX 4.1.0.2.0.21761691
- VMware NSX ALB (Avi) 22.1.4, 9196
Setup and Prerequisites
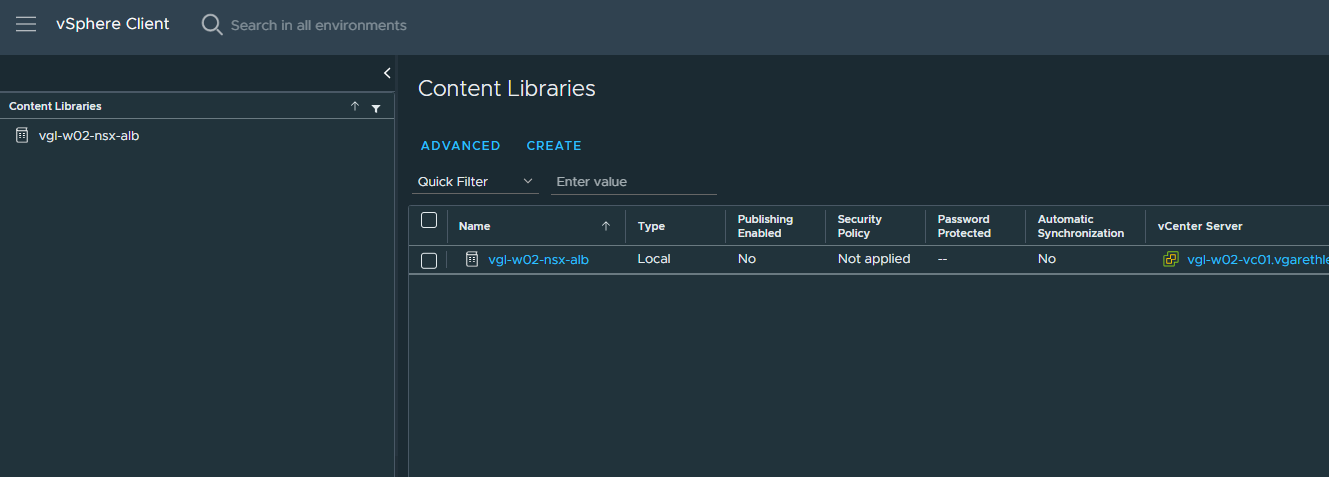
vSphere Content Library
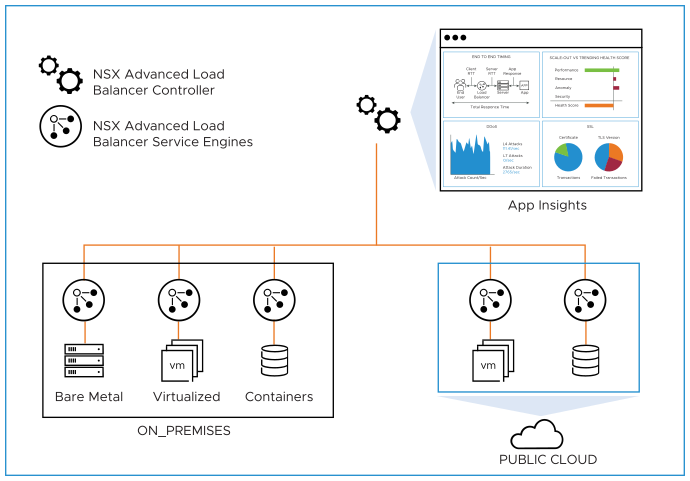
Firstly, NSX ALB Virtual Services depend on ALB Server Engines (SEs), virtual machines that facilitate load balancing and traffic steering and can scale based on customer/virtual service requirements. For this, SE OVAs are automatically deployed from a centralised vSphere Content Library.
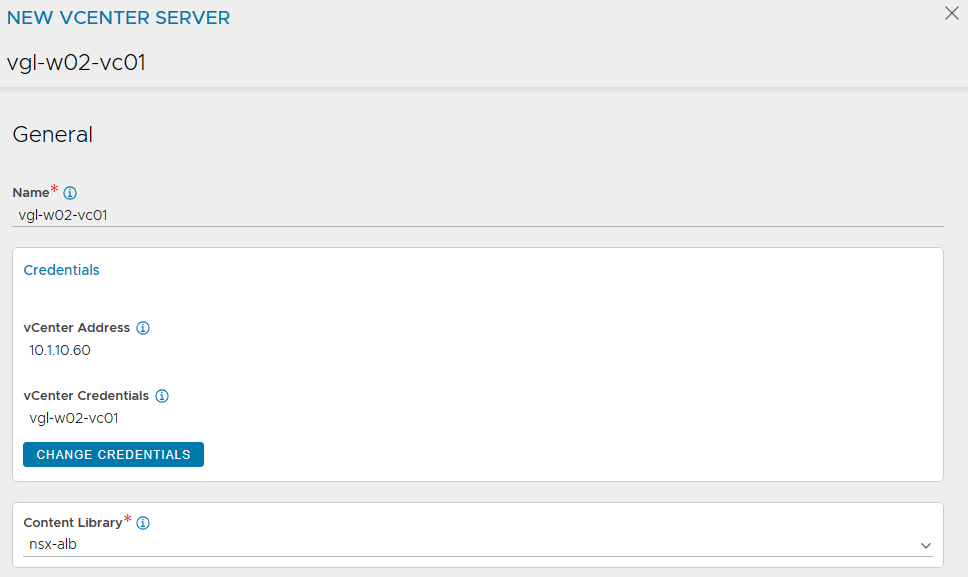
In the below screenshot, I have created a new vSphere Content Library for NSX ALB to utilise, and we will reference this Content Library in a later configuration step.
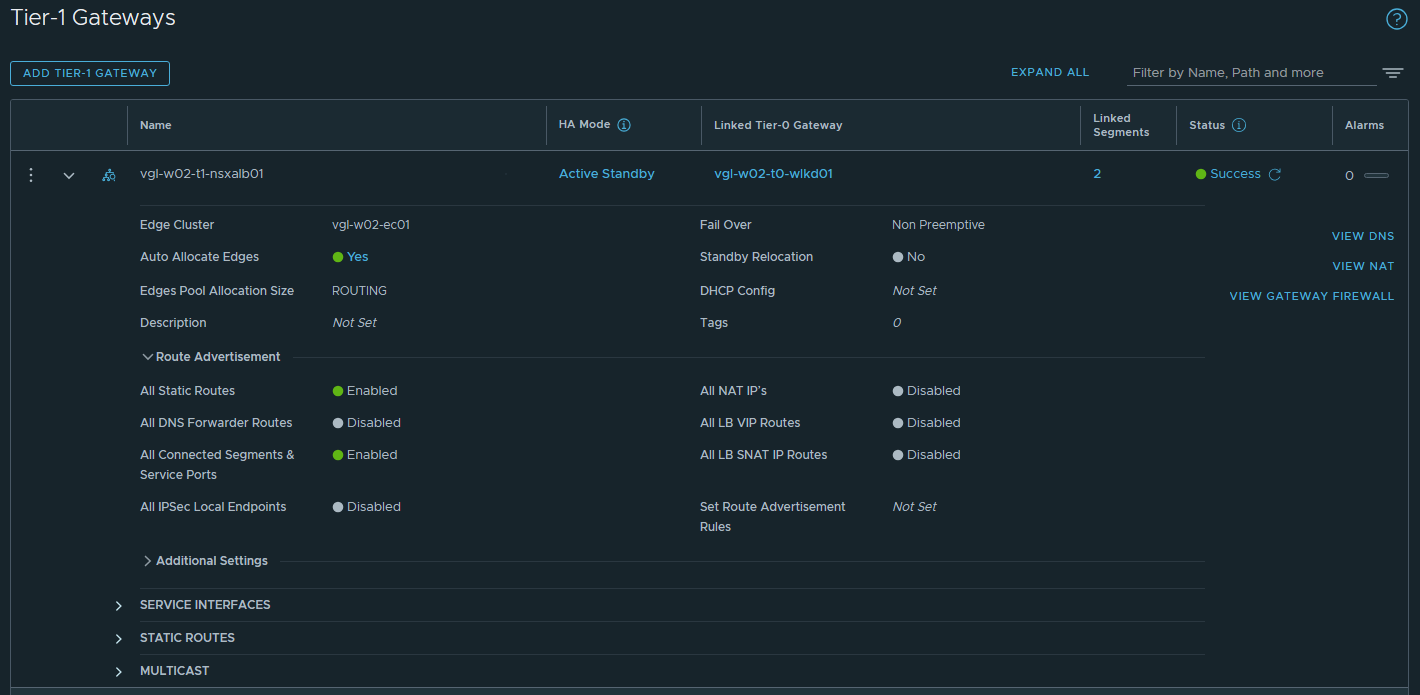
VMware NSX Tier-1 Gateway
Next, we create a new NSX T1 Gateway that will be connected to two (2) new Overlay Segments. These Segments will house our SE Management and VIP interfaces, respectively.
In the below screenshot, I have created a new T1 (vgl-w02-t1-nsxalb01), placed it on a suitable Edge Cluster, with route redistribution enabled for both Static Routes and All Connected Segments & Service Ports, and connected it to a T0 which already exists and is peered with the physical fabric via BGP.
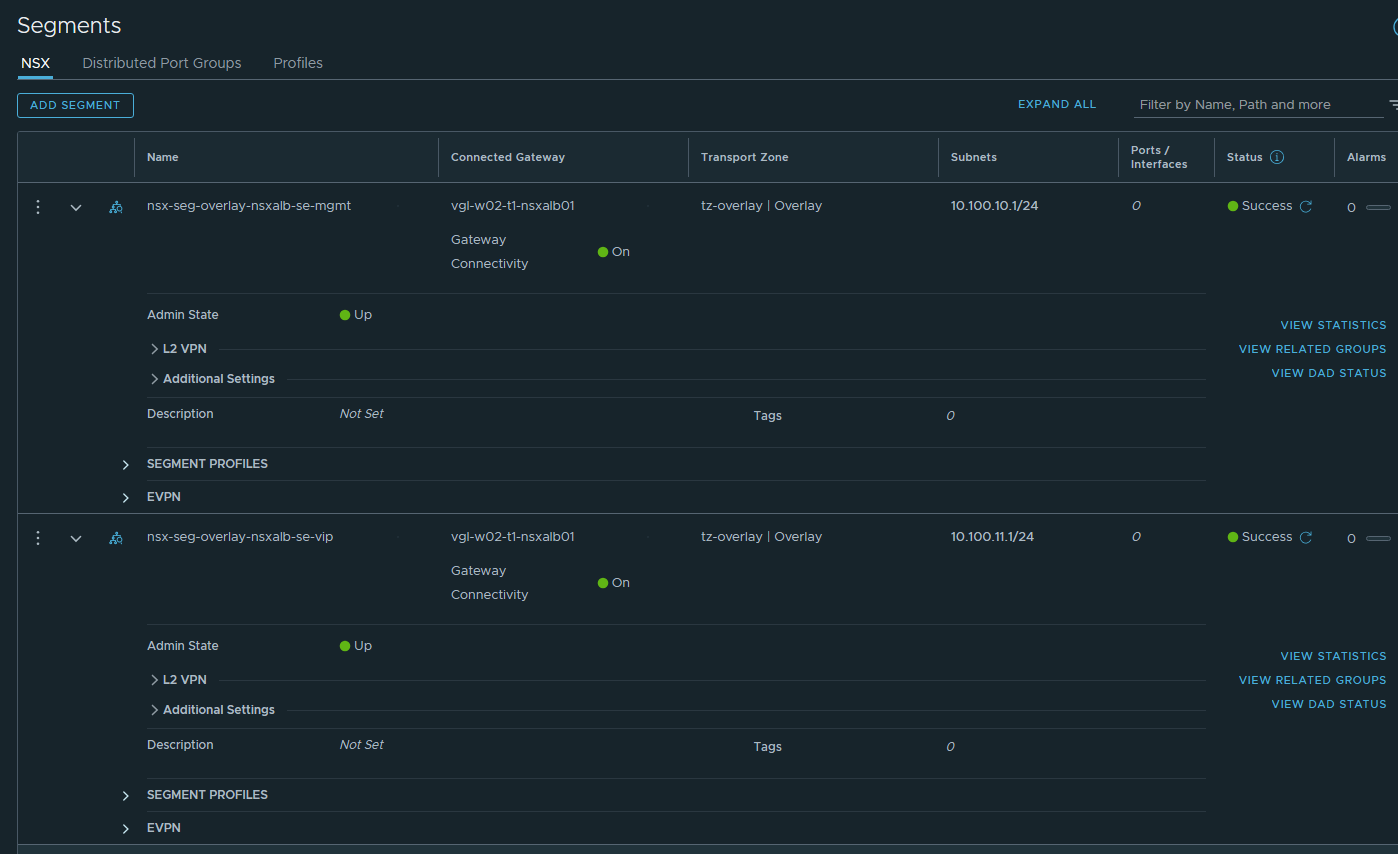
Furthermore, I have created two (2) new overlay segments in the screenshot below. These will be used for the NSX ALB SE Management and VIP networks. Both segments have been attached to the previously created T1.
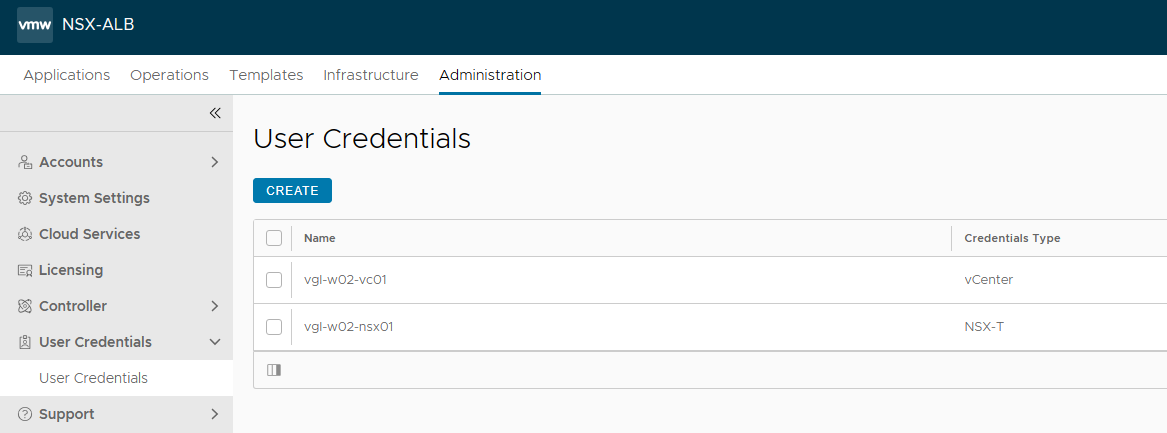
VMware ALB User Credentials
NSX ALB will need to interact with both vSphere and NSX at a later stage. In readiness for this, I have created appropriate credentials for both vSphere and NSX via the NSX ALB Controller. These will be referenced in a later step. For more information on roles and permissions, visit Configuring Roles and Permissions for vCenter and NSX-T Users (vmware.com).
Creating an NSX-T Cloud
Firstly, what is an NSX ALB Cloud?
Simply put, a Cloud can be defined as a container for service elements (SEs, Virtual Services, Pools/Backend Servers, etc.) A default cloud (Default-Cloud) is created during the initial setup, where the first Controller is deployed. Additional clouds may be added, containing SEs and virtual services. As such, a customer might only want to load balance within a vSphere environment. In this scenario, they would create a vSphere Cloud. Another Customer might want to load balance services within Amazon Web Services (AWS). In this scenario, they would create an AWS Cloud. Again, a Cloud is simply a container.
As we have a requirement to load balance services within NSX, we will create an NSX-T Cloud.
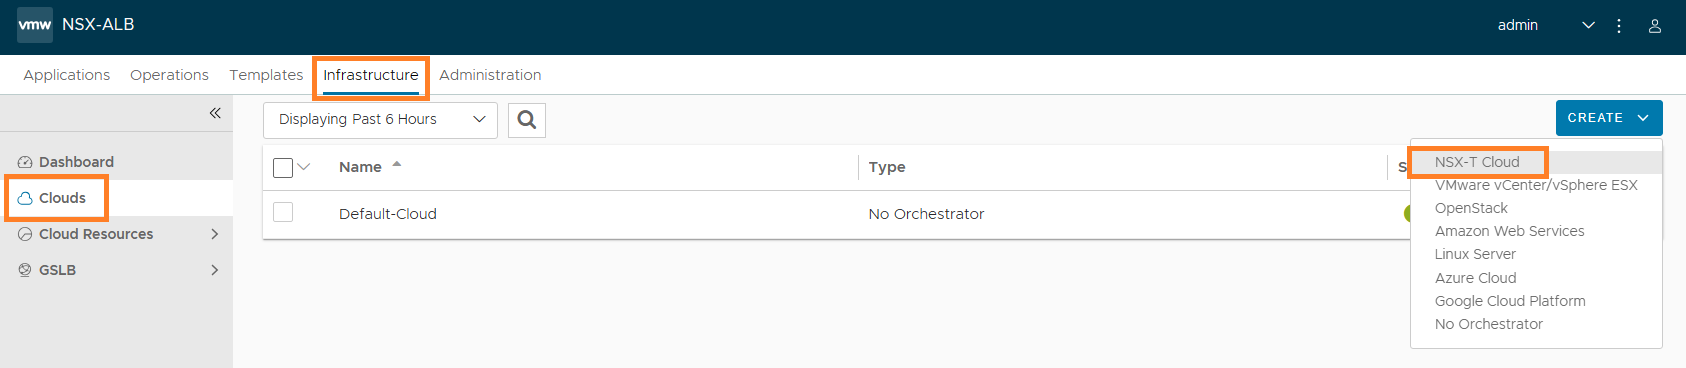
1. Browse to Infrastructure > Clouds and click Create NSX-T Cloud.
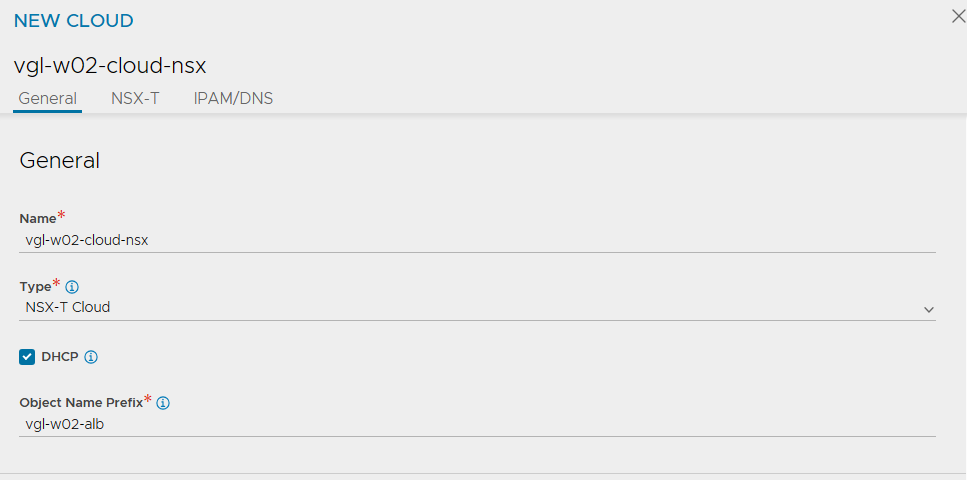
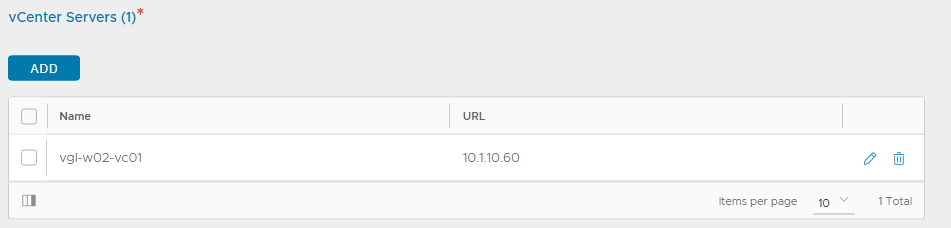
2. Configure the relevant sections accordingly by assigning a name, type, and object name prefix (which will append to the SE virtual machine name in vSphere), and configure the Management and Data (VIP) networks accordingly. You will also note that this is where we reference our NSX T1 Gateway and Overlay Segments as well as the vSphere Content Library.


3. After a short while, the new Cloud’s status will display green.

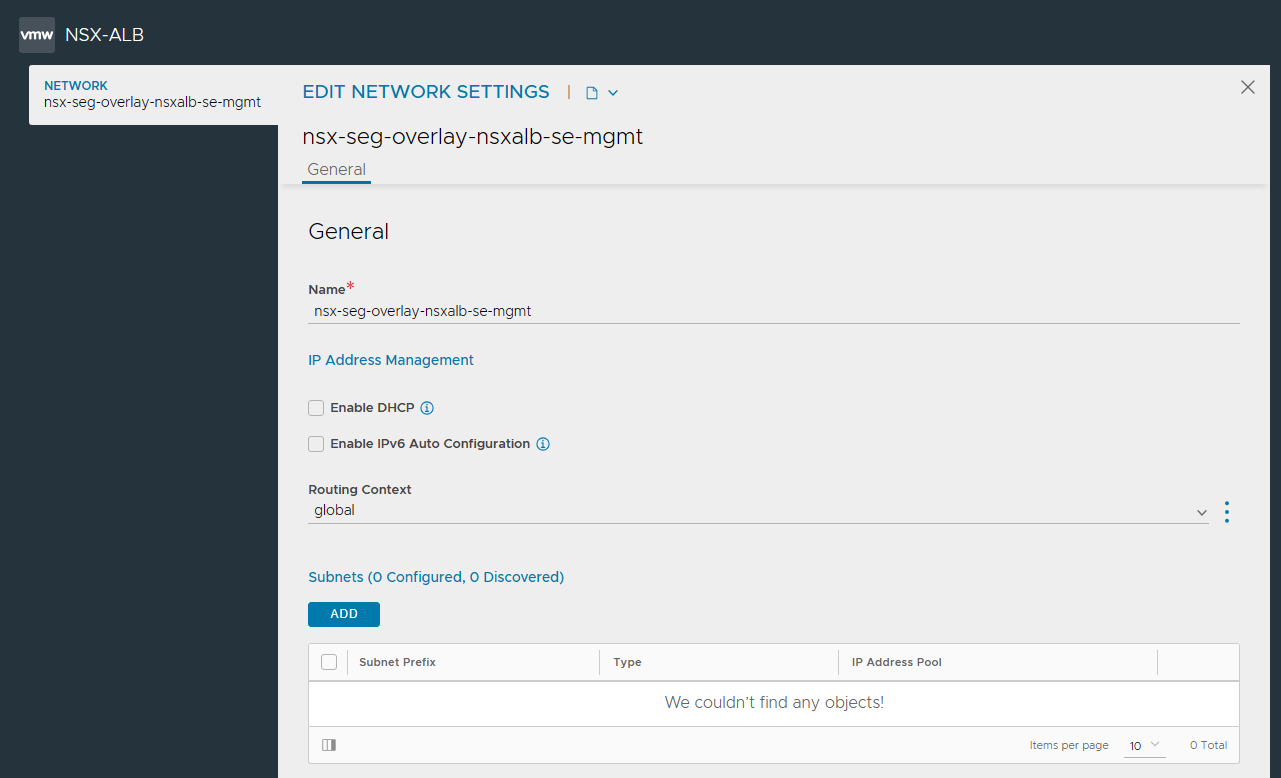
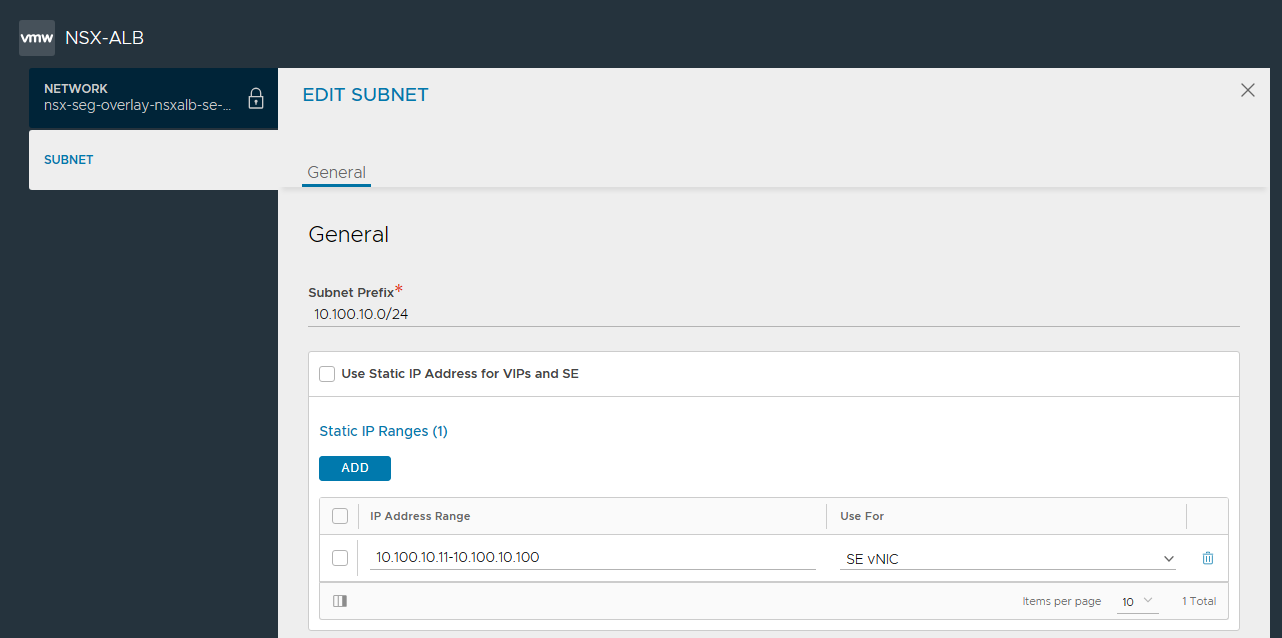
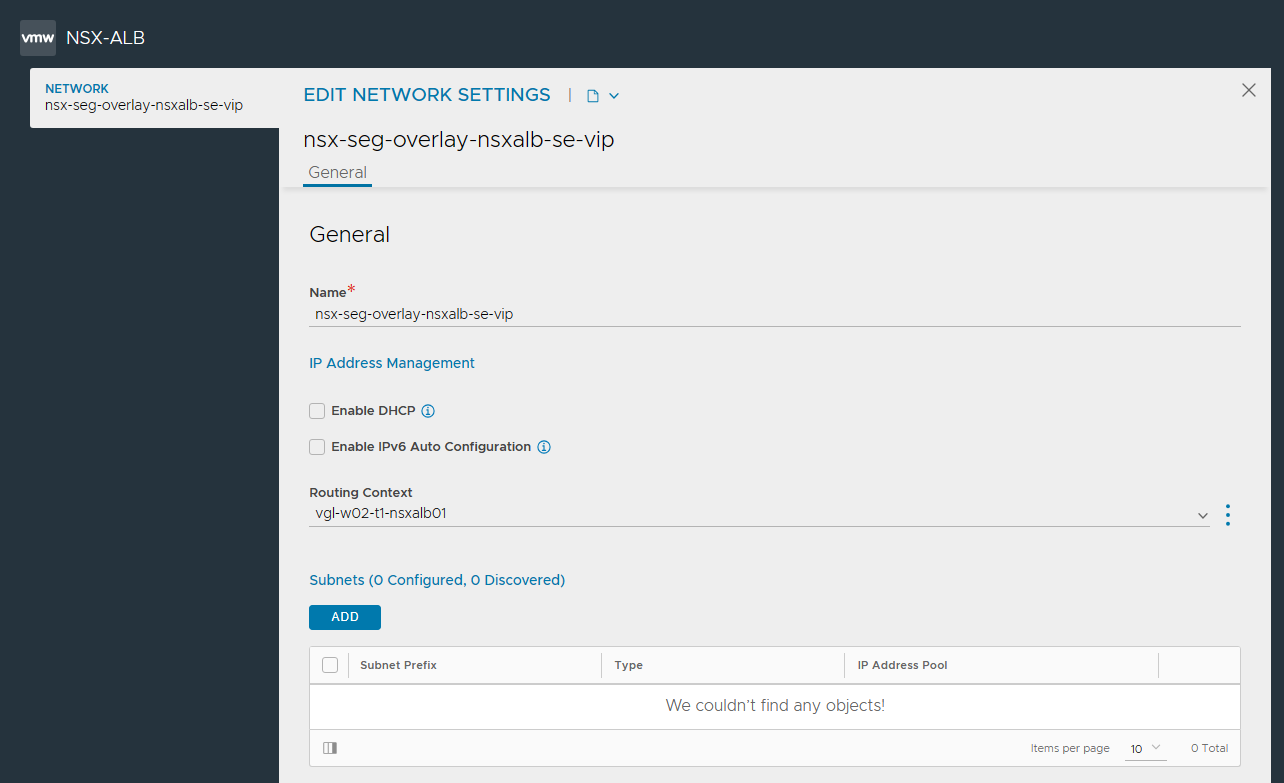
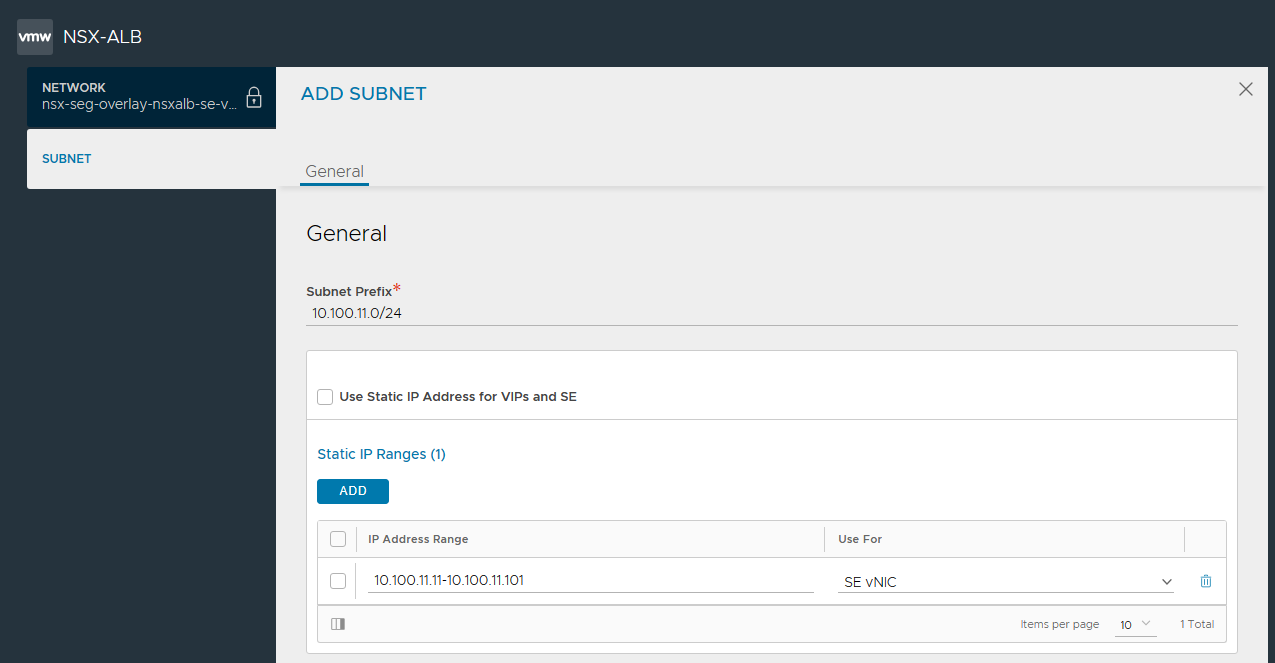
4. In readiness for creating our Service Engines (SEs), browse to Infrastructure > Cloud Resources > Networks and select the new NSX-T Cloud. Edit each of the Network Profiles, and configure the subnets for IP allocation according to your environment. This will ensure any new SE which is created is automatically allocated IP addresses from these IP pools. Note DHCP is disabled.

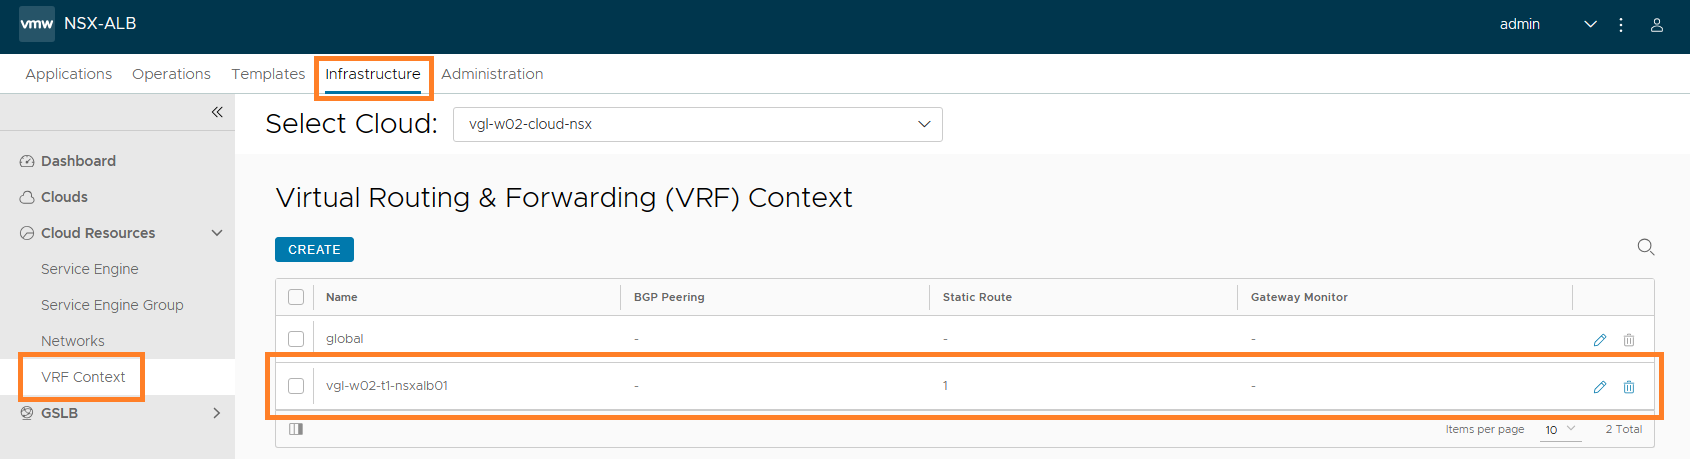
5. Finally, browse to Infrastructure > VRF Context, and edit our VRF Context. In my instance, I edit vgl-w02-t1-nsxalb01.
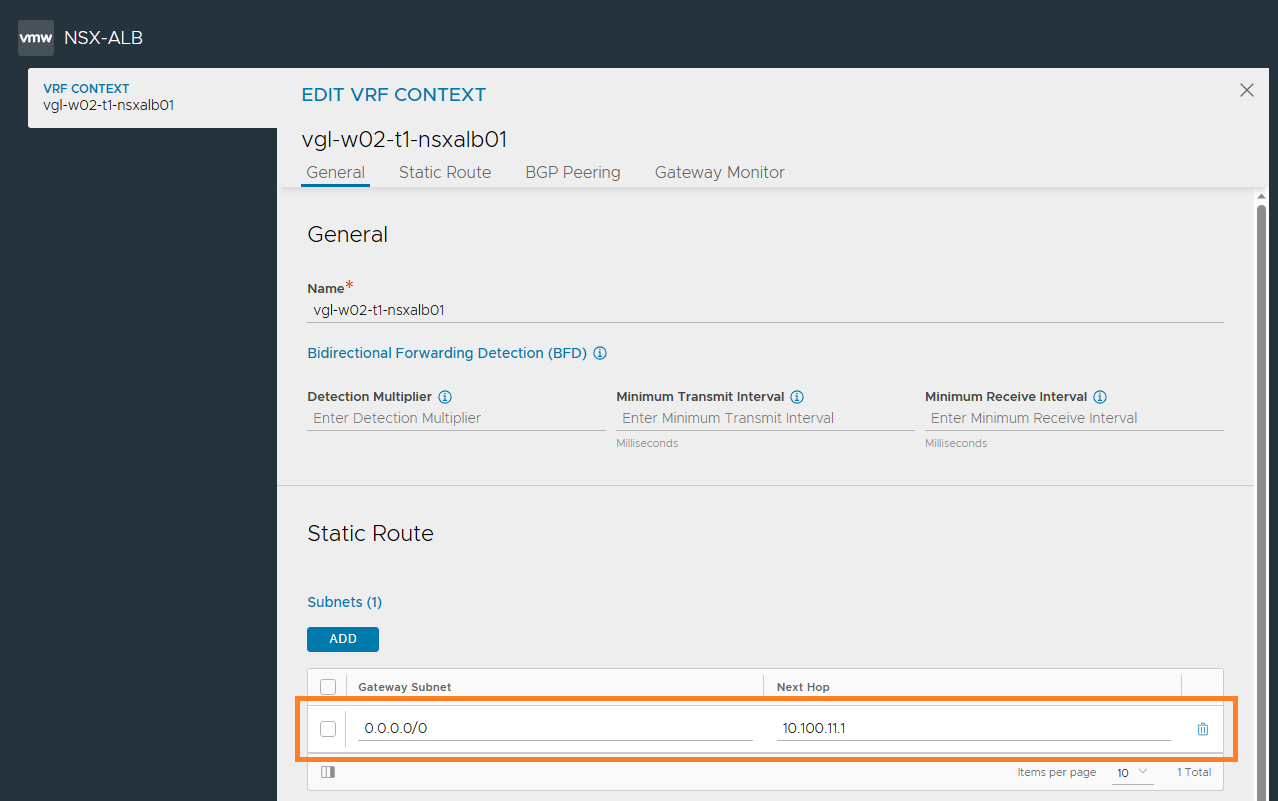
6. Add a static route which, in a later step/article, will ensure our Service Engine VIP vNICs can communicate with the wider network. We could also opt to configure BGP, however, this is a topic for a future article.
In Summary
This concludes the initial setup, prerequisites and creation of an ALB NSX-T Cloud in readiness for the next article, where we will create a virtual service to load balance traffic to two frontend web servers.
Leave a Reply