Out of the box, NSX-T Data Center utilises self-signed certificates for its cluster and manager nodes; however, it is recommended that you replace the self-signed certificates with CA-signed certificates to improve security.
In this article, we step through creating a certificate signing request and private key, generating a signed certificate in conjunction with your Certificate Authority, and finally applying the new certificate to your NSX-T cluster and manager nodes.
Types of Certificates
There are three categories of self-signed certificates utilised within NSX-T Data Center.
- Platform Certificates
- NSX Services Certificates
- Principal Identity Certificates
In this article, we concentrate on platform certificates which, by default, are self-signed X.509 RSA 2048/SHA256 certificates and are utilised for internal communication within NSX-T Data Center, as well as external authentication when NSX Manager is accessed via API.
Create a Certificate Signing Request
Firstly, we’ll need to create a config file which we’ll use to create a Certificate Signing Request (CSR) and private key. Use the below text and configure with the appropriate commonName, DNS, and IP Addresses for your environment. When complete, save as filename.cfg.
[ req ]
default_bits = 2048
distinguished_name = req_distinguished_name
req_extensions = req_ext
prompt = no

[ req_distinguished_name ]
countryName = GB
stateOrProvinceName = Wales
localityName = Cardiff
organizationName = vGarethLewis
organizationalUnitName = IT
commonName = nsx.vgarethlewis.com

[ req_ext ]
subjectAltName = @alt_names

[alt_names]
DNS.1 = nsx.vgarethlewis.com
DNS.2 = nsx-01.vgarethlewis.com
DNS.3 = nsx-02.vgarethlewis.com
DNS.4 = nsx-03.vgarethlewis.com
IP.1 = 10.0.10.110
IP.2 = 10.0.10.111
IP.3 = 10.0.10.112
IP.4 = 10.0.10.113
Next, we’ll use OpenSSL to generate our CSR and private key pair, where nsx.cfg below should mirror the name of your config file.
openssl req -out nsx.csr -newkey rsa:2048 -nodes -keyout nsx.key -config nsx.cfg -sha256

Once we have our CSR and private key, process the CSR via your CA, which in my case, is a Microsoft CA set up with a suitable certificate template as detailed in the VMware Docs – Create and Add a Microsoft Certificate Authority Template in Region A.
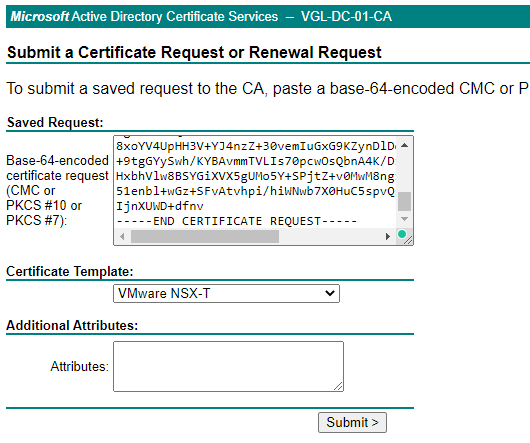
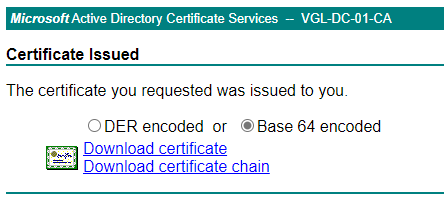
Once processed, download the certificate chain in Base 64 encoded.
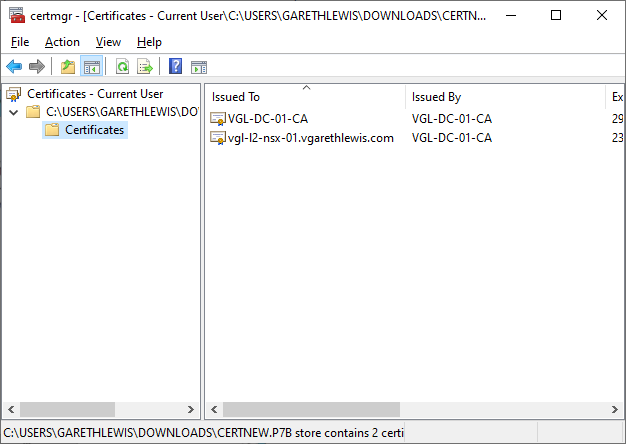
When we check our new certificate contents, we see both the server and root certificates are present. Perfect. Export both certificates as Base 64 encoded.
Import Certificate Chain
Next, we’ll need to create our certificate chain by combining the processed CSR and our root CA in the below format. I use Notepad++ to create the certificate chain and save it as nsx.cer.
-----BEGIN CERTIFICATE-----
SERVER CERTIFICATE
-----END CERTIFICATE-----
-----BEGIN CERTIFICATE-----
INTERMEDIATE CERTIFICATE (IF YOU HAVE ONE)
-----END CERTIFICATE-----
-----BEGIN CERTIFICATE-----
ROOT CERTIFICATE
-----END CERTIFICATE-----
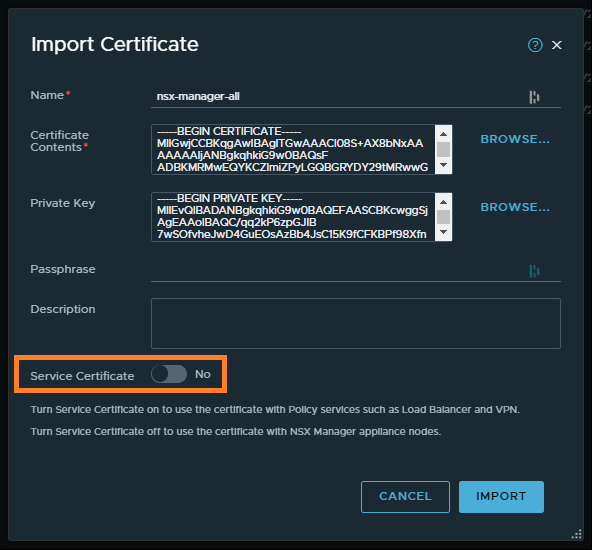
Once the certificate chain has been created, login to NSX-T, and browse to System > Certificates and select Import > Import Certificate.
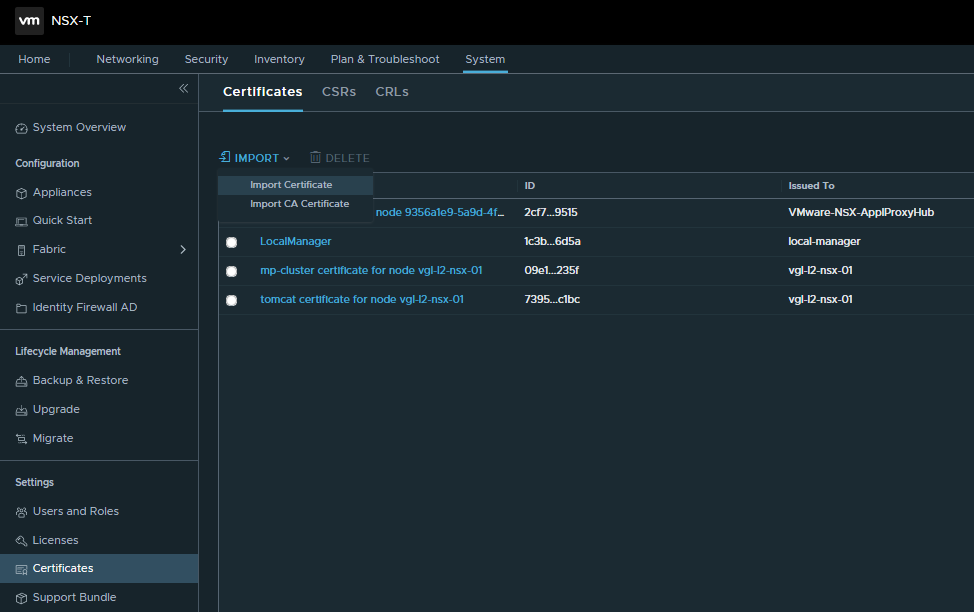
Next, give the certificate an appropriate name and assign the certificate chain and private key. As we will be utilising the certificate to provide SSL functionality when accessing our NSX-T environment (and not for load balancing or VPN services, for example), set the Service Certificate to No. When ready, click Import.
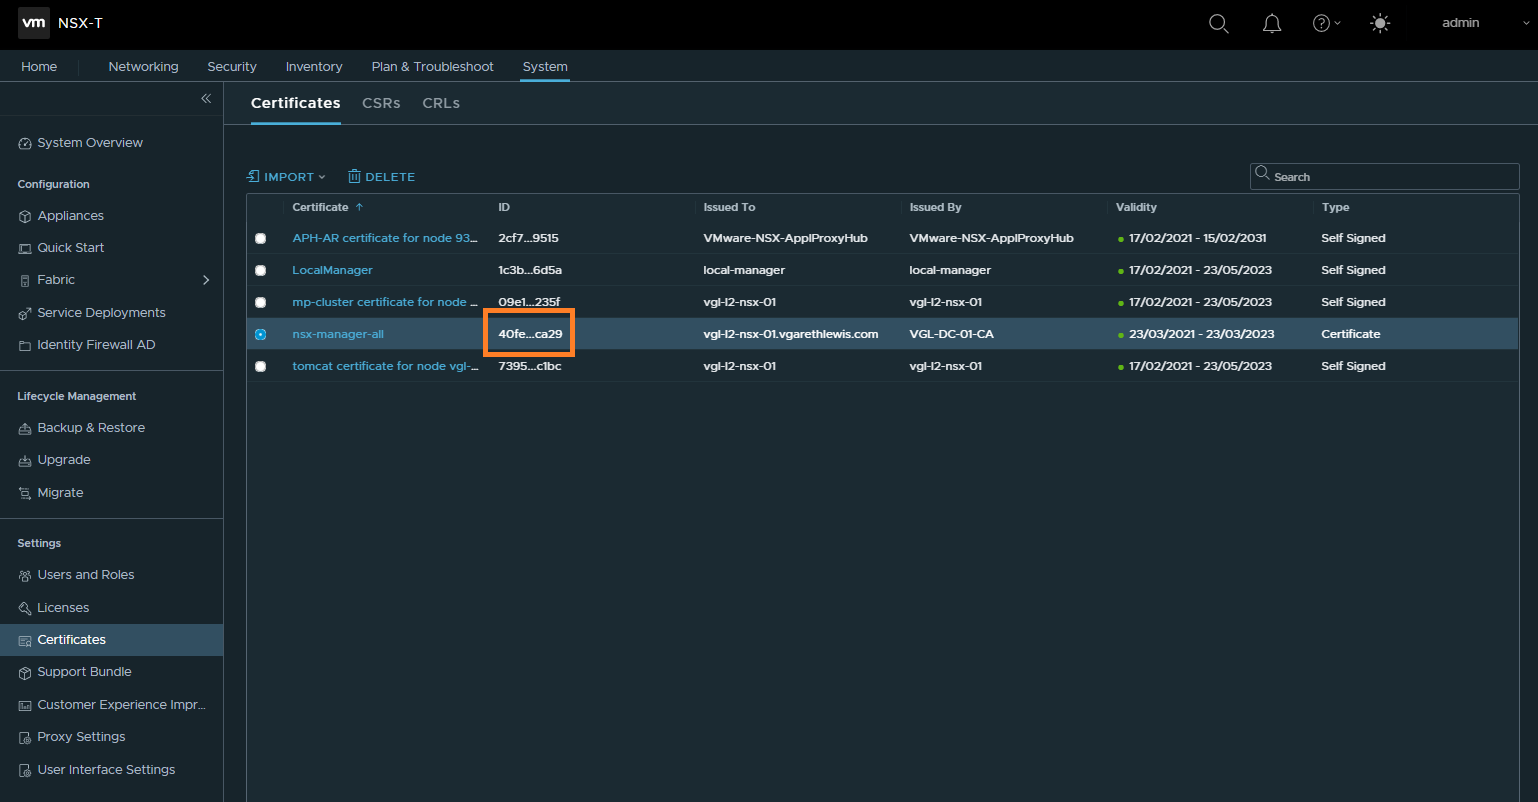
Once the import is complete, identify the certificate ID by clicking on the ID snippet. Copy the certificate ID as we will need this in a later step.
Disable Certificate Revocation List (CRL) Check
NSX-T 3.0 introduced Certificate Revocation List (CRL) checking when applying a certificate to a Manager node/cluster. As a result, the certificate cannot be applied to a Manager node or cluster if the CRL check cannot be performed (see VMware KB78794 for more information). As such, we will disable CRL checking to allow the certificate to be applied.
Via your API client of choice, run the below to disable the CRL check.
API call:
PUT https://<NSX-T-FQDN>/api/v1/global-configs/SecurityGlobalConfig
{
"crl_checking_enabled" : false,
"resource_type" : "SecurityGlobalConfig",
"_revision" : <REVISION NUMBER>
}
Certificate Validation
Before we try to replace the NSX-T Cluster and Manager node certificates, it would help to validate our new certificate.
Using the certificate ID we identified earlier, run the below API call to validate the certificate.
GET https://<NSX-T-FQDN>/api/v1/trust-management/certificates/<CERTIFICATE-ID>?action=validate

Replace Certificates
Now that we have added and validated our certificate chain, we can replace the certificates for both the NSX-T cluster virtual IP (VIP) and the NSX-T Manager nodes.
For the NSX-T Cluster/VIP, run the below API call:
POST https://<NSX-T-FQDN>/api/v1/cluster/api-certificate?action=set_cluster_certificate&certificate_id=<CERTIFICATE-ID>
For the NSX-T Manager nodes, run the below API call for EACH NSX-T Manager node:
POST https://<NSX-T-MANAGER-FQDN>/api/v1/node/services/http?action=apply_certificate&certificate_id=<CERTIFICATE-ID>
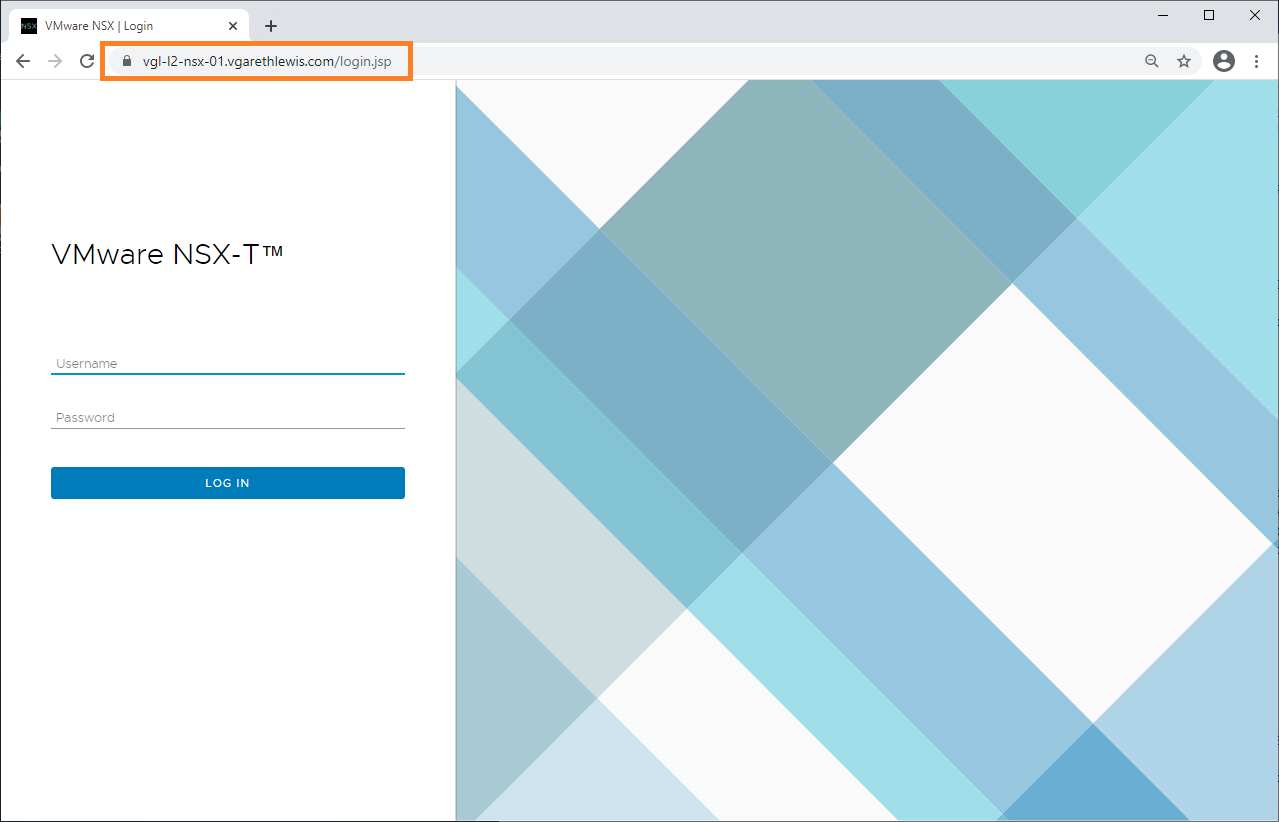
Finally, browse to your NSX-T Manager VIP or NSX-T Manager node and test that the new certificate has been applied successfully.
In Summary
In this article, we step through creating a certificate signing request and private key, generating a signed certificate in conjunction with your Certificate Authority, and finally applying the new certificate to your NSX-T cluster and manager nodes.
Leave a Reply