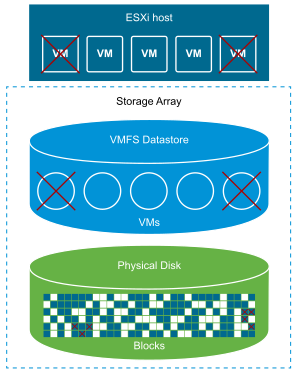
Reclaim VMFS Deleted Blocks via VAAI UNMAP
Since the release of vSphere 5.5 back in September 2013 we have been able to utilise ESXCLI to manually reclaim deleted blocks from VMFS datastores. Essentially, by using the VAAI UNMAP primitive, we can reclaim previously used blocks by releasing them back to the storage array, allowing them to be re-utilised by other devices/virtual machines. It wasn’t until the release of vSphere 6.5 in November 2016 that the much sought-after automation of disk space reclamation was announced with the availability of VMFS 6. More on VMFS 6 and automated reclamation in a future post.
In this article we will cover the manual process of reclaiming deleted blocks from a VMFS 5 (or earlier) file system via a esxcli UNMAP call.
Procedure
We have two options when making an UNMAP call on a VMFS volume:
Option 1 – Reference the Volume Label
1. Identify the volume/datastore label.
2. Via SSH, connect to an ESXi host which has access to the datastore in question.
3. Run the below command to perform an UNMAP call utilising the volume label.
esxcli storage vmfs unmap -l DatastoreName
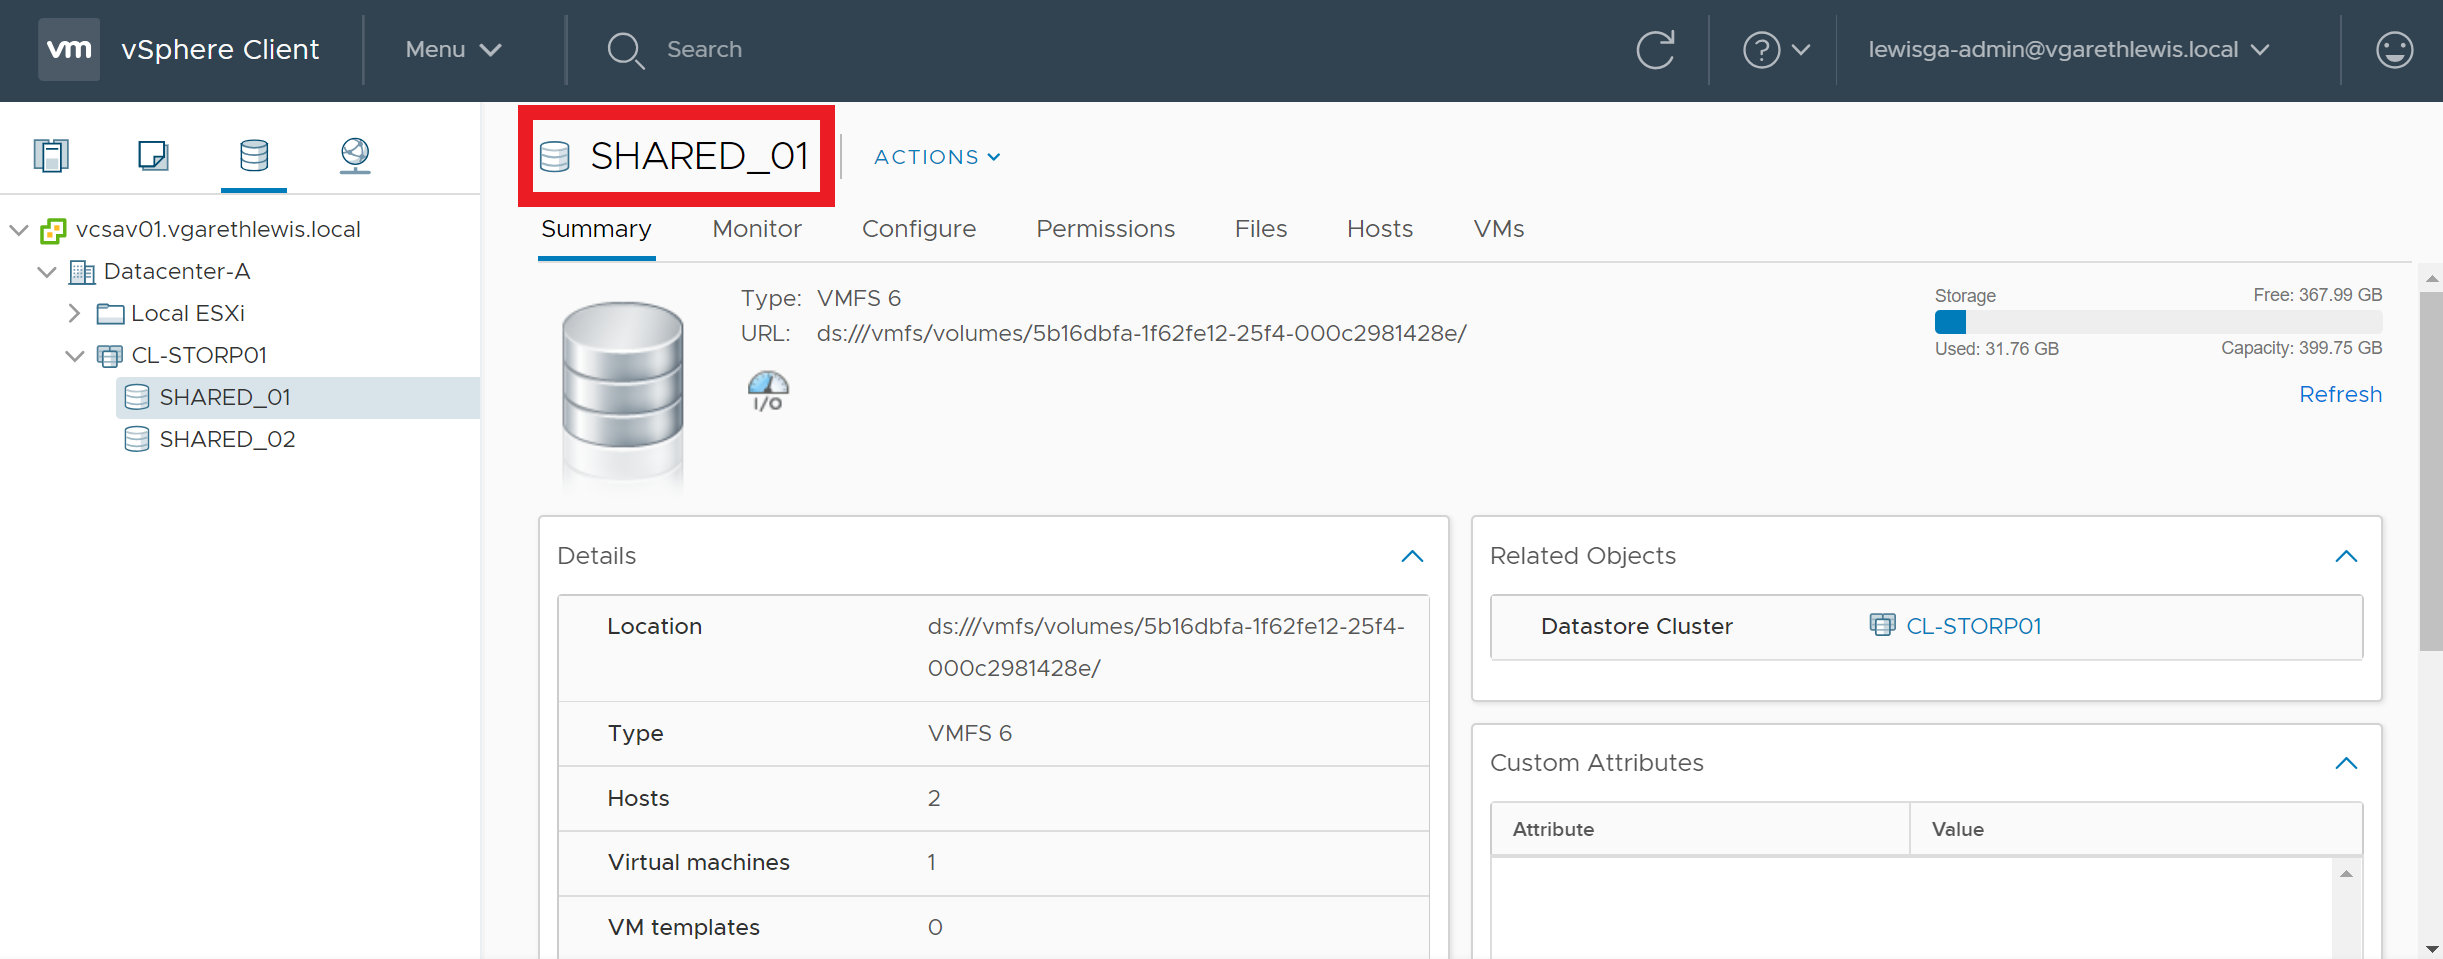
Option 2 – Reference the Volume UUID
1. Identify the UUID of the datastore/volume in question.
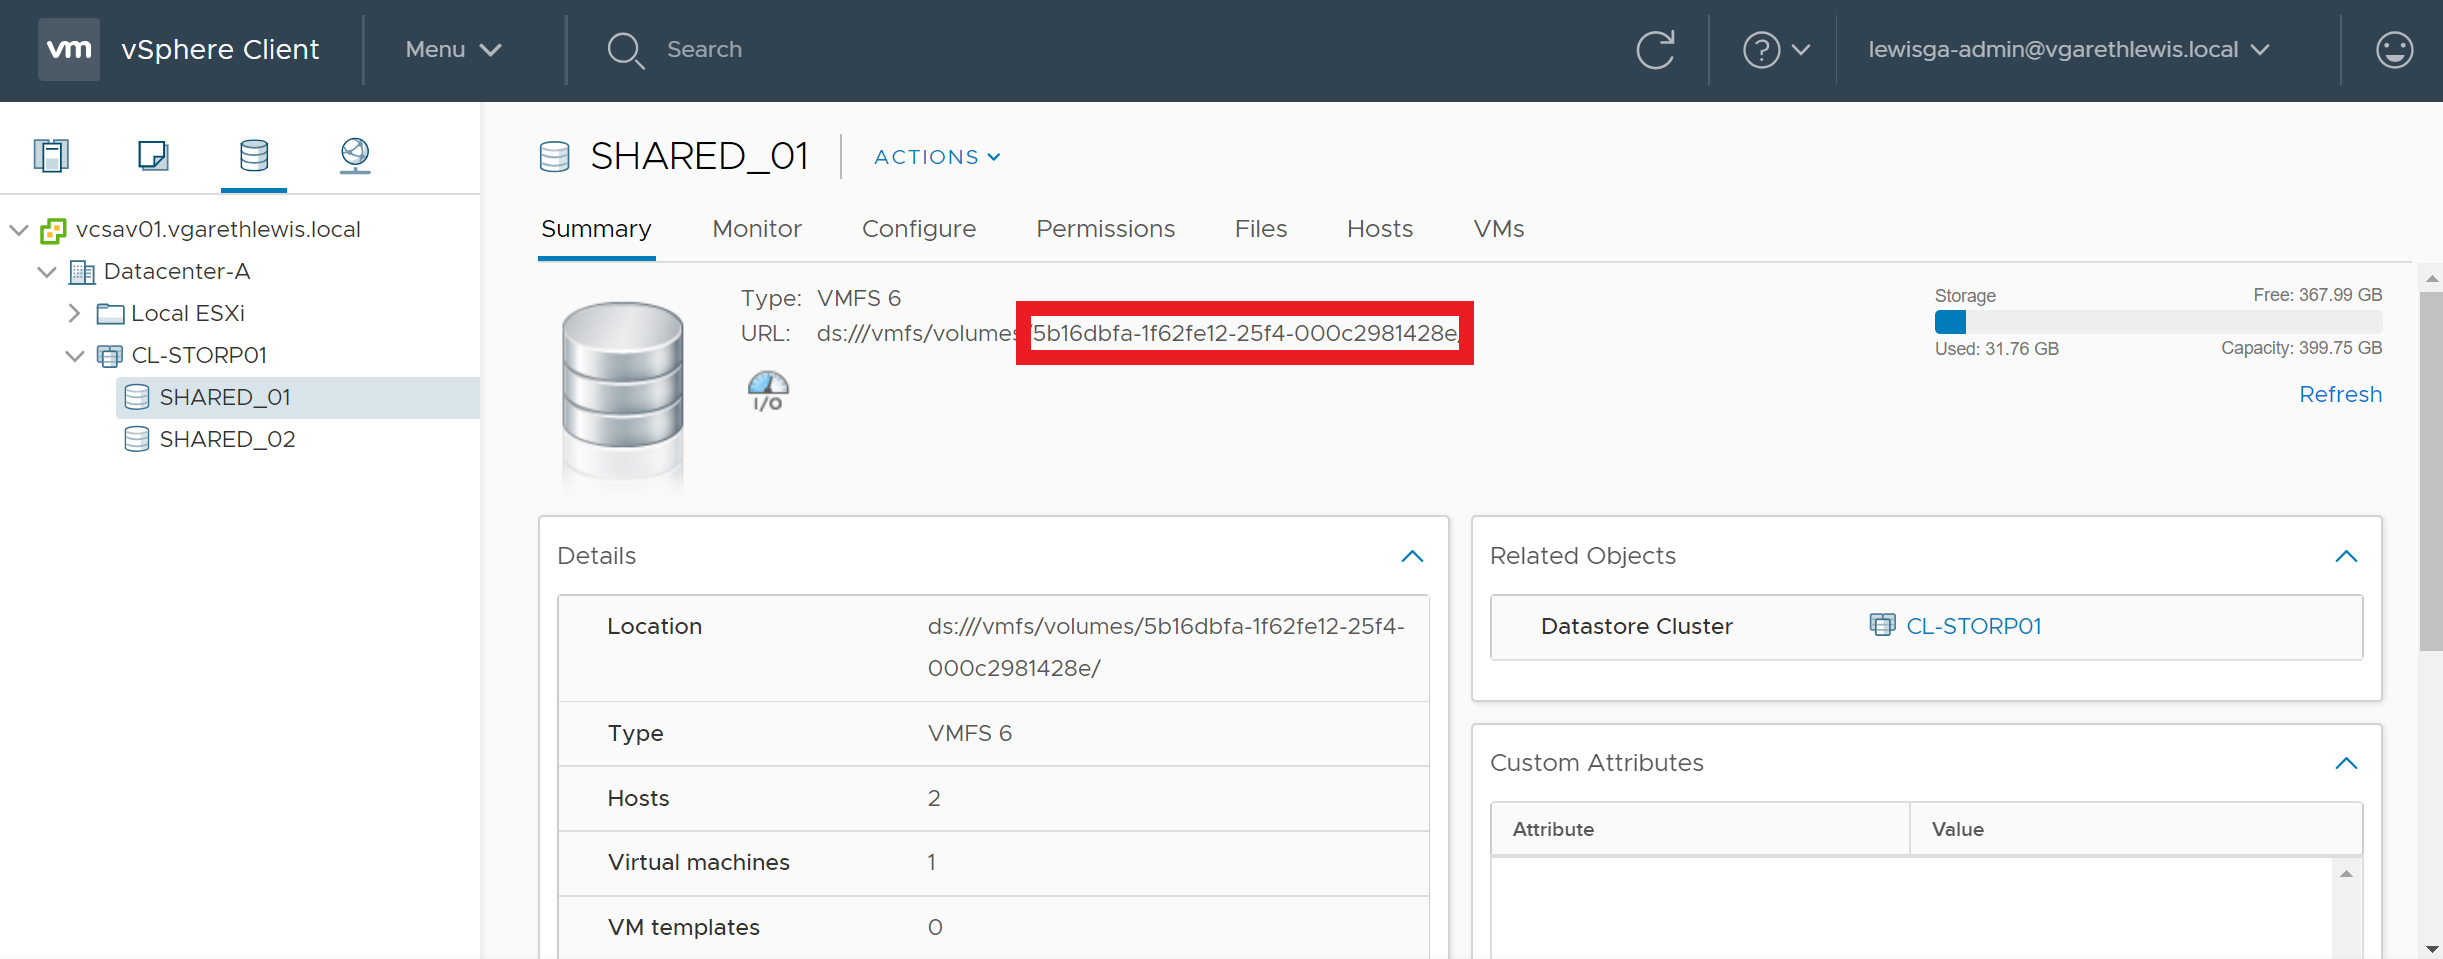
2. Via SSH, connect to an ESXi host which has access to the datastore in question.
3. Run the below command to perform an UNMAP call utilising the volume UUID.
esxcli storage vmfs unmap -u 5b16dbfa-1f62fe12-25f4-000c2981428e
As an example, the below screenshots detail a storage volume before and after an UNMAP call. Over time, the storage volume has experienced a high number of VM deletions and storage vMotions. Following either of the above UNMAP commands, the volume has reclaimed over 2 TB of deleted blocks.


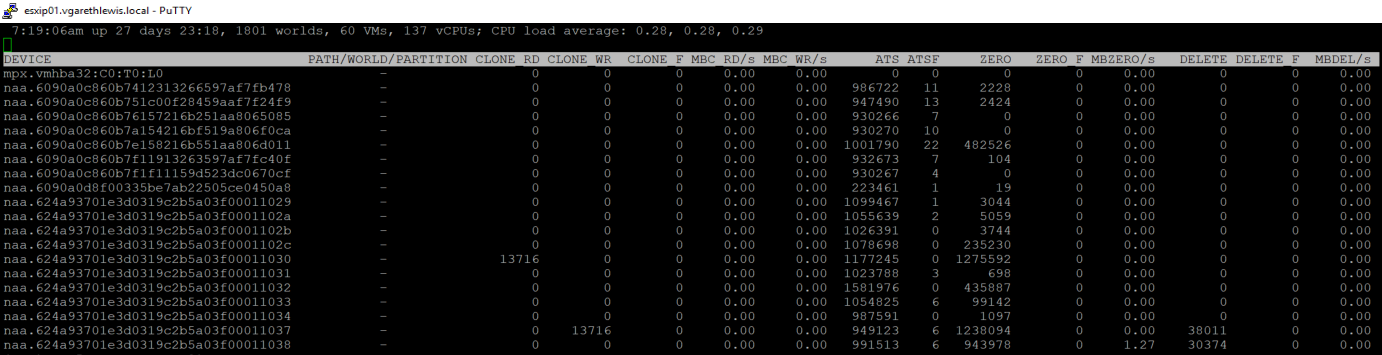
Monitoring UNMAPs via ESXTOP
Finally, it’s nice to be able to monitor such actions and, via ESXTOP, we can. Connect to one of your hosts via SSH and launch ESXTOP. There is going to be a lot of information displayed at this point, so we’ll likely need to toggle-off some of the superfluous information. Press ‘U’ to view disks/devices, and press ‘F’ to launch the currently displayed field order. In the below screenshot I have toggled-off all columns except A, B, and O.
From the below screenshot you can see that, following a little housekeeping on two volumes in my environment, the DELETE counters display the UNMAP I/O count issued to those devices. Note, ESXTOP counters are reset with each host restart.
With VMFS 6 now available, you’ll probably want to leverage it’s automated reclamation capabilities, however, the only upgrade path is to create new datastores, migrate your workloads, and blow away the old VMFS 5 datastores. More on VMFS 6 in a future post.