Integrating VMware Horizon with Azure Multi-Factor Authentication Server

Reading Time: 4 minutes

For those already consuming Microsoft Office 365, then you will undoubtedly (to some level) be utilising Azure Active Directory. Azure AD comes with an array of tools, some of which aren’t confined to public cloud; some can even aid and strengthen your on-premises applications. One such tool is the Azure Multi-Factor Authentication Server, an on-premises 2-factor authentication mechanism which can integrate with on-prem VMware Horizon environments.

The Azure MFA Server enables us to further enhance the security of numerous applications capable of integrating with 2FA authentication, and VMware Horizon has been able to integrate with such solutions for some time. This additional level of security is a much sought after function which serves to further secure public access to internal desktop pools.

Continue reading → Integrating VMware Horizon with Azure Multi-Factor Authentication Server

Configure Azure Internal Load Balancer (ILB) Listener for SQL Always On Availability Groups

Reading Time: 4 minutes

Some time towards the end of Q4 2015, I was tasked with re-designing an Azure environment which had initially be commissioned to host a custom web solution by an outsourced team. The original design lacked any real resilience or high availability, with the solution itself being, for the most part, a collection of single instance servers. For example, SQL offered no HA via clustering or AAGs; no load-balancing had been implemented on the frontends, etc.

After a number of website outages due to server failures and/or high traffic volumes resulting in application crawl, the organisation approached my team with a request of redesigning the infrastructure.

My design was simple; I would continue to utilise Azure’s Infrastructure as a Service (IaaS) for the medium-term, deploy multiple, load-balanced IIS front-ends (which would eventually host the Sitecore Content Delivery nodes), and a simple, two-node SQL Always-On Availability Group (AAG) back-end with witness server.

The first challenge was Azure itself. Cast your minds back twelve months ago, and the Azure platform was experiencing a storm of changes on nearly a daily basis. Throughout the official Microsoft Azure (Implementing Microsoft Azure Infrastructure Solutions: 20533C) course (which I sat just a month previous to this project), a continuous theme of ‘this is the old portal, and this is the new’ kept recurring and, after even after returning from the course, a number of items had already  been added, relocated, or simply removed. You can see the challenge.

Documentation in regards to how Azure interacts with other Microsoft products was another hurdle. You might say, Azure was starting to fight me all the way…

One area which boasted no documentation at the time, and even had the Microsoft Azure team scratching their heads, was the inability for SQL AAG nodes to communicate with their AAG Listener ‘out of the box’. All nodes were located in the same geographical Azure data center and all were housed within the same Cloud Service. All should be working right? Wrong.

After much communication back and forth with Microsoft, they eventually advised that an Internal Load Balancer was required. Nice, I was now back on track. After putting a simple PowerShell script together, as well as a re-configuration on all SQL AAG replica nodes, communication was up, and the Listener was in the game.

I’ll be honest, I’ve configured countless Listeners in our on-prem environment in the last 12 months alone, and the additional work required to get this working in Azure was a bit of a frustration. So, below is the exact procedure I used, fully documented, and now stored in our IT documentation library.

Configure Azure Internal Load Balancer (ILB) Listener for SQL Always On Availability Groups

1. Launch Windows PowerShell

2. Login to Azure using the appropriate credentials by using the below cmdlet.

# Login to Azure
Add-AzureAccount

3. View all available Subscriptions.

# View all available subscriptions
Get-AzureSubscription

4. Select the relevant Subscription.

# Select the relevant subscription
Select-AzureSubscription Suscription_Name

5. Define variables and create Internal Load Balancer using the below script. Note, this can take around 10 minutes to complete.

# Define variables for new Azure Internal Load Balancer
$ServiceName = "Cloud_Service_Name" # Cloud Service containing AAG nodes
$AGNodes = "SQL_Node_A","SQL_Node_B" # AAG nodes, all hold replica databases
$SubnetName = "Subnet_Name" # Subnet name
$ILBStaticIP = "X.X.X.X" # IP assigned to AAG Listener
$ILBName = "ILB_Name" # ILB name you wish to assign

# Create Azure Internal Load Balancer
Add-AzureInternalLoadBalancer -InternalLoadBalancerName $ILBName -SubnetName $SubnetName -ServiceName $ServiceName -StaticVNetIPAddress $ILBStaticIP

# Configure a load balanced endpoint for each AAG node in $AGNodes using ILB
ForEach ($node in $AGNodes)
{
    Get-AzureVM -ServiceName $ServiceName -Name $node | Add-AzureEndpoint -Name "ListenerEndpoint" -LBSetName "ListenerEndpointLB" -Protocol tcp -LocalPort 1433 -PublicPort 1433 -ProbePort 59999 -ProbeProtocol tcp -ProbeIntervalInSeconds 10 -InternalLoadBalancerName $ILBName -DirectServerReturn $true | Update-AzureVM

}

6. Once the above script has completed, the below output should be displayed.azure_sql_ilb_01-1

7. Next, launch the Azure portal and browse to each of the SQL AAG nodes. You’ll now be able to see that each node is included within the new load-balanced endpoint and Internal Load Balancer will have been allocated to each AAG node.azure_sql_ilb_02

8. Finally, on each of the SQL AAG nodes, launch an elevated Windows PowerShell window, and run the below script.

# Define variables
$ClusterNetworkName = "Cluster_Network_Name" # Cluster Network Name
$IPResourceName = "IP_Address_Resource_Name" # IP Address resource name
$ILBIP = "X.X.X.X" # ILB IP Address (AAG Listener IP)

Import-Module FailoverClusters

Get-ClusterResource $IPResourceName | Set-ClusterParameter -Multiple @{"Address"="$ILBIP";"ProbePort"="59999";"SubnetMask"="255.255.255.255";"Network"="$ClusterNetworkName";"EnableDhcp"=0}

9. Once complete, ensure the AAG Listener port is still set to 1433 via SQL Server Management Studio. The port seemed to have dropped for me following the above script. If this is the case, simply reset to 1433.azure_sql_ilb_03

10. After a few minutes, launch SQL Server Management Studio and test Listener connectivity by attempting to connect to the Listener name from both SQL nodes.

For more information regarding SQL AAGs, Azure ILBs, etc., a Microsoft KB is now available at https://docs.microsoft.com/en-us/azure/virtual-machines/virtual-machines-windows-classic-ps-sql-int-listener.

Microsoft Exchange 2013

Microsoft Exchange Server 2013 – Installation & Configuration

Reading Time: 5 minutes

Microsoft Exchange 2013

One of the major upcoming projects this year will see the upgrade and possible redesign of our Exchange environment, and this will mean upgrading our current Exchange 2010 solution to Exchange 2013. With this comes a number of differences (the management GUI to name just one), and I aim to capture my initial thoughts of the product in this and upcoming posts. In future posts we’ll cover various topics including the creation of database availability groups (DAGs), load balancing, and general all round resilient goodness!

So, back in the home lab, the idea was to get a better feel for the product by building a lightweight demo solution, but one which still offers HA capabilities. As the Outlook Web App now offers near-Office 365 functionality, the need for multiple Outlook clients running on Windows OS’s in the lab is no longer the case; this means I am able to run one domain controller, a Client Access server, and two mailbox servers all on a single laptop running VMware Workstation. All VMs will be running trial versions of Microsoft Windows Server 2012 R2, and all will be housed on a Crucial BX100 250GB SSD for best performance.

Network Prerequisites

Before building any lab-based solution, I always start with the networking requirements, and the great thing about working with VMware Workstation means VLANs can be created and configured quickly and easily.

We’ll be using two VLANs in order segregate different traffic types; the first VLAN is for our server LAN traffic, and the secondary for Exchange replication traffic (more on the latter shortly).

Network Configuration

  • VMnet0 – VLAN 20 – LAN Traffic – 172.22.20.0/24
  • VMnet1 – VLAN 25 – Replication Traffic – 172.22.25.0/24

Domain Controller Configuration – ADDSV01

Domain Controller Configuration

Client Access Server 01 Configuration – EXCAV01

Client Access Configuration

Mailbox Database Server Configuration – EXMBV01 & EXMBV02

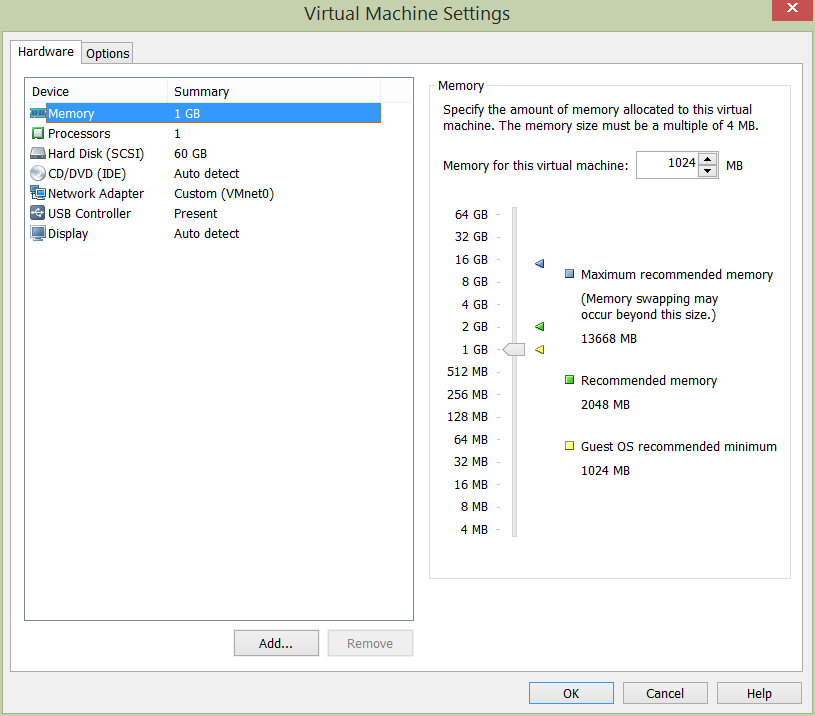
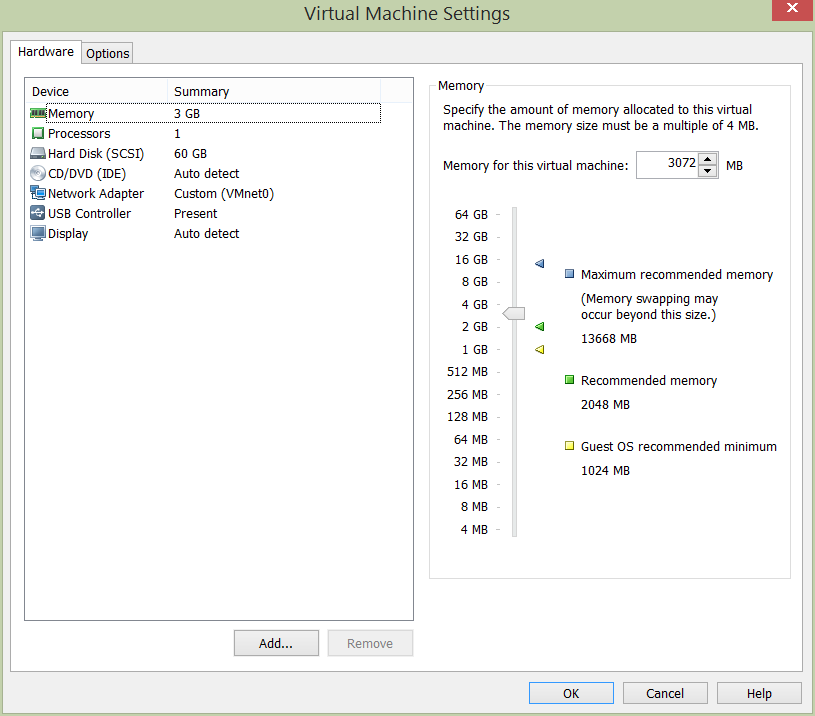
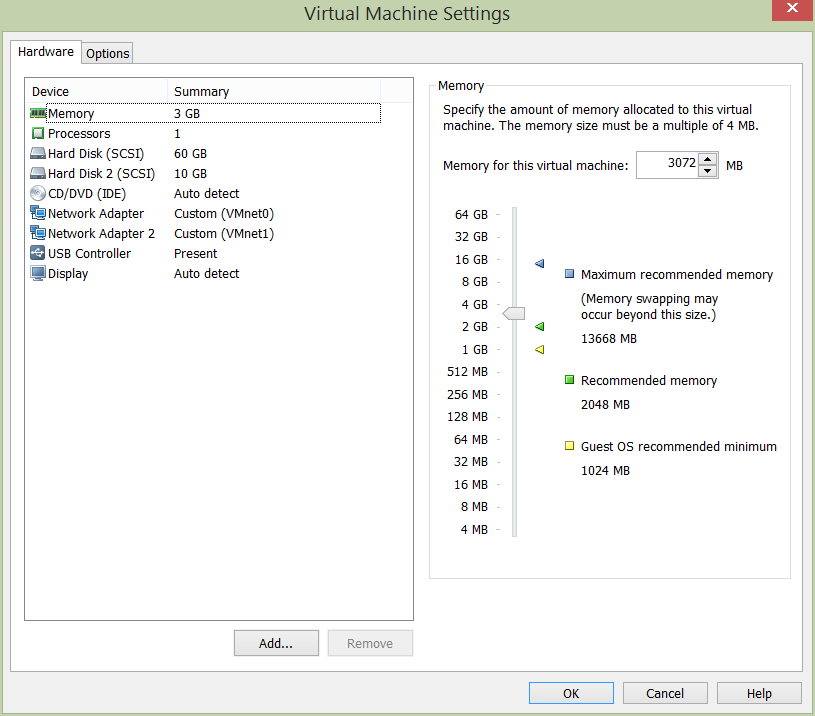
Mailbox storage requirements will see an additional 10GB disk added to each of the mailbox servers (as seen in the below VM configuration). The new disk will be used to house our mailbox databases. In production we would obviously add appropriately sized disks and span our databases across them, however, a single thin-provisioned 10GB disk in each of our mailbox servers will be perfectly acceptable for a lab environment.

Mailbox Role Configuration

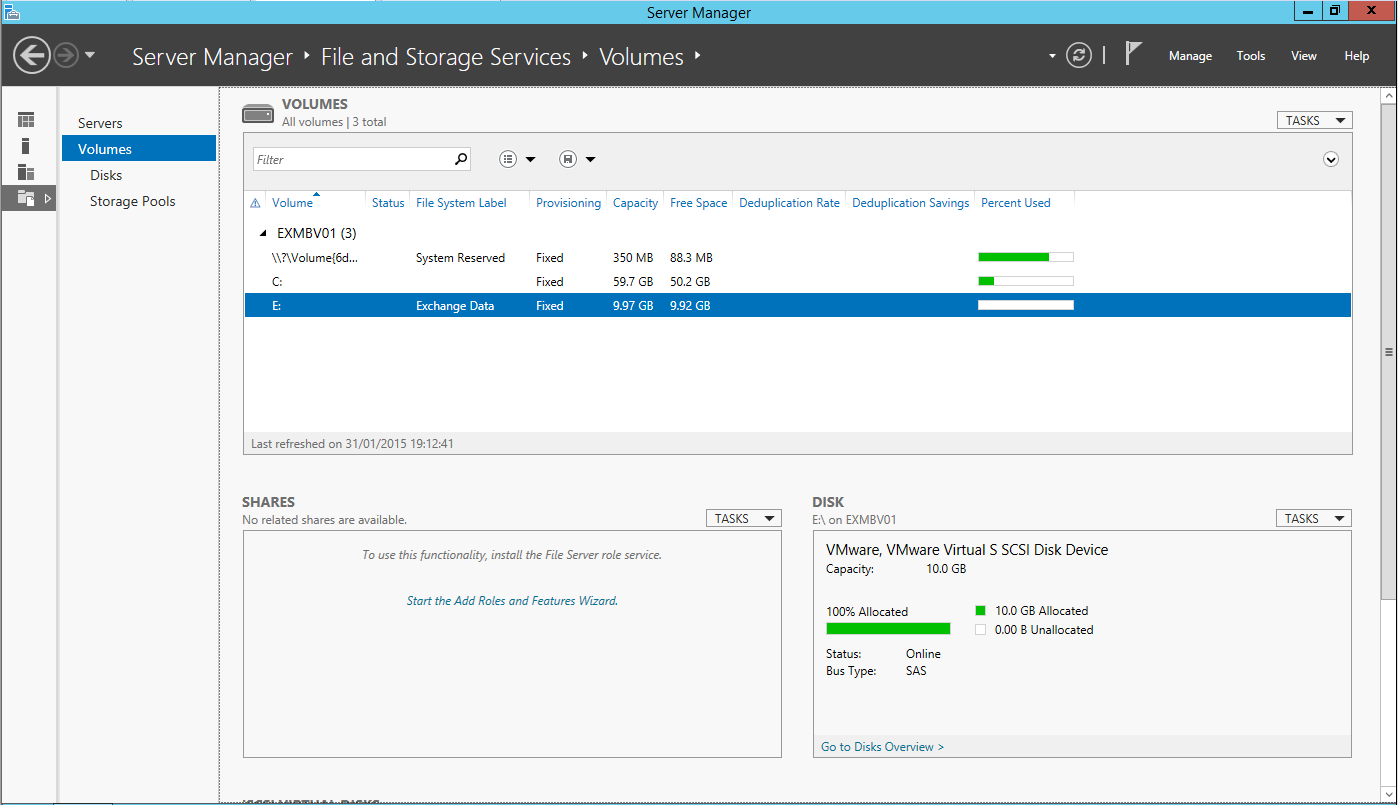
In the below screenshot I’ve brought the new disk online and created a volume accordingly:

Mailbox Disk Configuration

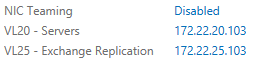
Lastly, we’ll be adding an additional NIC to each of the mailbox servers. I’ll be covering this in depth in my next post when I configure a database availability group (DAG); specifically, the NICs will be used to segregate replication traffic from our production network. Below shows our newly added NIC for replication traffic. The additional mailbox server NICs will be configured as such:

  • EXMBV01 – 172.22.25.102/24
  • EXMBV02 – 172.22.25.103/24

Mailbox Role NIC Configuration - Replication Network

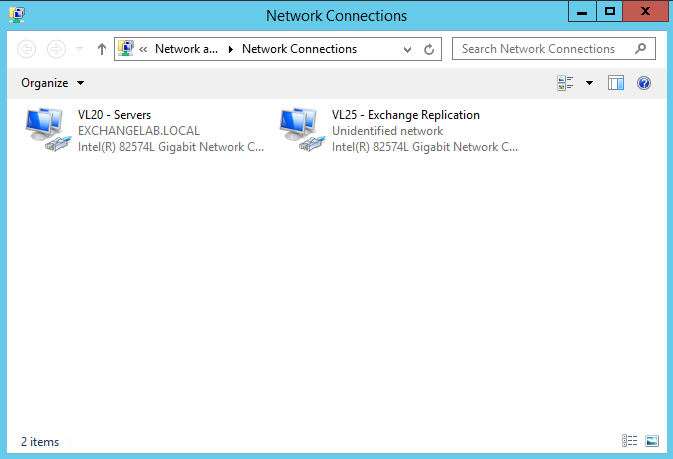
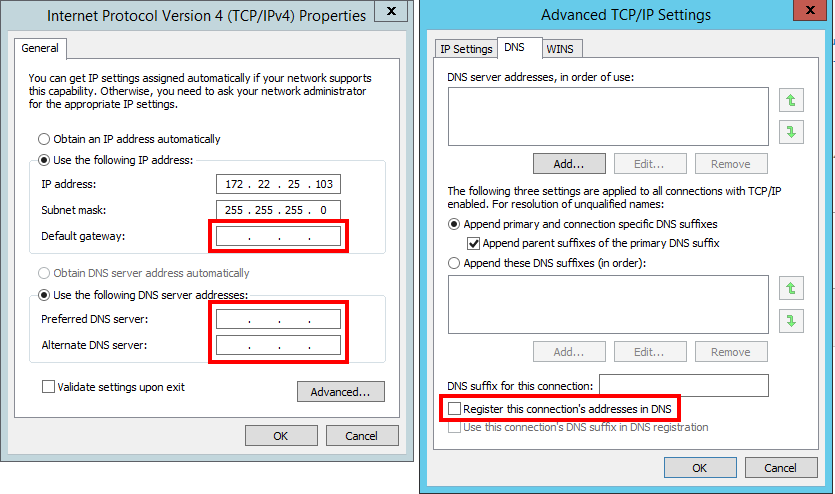
Note, a requirement of Exchange replication means the new NIC must have no gateway, no DNS servers, and DNS registration must be disabled (see below IP configuration for EXMBV02). Ensure the relevant fields are left blank and disabled.

Replication NIC Configuration_02

Windows Server Manager now shows our NICs as below (EXMBV02):

Replication NIC Configuration_02

Installating Microsoft Exchange Server 2013

Now our prereq work is complete, we can move on to the actual installation.

Once the ISO has been loaded and its pre-installation checks complete, installation across the three servers was very easy. For resilience, Client Access and Mailbox roles were segregated onto their own VMs. Installation of the Client Access role onto EXCAV01 took just 10 minutes, with the Mailbox role installing on EXMBV01 and EXMBV02 even quicker. All in all, the three roles were installed in just under 45 minutes. Not bad at all; but this is where flash storage comes into its own.

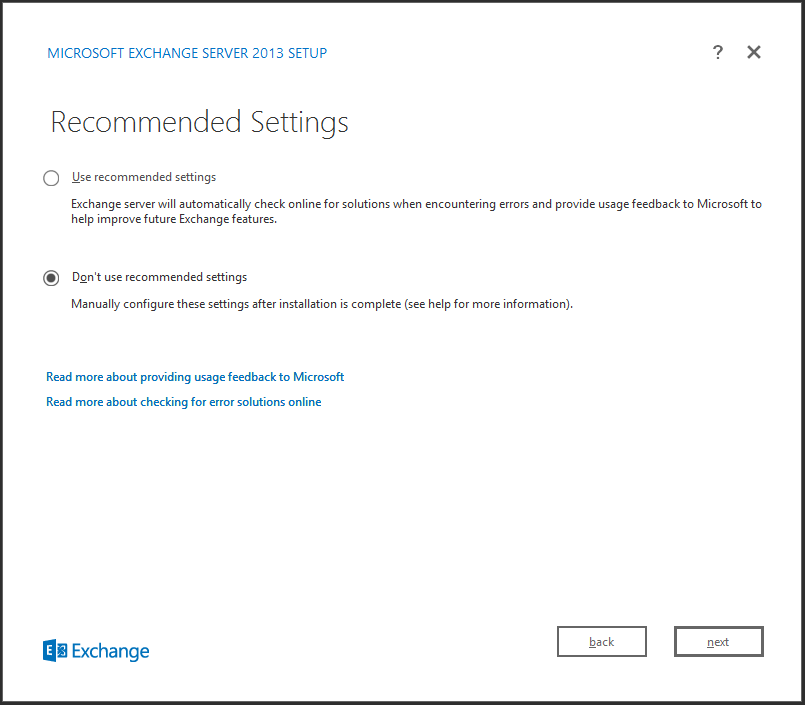
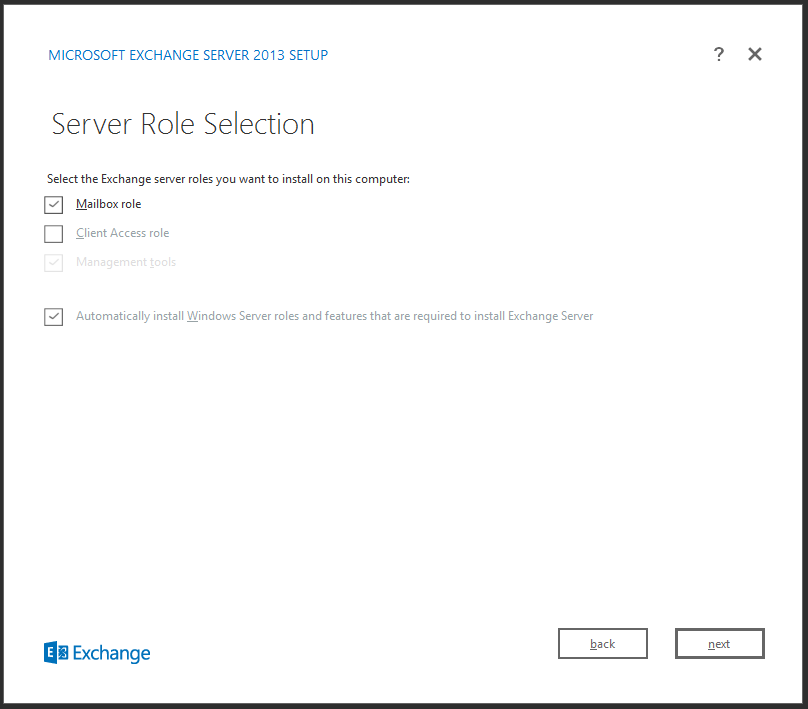
The below screenshots show just how ‘clean’ the the 2013 installation process is and, to ensure we install only the roles we require, ensure you select ‘Don’t use recommended settings’:

Exchange Install

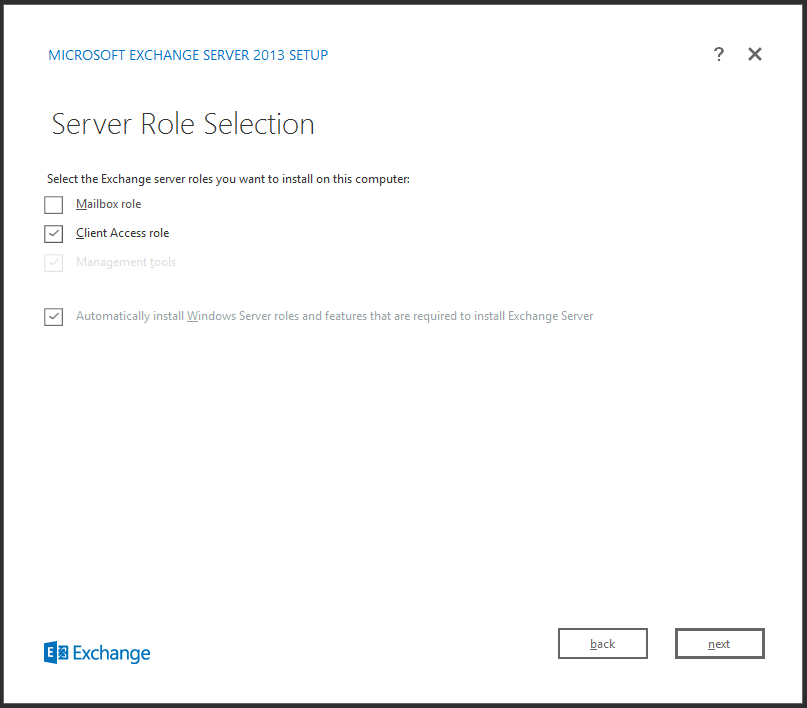
For the Client Access role, we select the relevant option for EXCAV01:

Exchange Install - Client Access Role

…and likewise for the Mailbox role on both EXMBV01 and EXMBV02:

Exchange Install - Mailbox Role

Following the readiness checks, installation proceeded without any fuss.

Post Installation Checks

And that’s it. If everything always went this easily, it’d be an easy life!

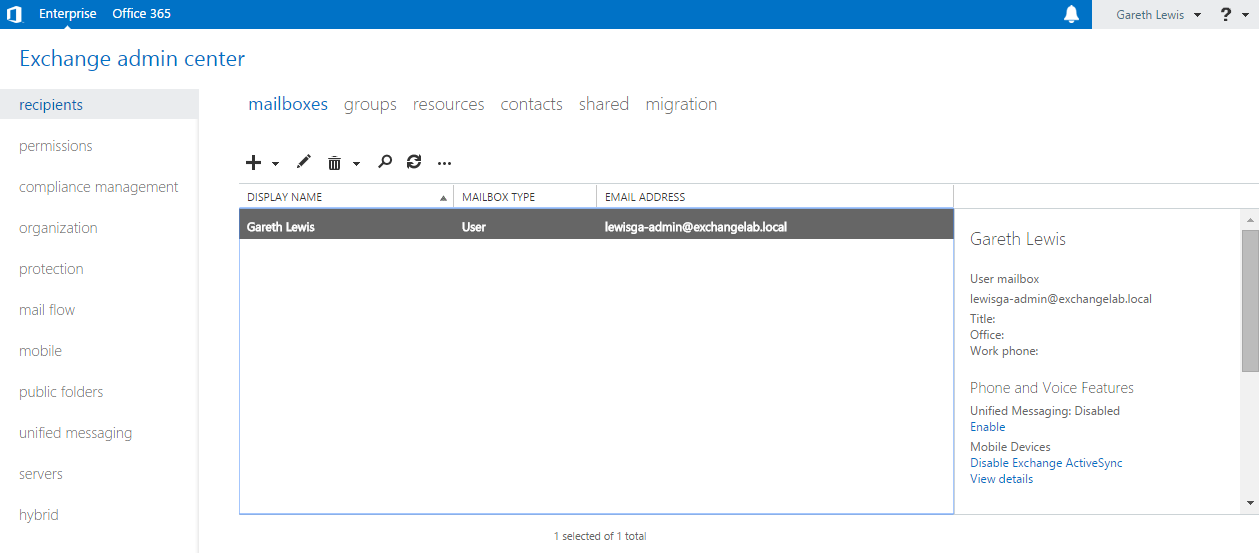
Following the installation of the Mailbox roles we’re now able to login to the new Exchange Control Panel. Unlike previous versions, this is now solely web based, and so allows us to login from anywhere on the network:

Exchange Control Panel

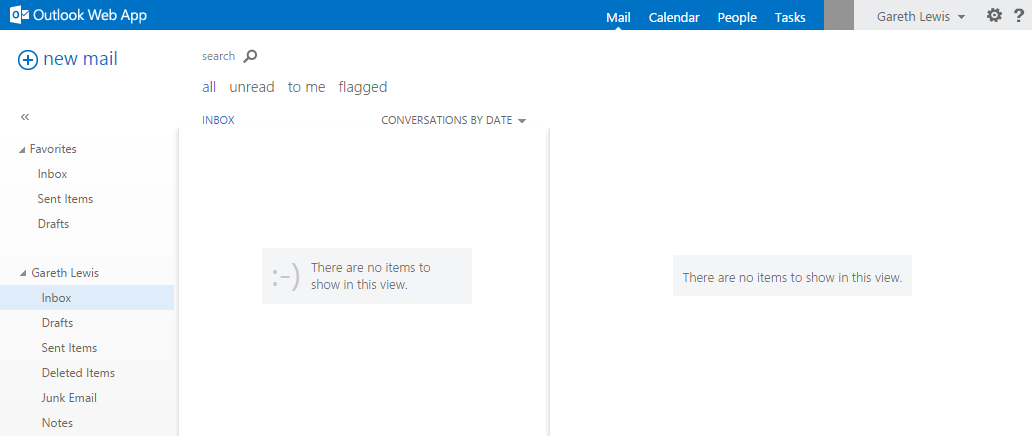
Likewise, we’re also able to login to the Outlook Web App, again, from anywhere on the network:

Outlook Web App

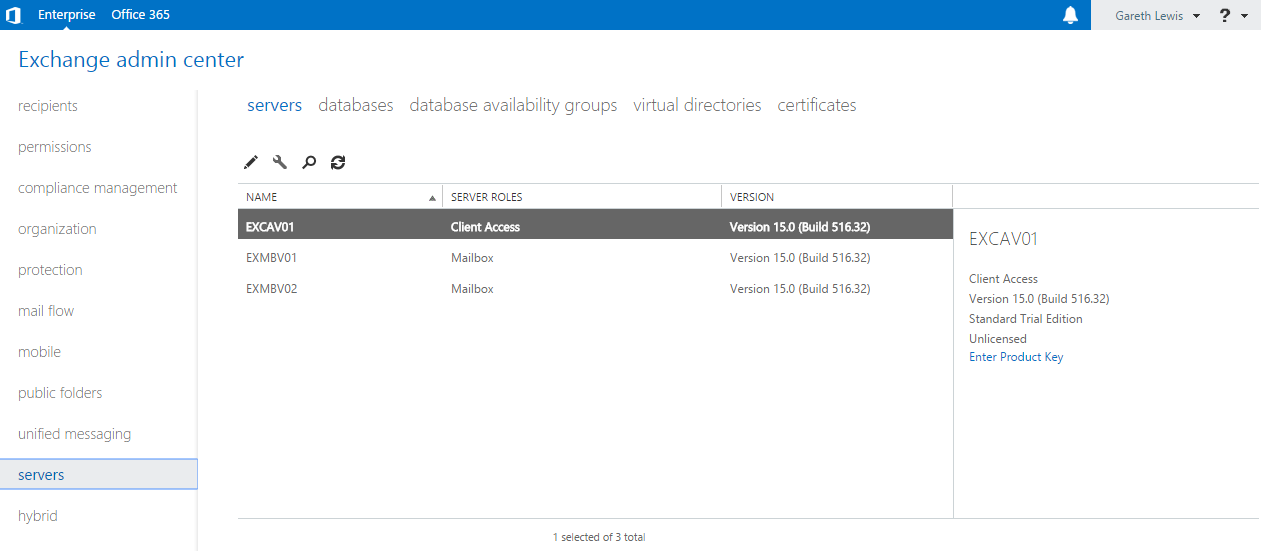
Browsing to ‘Servers > Servers’, we see that our three newly built Exchange servers are displayed, each with it’s role clearly indicated:

Servers

Final Task – Ensuring Database Health

Our last task is to ensure that our databases are mounted and in a healthy state. This can be confirmed by a) browsing to ‘Servers > Databases’, or b) via the Exchange Management Shell by running the cmdlet ‘Get-MailboxDatabaseCopyStatus’:

Database Health Check

Get-MailboxDatabaseCopyStatus

From the above screenshots, we see the three new databases I have created, all of which are housed on one of our Mailbox servers (in this case, EXMBV01).

To create a database, simply browse to ‘Server > Databases’, and click the ‘+’ symbol:

Create New Mailbox

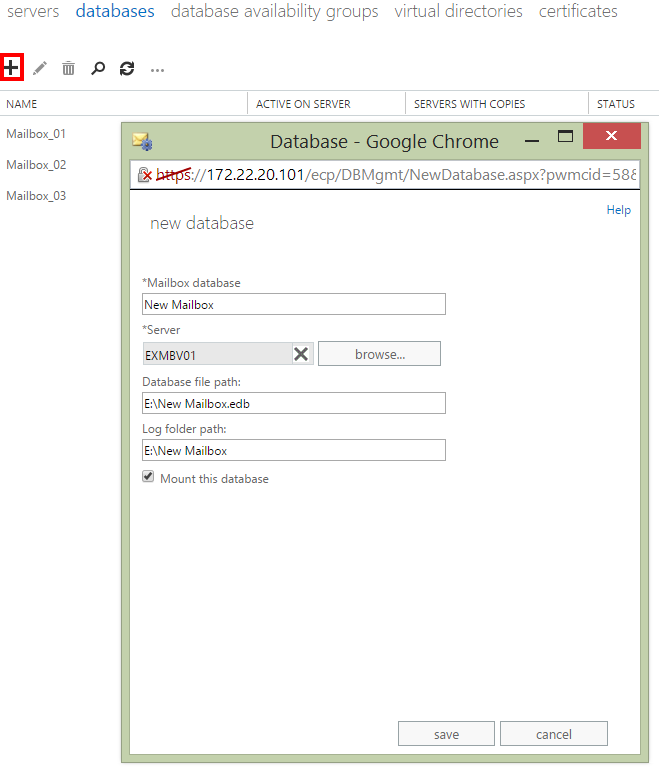
Simply give your new mailbox a name, select one of the new mailbox servers on which to store it, and set the file path (for which we need to point at the secondary 10GB disk).

And that is it. Mail is now flowing nicely and, in the next post, we’ll look at enabling replication between the mailbox servers in order to ensure resilience in the event of a server/network failure.

See you in the next post…