Like most of us in the virtualisation ecosystem, I run a lab. Actually, I run multiple labs, however, unlike some, my labs are nested environments running on a single ESXi host, specifically, the awesome SuperMicro SuperServer E300-9D-8CN8TP. My labs are just that – testing environments for personal development, study, validation of customer designs, etc. They don’t run any production/home applications, so they’re spun up and down fairly often.
As some of these labs can be resource hungry (multi-site VMware NSX-T Federation environments or VMware Cloud Foundation to name two examples), the workload VMs I deploy for testing within these environments must be small.
You don’t have to have an enterprise-grade lab environment to run VMware NSX Data Center for vSphere. For those who neither wish to house half a rack of servers, storage, and enterprise networking kit at home, nor wish to incur the wrath of their energy company for the privilege, a single desktop/laptop with appropriate compute and storage is more than capable of handling NSX.
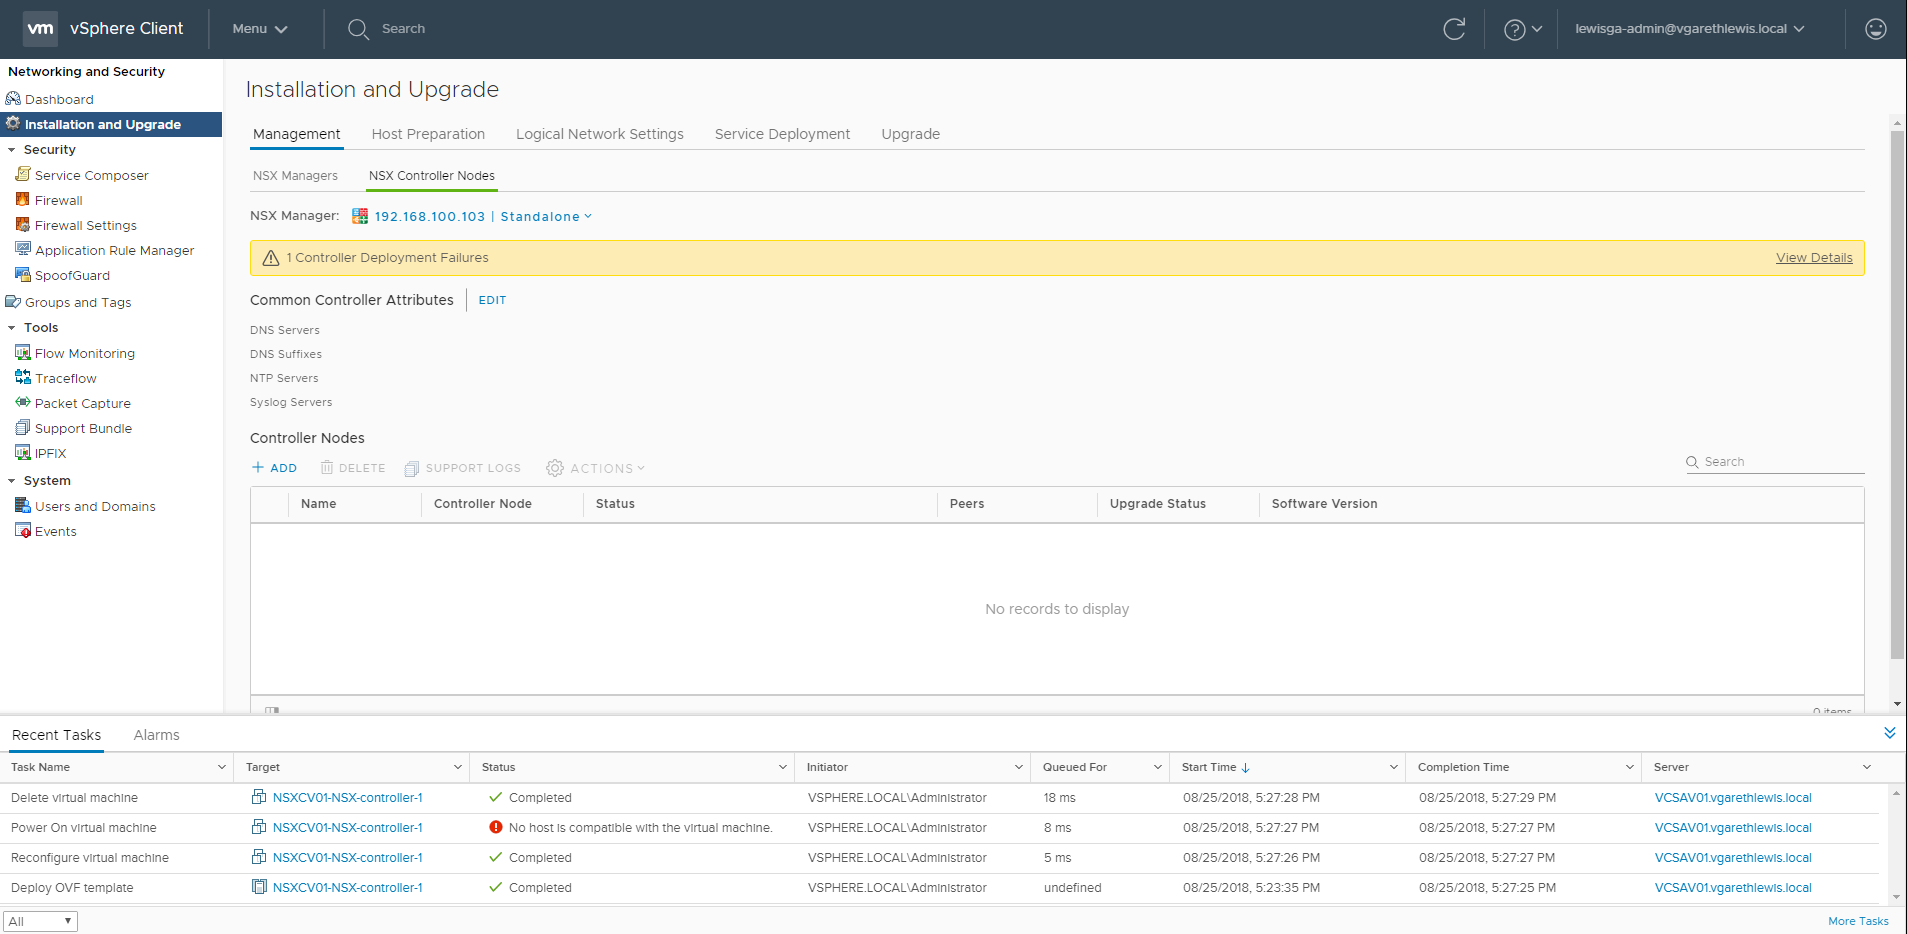
However, there are obvious limitations to this style of lab environment and, as you’re reading this, I’m guessing you’ve been unable to deploy an NSX Controller (likely due to its CPU requirements). By default, NSX Controllers are deployed with 4 vCPU and 4 GB memory. This is likely too high a requirement to be accommodated in smaller lab environments and, as a result, NSX Controller deployments will fail.
NSX Controller Deployment Failed – No host is compatible with the virtual machine.
Challenge – We are unable to specify NSX Controller resources during their deployment via UI. As NSX Controllers are also Protected VMs, we are unable to alter their resources via UI after the template is deployed and before it is deleted due to the error ‘No host is compatible with the virtual machine’.
Solution – We will a) remove the lock from the protected NSX Controller, and b) apply a more ‘lab-friendly’ resource configuration to the NSX Controller via PowerCLI.
Okay, so I’m guessing you’ve already attempted to deploy an NSX Controller. No problem, we just need to identify the failed entity’s Managed Object Reference ID (moRef ID). For more information, see my previous post regarding moRef IDs.
vCenter is quite predictable in that all newly created entities are assigned moRef IDs incrementally. Identifying the moRef ID of the previously failed NSX Controller (Stage 1) will allow us to delete the next moRef ID (which will remove the Protected VM lock) and, subsequently, enable us to reconfigure the NSX Controller’s resources via PowerCLI before the VM is powered on (Stage 2).
Please note, as stated in my previous post, VMware do not support or recommend this procedure in any way. As such, this procedure should not be implemented in a production environment.
Stage 1 – Identify Failed NSX Controller moRef ID
1. Connect to your vCenter Server via SSH.
2. Enable and enter Bash.
shell.set --enable True
shell
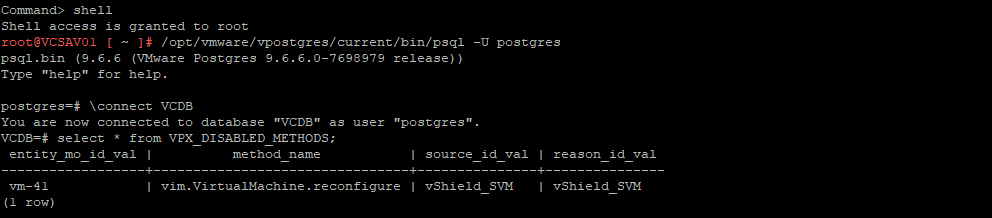
3. Connect to the vCenter Postgres Database via PSQL.
5. Identify and note the moRef ID of the failed NSX Controller. In my case, this is ‘vm-41’ (see below screenshot).
select * from VPX_DISABLED_METHODS;
The previous NSX Controller creation attempt. Note the MO_ID (vm-41).
Stage 2 – Remove Future NSX Controller Protected VM Lock and Reconfigure VM Resource via PowerCLI
Identification done, we now need to prepare for the next stage – the deployment of a new NSX Controller, the removal of the Protected VM lock via SSH, and the reconfiguration of its resources via PowerCLI.
For this we’ll need to setup two commands in readiness, both of which must be run at specific stages of the NSX Controller ‘Deploy OVF template’ task.
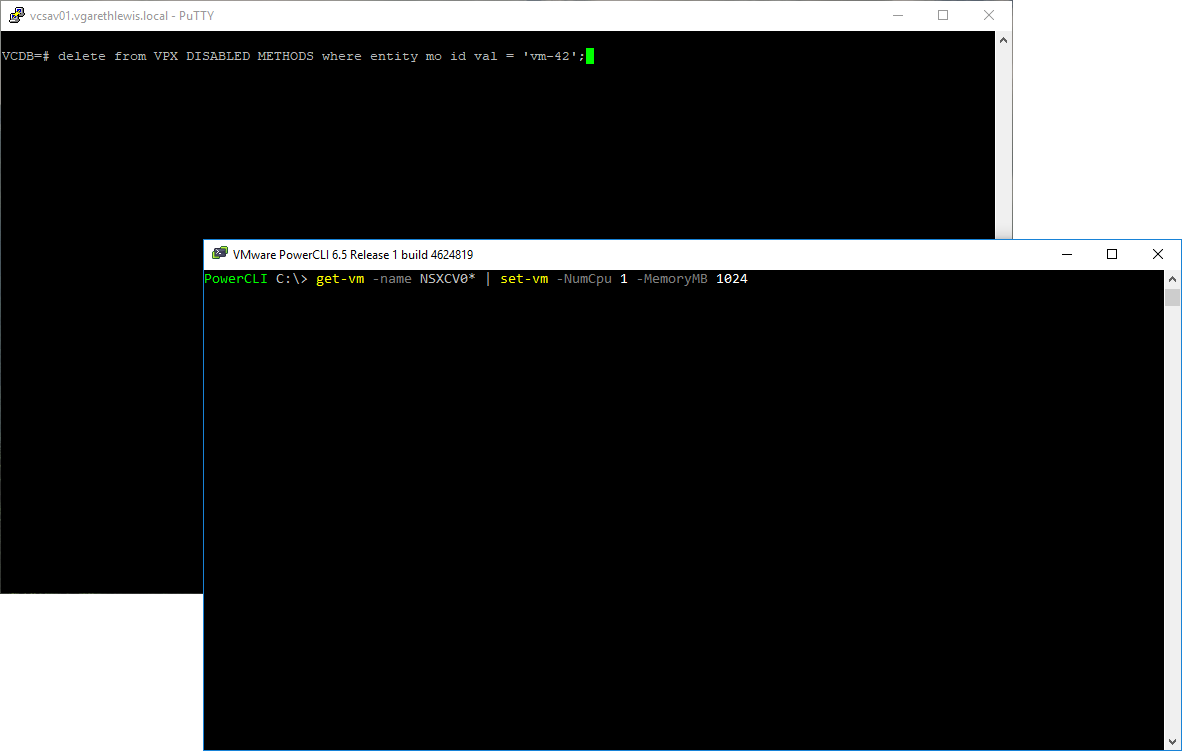
1. Remove Protected VM Lock via SSH – Jump back into your previous SSH session and ready the below command (but don’t run it yet), configured with the ‘next in line’ moRef ID (in my case ‘vm-42’). This will remove the Protected VM lock at the end of the OVF template deployment, and will allow PowerCLI to jump in and reconfigure the VM just before it is powered on.
delete from VPX_DISABLED_METHODS where entity_mo_id_val = 'vm-42';
2. Reconfigure NSX Controller Resources via PowerCLI – Launch PowerCLI, connect to your VCSA, and ready the below command (but don’t run it yet). This is the NSX Controller resource configuration change. For my lab environment, 1x vCPU and 1 GB of memory is fine. Note, ‘NSXCV0’ is the start of my NSX Controller name. Configure yours accordingly.
3. With both commands prepared, do not run them yet. They will be run AFTER the NSX Controller deployment has started.
Protected VM Lock Removal and PowerCLI Resource Configuration commands prepared.
4. Jump back into your vSphere Client and create a new NSX Controller.
5. At specific stages of the Deploy OVF Template task, run the prepared commands detailed above.
~60% – Reconfigure NSX Controller Resources via PowerCLI. This will queue until it’s able to run (e.g. – following the removal of the Protected VM lock).
~98% – Remove Protected VM Lock via SSH. Run this command repeatedly from 98%, and until you receive the ‘DELETE 1’ feedback. Don’t hold back on this step! Repeat the command as you would mash your keyboard to enter BIOS.
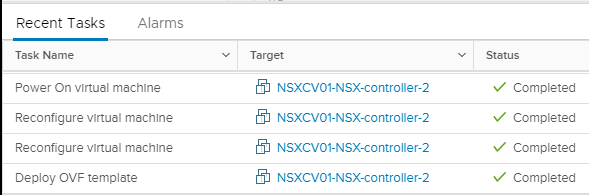
And, hey presto! From the below screenshots we can see the Protected VM lock has been removed successfully, allowing the PowerCLI command to complete, resulting in a reconfigured NSX Controller.
Protected VM Lock Removed after repeatedly running the delete command via SSH at ~98%.
Allocating a more ‘lab-friendly resource configuration via PowerCLI.
Via the vSphere Client, we can see the Deploy OVF template, Reconfigure virtual machine, and Power On virtual machine tasks were able to complete successfully.
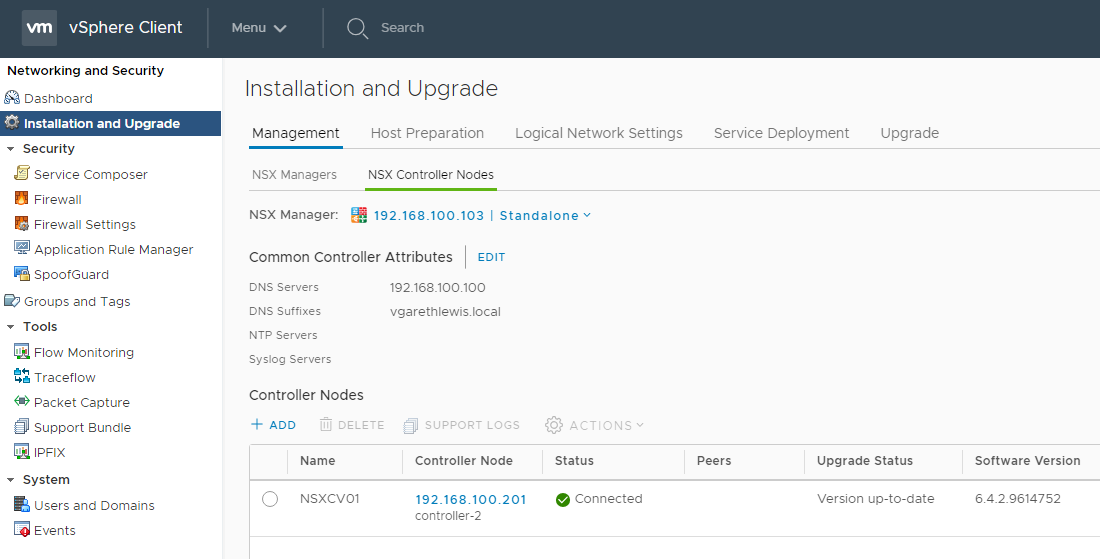
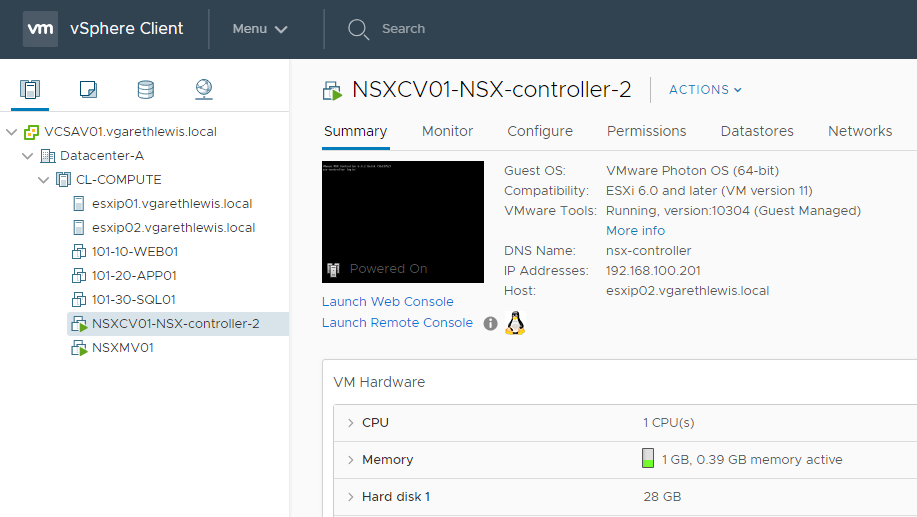
And below, our shiny, new, ‘lab-friendly’ NSX Controller.
The ‘Lab-Friendly’ NSX Controller.
…and confirmation of its more appropriate resource allocation.
References
During my research for this article, I came across to below guides, without which, the above would not have been possible. Props.
By design, there are certain virtual machines and/or appliances within vSphere which are protected to prevent editing (this can include NSX Controllers, Edges, Logical Routers, etc.) In a live/production environment, you’d not normally care about editing these appliances, however, in a lab environment (especially one where resource is tight), reducing memory and/or CPU allocation can help a lot. As such, this article will cover the process of removing the lock on protected VM in vSphere, in order to enable editing.
The scenario: a customer needs to reduce the resource allocation of an NSX Controller, however, due to the VM in question being protected/locked, editing the VM’s resources is not possible via UI or PowerCLI.
The process of removing this lock is quick and easy, however, we first need to identify the virtual machine’s Managed Object Reference (moRef ID). Please note, VMware do not support or recommend this procedure in any way. As such, this procedure should not be implemented in a production environment.
One of the major upcoming projects this year will see the upgrade and possible redesign of our Exchange environment, and this will mean upgrading our current Exchange 2010 solution to Exchange 2013. With this comes a number of differences (the management GUI to name just one), and I aim to capture my initial thoughts of the product in this and upcoming posts. In future posts we’ll cover various topics including the creation of database availability groups (DAGs), load balancing, and general all round resilient goodness!
So, back in the home lab, the idea was to get a better feel for the product by building a lightweight demo solution, but one which still offers HA capabilities. As the Outlook Web App now offers near-Office 365 functionality, the need for multiple Outlook clients running on Windows OS’s in the lab is no longer the case; this means I am able to run one domain controller, a Client Access server, and two mailbox servers all on a single laptop running VMware Workstation. All VMs will be running trial versions of Microsoft Windows Server 2012 R2, and all will be housed on a Crucial BX100 250GB SSD for best performance.
Network Prerequisites
Before building any lab-based solution, I always start with the networking requirements, and the great thing about working with VMware Workstation means VLANs can be created and configured quickly and easily.
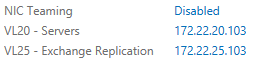
We’ll be using two VLANs in order segregate different traffic types; the first VLAN is for our server LAN traffic, and the secondary for Exchange replication traffic (more on the latter shortly).
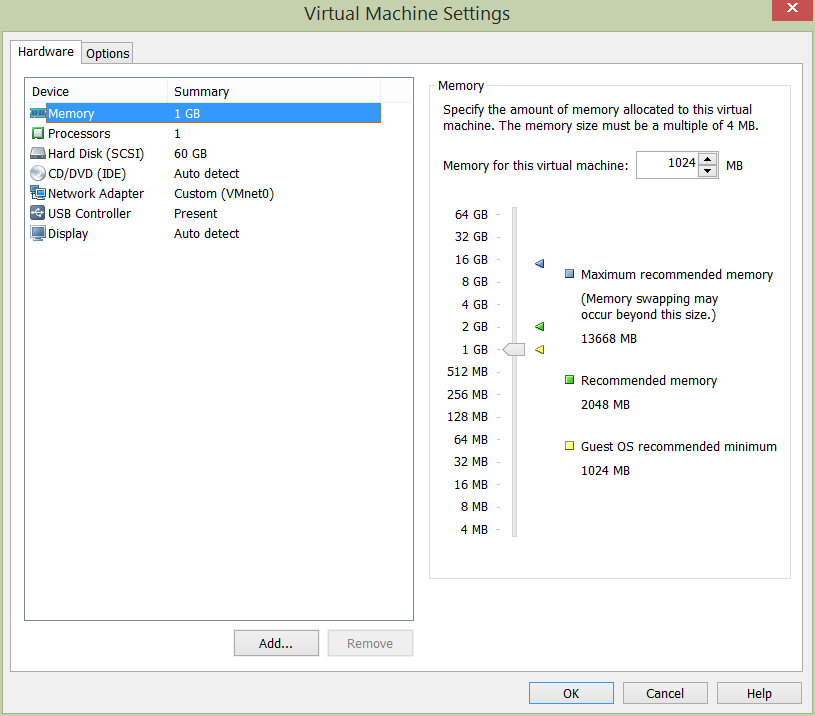
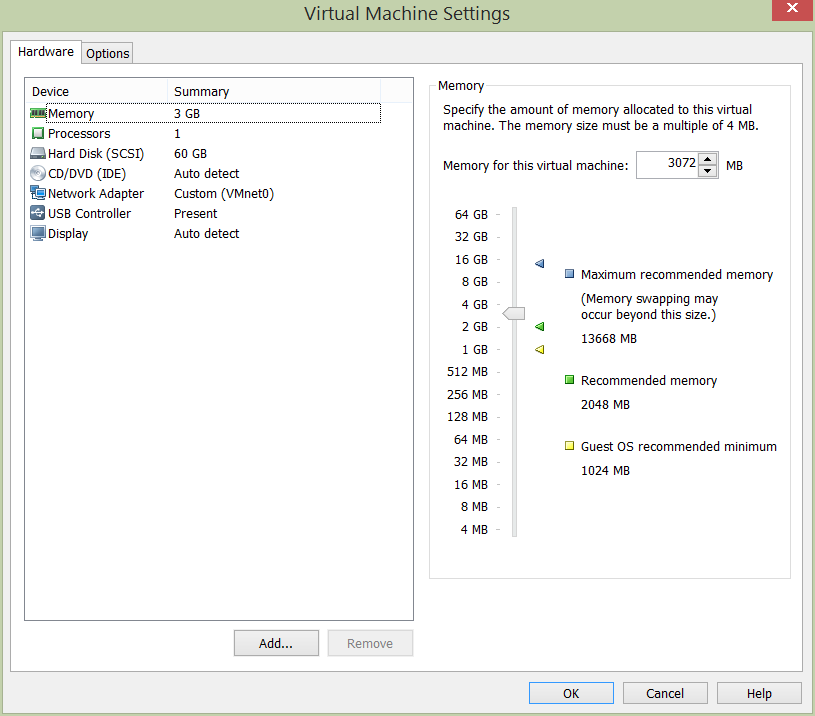
Mailbox Database Server Configuration – EXMBV01 & EXMBV02
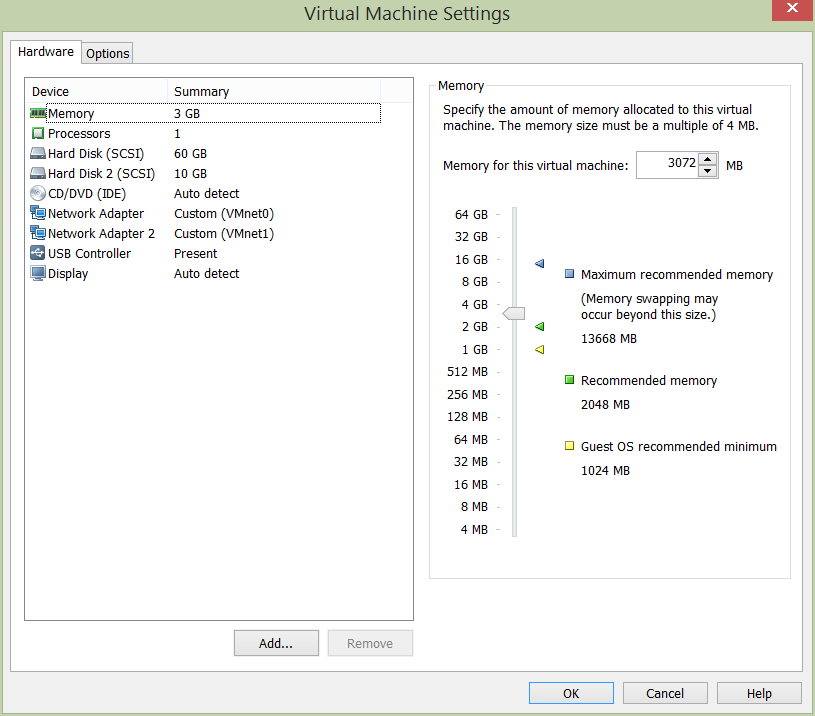
Mailbox storage requirements will see an additional 10GB disk added to each of the mailbox servers (as seen in the below VM configuration). The new disk will be used to house our mailbox databases. In production we would obviously add appropriately sized disks and span our databases across them, however, a single thin-provisioned 10GB disk in each of our mailbox servers will be perfectly acceptable for a lab environment.
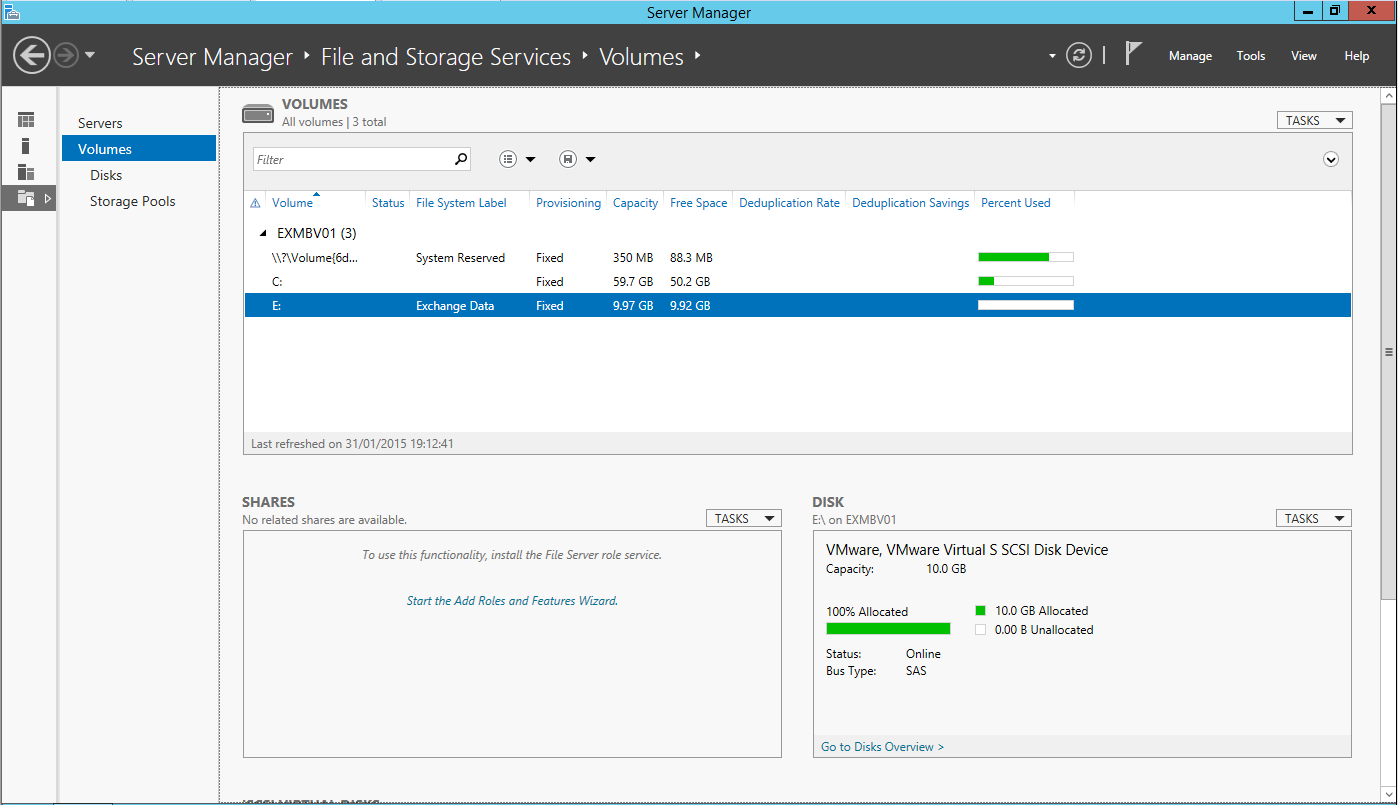
In the below screenshot I’ve brought the new disk online and created a volume accordingly:
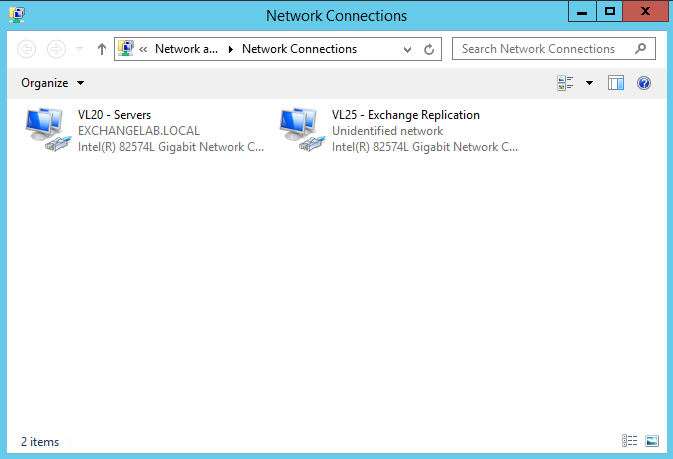
Lastly, we’ll be adding an additional NIC to each of the mailbox servers. I’ll be covering this in depth in my next post when I configure a database availability group (DAG); specifically, the NICs will be used to segregate replication traffic from our production network. Below shows our newly added NIC for replication traffic. The additional mailbox server NICs will be configured as such:
EXMBV01 – 172.22.25.102/24
EXMBV02 – 172.22.25.103/24
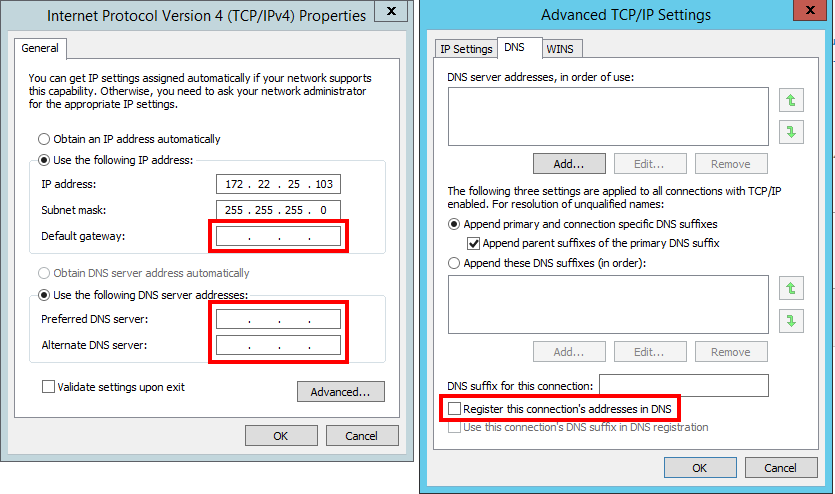
Note, a requirement of Exchange replication means the new NIC must have no gateway, no DNS servers, and DNS registration must be disabled (see below IP configuration for EXMBV02). Ensure the relevant fields are left blank and disabled.
Windows Server Manager now shows our NICs as below (EXMBV02):
Installating Microsoft Exchange Server 2013
Now our prereq work is complete, we can move on to the actual installation.
Once the ISO has been loaded and its pre-installation checks complete, installation across the three servers was very easy. For resilience, Client Access and Mailbox roles were segregated onto their own VMs. Installation of the Client Access role onto EXCAV01 took just 10 minutes, with the Mailbox role installing on EXMBV01 and EXMBV02 even quicker. All in all, the three roles were installed in just under 45 minutes. Not bad at all; but this is where flash storage comes into its own.
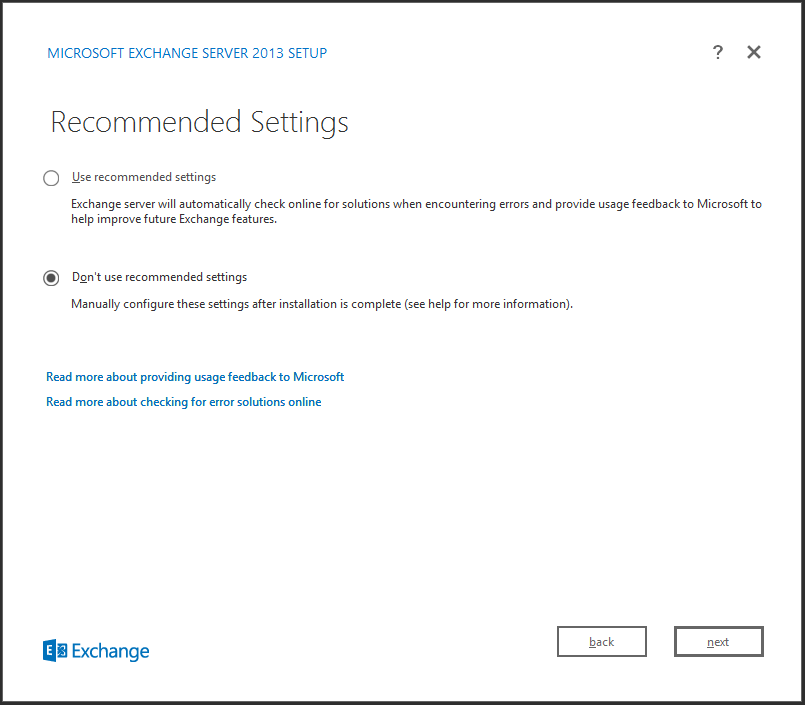
The below screenshots show just how ‘clean’ the the 2013 installation process is and, to ensure we install only the roles we require, ensure you select ‘Don’t use recommended settings’:
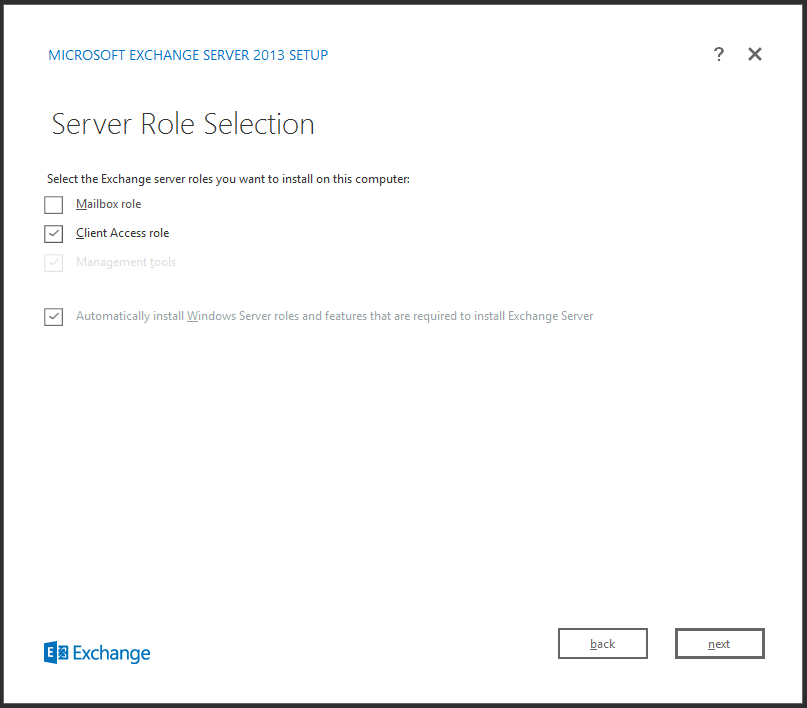
For the Client Access role, we select the relevant option for EXCAV01:
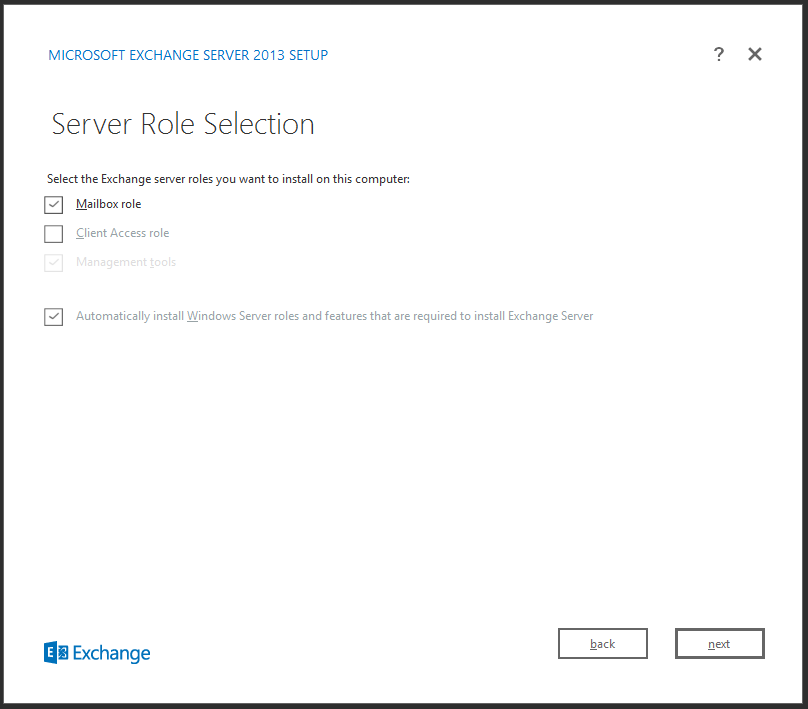
…and likewise for the Mailbox role on both EXMBV01 and EXMBV02:
Following the readiness checks, installation proceeded without any fuss.
Post Installation Checks
And that’s it. If everything always went this easily, it’d be an easy life!
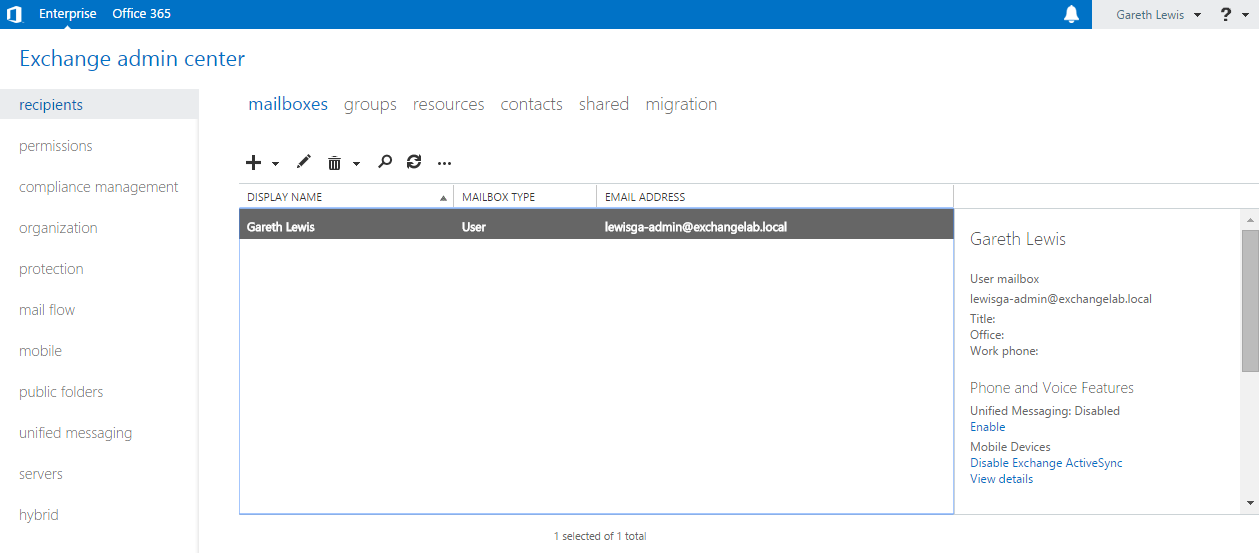
Following the installation of the Mailbox roles we’re now able to login to the new Exchange Control Panel. Unlike previous versions, this is now solely web based, and so allows us to login from anywhere on the network:
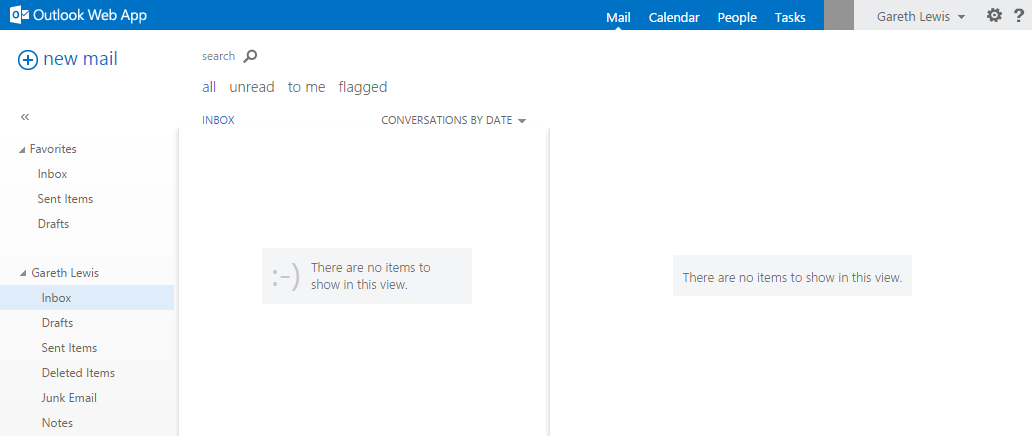
Likewise, we’re also able to login to the Outlook Web App, again, from anywhere on the network:
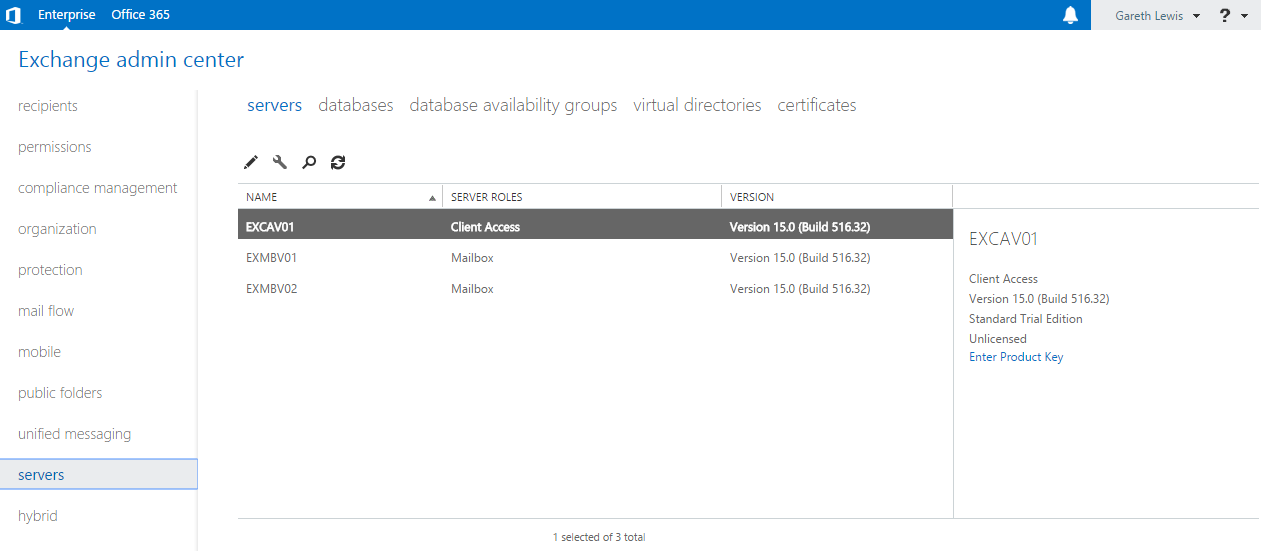
Browsing to ‘Servers > Servers’, we see that our three newly built Exchange servers are displayed, each with it’s role clearly indicated:
Final Task – Ensuring Database Health
Our last task is to ensure that our databases are mounted and in a healthy state. This can be confirmed by a) browsing to ‘Servers > Databases’, or b) via the Exchange Management Shell by running the cmdlet ‘Get-MailboxDatabaseCopyStatus’:
From the above screenshots, we see the three new databases I have created, all of which are housed on one of our Mailbox servers (in this case, EXMBV01).
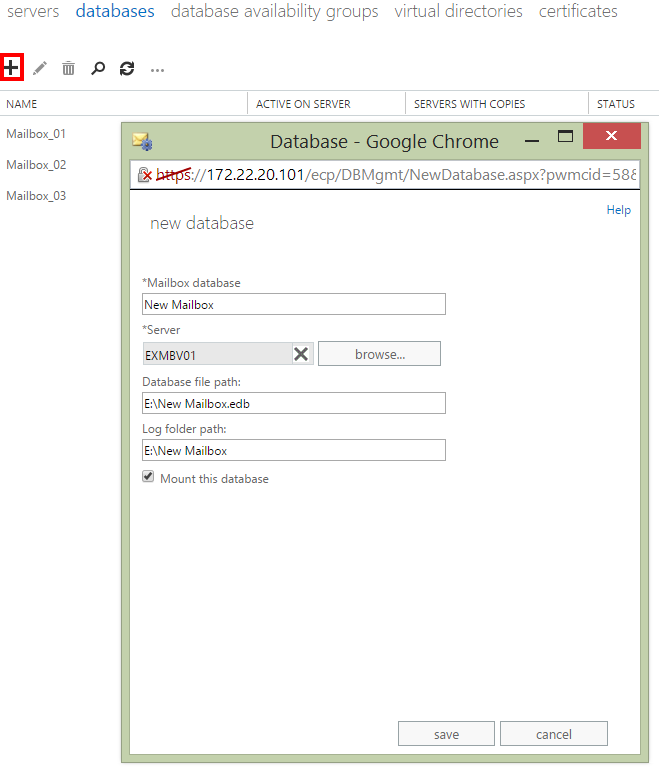
To create a database, simply browse to ‘Server > Databases’, and click the ‘+’ symbol:
Simply give your new mailbox a name, select one of the new mailbox servers on which to store it, and set the file path (for which we need to point at the secondary 10GB disk).
And that is it. Mail is now flowing nicely and, in the next post, we’ll look at enabling replication between the mailbox servers in order to ensure resilience in the event of a server/network failure.
See you in the next post…
We use cookies to ensure that we give you the best experience on our website. If you continue to use this site we will assume that you are happy with it.