Software-defined data centres, software-defined networks, software-defined storage – they are all great, aren’t they? They enable us to abstract software-defined-X from the physical and allows us to scale at speed via automation. However, physical servers, the elephant in the room, still exist, and they likely will for some time.
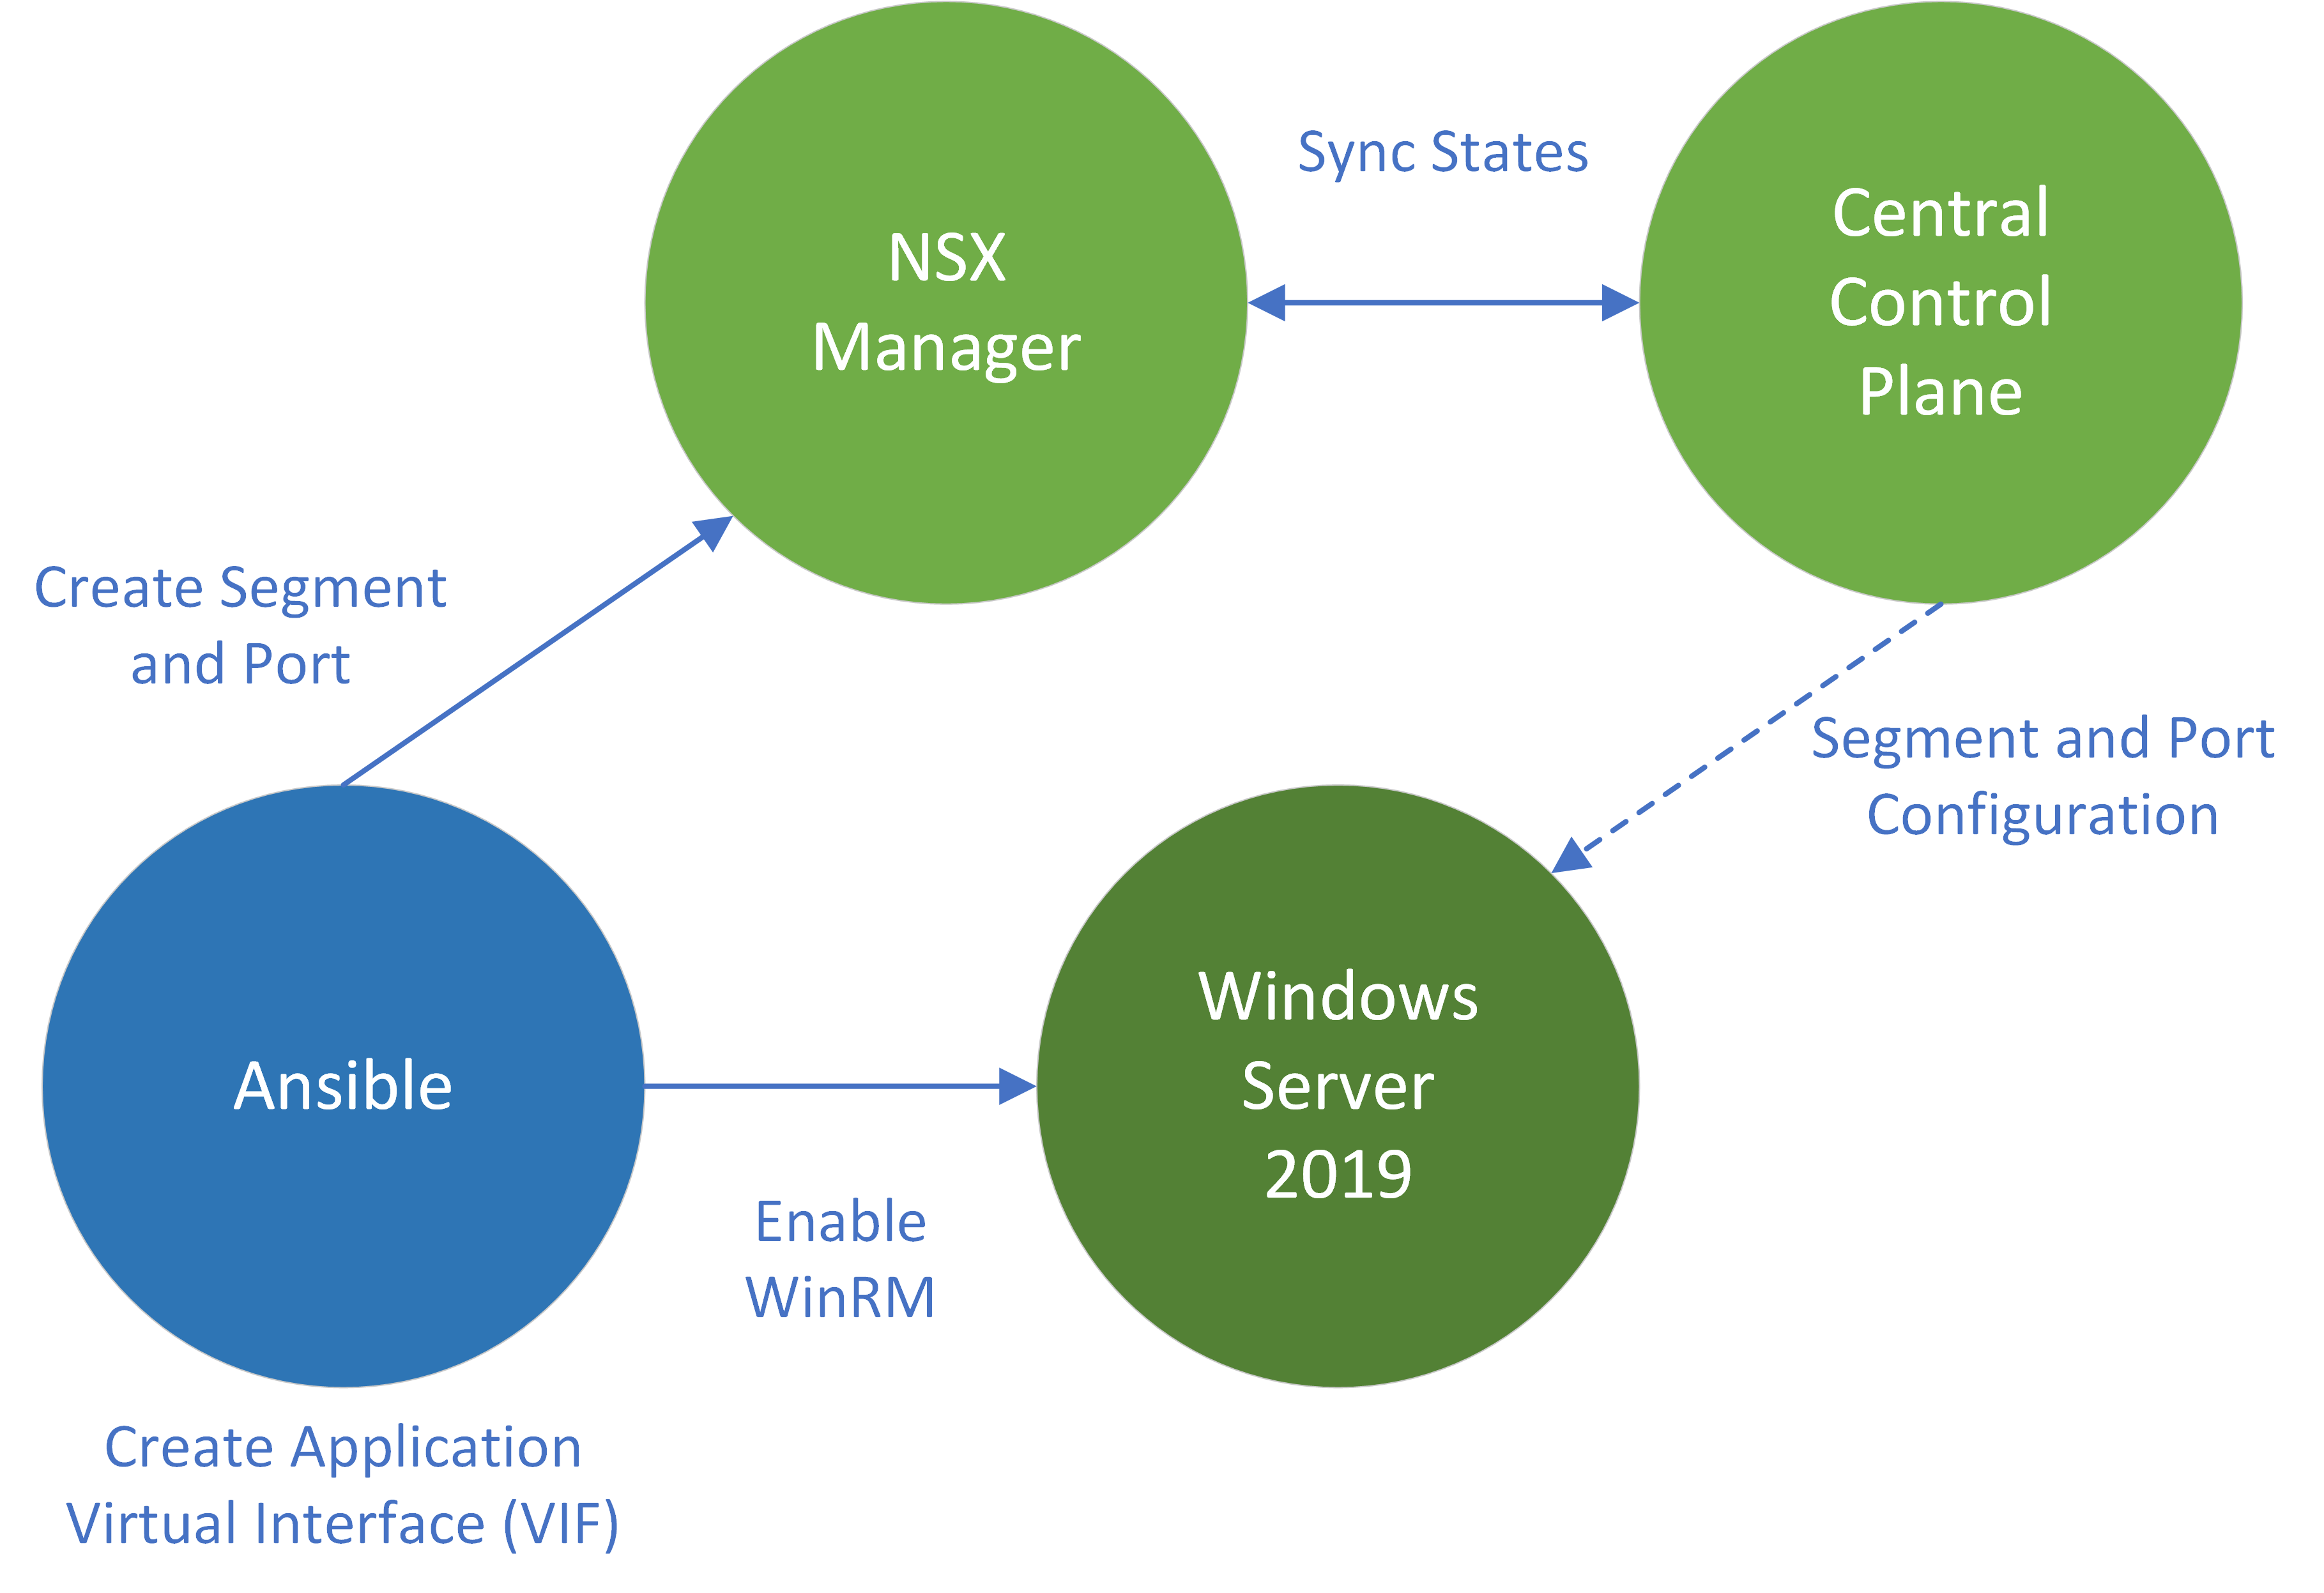
So then, can we integrate physical devices into a software-defined world? Yes. But, NSX-T micro-segmentation is only available to virtual machines, right? No. By using the VMware NSX-T Agent/kernel module, we can provide connectivity to bare-metal workloads and enable them to participate and leverage the same security functions as those enjoyed by virtual machines.
In this article, we deploy the NSX-T Agent to a Windows Server 2019 webserver hosting IIS and secure the physical, bare-metal server utilising the NSX-T Distributed Firewall (DFW).
The Physical Server – Windows Server 2019
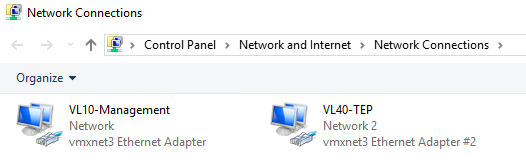
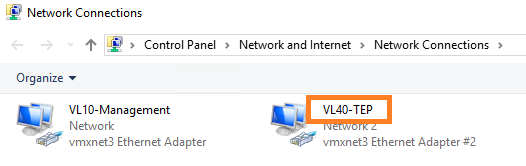
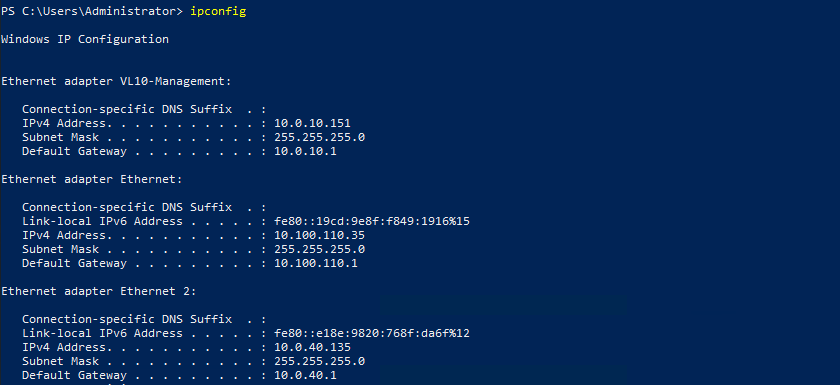
The physical server we need to secure is a Windows Server 2019 webserver. The server houses two physical NICs, one of which is dedicated to Management traffic, the other to GENEVE TEP traffic.
Note – For the eagle-eyed of you, you’ll notice the interfaces are actually VMXNET3 adapters. That’s because the ‘physical’ server is actually nested in my lab, however, it performs the same role as a bare-metal server.

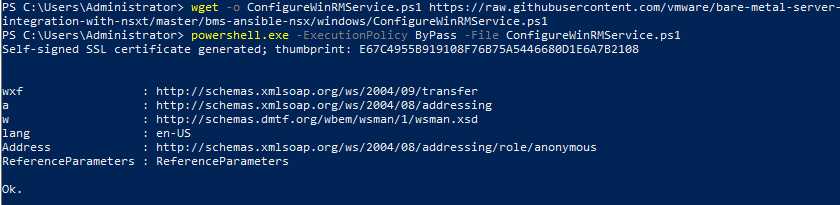
1. Firstly, and before installing the NSX-T Kernel Module, we need to enable WinRM so that the server can interoperate with third-party software and hardware. To enable the WinRM service with a self-signed certificate, run the below PowerShell commands.
wget -o ConfigureWinRMService.ps1 https://raw.githubusercontent.com/vmware/bare-metal-server-integration-with-nsxt/master/bms-ansible-nsx/windows/ConfigureWinRMService.ps1
powershell.exe -ExecutionPolicy ByPass -File ConfigureWinRMService.ps1
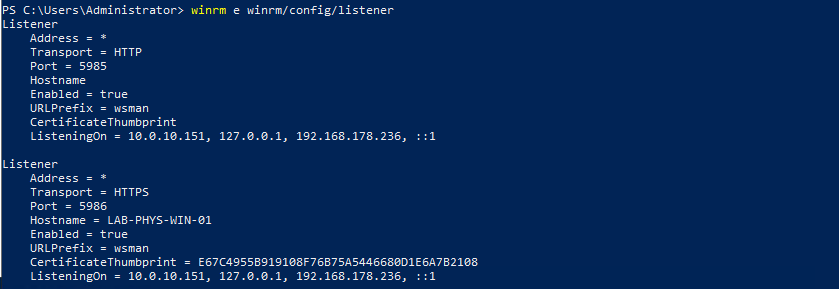
2. Verify the configuration of WinRM via the below PowerShell command.
winrm e winrm/config/listener
NSX-T Agent Installation
Next, let’s install the NSX-T Agent (Kernel Module).


NSX-T Configuration
Before we add the bare metal server as a standalone transport node, we must ensure the below NSX-T prerequisites are met:
NSX-T Prerequisites:
- A transport zone must be configured.
- An uplink profile must be configured, or you can use the default uplink profile.
- An IP pool must be configured, or DHCP must be available in the network deployment.
- At least one physical NIC must be available on the host node.
- Hostname
- Management IP address
- Username
- Password
- A segment (VLAN or Overlay), depending upon your requirement, must be available to attach to the application interface of the physical server.
1. From a browser, log in with admin privileges to an NSX Manager at https://<NSX-Manager-FQDN-or-IP-Address>.
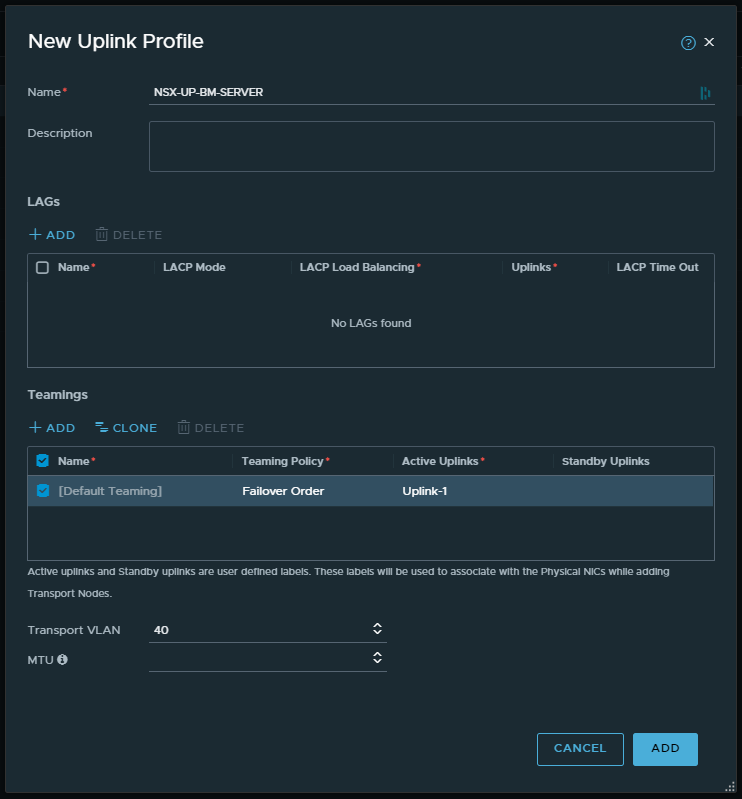
2. Browse to System > Fabric > Profiles > Uplink Profiles and create a new bare-metal Uplink Profile.
3. Browse to System > Fabric > Nodes > Host Transport Nodes and click + Add Host Node.

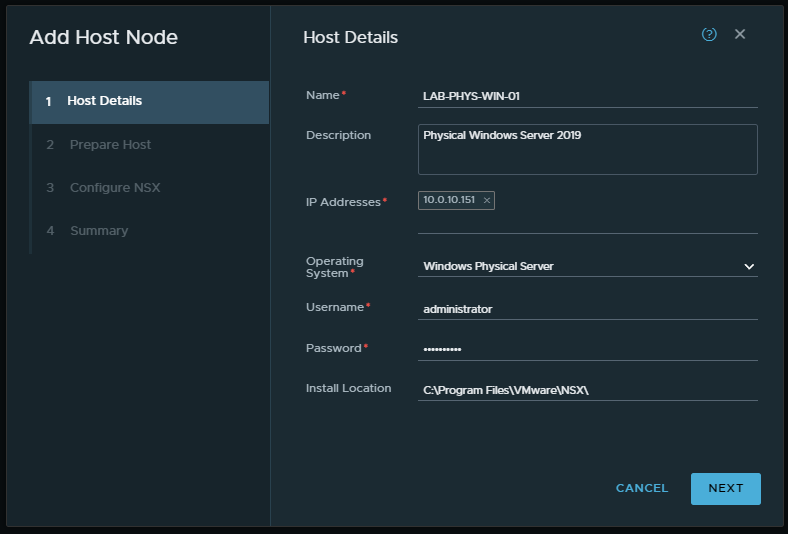
4. On the Host Details window, enter the details according to your environment, and where IP Addresses must equal the Management IP. When ready, click Next.
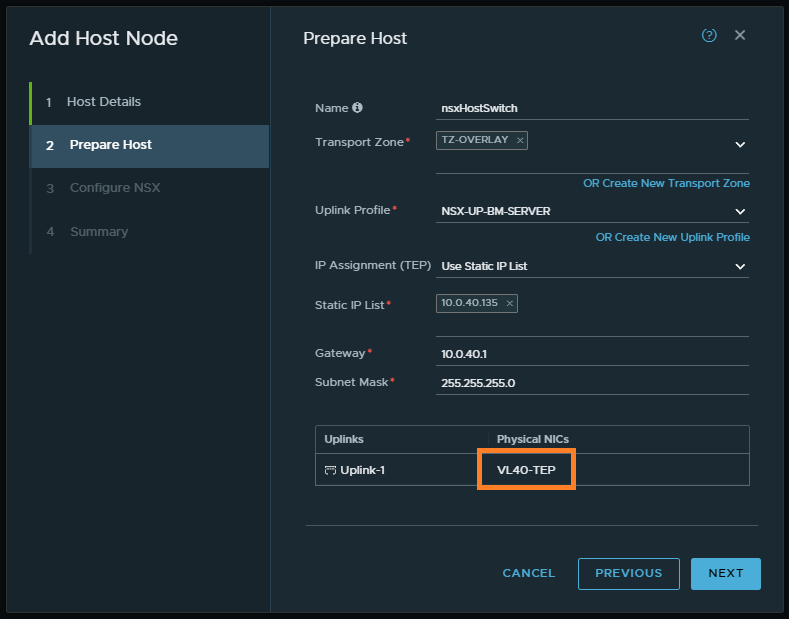
5. On the Prepare Host window, enter the details according to your environment and ensure the Physical NIC name matches the name displayed on your physical Windows Server. When ready, click Next.
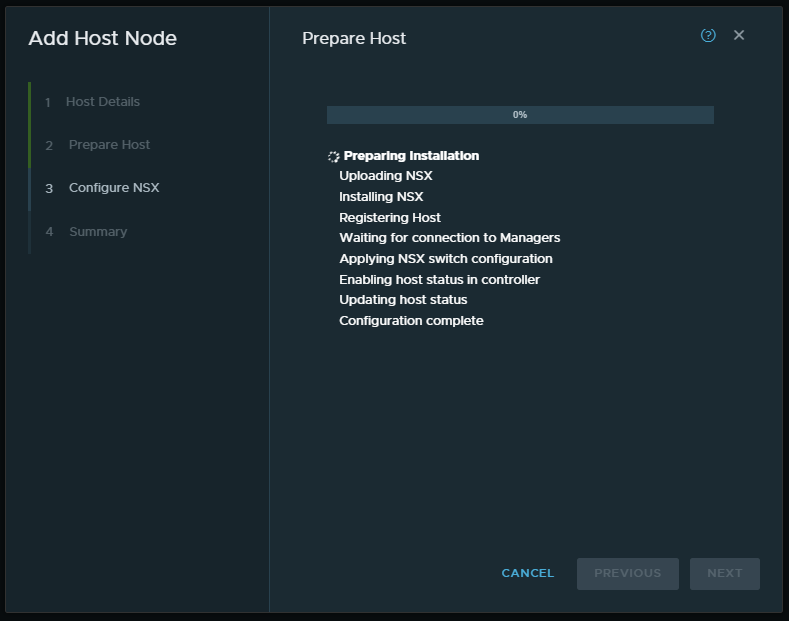
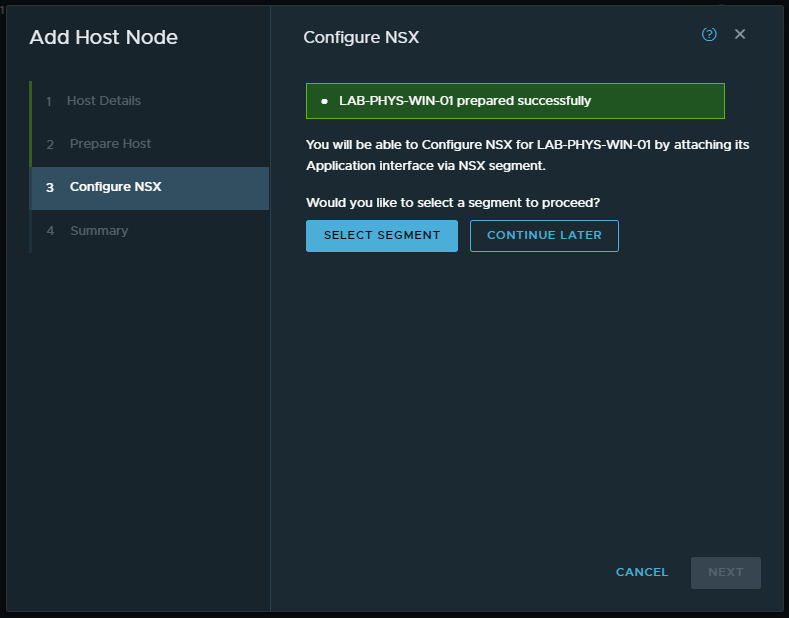
6. On the Configure NSX window, monitor the status of the physical server as it is prepared.
7. We now have the option to select a segment; however, before we do, see the next step below.
8. Let’s jump back to our bare-metal Windows Server. Note the newly created NICs, where the VIF is, essentially, a vNIC for our overlay traffic, and we also have a new virtual TEP.


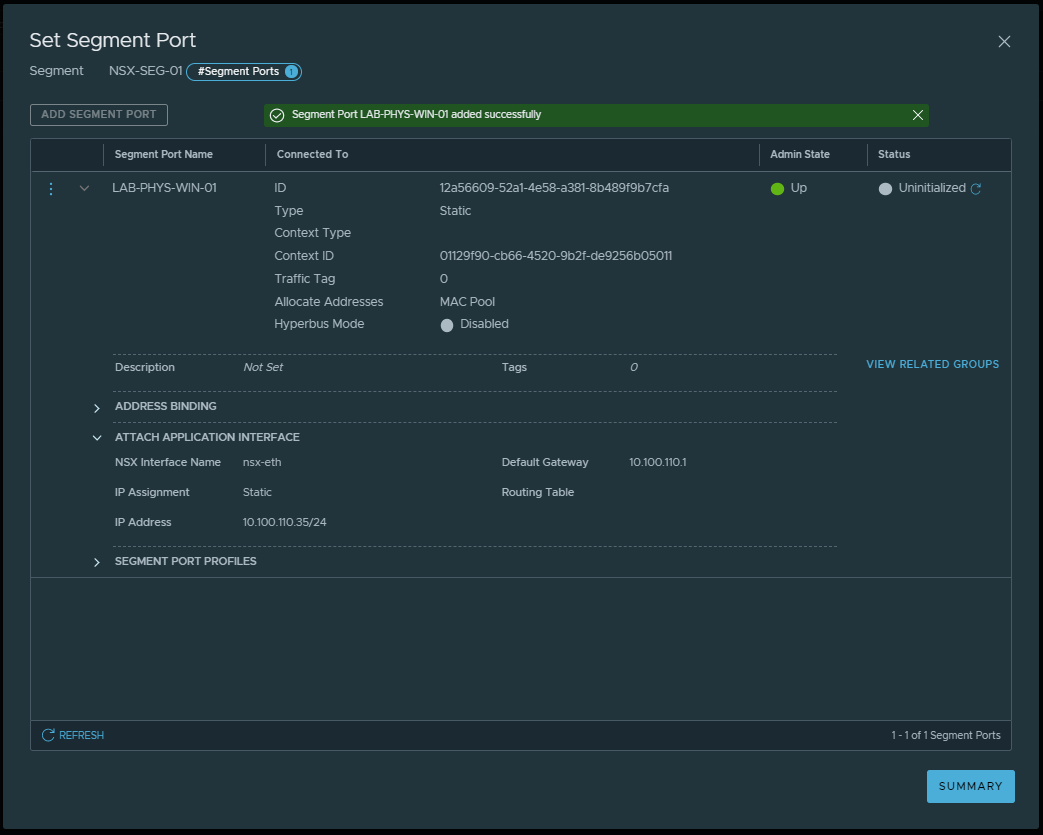
9. Back on the NSX-T Add Host Node wizard, click Select Segment and, from the list of segments connected to the transport zone that you configured for the physical server, select an appropriate segment and click Add Segment Port. This segment will be used by the application installed on the physical server.

10. On the Set Segment Port window, expand the Attach Application Interface section and enter an appropriate IP Address and Default Gateway for your overlay network segment. When ready, click Save.

11. Once added successfully, click Summary and close.
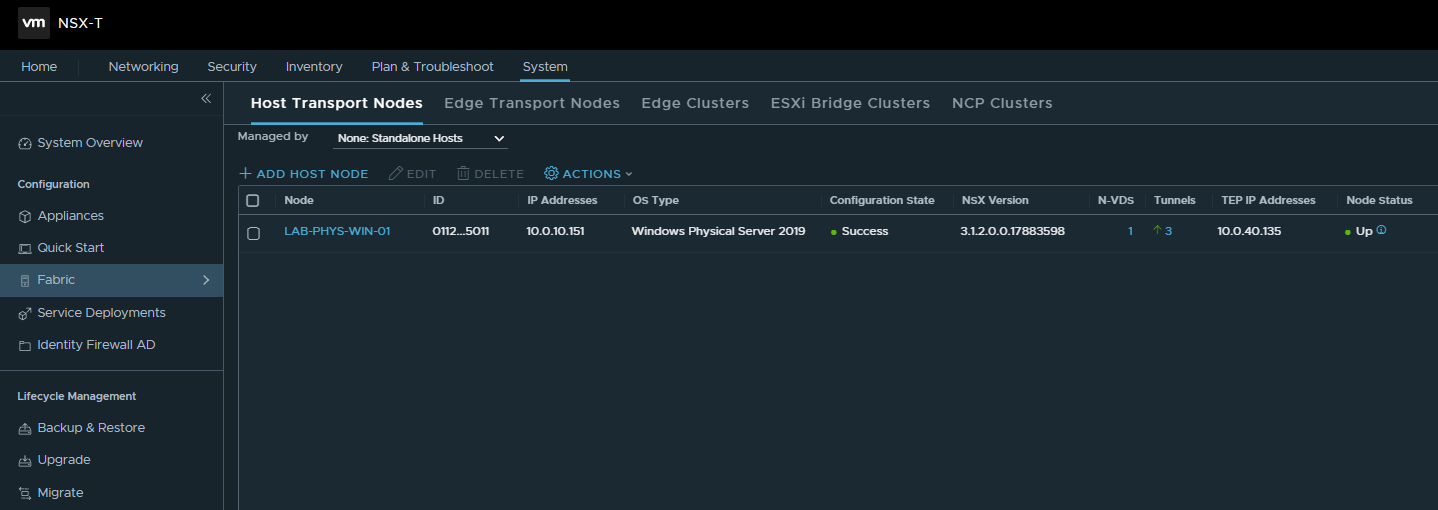
12. The new physical Windows Server is now present on the Host Transport Node page.
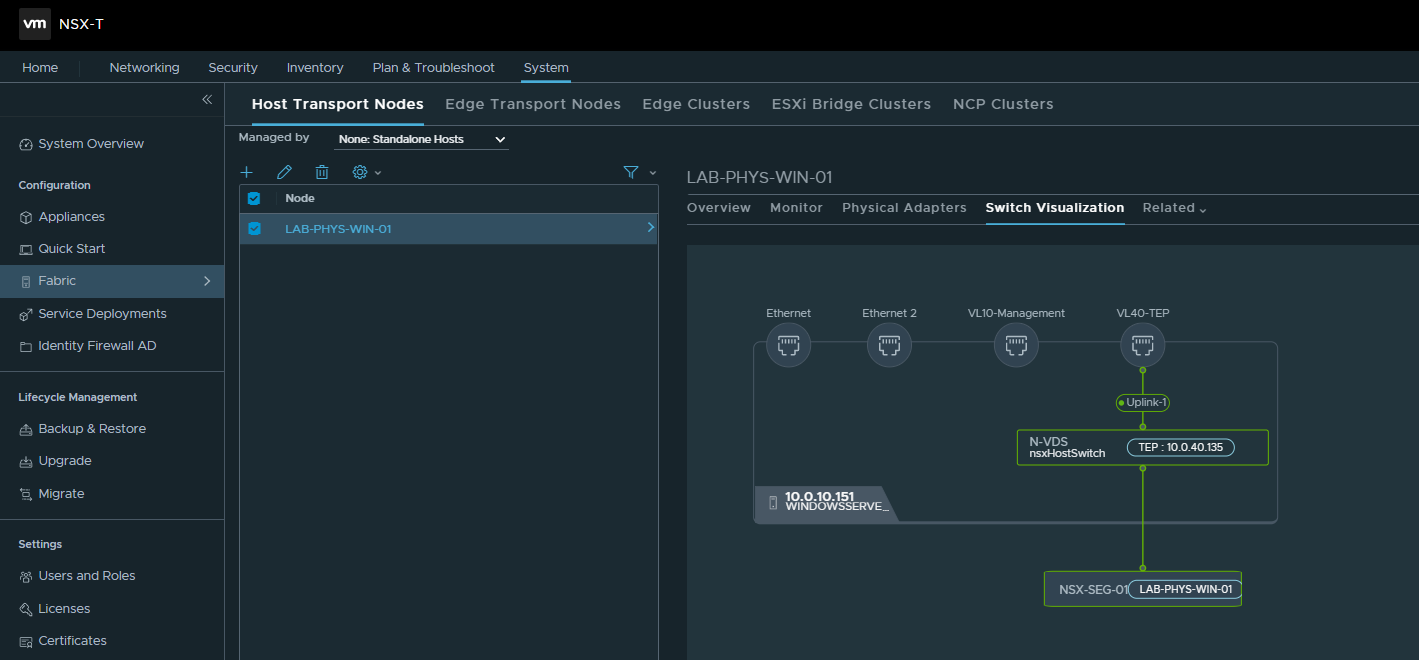
13. If we click the new Host Transport Node, we can view additional information. The Switch Visualization tab is worth reviewing and visualises the bare-metal server’s connectivity and its TEP uplink.
14. If we jump back over to the physical server, we can see the Segment Port IP address has been assigned to the overlay traffic adapter.
NSX-T Micro-Segmentation
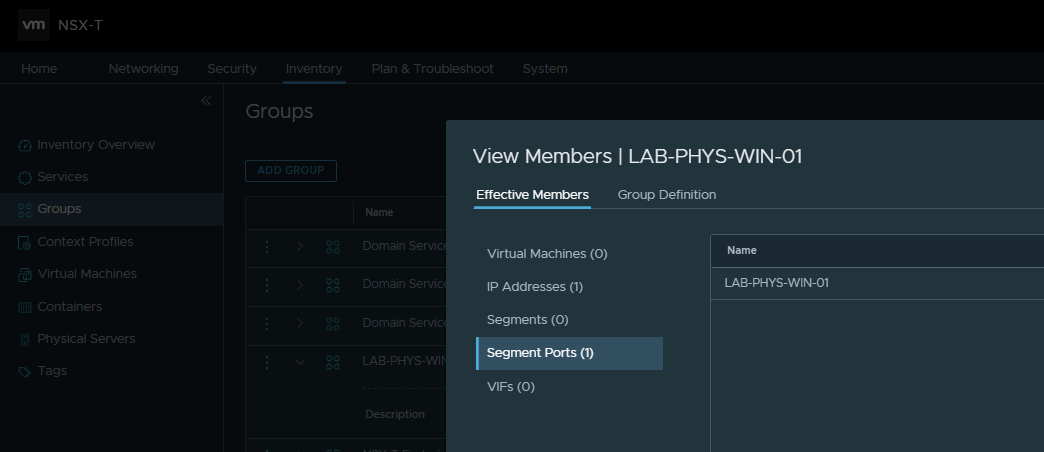
Next, we’ll look to micro-segment our web server application, but first, we’ll create a new NSX-T Group, which we can use within our DFW rules.
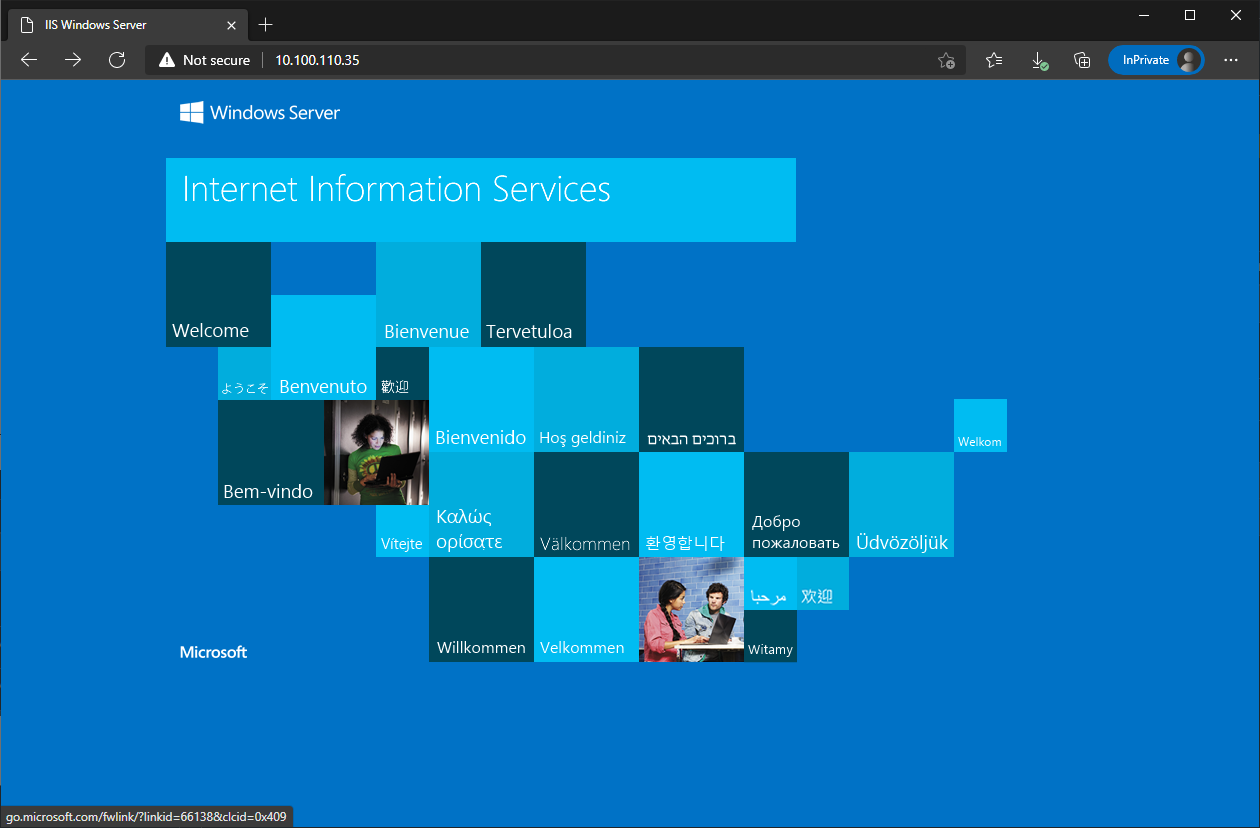
1. Before we create our rules, let’s ensure we can access the physical web server via a browser.

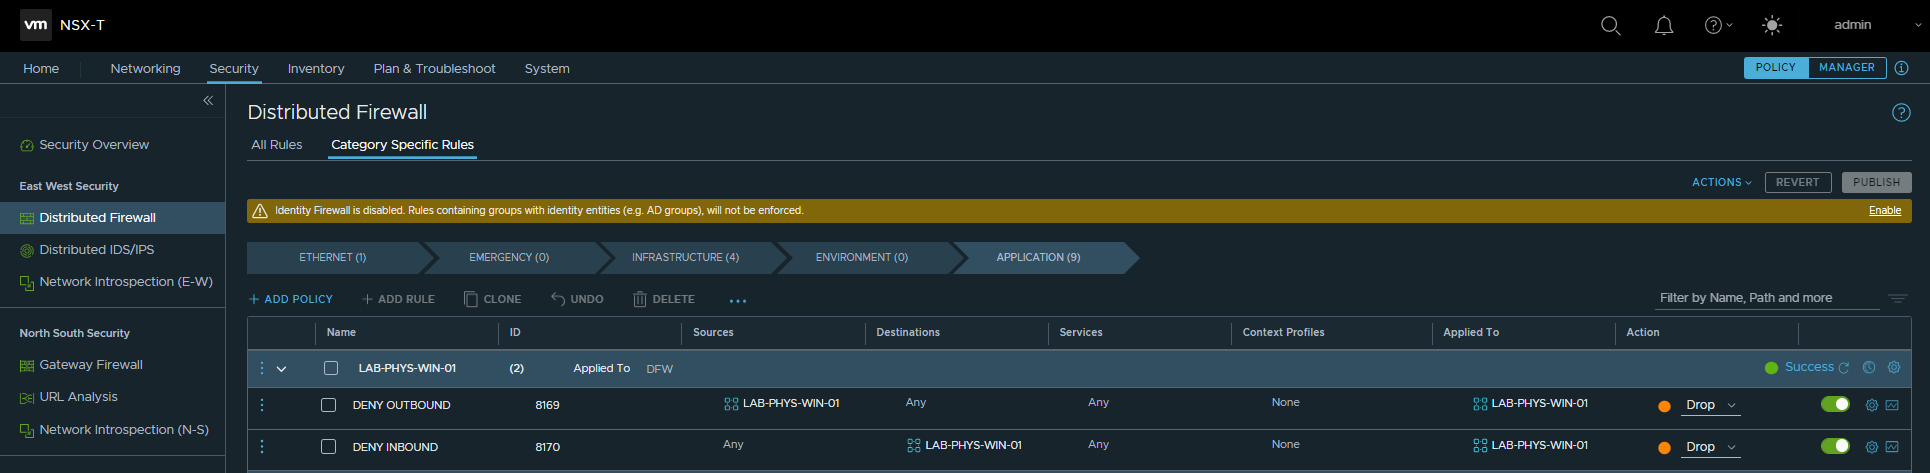
2. As we are implementing per-application micro-segmentation, we’ll create two drop rules using our newly created NSX-T Group, one for inbound traffic and one for outbound. When ready, publish the new rules.
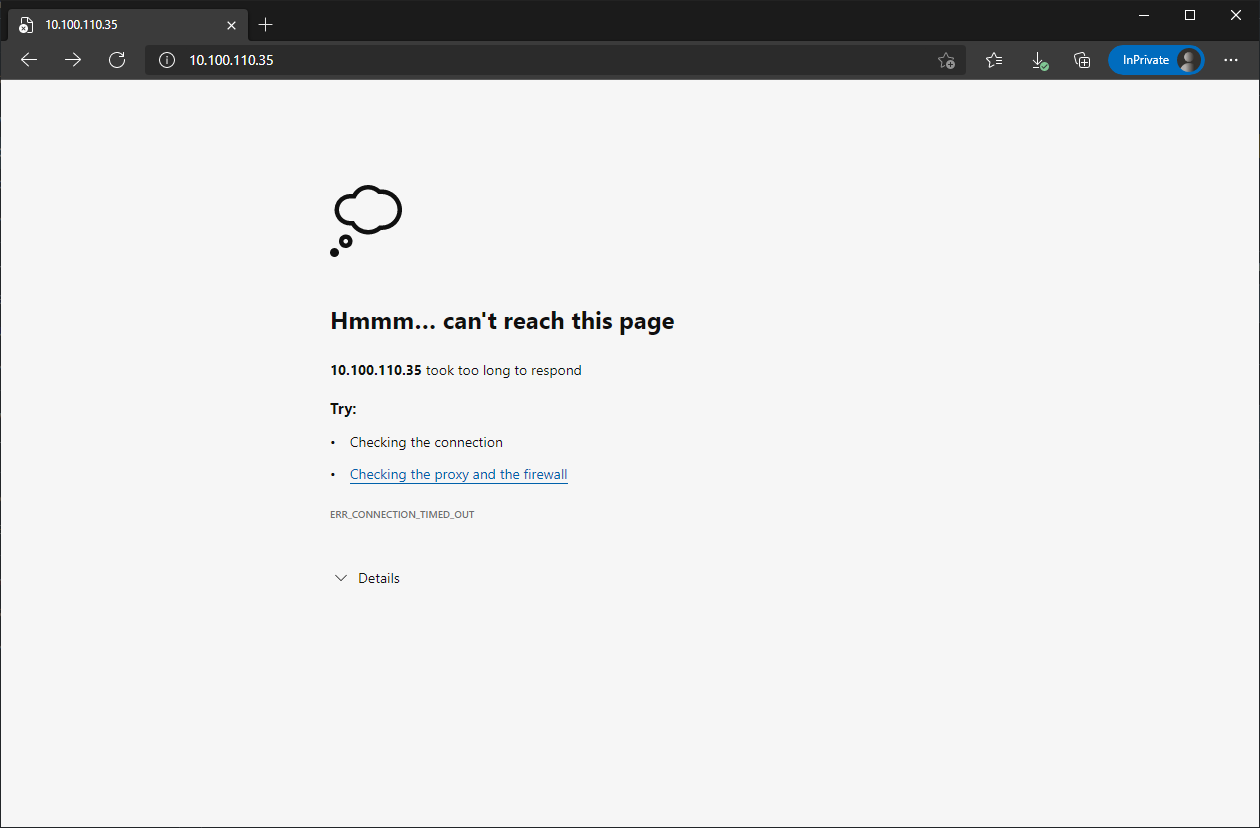
3. After publishing the new rules, we can see HTTP access, by design, is no longer possible.
4. Let’s add one more rule to allow inbound HTTP and HTTPS traffic.

5. After refreshing the browser, HTTP access is now successful.
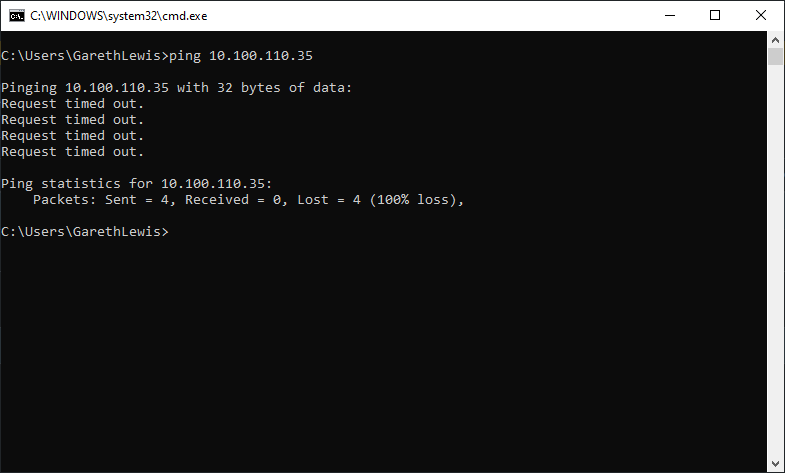
6. Note, as we have only created a rule to allow HTTP/S, we are dropping all other traffic. A simple test, and we can ensure all else (or, in this case, ICMP) is being dropped.
In Summary
In this article, we prepared a bare-metal Windows Server 2019 webserver hosting IIS with WinRM, before installing the NSX-T Agent (kernel module). Once installed, we added the bare-metal server to NSX-T Data Center as a standalone Host Transport Node and configured it to utilise a pre-existing overlay network segment. Finally, we secured the IIS application by creating several NSX-T Distributed Firewall rules to only allow HTTP and HTTPS traffic, thus proving that we can effectively secure bare-metal workloads utilising a software-defined network and security platform.
Leave a Reply