With the recent announcement and general availability of VMware NSX-T Data Center 3.1 on Friday 30th October 2020, we have a number of enhancements, new features, and functionality. The new features and functionality can be seen in a previous post (VMware NSX-T 3.1.0 Release Announcement), however, I realise I’ve never discussed the upgrade procedure itself.
Upgrading NSX-T Data Center couldn’t be easier. Yes, there are some disruptive elements, however, if your NSX-T design has redundancy built-in, we aren’t talking much. Upgrading the edge and transport nodes is as simple as you can imagine, as is the process of upgrading the NSX Managers themselves and, in this article, I cover the process from start to finish.
Upgrade Considerations
In this article, I detail the process of upgrading from version 3.0.2 to version 3.1. If you are upgrading from a version earlier than NSX-T Data Center 3.0, please review the Pre-Upgrade Tasks.
Before we begin upgrading our environment, it’s important to understand the upgrade process itself. Simply put, the upgrade is progressed in the following order:
- NSX Edge cluster
- Hosts
- Management plane
It is also important to understand the operational impact on each of the above areas during the upgrade process. Please ensure these items are reviewed fully before initiating the upgrade.
NSX Edge Cluster Upgrade
- During the NSX Edge upgrade, the below traffic interruptions may be experienced:
- North-south datapath (where the NSX Edge is part of the datapath).
- East-west traffic between Tier-1 gateways utilising NSX Edge firewall, NAT, or load balancing.
- Temporary L2/L3 interruption.
- Configuration changes are not prevented by the NSX Manager, however, they may be delayed.
Host Upgrade
- For standalone ESXi hosts or ESXi hosts that are part of a disabled DRS cluster, hosts must be placed into maintenance mode manually.
- For ESXi hosts that participate in a fully enabled DRS cluster, where a host is not in maintenance mode, the upgrade coordinator requests the host to be put into maintenance mode. vSphere DRS migrates the VMs to another host in the same cluster during the upgrade and places the host into maintenance mode.
Note: Before you place your ESXi host in maintenance mode, power off any NSX Edge VMs that may be residing on the host and ensure that the NSX Edge VMs continue to reside on the same host. - Where an in-place upgrade is taking place on a vSphere Host (ESXi), tenant VMs do not need to be powered off.
- Where an in-place upgrade is taking place on a KVM host, tenant VMs do not need to be powered off. However, where a maintenance mode upgrade is taking place, power off the VMs.
- Configuration changes are allowed on NSX Manager.
Management Plane Upgrade
- Configuration changes are not blocked on the Management plane; however, there should be no changes during the Management plane upgrade.
- The API service and user interface will be unavailable for a short period.
Pre-Upgrade Tasks
1. Firstly, log in to your NSX Manager/Cluster, check for any outstanding errors/issues and ensure the previous backups ran successfully. If you aren’t utilising the ‘Detect NSX configuration change’ backup option, I would suggest you run a manual backup to ensure you have an up-to-date backup.
2. Download the appropriate upload bundle from the VMware download portal.

3. Once you have confirmed your environment is operating without any issues, and once you have acquired the appropriate upgrade bundle, disable automatic backups and proceed to the below upgrade process.
Upgrade the Upgrade Coordinator
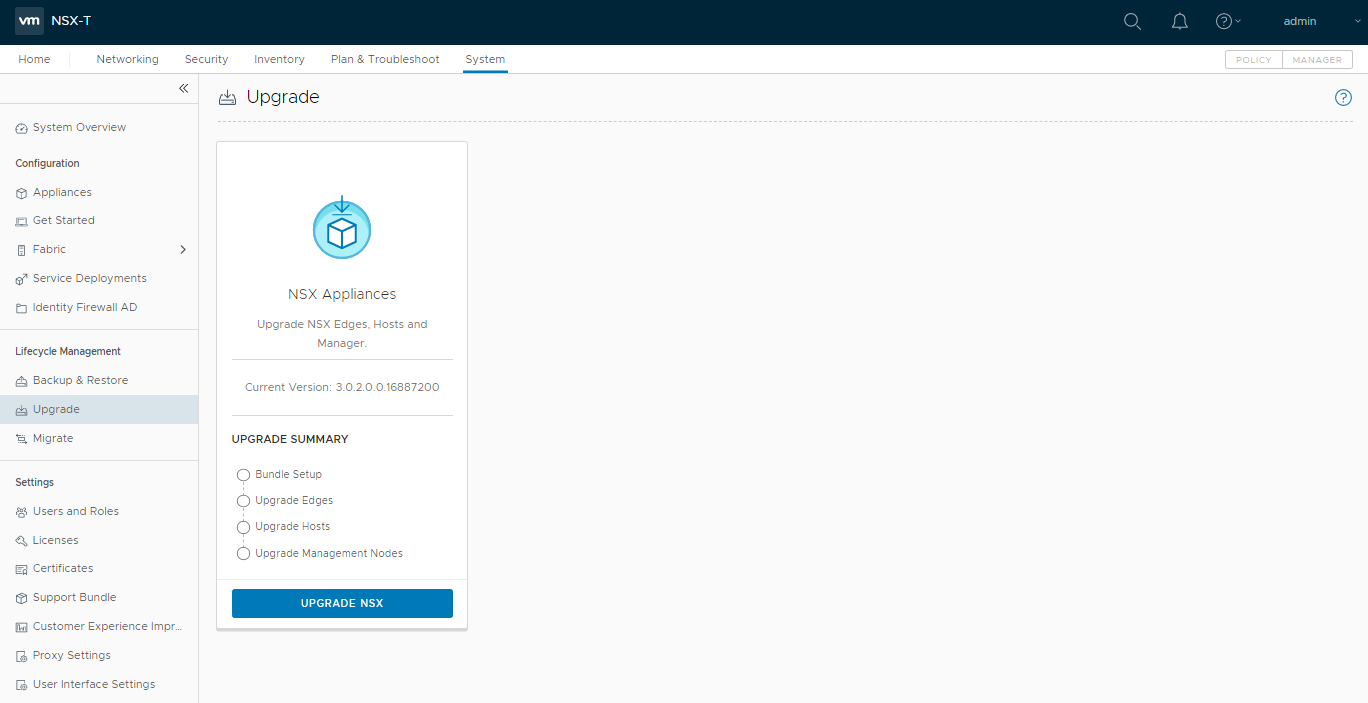
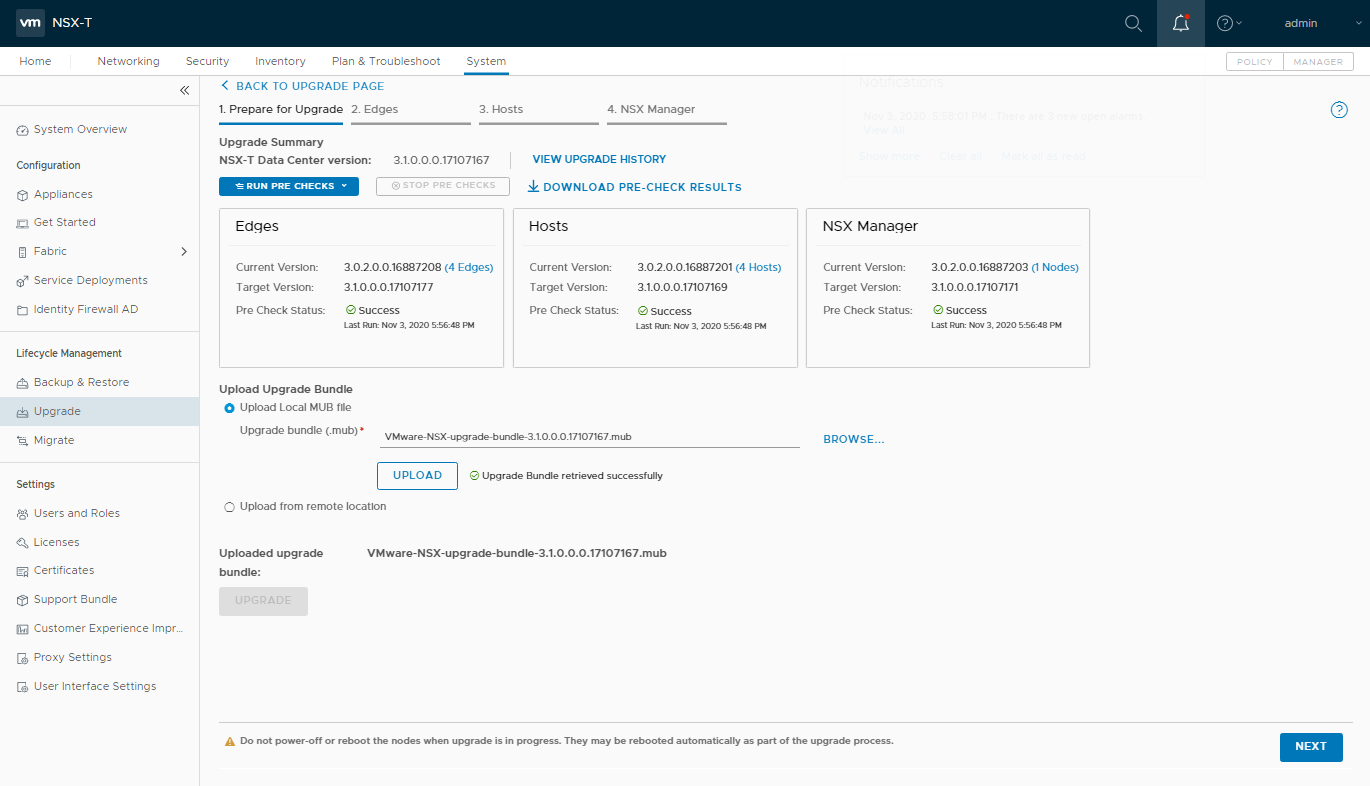
1. Browse to System > Lifecycle Management > Upgrade and click Upgrade NSX.
2. Under Upload Upgrade Bundle, select Upload Local MUB file, browse to the location of the Upgrade Bundle we downloaded earlier and click Upload.
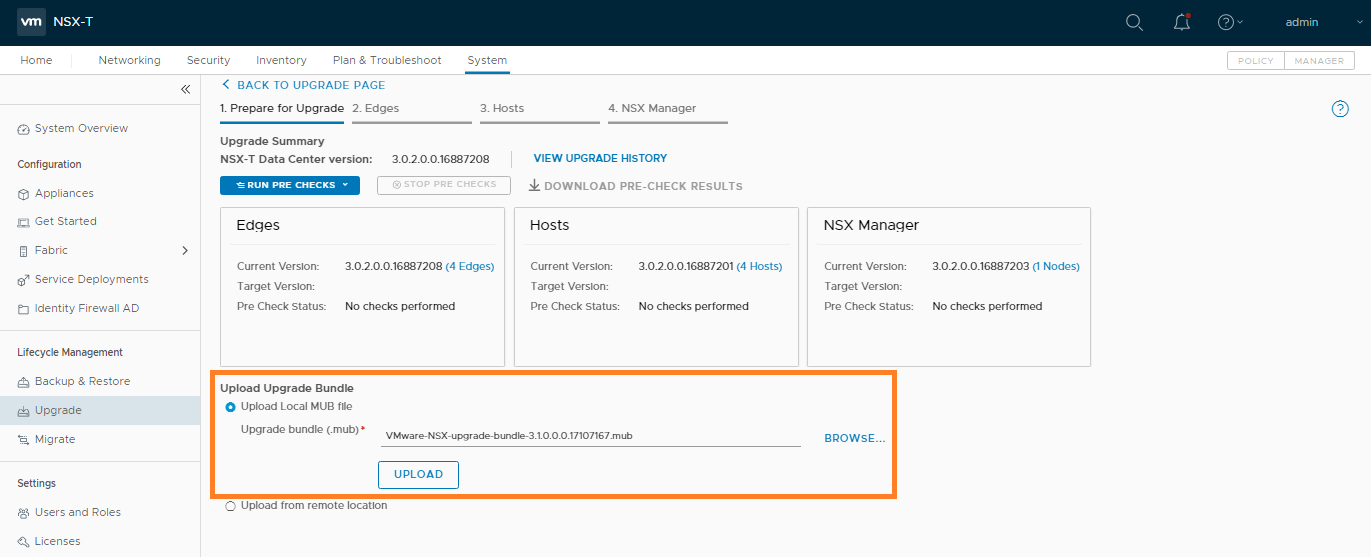

3. Once uploaded, NSX will begin to extract, verify, and check the compatibility matrix of the Upgrade Bundle. No user intervention is required during this phase.
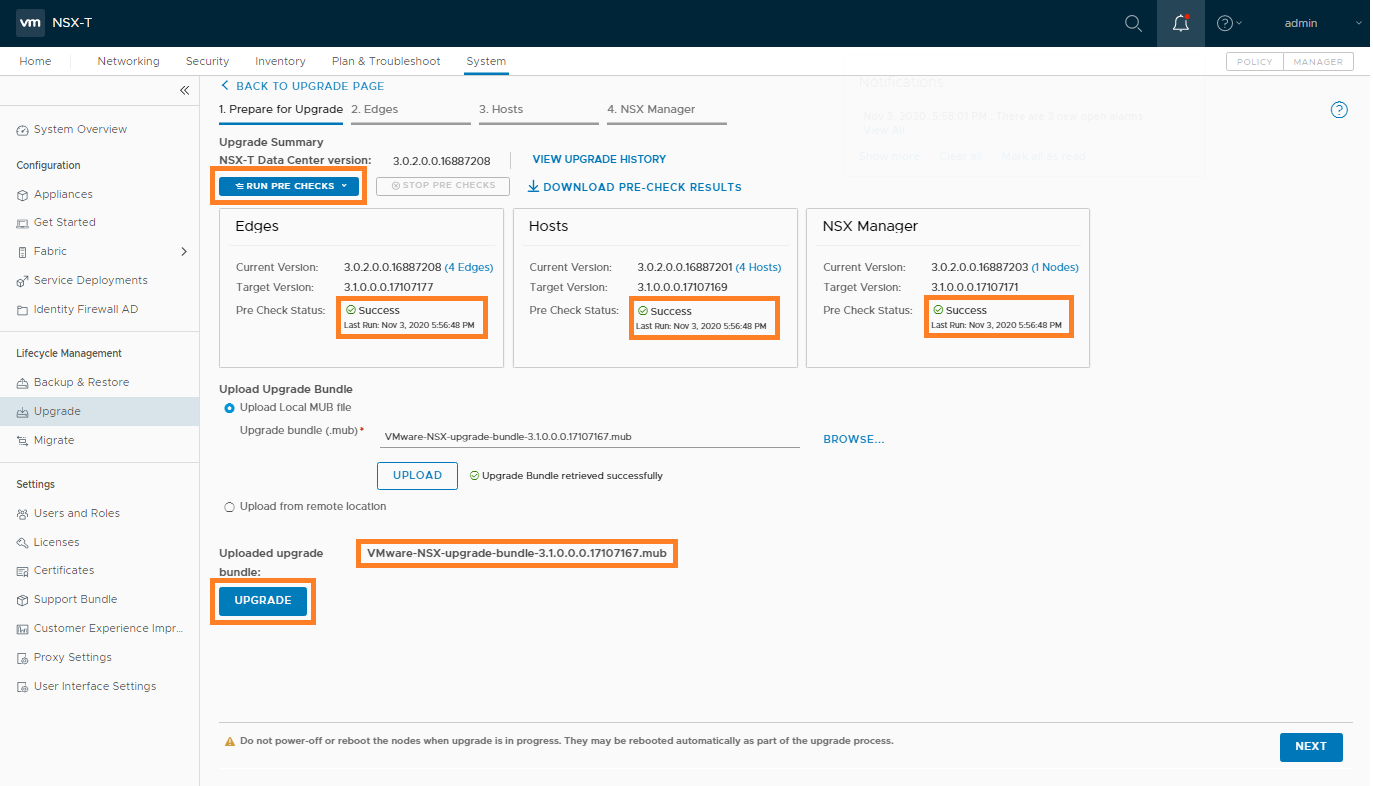
4. Once the upgrade bundle has been retrieved successfully and, following the automated validation checks, click Run Pre Checks and confirm all checks show Success. When ready, confirm the Uploaded upgrade bundle and click Upgrade.
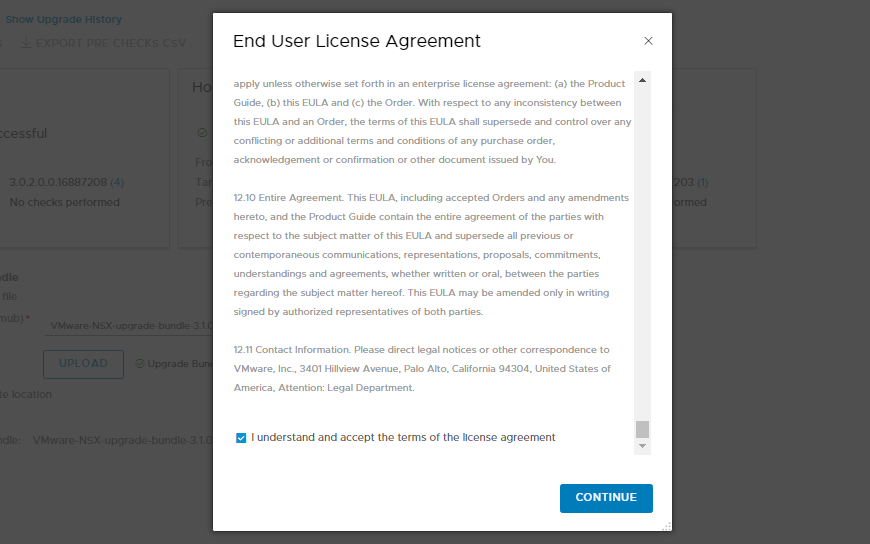
5. When prompted, accept the EULA and click Continue.
6. The point of no return. You have your backups in place, you’ve got yourself a coffee, so when ready, click Yes, Continue to begin the upgrade process in earnest.

7. Once the Upgrade Coordinator upgrade has completed successfully, click Next to proceed to the NSX Edge Cluster upgrade.
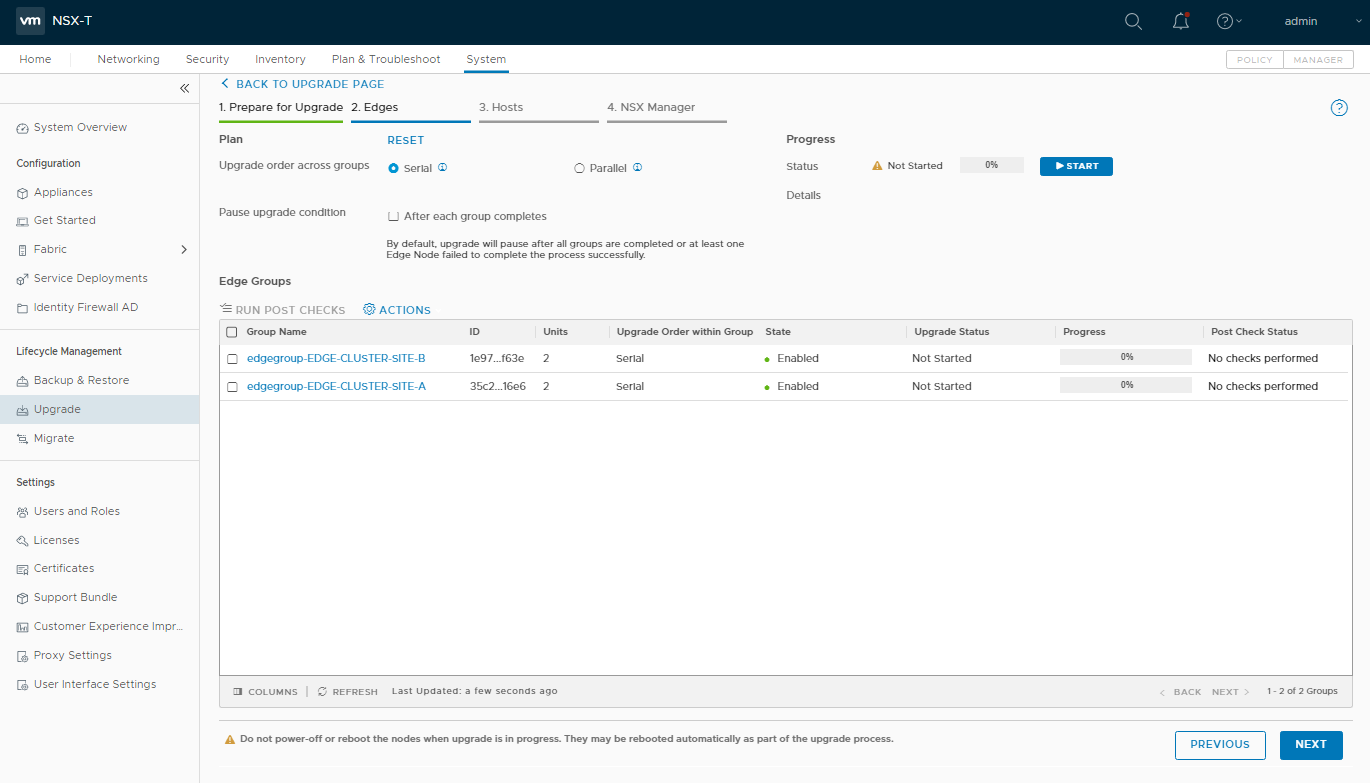
Upgrade NSX Edge Cluster
1. With the Upgrade Coordinator now successfully upgraded, click Start to begin upgrading all Edge clusters. Depending on the number of Edges/Clusters in your environment, this may take some time.
2. Monitor the upgrade process as it progresses…
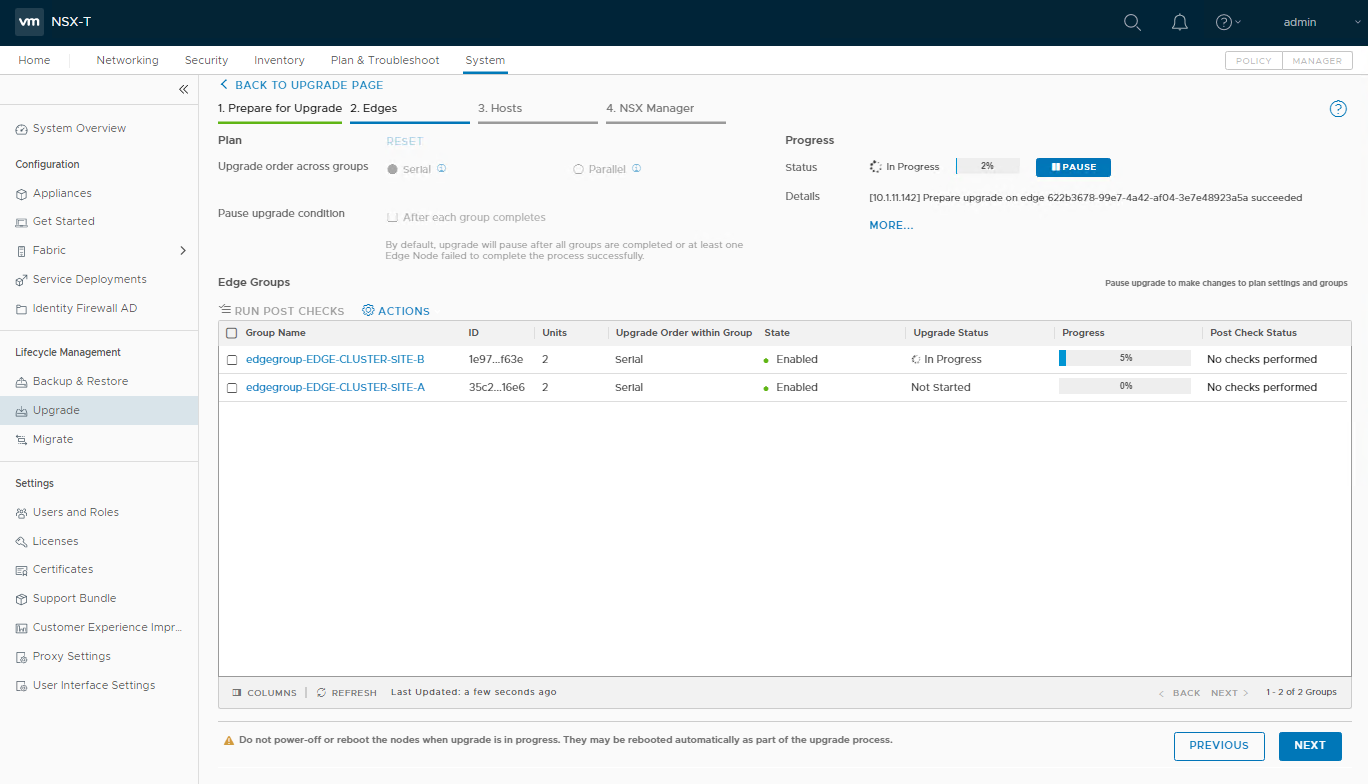
3. …more detail for which can be viewed by clicking More… In the below screenshot, you will note the upgrade of one Edge transport node has completed, and the process has progressed to the next available Edge.

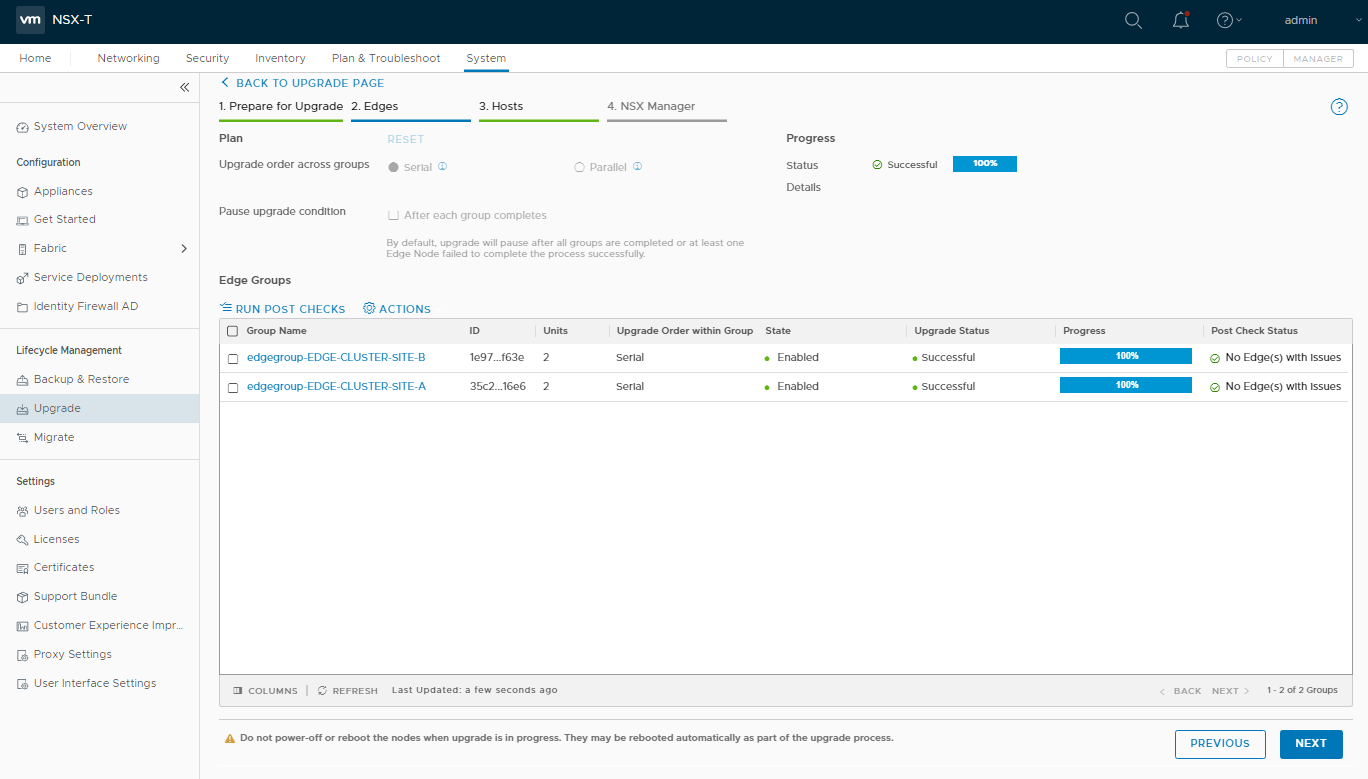
4. Once all Edge transport nodes have been successfully upgraded, click Run Post Checks.
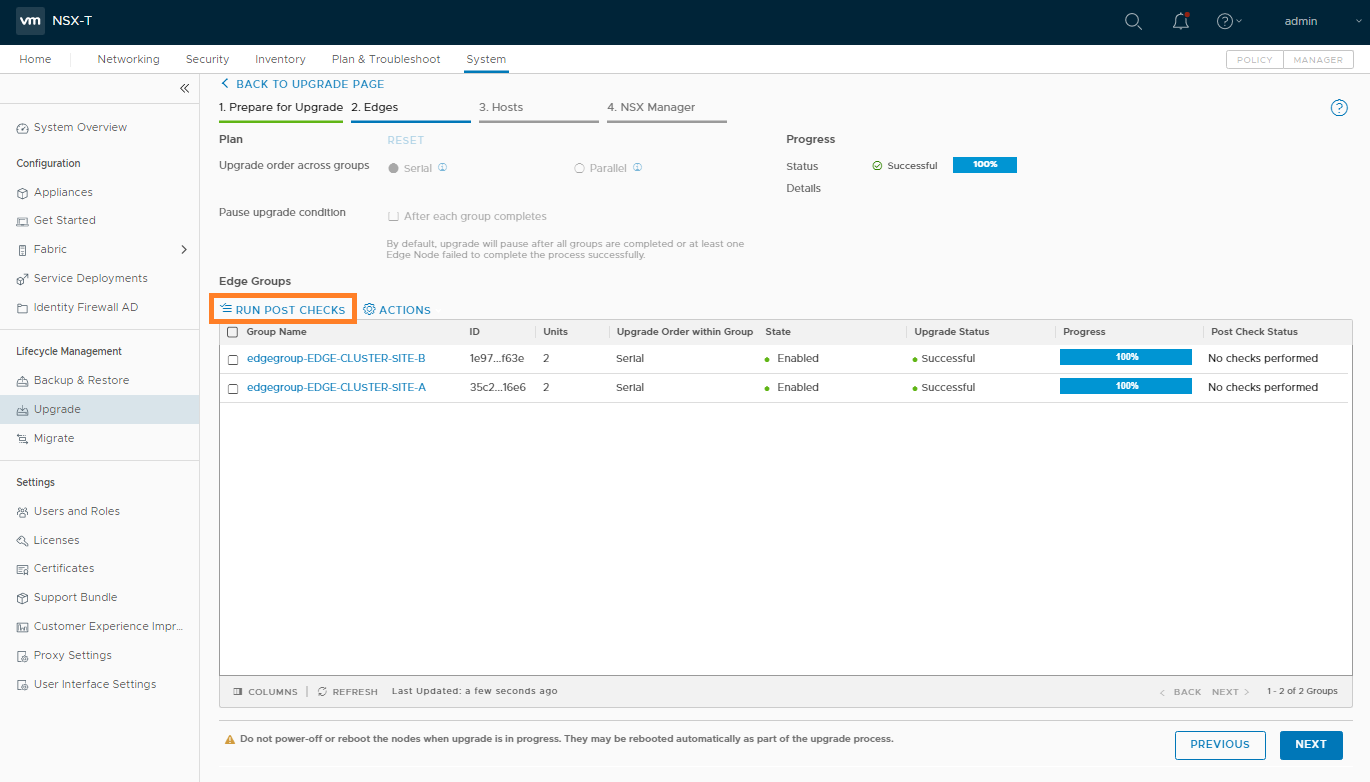

5. Once the Post Check Status confirms no issues, click Next to proceed to the Host transport node upgrade.
Configuring and Upgrading Hosts
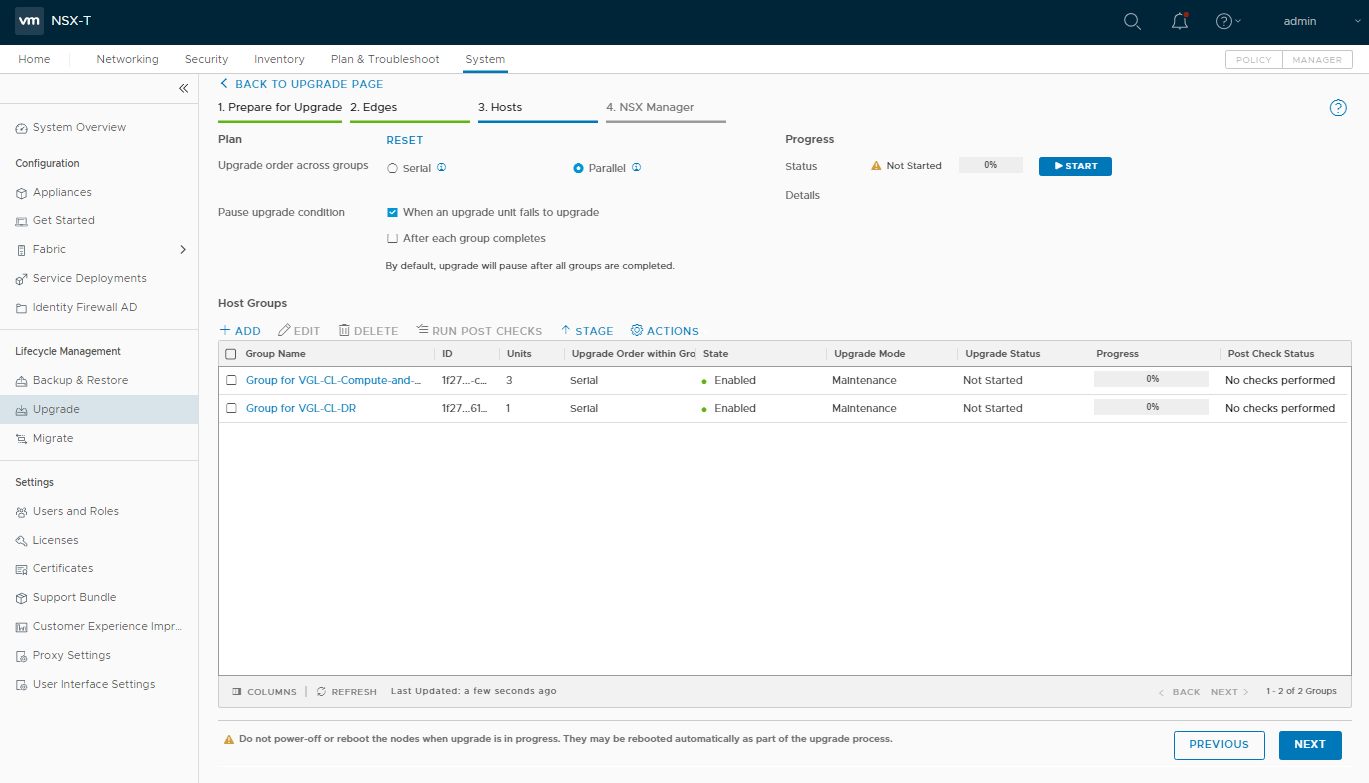
1. Similarly to the Edge transport node upgrade, when you’re ready to proceed, click Start to begin upgrading the Host transport nodes. At this point, your hosts will be upgraded one at a time and will be placed into Maintenance Mode while the new VIBs are downloaded and installed.
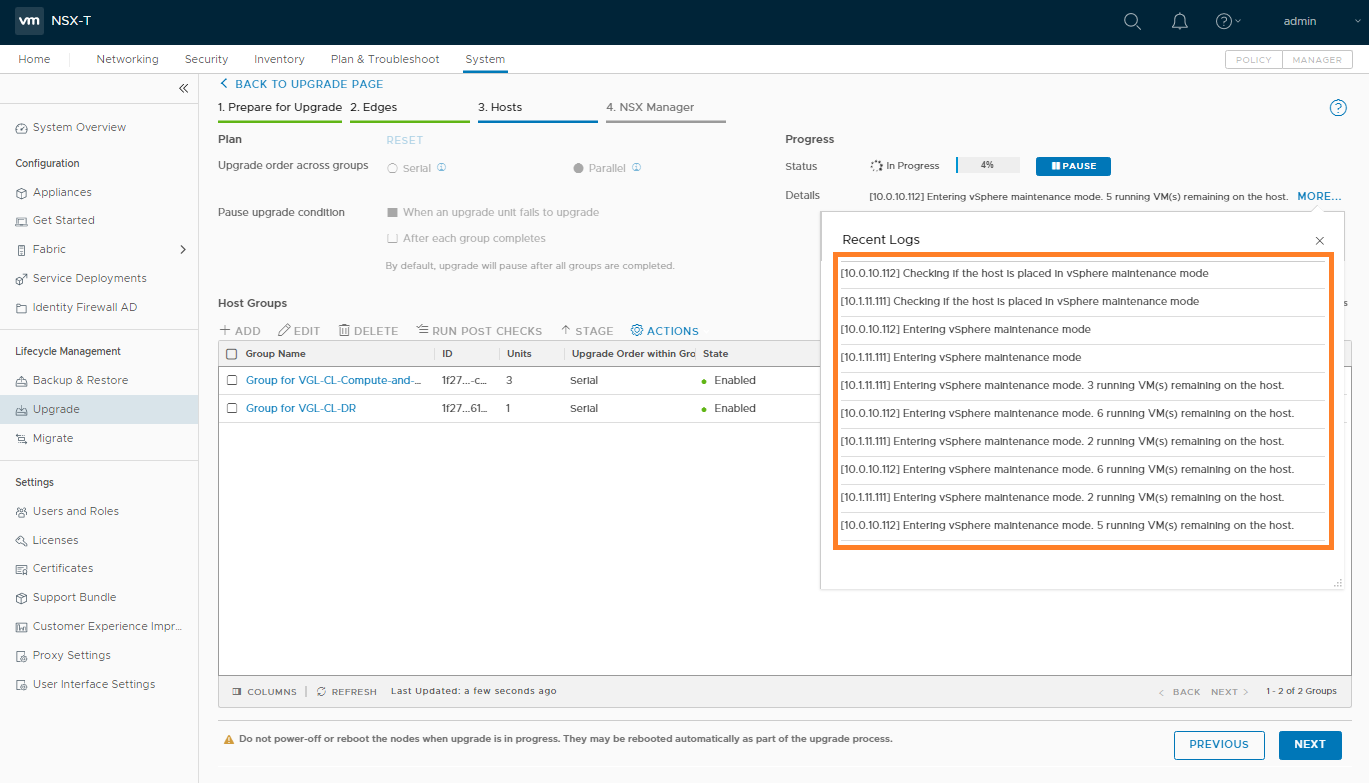
2. Again, and just like the Edge transport nodes earlier, click More… to monitor the detailed upgrade process.
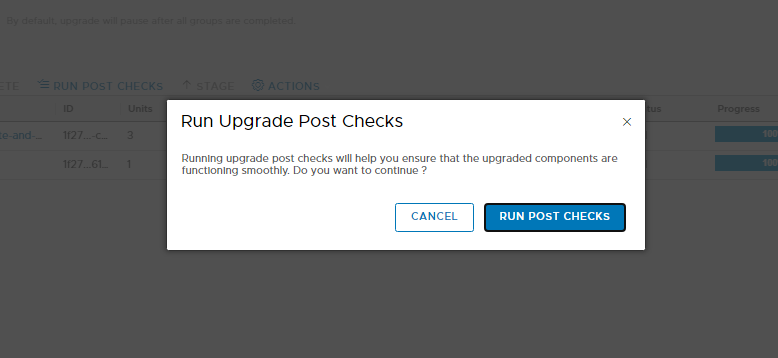
3. Once all Host transport nodes have been successfully upgraded, click Run Post Checks.
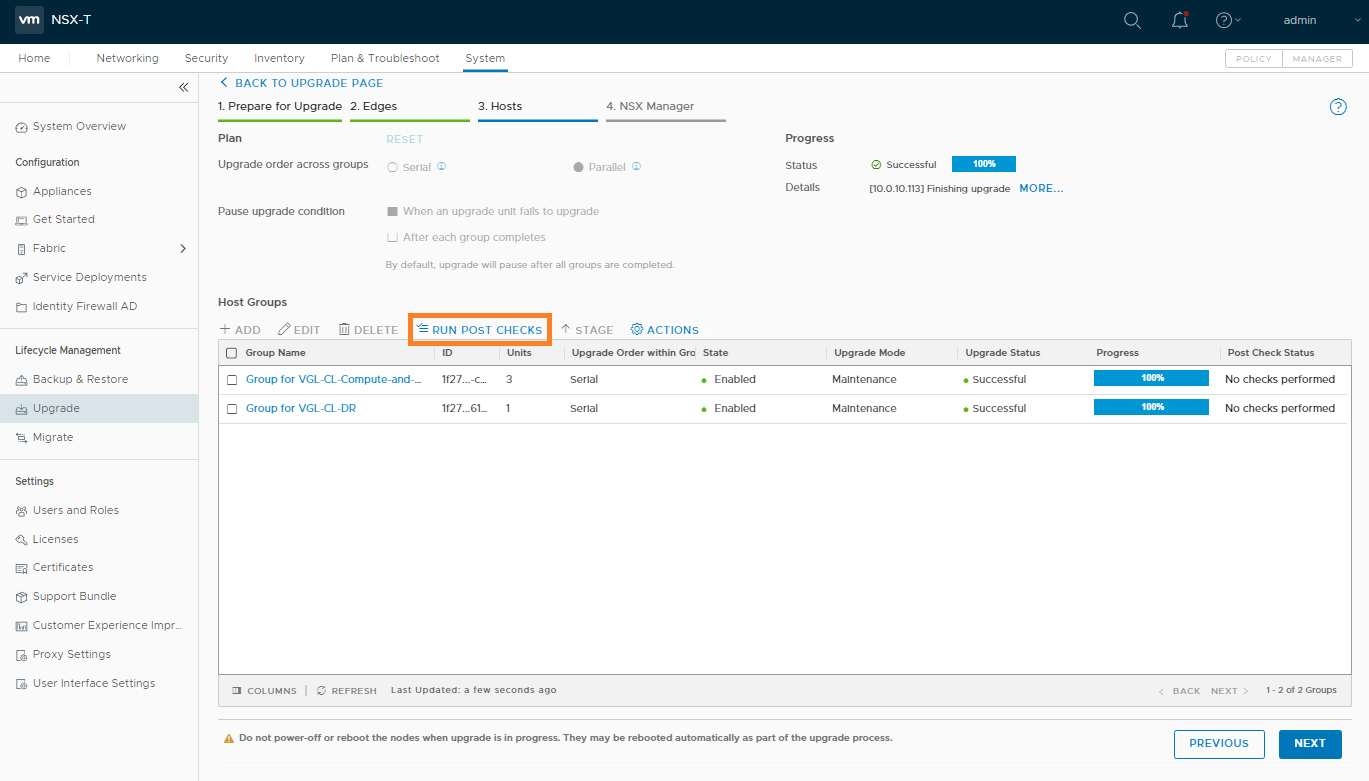
4. Once the Post Check Status shows no issues, click Next to proceed to the NSX Manager upgrade.

Upgrade Management Plane
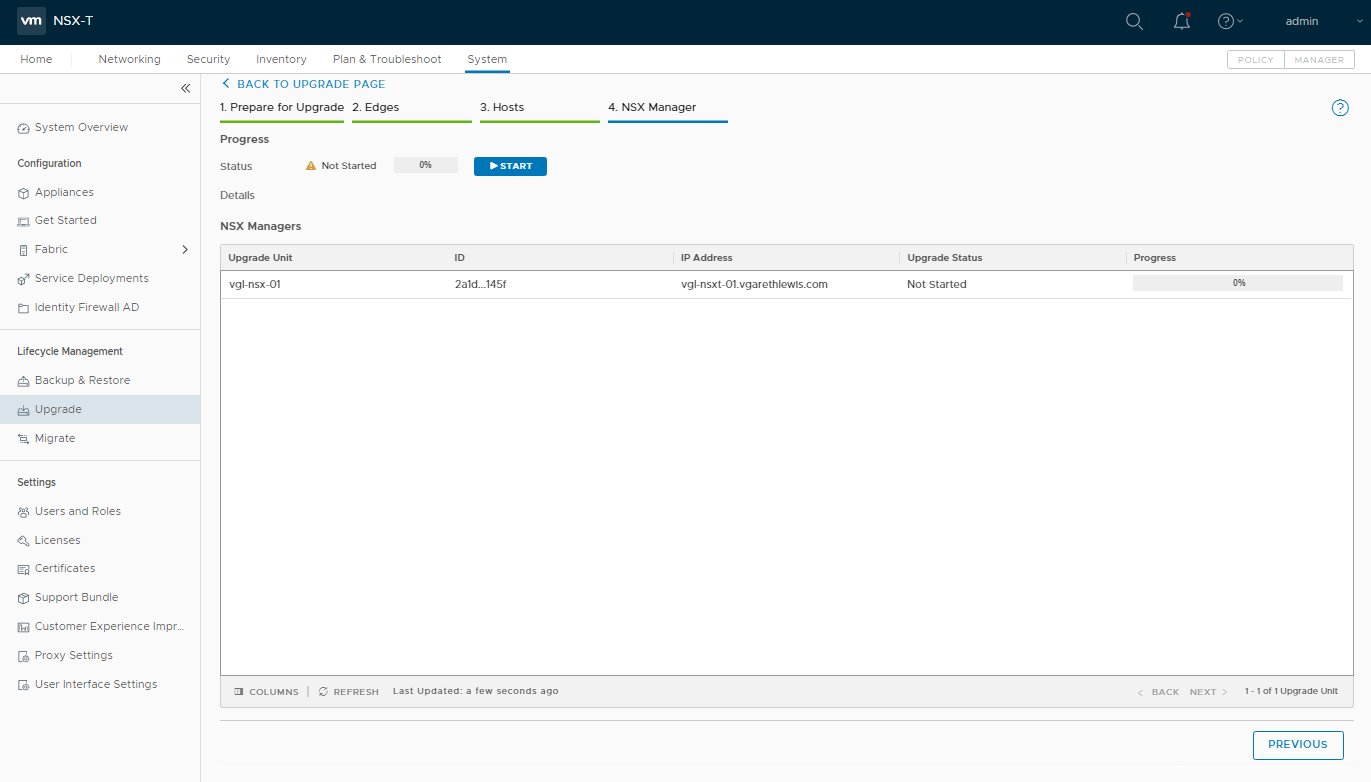
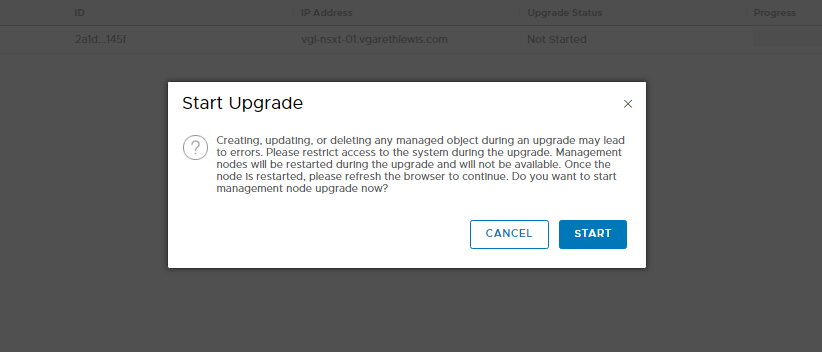
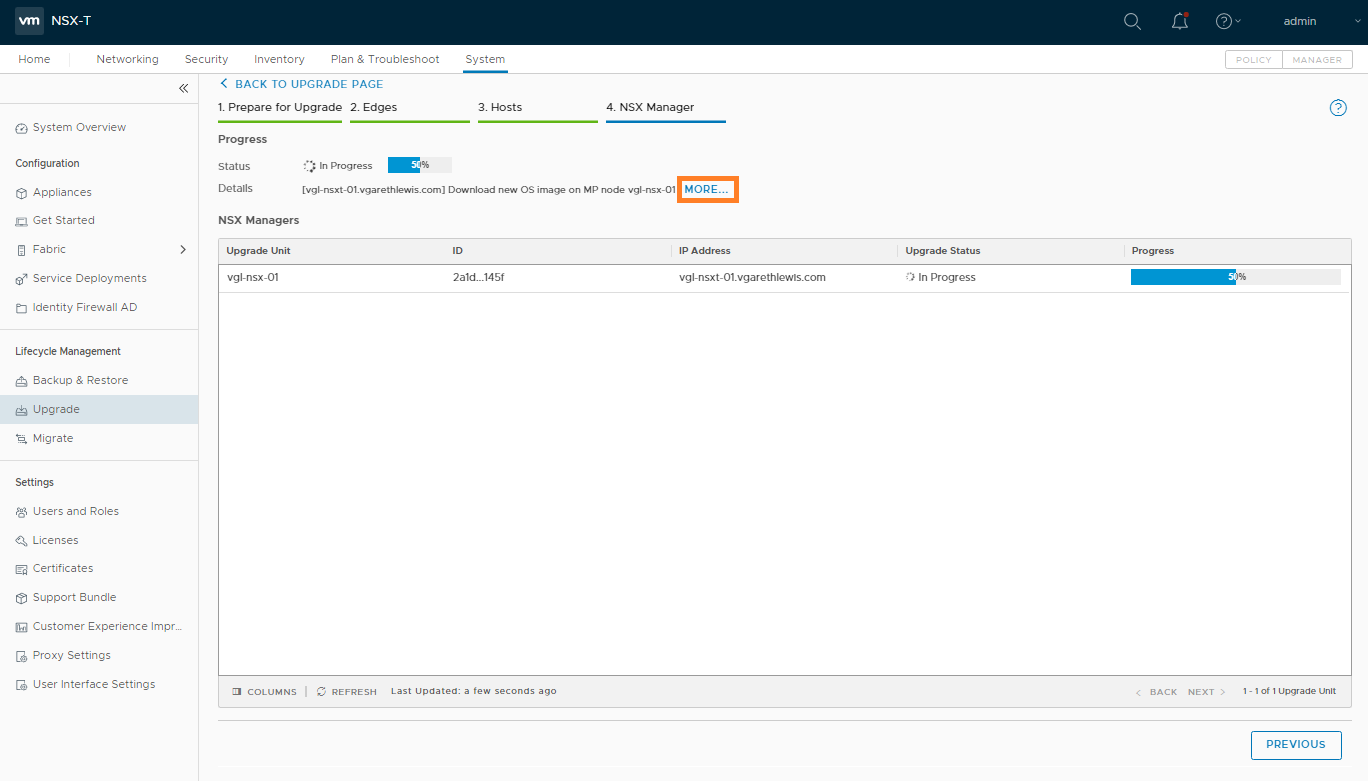
1. Similarly to the Edge Cluster and Host upgrades, when you’re ready to proceed, simply click Start. At this point, your NSX Manager(s) will be upgraded and restarted. In a lab environment whereby you’re only running one NSX Manager, access to the environment will be lost during the upgrade progresses.
2. Again, more information can be viewed by clicking More…
3. Around the 60% mark, the NSX Manager will restart.
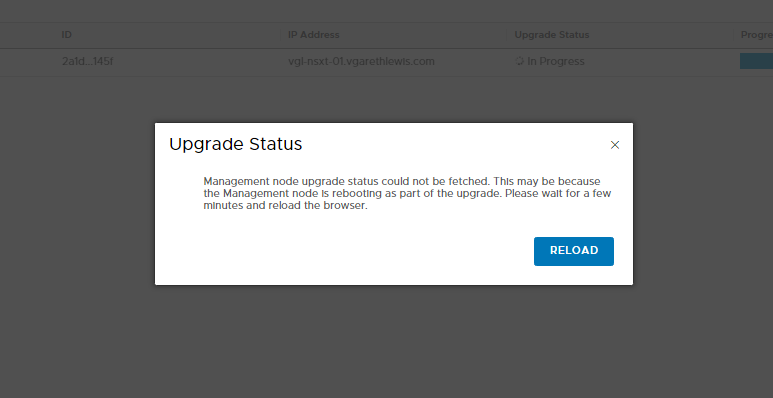
4. As the access to the NSX Manager will be lost at this point, you have the option of checking the upgrade progress by SSH’ing to the relevant Manager, and by running the below command:
get upgrade progress-status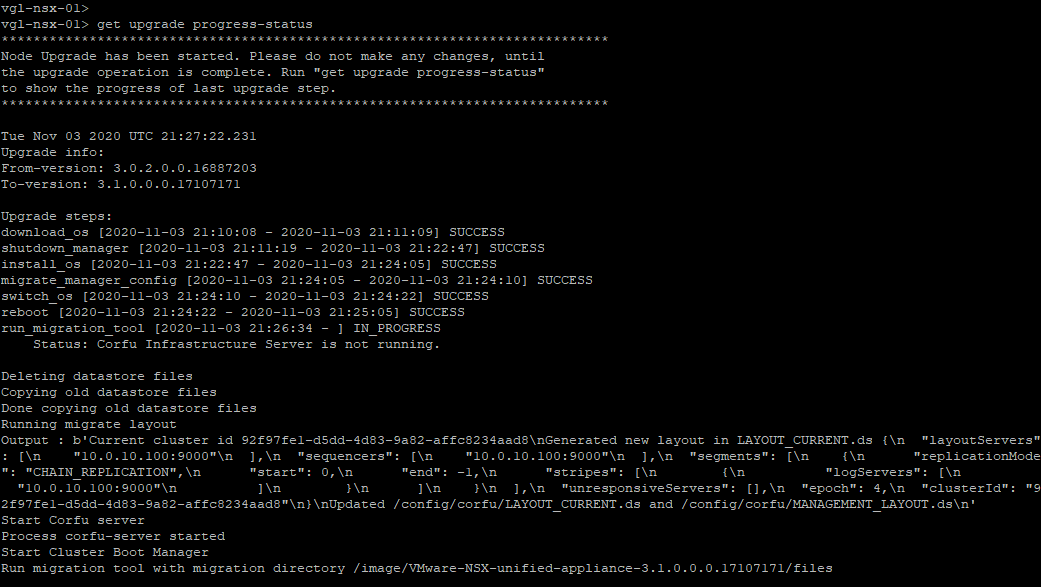
Post-Upgrade Tasks & Validation Checks
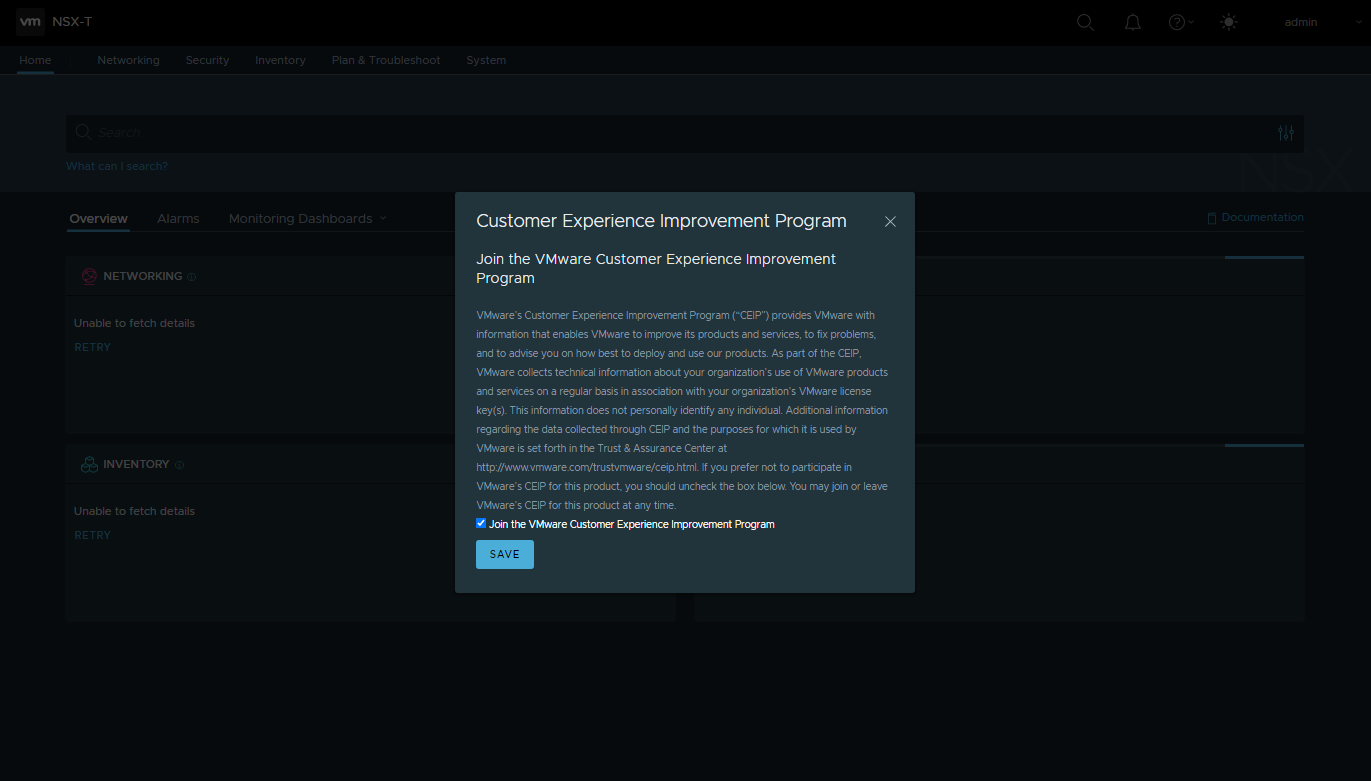
1. Once the NSX Manager has completed its upgrade and has finished booting, log back in and, when prompted, opt-in/out of the CEIP.
2. Browse to System > Lifecycle Management > Upgrade and ensure all upgrade items show successful completion.

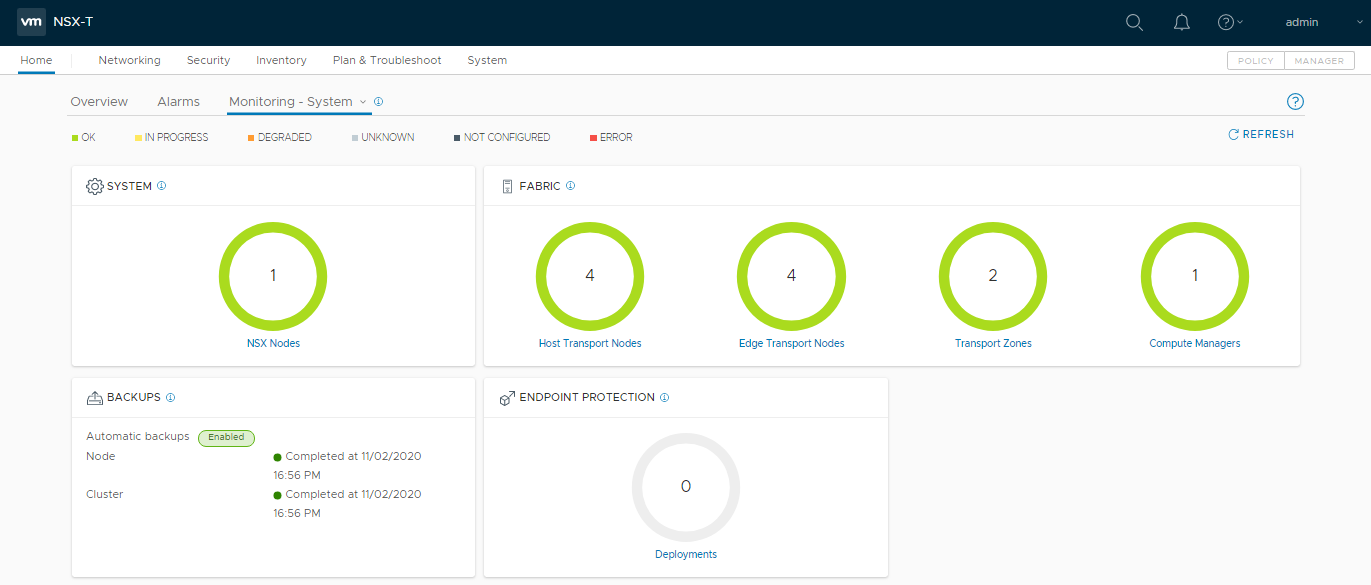
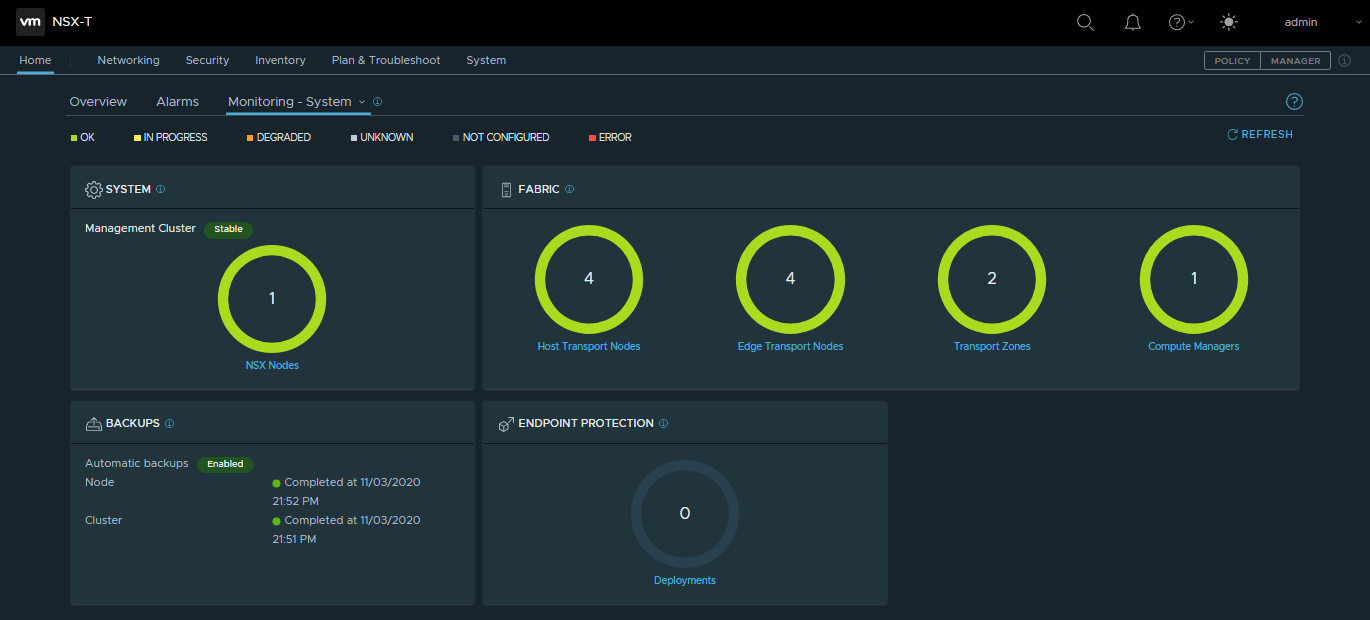
3. Check for any alarms via the dashboard, Monitoring – System.
4. If required, confirm the new VIBs are present on each host by running the below command via an vSphere Host (ESXi):
esxcli software vib list | grep nsx
5. Finally, you’ll remember that we disabled automatic backups during the pre-upgrade tasks. Make sure to re-enable automatic backups.
This concludes the NSX upgrade from 3.0.2 to 3.1.0.
Documentation & Downloads
For further information and detailed release notes, simply explore the below links.
- VMware Docs
- Download Link
- Release Notes
- Documentation Link
Leave a Reply