Backing up NSX-T Data Center is a simple process; however, at time of writing, automating the retention period for the backup files requires a few additional tasks and is not configurable via the NSX Manager UI. These additional steps are quick to implement and will ensure your SFTP server does not run out of storage.
In the event that your NSX Manager becomes inoperable, you can simply restore it from backup. Note that while the NSX Manager is inoperable, data plane operations will not be affected; however, you will not be able to make configuration changes.
Three sets of data are collected within each each backup:
- Cluster Backup – Includes the desired state of the virtual network.
- Node Backup – Backup of the NSX Manager node.
- Inventory Backup – Includes the set of ESX and KVM hosts and edges. This information is used during a restore operation to detect and fix discrepancies between the Management Plane’s desired state and these hosts.
There are two backups methods:
- Manual Backups
Manual node and cluster backups can be run at any time as and when they are required. - Automated Backups
Automated backups run based on a user-defined schedule and are, for obvious reasons, this is the recommended option.
An NSX-T Data Center configuration can be restored to the state that is captured in any of the cluster backups, however, backups can only be restored to a brand new NSX Manager appliance. The new appliance must be running the same NSX Manager version as the appliance that was backed up.
Prerequisites
In this article I am running VMware NSX-T Data Center 3.0.2 and am using Ubuntu Server for my SFTP requirements.
Backup Process
So, let’s look at the backup procedure itself.
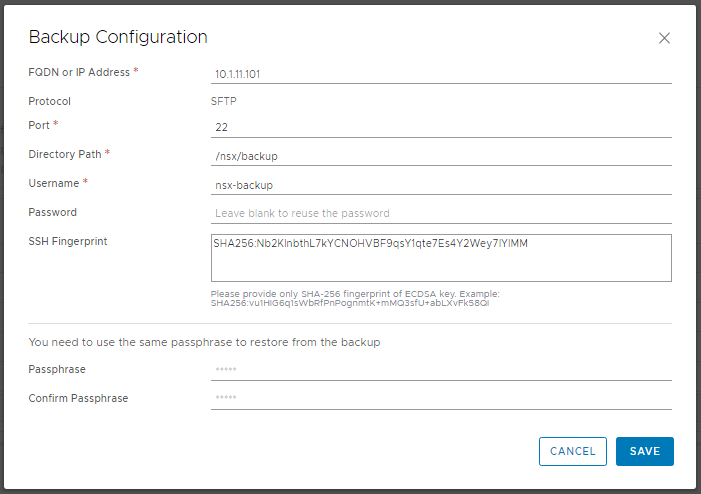
1. From a browser, log in to the NSX Manager and browse to System > Lifecycle Management > Backup & Restore. Add the information for your SFTP server, accept the SSH Fingerprint and, when ready, click Save.
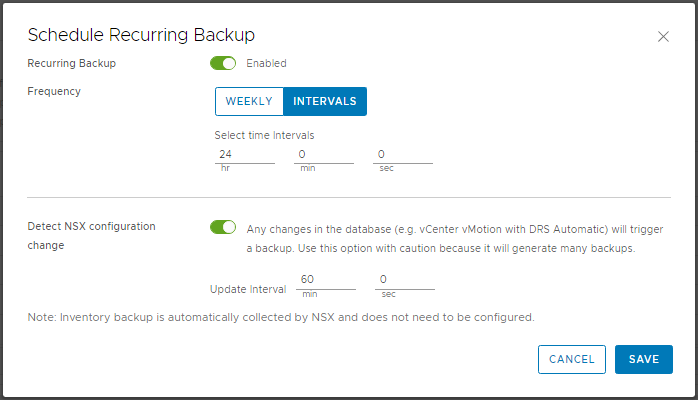
2. Configure the backup schedule as per your requirements and, for NSX-T Multisite users, ensure Detect NSX configuration change is enabled.
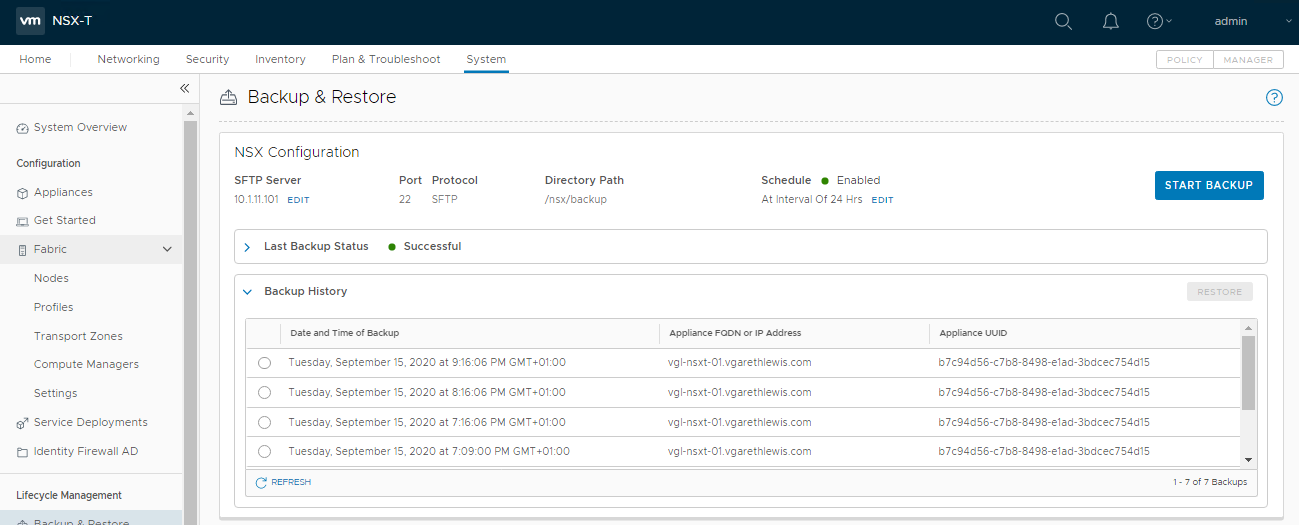
3. Finally. ensure backups complete successfully.
Automated Retention Process
In my lab environment, I configure a 7 day retention period for NSX-T backups. The script will run once a day, iterate through all NSX-T backups, and will delete the ones that are older than 7 days.
1. Copy the Python script from an NSX Manager node to the SFTP server. In the below example I use SCP.
sudo scp root@<nsx-mgr>:/var/vmware/nsx/file-store/nsx_backup_cleaner.py /sbin/
2. Create a wrapper shell script under /etc/cron.daily. This wrapper script will run the ‘nsx_backup_cleaner.py’ python script’ along with the required parameters.
sudo nano /etc/cron.daily/nsx_backup_cleaner.sh3. Copy the following lines into the script. The following runs daily (-d) and keeps backups for 7 days (-k 7). Save the script (Ctrl + O) and Exit (Ctrl + X).
#!/bin/sh
/sbin/nsx_backup_cleaner.py -d /backup -k 7
4. Save the script and make it executable.
sudo chmod +x /etc/cron.daily/nsx_backup_cleaner.shThis concludes the procedure for backing up NSX-T Data Center.
Leave a Reply