In my previous articles, we installed (VMware vRealize Network Insight (vRNI) – Part 1 – Installation) and configured (VMware vRealize Network Insight (vRNI) – Part 2 – Configuration) our VMware vRealize Network Insight infrastructure.
Now that we have the vRNI components in place and happily collecting data, we’re going to take a quick detour and configure LDAP, enabling our users to log in using their domain credentials instead of the single local@admin user.
Full vRNI Series
- VMware vRealize Network Insight (vRNI) – Part 1 – Installation
- VMware vRealize Network Insight (vRNI) – Part 2 – Configuration
- VMware vRealize Network Insight (vRNI) – Part 3 – Identity & Access Management via LDAP
- VMware vRealize Network Insight (vRNI) – Part 4 – Application Discovery
- VMware vRealize Network Insight (vRNI) – Part 5 – Data Flow Analysis & Micro-Segmentation
- VMware vRealize Network Insight (vRNI) – Part 6 – Importing Recommended Firewall Rules into NSX-T via Python Script
Besides LDAP, we also have the option of creating additional local users, as well as integrating vRNI with VMware Identity Manager; however, this article will focus on connecting our vRNI Platform appliance with Microsoft Active Directory via LDAP.
Network Insight User Roles
Network Insight has three inbuilt security roles:
- Administrator – Complete access.
- Auditor – Read-only access, and restricted from all create, add, edit, or delete actions. Users can only view the state.
- Member – Limited access.
To view the supported features for each role, visit the VMware Docs – Configure User Management for vRealize Network Insight guide.
Prerequisites
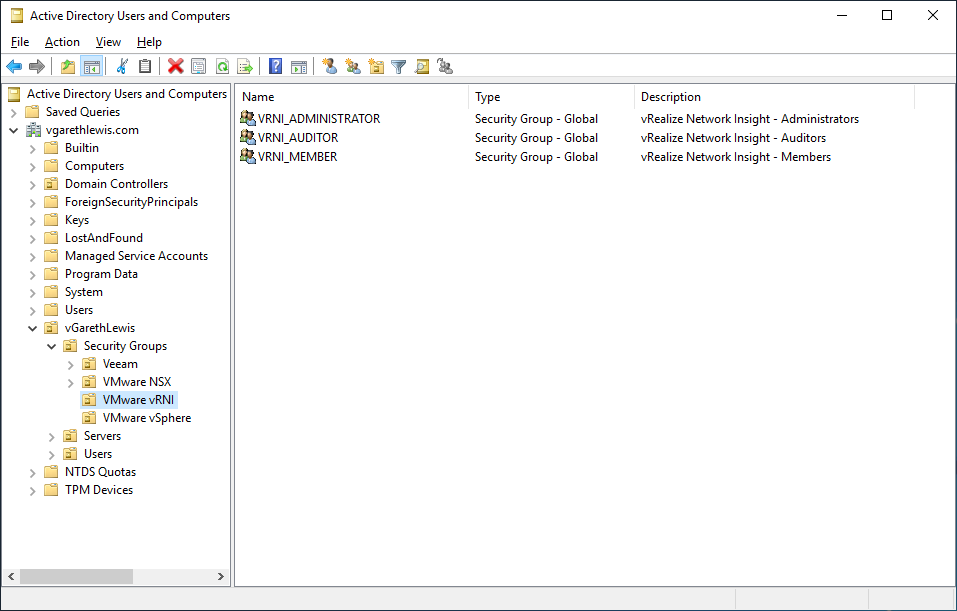
Firstly, we’ll need to create several AD Security Groups which we’ll eventually map to our vRNI roles. In the below screenshot you can see I’ve created three Security Groups:
- VRNI_Administrator
- VRNI_Auditor
- VRNI_Member
For demo purposes, I have also added a single dummy user to each Security Group:
- Jean-Luc Picard > VRNI_Administrator
- Wesley Crusher > VRNI_Auditor
- William T. Riker > VRNI_Member
Configure LDAP as an Identity Source
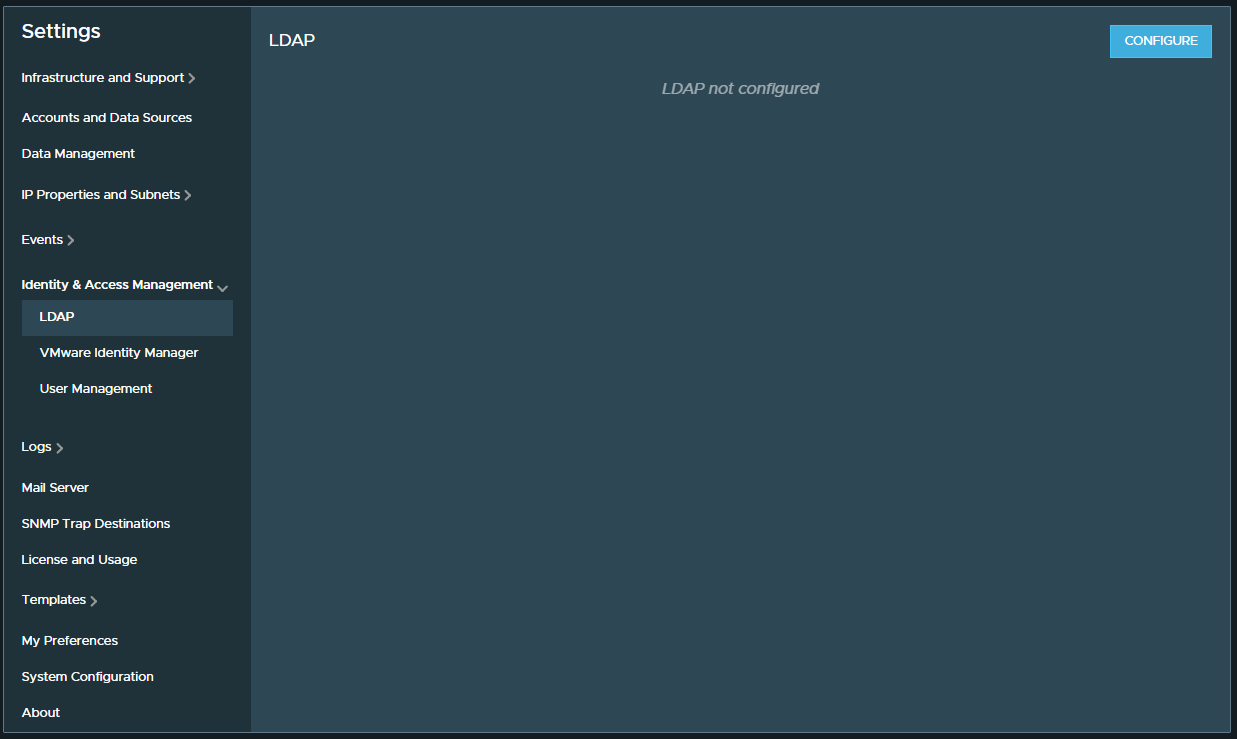
1. Browse to Settings > Identity & Access Management > LDAP and click Configure.
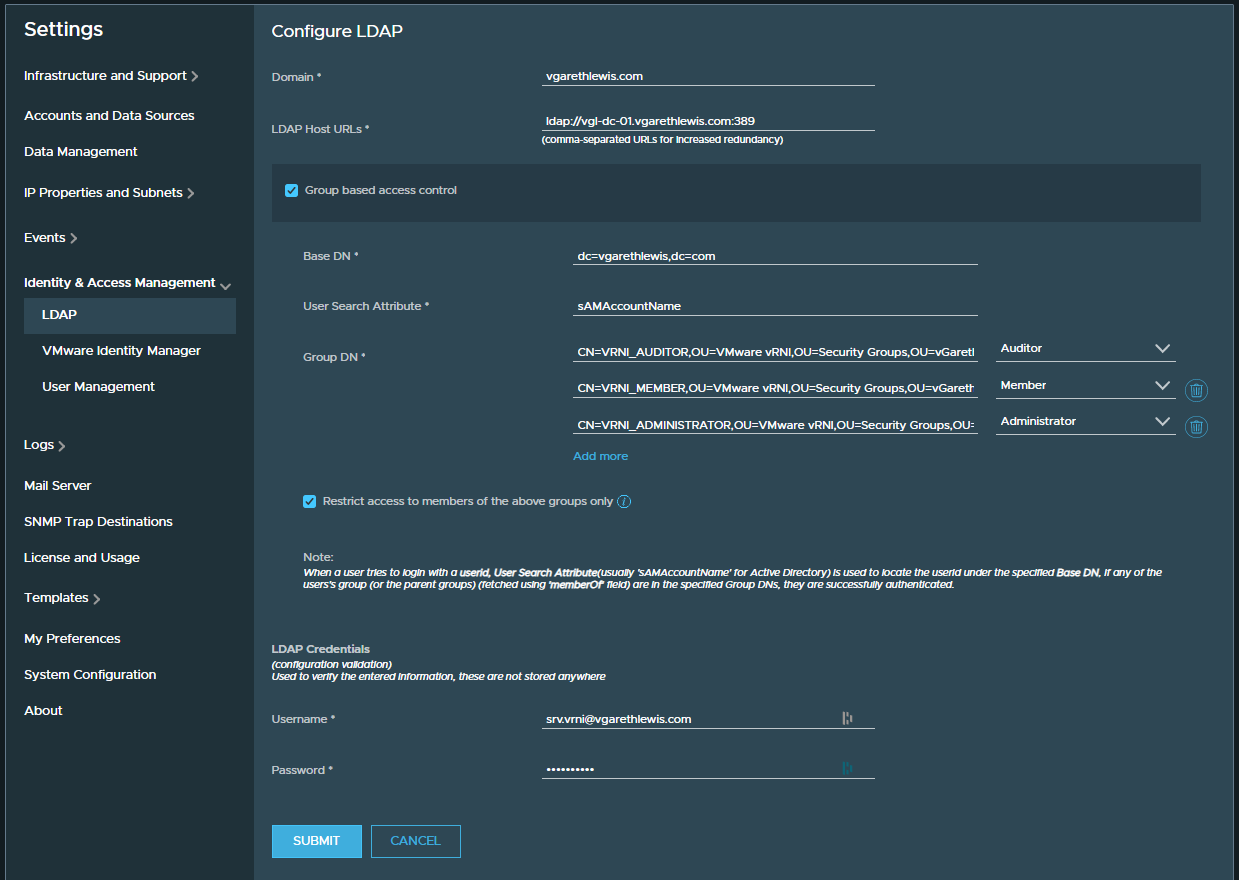
2. Configure the LDAP details accordingly, specifying your Domain, LDAP Host URLs, Base DN, etc. Add the Group DN of each of the newly created AD Security Groups and map to the relevant vRNI user role. Finally, provide your LDAP credentials and click Submit.
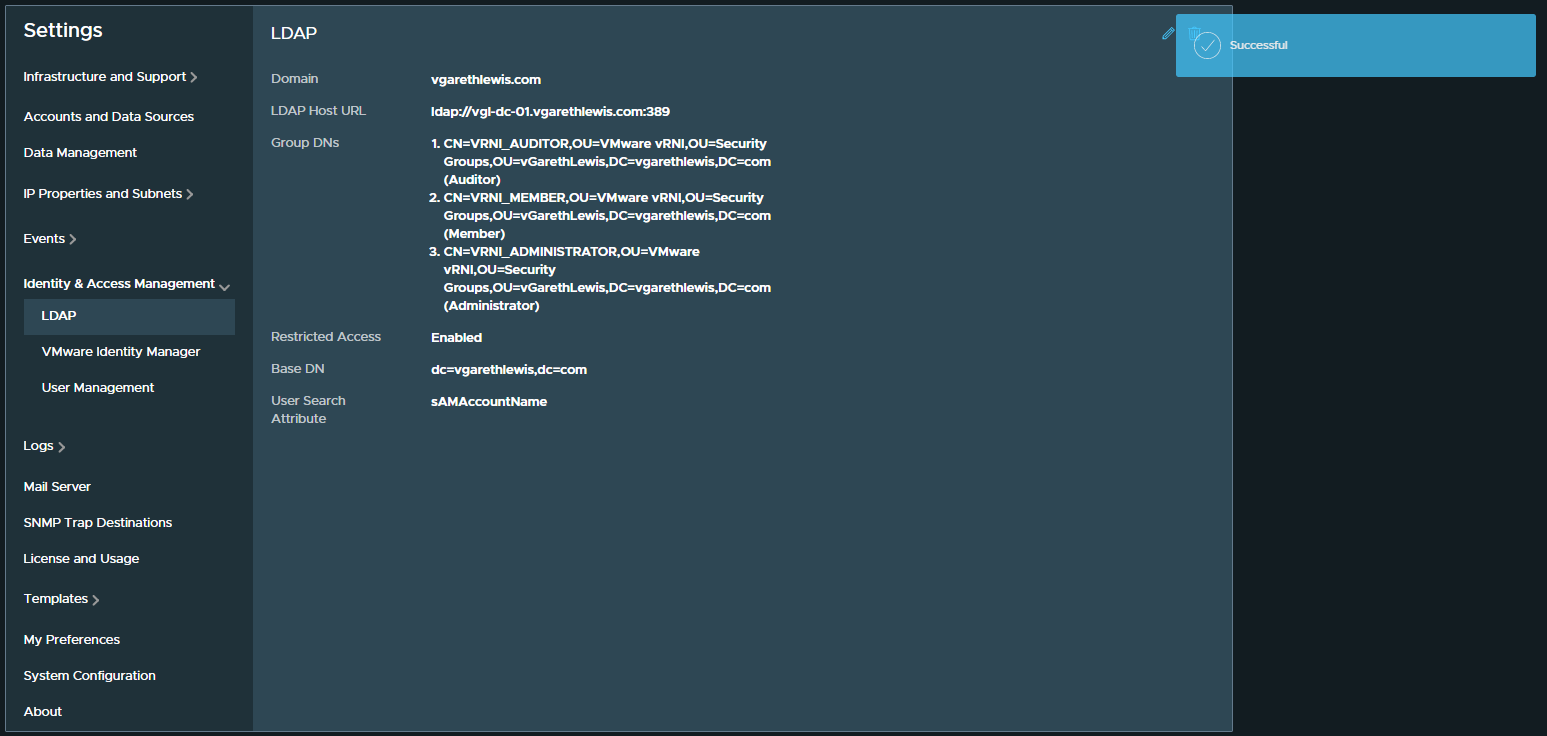
3. Once submitted, the LDAP configuration will be displayed. This can be edited at any time.
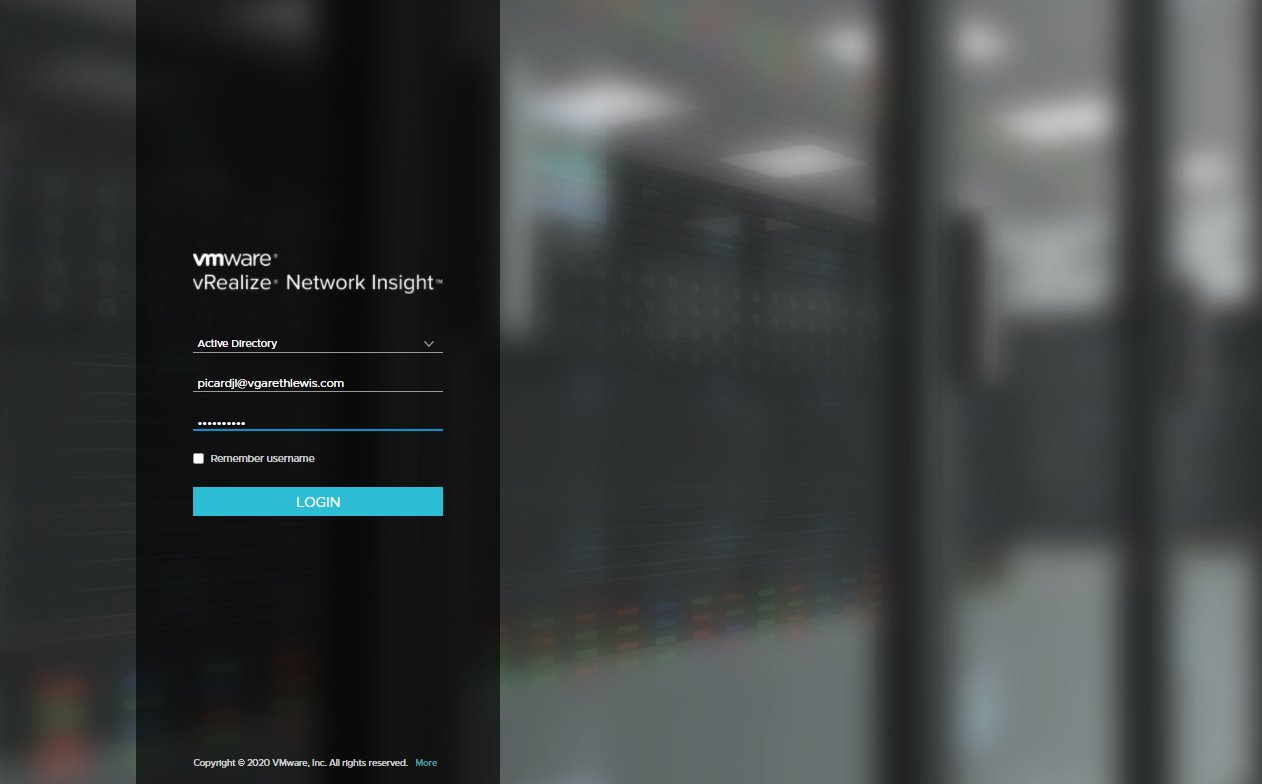
4. Finally, in the below screenshot, I log in with each of our new dummy users, and check the relevant access according to the assigned vRNI user role.
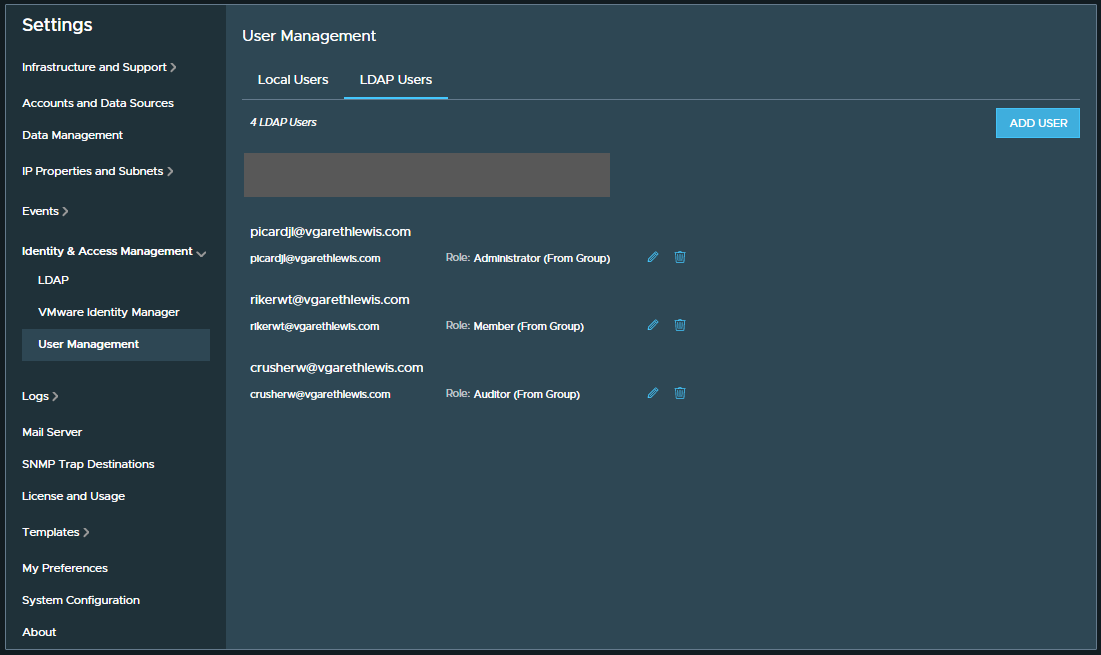
5. Once our users have logged in to vRNI; we will be able to see the relevant details via Settings > Identity & Access Management > User Management > LDAP Users.
In Summary
In this article, we configured identity and access management by connecting vRNI to our Microsoft Active Directory infrastructure via LDAP. This enabled members of the AD Security Groups to log into vRNI and enjoy the benefits of their assigned vRNI user roles.
In the next article (VMware vRealize Network Insight (vRNI) – Part 4 – Application Discovery) we will begin defining our applications (both manually and automatically) in readiness for Part 5, where we begin analysing the data flows to use the data to micro-segment an application via the NSX-T Distributed Firewall.
Full vRNI Series
- VMware vRealize Network Insight (vRNI) – Part 1 – Installation
- VMware vRealize Network Insight (vRNI) – Part 2 – Configuration
- VMware vRealize Network Insight (vRNI) – Part 3 – Identity & Access Management via LDAP
- VMware vRealize Network Insight (vRNI) – Part 4 – Application Discovery
- VMware vRealize Network Insight (vRNI) – Part 5 – Data Flow Analysis & Micro-Segmentation
- VMware vRealize Network Insight (vRNI) – Part 6 – Importing Recommended Firewall Rules into NSX-T via Python Script
Leave a Reply