By design, there are certain virtual machines and/or appliances within vSphere which are protected to prevent editing (this can include NSX Controllers, Edges, Logical Routers, etc.) In a live/production environment, you’d not normally care about editing these appliances, however, in a lab environment (especially one where resource is tight), reducing memory and/or CPU allocation can help a lot. As such, this article will cover the process of removing the lock on protected VM in vSphere, in order to enable editing.
The scenario: a customer needs to reduce the resource allocation of an NSX Controller, however, due to the VM in question being protected/locked, editing the VM’s resources is not possible via UI or PowerCLI.
The process of removing this lock is quick and easy, however, we first need to identify the virtual machine’s Managed Object Reference (moRef ID). Please note, VMware do not support or recommend this procedure in any way. As such, this procedure should not be implemented in a production environment.
Every object within vCenter has a moRef ID. Your data centres, your hosts, clusters, virtual machines, networks, datastores, everything. Identifying a moRef ID can be done via PowerCLI or via the Managed Object Browser, and the IDs are displayed in the following formats (note, the ID’s are below in bold):
- Data Centres: Datacenter-datacenter-ID
- Clusters: ClusterComputeResource-domain-cID
- Virtual Machines: VirtualMachine-vm-ID
- Datastores: Datastore-datastore-ID
- Hosts: HostSystem-host-ID
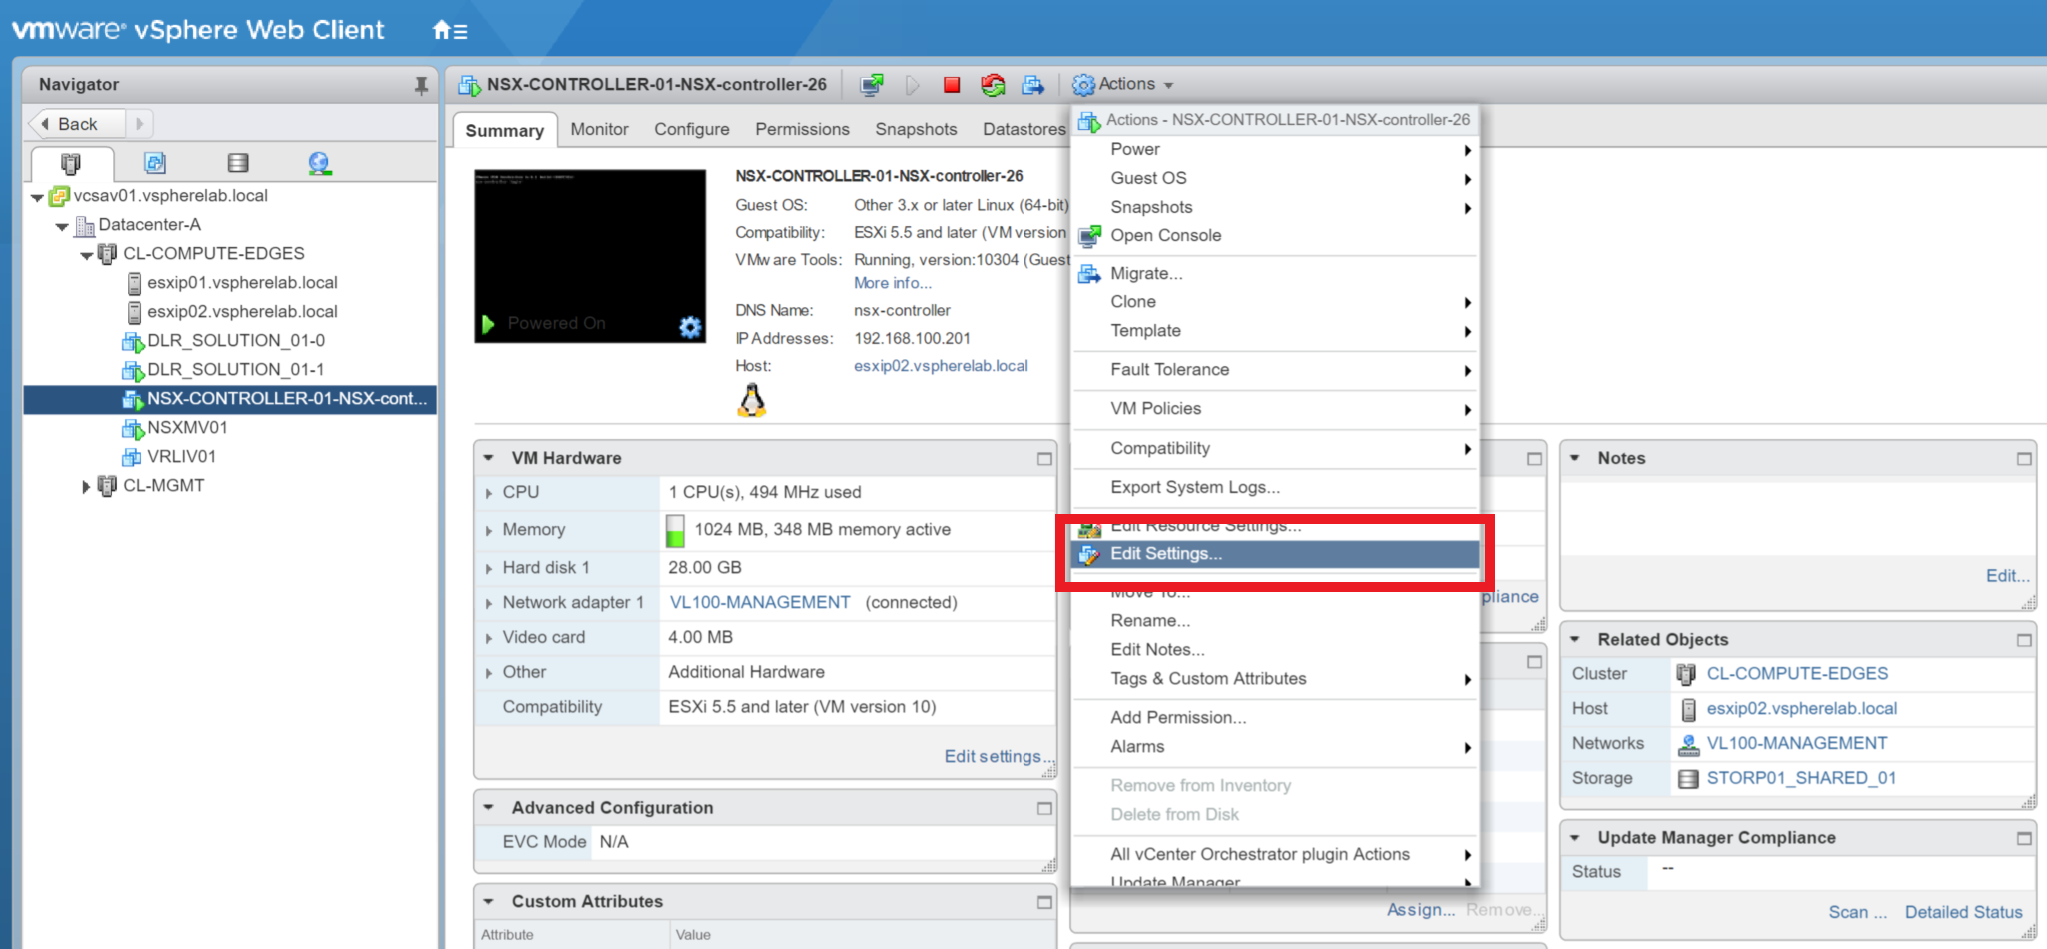
From the below screenshot, you can see my NSX Controller is locked, preventing any editing. First of all, we need to identify the VM’s moRef ID.

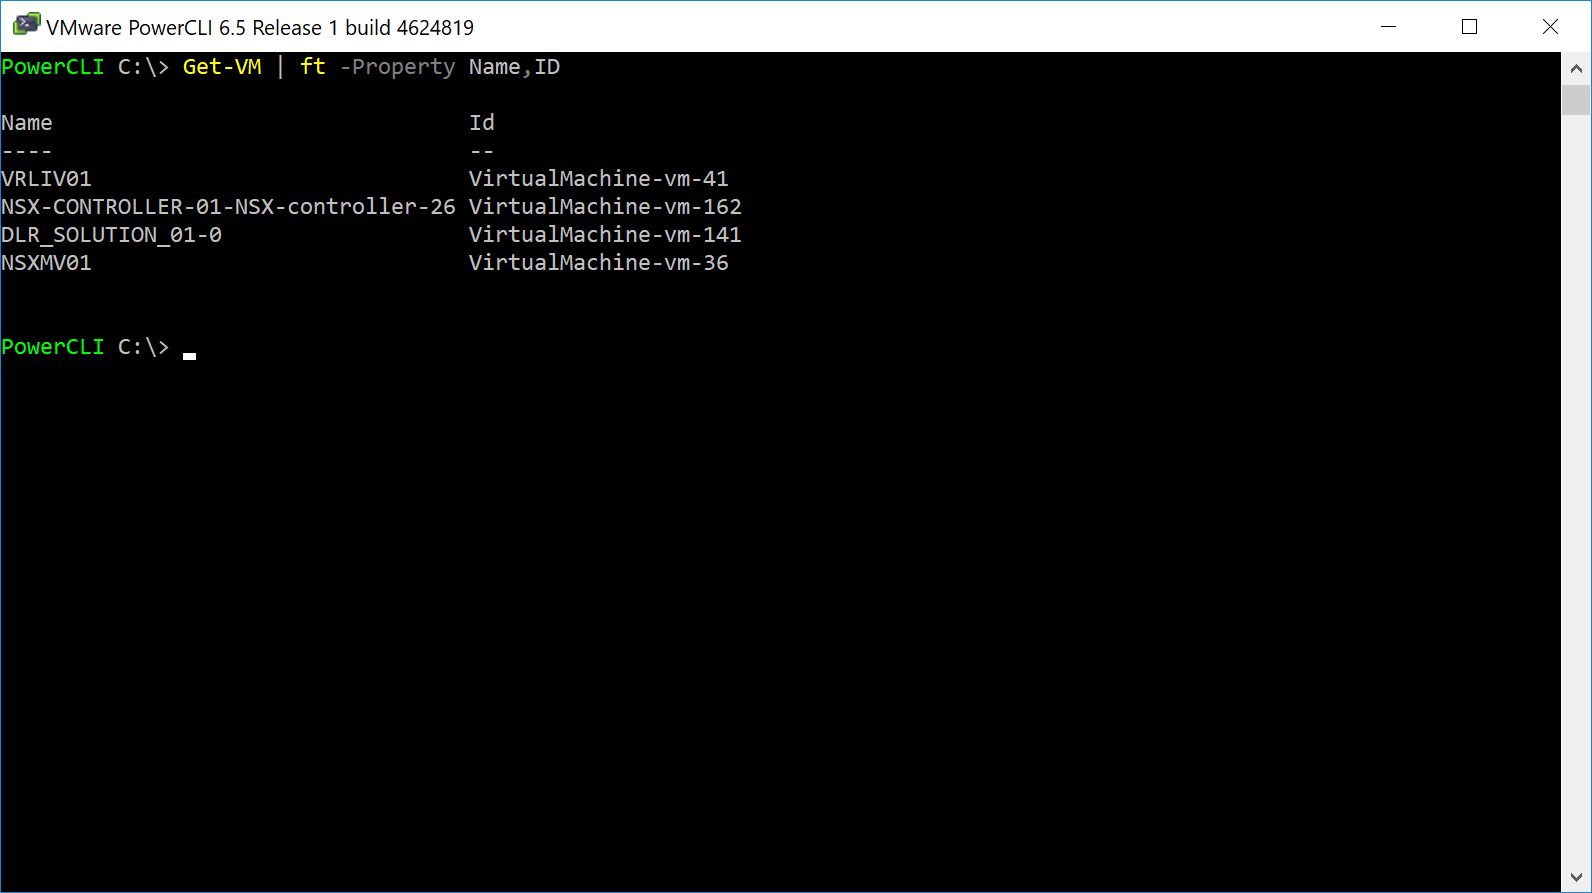
1. To identify the moRef ID via PowerCLI, connect to your vCenter Server and list all VMs. In the below example, the moRef ID for the NSX Controller is vm-162.
Get-VM | ft -Property Name,ID
Alternatively, if you wish to use the Managed Object Browser, browse to https://vCenter-Server-Name-or-IP/mob and, via content > rootFolder > childEntity > vmFolder > childEntity, the moRef ID for the NSX Controller is again identified as vm-162.

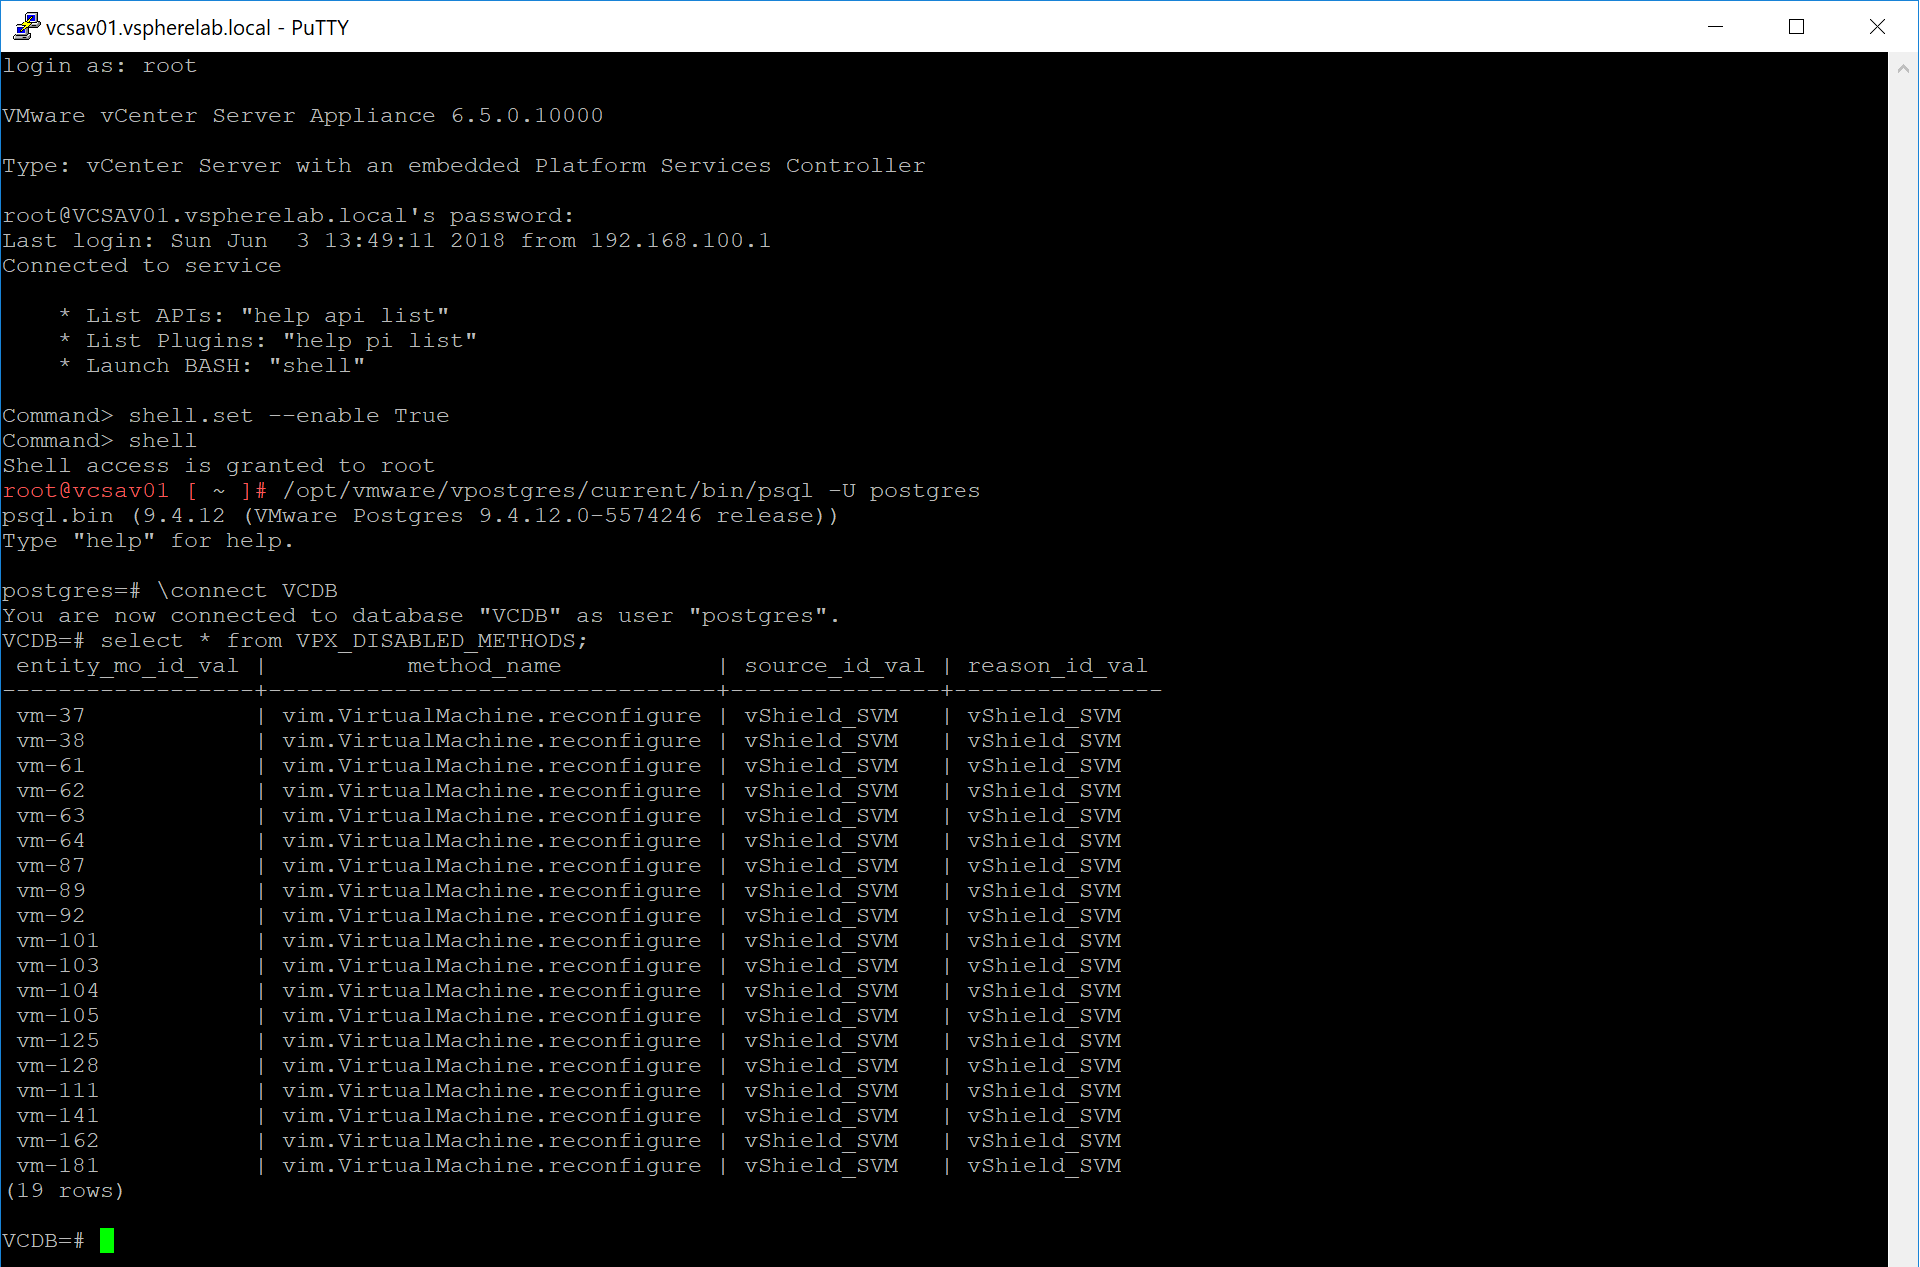
2. Next we need to remove the lock from the virtual machine. For this, we’ll start by creating an SSH session to the vCenter Server and by enabling Bash.
shell.set --enable True
shell
3. Connect to the vCenter Server’s Postgres Database.
/opt/vmware/vpostgres/current/bin/psql -U postgres
4. Connect to the VCDB.
\connect VCDB
5. Show all protected objects. Note the inclusion of our NSX Controller object (vm-162).
select * from VPX_DISABLED_METHODS;
6. Delete the entry for the VM you wish to edit (in our case, vm-162).
delete from VPX_DISABLED_METHODS where entity_mo_id_val = 'MO_ID';
![]()
7. To finalise the changes, restart the vCenter Server Service.
service-control --stop vmware-vpxd
service-control --start vmware-vpxd
8. Once the service has restarted, jump back over to your vSphere Client, and hey presto. Your virtual machine is now editable.
To conclude and reiterate, VMware do not support or recommend this procedure in any way. As such, this procedure should not be implemented in a production environment.
Leave a Reply